Updating the BIOS on your MSI motherboard is an essential step to ensure optimal performance and compatibility with the latest hardware and software. The BIOS, or Basic Input/Output System, is a firmware that controls the basic functions of your motherboard. It is important to keep it up to date to take advantage of new features and improvements.
Updating the BIOS may sound intimidating, but with the right guidance, it can be a straightforward process. In this step-by-step guide, we will show you how to update the BIOS on your MSI motherboard, ensuring that you have the latest version installed.
Step 1: Identify your motherboard model
Before you can update the BIOS, you need to know the exact model of your MSI motherboard. This information can usually be found on the motherboard itself or in the user manual. Once you have identified the model, visit the MSI website and navigate to the support section.
Step 2: Download the latest BIOS version
On the MSI support page, locate the download section for your motherboard model. Look for the BIOS category and download the latest version available. Make sure to choose the correct version for your specific motherboard model and operating system.
Step 3: Prepare a USB drive
Next, you will need to prepare a USB drive to transfer the BIOS update file to your motherboard. Format the USB drive to FAT32 and create a new folder named “BIOS” on it. Copy the downloaded BIOS update file into this folder.
Step 4: Enter BIOS and update
Now it’s time to update the BIOS. Restart your computer and press the designated key (usually Del or F2) to enter the BIOS setup. Once inside the BIOS, navigate to the “M-Flash” or “Flash BIOS” section. Select the USB drive as the source and choose the BIOS update file you copied earlier.
Step 5: Follow the on-screen instructions
Follow the on-screen instructions to complete the BIOS update process. It is crucial not to interrupt the update or turn off your computer during this process, as it can cause irreversible damage to your motherboard.
By following these steps, you can easily update the BIOS on your MSI motherboard and ensure that you have the latest firmware installed. Remember to always check for BIOS updates regularly to keep your system running smoothly and efficiently.
Section 1: Preparing for the BIOS Update

Before you begin the update process, it is important to properly prepare your MSI motherboard for the BIOS update. Follow these steps to ensure a smooth and successful update:
1. Backup your data: Before updating the BIOS, it is always recommended to back up any important data on your computer. This will help prevent any potential data loss in case something goes wrong during the update process.
2. Check for compatibility: Make sure that the BIOS update you are planning to install is compatible with your specific MSI motherboard model. Check the MSI website or the motherboard manual for information on compatible BIOS versions.
3. Download the latest BIOS update: Visit the MSI website and navigate to the support section for your motherboard model. Look for the latest BIOS update available for download. Download the update file to your computer.
4. Read the release notes: Before proceeding with the BIOS update, it is important to read the release notes provided by MSI. These notes will contain important information about the changes and improvements made in the new BIOS version.
5. Prepare a USB drive: You will need a USB drive to transfer the BIOS update file to your MSI motherboard. Format the USB drive to FAT32 file system and make sure it is empty and has enough storage space for the update file.
6. Disconnect unnecessary devices: To minimize the risk of any issues during the BIOS update, disconnect any unnecessary devices from your MSI motherboard, such as external hard drives, printers, and USB devices.
7. Disable antivirus software: Temporarily disable any antivirus software running on your computer. Some antivirus programs may interfere with the BIOS update process and cause errors.
8. Connect to a stable power source: Ensure that your computer is connected to a stable power source throughout the BIOS update process. A sudden power outage or loss of power can disrupt the update and potentially damage your motherboard.
By following these steps, you will be well-prepared to update the BIOS on your MSI motherboard and minimize the risk of any issues or errors during the update process.
Checking the Current BIOS Version
Before updating the BIOS on your MSI motherboard, it is important to check the current version of your BIOS. This will help you determine if an update is necessary and which version you should update to. Here’s how you can check the current BIOS version:
| Step | Description |
|---|---|
| Step 1 | Start your computer and enter the BIOS setup by pressing the designated key during the boot process. The key to enter the BIOS setup may vary depending on your motherboard model, but it is usually displayed on the screen during startup. Common keys include Del, F2, and F10. |
| Step 2 | Navigate through the BIOS setup using the arrow keys on your keyboard. Look for a section or tab that displays information about your motherboard or system. |
| Step 3 | Locate the BIOS version information. It may be labeled as “BIOS Version,” “Firmware Version,” or something similar. The version number is usually a combination of letters and numbers. |
| Step 4 | Take note of the current BIOS version. You can write it down or take a picture for reference. |
Once you have determined the current BIOS version, you can proceed with updating the BIOS if necessary. Make sure to download the correct BIOS update file from the MSI website and follow the instructions provided by MSI to ensure a successful update.
Downloading the Latest BIOS Version
To update the BIOS on your MSI motherboard, you will need to download the latest BIOS version from the official MSI website. Follow the steps below to download the latest BIOS version:
| Step 1: | Open your web browser and go to the official MSI website. |
| Step 2: | Click on the “Support” tab located at the top of the page. |
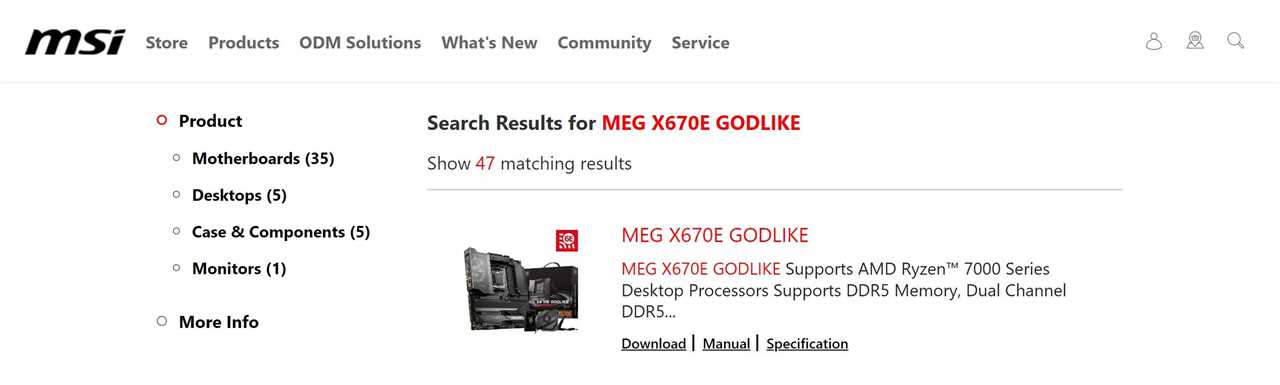
| Step 3: | Select your motherboard model from the drop-down menu or enter the model name in the search bar. |
| Step 4: | Once you have selected your motherboard model, you will be taken to the product page. Look for the “Download” tab and click on it. |
| Step 5: | Under the “BIOS” section, you will find the latest BIOS version available for your motherboard. Click on the download link to start the download. |
| Step 6: | Save the downloaded file to a location on your computer where you can easily access it. |
Once you have downloaded the latest BIOS version, you are ready to proceed with the next steps to update the BIOS on your MSI motherboard.
Creating a Bootable USB Drive

To update the BIOS on your MSI motherboard, you will need to create a bootable USB drive. Follow these steps to create a bootable USB drive:
| Step 1: | Download the latest BIOS update file from the MSI website. Make sure to choose the correct BIOS update file for your specific motherboard model. |
| Step 2: | Insert a USB drive into your computer. Make sure the USB drive has enough storage capacity to hold the BIOS update file. |
| Step 3: | Format the USB drive to FAT32 file system. This can be done by right-clicking on the USB drive in File Explorer, selecting “Format,” and choosing FAT32 as the file system. |
| Step 4: | Open the downloaded BIOS update file and extract its contents to the root directory of the USB drive. Make sure to keep the file structure intact. |
| Step 5: | Once the BIOS update file has been copied to the USB drive, safely eject the USB drive from your computer. |
| Step 6: | Restart your computer and enter the BIOS setup by pressing the designated key during the boot process (usually Del or F2). Consult your motherboard’s manual for the specific key. |
| Step 7: | In the BIOS setup, navigate to the “Boot” tab and change the boot order to prioritize the USB drive as the first boot device. |
| Step 8: | Save the changes and exit the BIOS setup. Your computer will now restart. |
| Step 9: | Your computer should now boot from the USB drive. Follow the on-screen instructions to update the BIOS using the files on the USB drive. |
| Step 10: | Once the BIOS update process is complete, restart your computer and remove the USB drive. |
By following these steps, you can easily create a bootable USB drive to update the BIOS on your MSI motherboard.
Section 2: Updating the BIOS
Updating the BIOS on an MSI motherboard is a straightforward process that ensures your system is running the latest firmware. Here’s how to do it:
- First, visit the MSI website and navigate to the support page for your specific motherboard model. Look for the “Downloads” or “Support” section.
- Once you’re on the support page, locate the BIOS section and download the latest BIOS update for your motherboard. Make sure to choose the correct version for your operating system.
- After the download is complete, extract the files from the ZIP or RAR archive. You should see a file with a .exe extension, which is the BIOS update utility.
- Before proceeding with the update, it’s essential to back up your current BIOS settings. Restart your computer and enter the BIOS setup by pressing the designated key (usually Del or F2) during the boot process.
- Inside the BIOS setup, navigate to the “Save & Exit” or similar section and select the option to save your current BIOS settings to a USB flash drive or another storage device.
- Once you’ve backed up your BIOS settings, exit the BIOS setup and restart your computer.
- Upon restarting, double-click the BIOS update utility that you downloaded earlier. Follow the on-screen instructions to begin the update process.
- During the update, your computer may restart multiple times. Do not interrupt the process or turn off your computer until the update is complete.
- After the update is finished, your computer will restart again. Enter the BIOS setup and restore your previously saved BIOS settings from the USB flash drive or storage device.
- Finally, save the changes and exit the BIOS setup. Your MSI motherboard now has the latest BIOS version installed.
Updating the BIOS is an important step in ensuring the stability and compatibility of your MSI motherboard. By following these steps, you can easily update the BIOS and take advantage of any improvements or bug fixes provided by MSI.
Entering the BIOS Setup
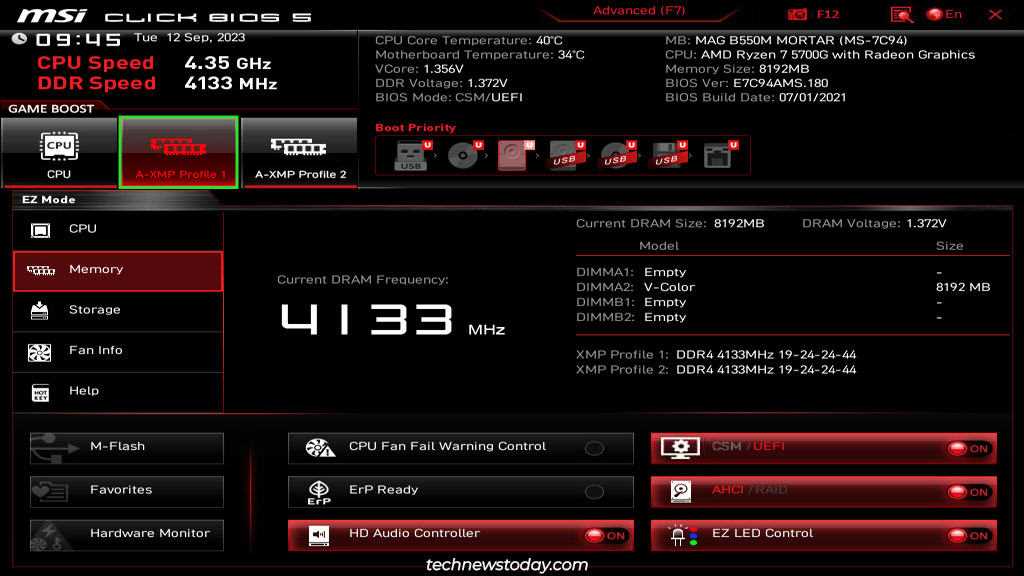
To update the BIOS on your MSI motherboard, you will need to enter the BIOS setup. The BIOS setup is a menu-based interface that allows you to configure various settings on your motherboard.
To enter the BIOS setup, follow these steps:
- Turn on your computer and press the “Delete” key repeatedly as soon as the MSI logo appears on the screen. This will take you to the BIOS setup.
- Alternatively, you can try pressing the “F2” key or the “F10” key to enter the BIOS setup, as these are commonly used keys for accessing the BIOS on MSI motherboards.
- Once you are in the BIOS setup, you can navigate through the different menus using the arrow keys on your keyboard. Use the “Enter” key to select a menu or option.
- Look for the “BIOS Update” or “Firmware Update” option in the BIOS setup. The exact location and name of this option may vary depending on your motherboard model.
- Select the “BIOS Update” or “Firmware Update” option and follow the on-screen instructions to update the BIOS on your MSI motherboard.
It is important to note that updating the BIOS carries some risks, so it is recommended to proceed with caution and follow the instructions provided by MSI. Make sure to have a stable power source and avoid interrupting the update process.
Once the BIOS update is complete, you can exit the BIOS setup and restart your computer. Your MSI motherboard should now be updated with the latest BIOS version.
Updating the BIOS Using M-Flash
If you own an MSI motherboard and want to update the BIOS, one of the easiest ways to do it is by using the M-Flash feature. M-Flash is a built-in utility that allows you to update the BIOS without the need for any additional software or tools.
To update the BIOS using M-Flash, follow these steps:
- Prepare a USB drive: First, you need to prepare a USB drive that will be used to store the BIOS update file. Make sure the USB drive is formatted to FAT32 and has enough free space to accommodate the update file.
- Download the BIOS update: Go to the official MSI website and download the latest BIOS update for your specific motherboard model. Make sure to download the correct file, as using the wrong BIOS update can cause serious issues.
- Copy the BIOS update file to the USB drive: Once the BIOS update file is downloaded, copy it to the root directory of the USB drive. Do not place it inside any folders or rename the file.
- Restart your computer: Insert the USB drive into one of the USB ports on your MSI motherboard and restart your computer.
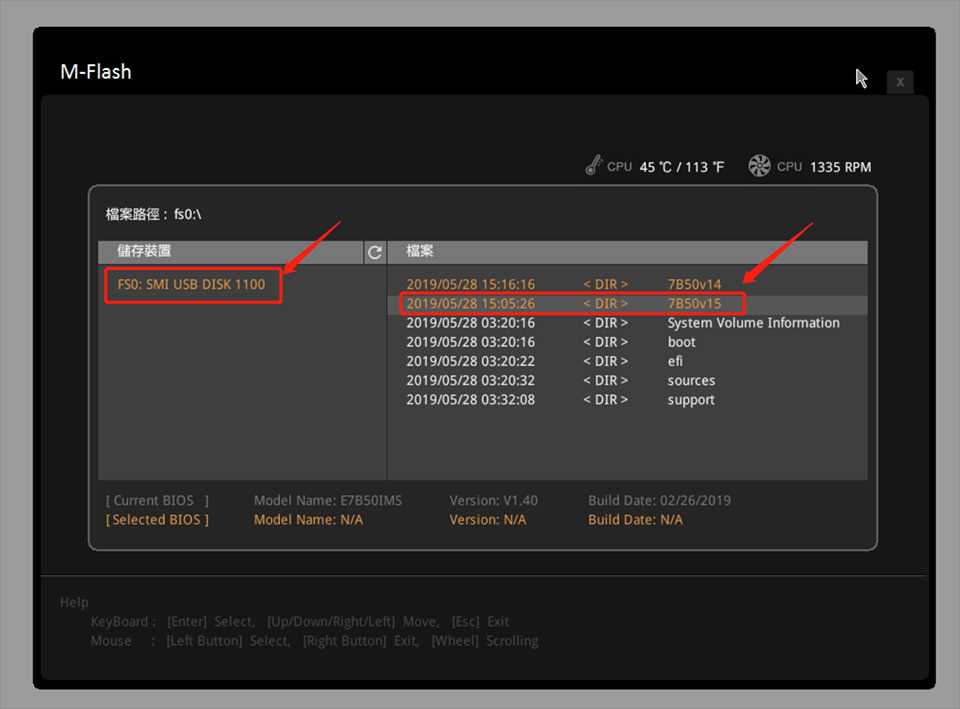
- Enter M-Flash: During the boot process, press the designated key to enter the BIOS setup. The key to enter the BIOS setup may vary depending on your motherboard model, but it is usually Del, F2, or F10. Once you are in the BIOS setup, navigate to the “M-Flash” section.
- Select the BIOS update file: In the M-Flash section, you will see an option to select the BIOS update file. Use the arrow keys to navigate to the USB drive and select the BIOS update file that you copied earlier.
- Start the BIOS update: After selecting the BIOS update file, you will be prompted to confirm the update. Make sure to read any on-screen instructions carefully and follow them. Once you are ready, select the option to start the BIOS update.
- Wait for the update to complete: The BIOS update process may take a few minutes. During this time, do not turn off your computer or interrupt the update process in any way. Once the update is complete, your computer will automatically restart.
Updating the BIOS using M-Flash is a straightforward process that can help ensure your MSI motherboard is running the latest firmware. However, it is important to note that updating the BIOS carries some risks, so it is recommended to proceed with caution and only update the BIOS if necessary.