Converting a Word document to a PDF file is a common task that many people need to do. Whether you want to share a document with someone who doesn’t have Microsoft Word or you simply prefer the PDF format, the conversion process is straightforward and easy to follow. In this step-by-step guide, we will walk you through the process of converting a Word document to a PDF using various methods and software.
First, let’s discuss why you might want to convert a Word document to a PDF. The PDF format is widely used and accepted, making it a reliable choice for sharing documents. PDF files are also more secure and less likely to be altered compared to Word documents. Additionally, PDFs are compatible with different operating systems and devices, ensuring that your document will look the same for everyone who opens it.
To convert a Word document to a PDF, you can use different programs and software. One of the most popular options is to use Microsoft Word itself. Word has a built-in feature that allows you to save your document as a PDF file. Simply open your Word document, go to the “File” menu, and select the “Save As” option. Choose “PDF” as the file format, and click “Save”. Your Word document will be converted to a PDF file in no time.
If you don’t have Microsoft Word or prefer to use a different program, there are plenty of other options available. Many online conversion tools and software programs can convert Word documents to PDFs. These programs are often free and easy to use. Simply upload your Word document, select the PDF format, and click “Convert”. The program will process your document and provide you with a download link for the converted PDF file.
Step 1: Open the Word Document
To convert a Word document to a PDF file, you will need to open the Word document using a word processing software or program. There are several options available, such as Microsoft Word, Google Docs, or other similar software.
Once you have the Word document open, you can proceed with the conversion process. It’s important to note that the steps may vary slightly depending on the software or program you are using, but the general process remains the same.
If you are using Microsoft Word, you can open the Word document by following these steps:
| 1. | Launch Microsoft Word on your computer. |
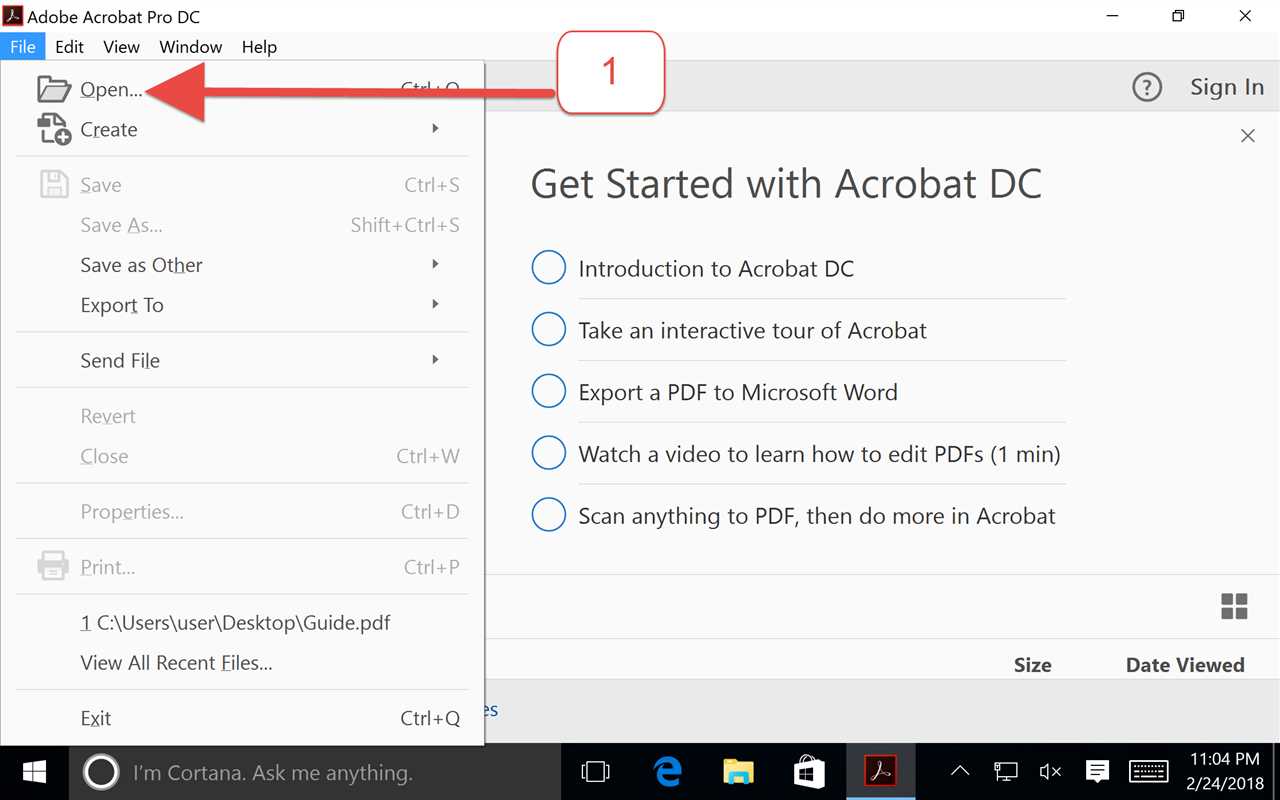
| 2. | Click on the “File” tab located in the top left corner of the screen. |
| 3. | Select “Open” from the drop-down menu. |
| 4. | Navigate to the location where the Word document is saved. |
| 5. | Click on the Word document to select it. |
| 6. | Click on the “Open” button. |
Once you have successfully opened the Word document, you are ready to proceed with the next steps of converting it to a PDF file.
Launch Microsoft Word
To convert a Word document to a PDF, you will need to have Microsoft Word installed on your computer. Microsoft Word is a popular word processing program that allows you to create and edit documents. If you don’t have Microsoft Word installed, you can download it from the official Microsoft website or use an alternative word processing software.
Once you have Microsoft Word installed, you can launch the program by double-clicking on the Word icon on your desktop or by searching for “Microsoft Word” in the Start menu. When the program opens, you will be greeted with a blank document ready for you to start working on.
If you already have a Word document that you want to convert to a PDF, you can open it by clicking on the “File” tab in the top left corner of the program. From the drop-down menu, select “Open” and navigate to the location where your Word document is saved. Select the file and click “Open” to open it in Microsoft Word.
Before proceeding with the conversion to PDF, make sure that your Word document is properly formatted and edited. Check for any spelling or grammar errors and make any necessary changes. It’s important to ensure that your document looks the way you want it to appear in the final PDF file.
Once you are satisfied with the formatting and content of your Word document, you can proceed with the conversion to PDF. In the next step, we will explore how to convert the Word document to a PDF file using Microsoft Word.
Locate and open the Word document you want to convert
To convert a Word document to PDF format, you first need to locate and open the document you want to convert. This can be done by navigating to the folder or directory where the document is saved on your computer.
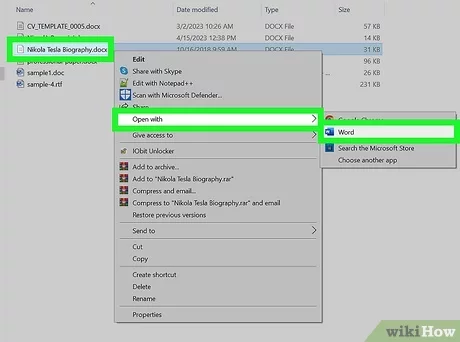
Once you have located the Word document, you can open it by double-clicking on the file. This will launch the default program associated with .doc or .docx files, which is typically Microsoft Word.
If you don’t have Microsoft Word installed on your computer, you can use alternative software or online tools that support Word documents. Some popular options include Google Docs, LibreOffice, or WPS Office. Simply open the program or online tool and navigate to the location of the Word document to open it.
After opening the Word document, you should review its content to ensure it is in the desired format and layout. Make any necessary edits or adjustments before proceeding with the conversion process.
It is important to note that the document should be saved in the Word format (.doc or .docx) before converting it to PDF. This ensures that all formatting, images, and text are preserved during the conversion process.
Once you have located and opened the Word document, you are ready to proceed with the conversion to PDF format.
Step 2: Save the Word Document as PDF

Once you have completed the necessary edits and formatting in your Word document, it’s time to save it as a PDF file. To do this, you will need to use a software or program that supports the conversion of Word documents to PDF format.
There are several options available for converting Word documents to PDF. One popular choice is to use Microsoft Word itself, as it has a built-in feature for saving documents as PDF. To save your Word document as a PDF using Microsoft Word, follow these steps:
| 1. | Open the Word document you want to convert to PDF. |
| 2. | Click on the “File” tab in the top left corner of the Word window. |
| 3. | From the drop-down menu, select “Save As”. |
| 4. | In the “Save As” dialog box, choose the location where you want to save the PDF file. |
| 5. | In the “Save As” dialog box, select “PDF” from the “Save as type” drop-down menu. |
| 6. | Click on the “Save” button to save the Word document as a PDF file. |
Alternatively, if you don’t have Microsoft Word or prefer to use a different program, there are other software and online tools available that can convert Word documents to PDF. Some popular options include Adobe Acrobat, Nitro Pro, and online converters like SmallPDF and Zamzar. These programs and tools generally have similar steps for converting Word documents to PDF, so you can follow their respective instructions to save your document in PDF format.
By following these steps, you can easily convert your Word document into a PDF file, making it compatible with a wider range of devices and ensuring that the formatting remains intact.
Click on the “File” tab in the top left corner
To convert a Word document to a PDF, you will need to use a program or software that supports this conversion. One popular option is Adobe Acrobat, which is specifically designed for creating and editing PDF files. Here is a step-by-step guide on how to convert a Word document to a PDF using Adobe Acrobat.
First, open the Word document that you want to convert to a PDF. Once the document is open, click on the “File” tab located in the top left corner of the program. This will open a drop-down menu with various options.
Next, navigate to the “Save As” option in the drop-down menu and click on it. This will open a new window where you can choose the format in which you want to save the document.
In the “Save As” window, select the “PDF” format from the available options. This will ensure that the document is saved as a PDF file. You can also choose the location where you want to save the file on your computer.
After selecting the PDF format and the desired save location, click on the “Save” button. This will initiate the conversion process and save the Word document as a PDF file.
Once the conversion is complete, you can locate the PDF file in the specified save location. You can now open and view the PDF document using any PDF reader software.
Converting a Word document to a PDF format is a simple process that can be done using various software programs. By following these step-by-step instructions, you can easily convert your Word documents to PDF files and ensure that they are compatible with different devices and platforms.
Select the “Save As” option
Once you have finished editing your Word document and are ready to convert it to a PDF, you will need to select the “Save As” option. This option allows you to save the document in a different format, such as PDF.
To access the “Save As” option, you can click on the “File” tab at the top left corner of the Word program. A drop-down menu will appear, and you should select the “Save As” option from this menu.
After selecting the “Save As” option, a new window will open, allowing you to choose the location where you want to save the converted PDF file. You can select a specific folder or directory on your computer to save the file.
Next, you will need to choose the format for the file. In this case, you want to convert the Word document to a PDF, so you should select the PDF format from the available options.
Once you have selected the PDF format, you can click on the “Save” button to start the conversion process. The Word document will be converted to a PDF file and saved in the location you specified.
By selecting the “Save As” option and choosing the PDF format, you can easily convert your Word document into a PDF file using the Word program or other software that supports this conversion.
Choose the PDF format from the drop-down menu

Once you have selected the file you want to convert, it’s time to choose the desired format for conversion. In this case, we want to convert a Word document to a PDF format. To do this, you will need to use a software or program that supports this type of conversion.
There are many options available for converting Word documents to PDF format. Some popular choices include Adobe Acrobat, Microsoft Word itself, and online conversion tools. Whichever method you choose, the steps are generally the same.
First, open the software or program that you will be using for the conversion. Once it is open, locate the “File” menu or tab. Click on it to reveal a drop-down menu with various options.
From the drop-down menu, look for an option that says “Convert” or “Save As.” This is the option you will need to select in order to choose the PDF format for conversion.
Click on the “Convert” or “Save As” option, and a new window or dialog box will appear. In this window, you will be able to choose the format for conversion.
Look for an option that says “PDF” or “Portable Document Format.” This is the format you will need to select in order to convert your Word document to a PDF file.
Once you have selected the PDF format, click on the “Save” or “Convert” button to initiate the conversion process. The software or program will then convert your Word document to a PDF file, and you will be able to save it to your desired location on your computer.
After the conversion is complete, you can open the PDF file to ensure that the conversion was successful. You can also make any necessary edits or changes to the PDF file using a PDF editing software or program.
Choosing the PDF format from the drop-down menu is a crucial step in the conversion process. By selecting the PDF format, you are ensuring that your Word document will be converted into a format that is widely compatible and can be easily viewed and shared by others.
Specify the destination folder and file name
Once you have chosen the format you want to convert your Word document to, it’s time to specify the destination folder and file name for your PDF file. This step is important as it determines where the converted file will be saved on your computer and how it will be named.
Most conversion software or programs will prompt you to choose a destination folder before converting the document. This folder can be any location on your computer where you want the PDF file to be saved. You can choose an existing folder or create a new one specifically for this purpose.
After selecting the destination folder, you will also need to specify the file name for the PDF document. This is the name that will be given to the converted file. You can choose any name you prefer, but it’s a good practice to give it a descriptive name that reflects the content of the document.
It’s important to note that some conversion programs may automatically generate a file name based on the original Word document’s name. In such cases, you can either keep the suggested name or modify it according to your preference.
Once you have specified the destination folder and file name, you can proceed with the conversion process. The software or program will convert your Word document into a PDF file and save it in the specified location with the chosen file name.
Click on the “Save” button

Once you have finished making any necessary edits or changes to your Word document, it is time to convert it to a PDF format. To do this, you will need to click on the “Save” button in your word processing software.
When you click on the “Save” button, a dialog box will appear, allowing you to choose the location where you want to save the converted PDF file. You can select any desired folder or directory on your computer.
After selecting the location, you will need to provide a name for the PDF file. It is recommended to use a descriptive and meaningful name that reflects the content of the document. This will make it easier to locate the file in the future.
Once you have entered the desired name, make sure to select the PDF format from the drop-down menu of available file formats. This ensures that the document will be saved as a PDF file.
Finally, click on the “Save” button to initiate the conversion process. The word document will be converted to a PDF file and saved in the specified location. Depending on the size of the document and the performance of your computer, the conversion process may take a few seconds or longer.
Once the conversion is complete, you can navigate to the specified location and locate the newly created PDF file. You can now open and view the PDF file using any PDF reader software.
By following these simple steps, you can easily convert your Word document to a PDF format and ensure that your file is accessible and viewable by anyone, regardless of the word processing software they have installed on their computer.

