
Are you running out of storage space on your computer’s C drive? Do you have unwanted files cluttering up your system? If so, it’s time to learn how to delete files from the C drive and free up valuable space. In this article, we will guide you through the quick and easy steps to remove those unwanted files and reclaim your storage.
Deleting files from the C drive is a simple process that can be done in just a few steps. First, you need to locate the files you want to delete. This can be done by navigating to the C drive in File Explorer or using the search function to find specific files. Once you have found the files you want to delete, simply select them and press the delete key or right-click and choose the delete option.
It’s important to note that when you delete files from the C drive, they are not immediately removed from your computer. Instead, they are sent to the Recycle Bin, where they can be restored if needed. To permanently delete the files and free up space on your C drive, you will need to empty the Recycle Bin. This can be done by right-clicking on the Recycle Bin icon and selecting the empty option.
By following these quick and easy steps, you can easily delete unwanted files from your C drive and free up valuable storage space. Remember to regularly clean out your C drive to keep your computer running smoothly and efficiently. So, why wait? Start deleting those unwanted files today and enjoy a clutter-free C drive!
Quick and Easy Steps to Delete Files from C Drive
If you want to free up some space on your computer’s C drive, deleting unnecessary files is a great way to do it. Here are some quick and easy steps to help you delete files from your C drive:
- Open File Explorer by pressing the Windows key and E at the same time.
- Navigate to the C drive by clicking on it in the left sidebar.
- Once you’re in the C drive, you can browse through the folders to find the files you want to delete.
- Select the files you want to delete by clicking on them. You can select multiple files by holding down the Ctrl key while clicking.
- Right-click on the selected files and choose “Delete” from the context menu.
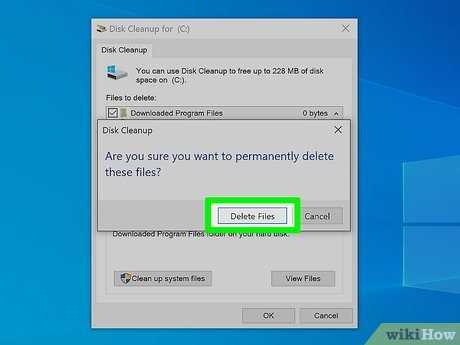
- A confirmation dialog will appear asking if you want to permanently delete the files. Click “Yes” to proceed.
- The selected files will be moved to the Recycle Bin. If you want to free up even more space, you can empty the Recycle Bin by right-clicking on it and choosing “Empty Recycle Bin”.
That’s it! By following these quick and easy steps, you can easily delete files from your C drive and free up valuable space on your computer.
Step 1: Open File Explorer

To delete unwanted files from your C drive, you need to open File Explorer. File Explorer is a built-in file management tool in Windows that allows you to navigate through your computer’s files and folders.
Here’s how you can open File Explorer:
| 1. | Click on the Start menu located at the bottom left corner of your screen. |
| 2. | From the Start menu, click on “File Explorer” or search for “File Explorer” in the search bar. |
| 3. | Once File Explorer opens, you will see a list of drives on the left-hand side. Locate and click on the “C” drive to access its contents. |
By following these steps, you will be able to open File Explorer and navigate to the C drive, where you can proceed to delete unwanted files.
Locate the File Explorer Icon

To delete unwanted files from your C drive, you will need to locate the File Explorer icon on your computer. The File Explorer is a built-in feature in Windows that allows you to navigate through your files and folders.
To find the File Explorer icon, you can either click on the Start menu and search for “File Explorer” or look for the folder icon on your taskbar. The folder icon is typically located at the bottom of your screen, next to the Start button.
Once you have located the File Explorer icon, click on it to open the File Explorer window. This window will display all the files and folders on your C drive.
Now that you have accessed the File Explorer, you can proceed to delete unwanted files from your C drive. Simply navigate to the location of the files you want to delete, select them, and press the “Delete” key on your keyboard or right-click and choose the “Delete” option from the context menu.
It is important to note that deleting files from your C drive will permanently remove them from your computer, so make sure you double-check the files you want to delete before proceeding.
By following these quick and easy steps, you can easily delete unwanted files from your C drive and free up valuable storage space on your computer.
Click on the Icon to Open File Explorer

To delete unwanted files from your C drive, you first need to open File Explorer. To do this, locate and click on the File Explorer icon on your desktop or taskbar. The File Explorer icon typically looks like a folder and is easily recognizable.
Once you click on the icon, a new window will open, displaying the contents of your C drive. This is where you can navigate through the folders and files stored on your C drive.
Note: If you don’t see the File Explorer icon on your desktop or taskbar, you can also open it by pressing the Windows key on your keyboard and typing “File Explorer” in the search bar. Then, click on the File Explorer app that appears in the search results.
Now that you have File Explorer open, you can proceed to delete the unwanted files from your C drive. Simply navigate to the folder where the files are located, select the files you want to delete by clicking on them, and then press the “Delete” key on your keyboard or right-click and select “Delete” from the context menu.
Remember: Deleting files from your C drive permanently removes them from your computer, so make sure you double-check the files you want to delete before proceeding.
Step 2: Navigate to the C Drive

Once you have identified the unwanted files that you want to delete from your computer, the next step is to navigate to the C drive. The C drive is the primary storage location on most Windows computers, and it contains important system files and folders.
To access the C drive, follow these steps:
| 1. | Open the File Explorer by clicking on the folder icon in the taskbar or by pressing the Windows key + E on your keyboard. |
| 2. | In the File Explorer window, you will see a list of drives and folders on the left-hand side. Look for the “This PC” or “My Computer” option and click on it. |
| 3. | Once you click on “This PC” or “My Computer,” you will see a list of drives on the right-hand side. Look for the C drive and click on it to open it. |
After navigating to the C drive, you will be able to see all the files and folders stored on your computer’s primary storage. From here, you can proceed to the next step and delete the unwanted files to free up space and improve the performance of your computer.


