
If you’re looking to upgrade to the latest version of Windows, you might be wondering how to clean install Windows 11 from a USB. A clean install can help improve performance and remove any unwanted files or programs that may be slowing down your system. In this step-by-step guide, we’ll walk you through the process of installing Windows 11 from a USB drive.
Before you begin, it’s important to note that a clean install will erase all data on your computer, so be sure to back up any important files or documents. You’ll also need a USB drive with at least 8GB of storage space and a valid Windows 11 product key.
To start, insert the USB drive into your computer and restart it. As your computer boots up, you’ll need to access the BIOS settings. This can usually be done by pressing a key like F2 or Delete during the startup process. Once you’re in the BIOS settings, navigate to the boot options and set the USB drive as the primary boot device.
Save your changes and exit the BIOS settings. Your computer will now restart and boot from the USB drive. Follow the on-screen instructions to begin the Windows 11 installation process. You’ll be prompted to enter your product key, so make sure you have it handy.
During the installation process, you’ll have the option to customize your settings, such as language preferences and privacy options. Once you’ve made your selections, Windows 11 will begin installing. This process may take some time, so be patient.
After the installation is complete, your computer will restart and you’ll be greeted with the Windows 11 setup screen. Follow the prompts to set up your user account and personalize your settings. Once you’re finished, you’ll be ready to enjoy all the new features and improvements that Windows 11 has to offer.
In conclusion, a clean install of Windows 11 from a USB drive can help optimize your computer’s performance and remove any unnecessary files or programs. By following this step-by-step guide, you’ll be able to easily install Windows 11 and start enjoying its new features. Remember to back up your data and have your product key ready before starting the installation process. Happy upgrading!
Preparing for Installation
Before you can clean install Windows 11 from a USB, you need to make sure you have all the necessary tools and files. Here’s a step-by-step guide on how to prepare for the installation:
1. Backup your data: Before proceeding with a clean install, it’s important to back up all your important files and data. This will ensure that you don’t lose any important information during the installation process.
2. Create a bootable USB: You’ll need a USB drive with at least 8GB of storage space to create a bootable USB. You can use the Windows 11 Media Creation Tool to create a bootable USB drive. Follow the instructions provided by Microsoft to create the bootable USB.
3. Download Windows 11 ISO: You’ll also need the Windows 11 ISO file to perform a clean install. You can download the Windows 11 ISO file from the official Microsoft website. Make sure to download the correct version of Windows 11 that matches your system architecture (32-bit or 64-bit).
4. Check system requirements: Before installing Windows 11, it’s important to check if your system meets the minimum requirements. Windows 11 has specific hardware requirements, so make sure your computer meets them to ensure a smooth installation process.
5. Disconnect unnecessary peripherals: To avoid any potential issues during the installation process, it’s recommended to disconnect any unnecessary peripherals, such as printers, scanners, and external hard drives. Only keep the essential devices connected, such as the keyboard and mouse.
Once you have completed these steps, you are ready to proceed with the clean installation of Windows 11 from the USB drive.
Check System Requirements

Before you proceed with the installation of Windows 11 from a USB, it is important to ensure that your system meets the minimum requirements. This will ensure a smooth and successful installation process.
Firstly, make sure that your computer is running a compatible version of Windows. Windows 11 can only be installed on devices that are currently running Windows 10. If you are using an older version of Windows, you will need to upgrade to Windows 10 before proceeding.
Next, check the hardware requirements. Windows 11 has specific hardware requirements that must be met in order for the operating system to run properly. These requirements include a compatible processor, sufficient RAM, and a certain amount of available storage space.
You will also need a USB drive with at least 8GB of storage capacity. This USB drive will be used to create a bootable installation media for Windows 11. Make sure that the USB drive is empty, as the installation process will erase all data on the drive.
Lastly, ensure that you have a valid product key for Windows 11. You will need this key during the installation process to activate your copy of Windows 11. If you don’t have a product key, you can purchase one from Microsoft or from an authorized retailer.
By checking these system requirements before proceeding, you can ensure that your computer is ready for the installation of Windows 11 from a USB. This will help to avoid any compatibility issues or errors during the installation process.
Backup Your Data
Before you proceed with the clean installation of Windows 11 from a USB drive, it is crucial to back up all your important data. This step ensures that you don’t lose any valuable files or documents during the installation process.
To backup your data, you can use various methods. One option is to manually copy your files to an external storage device, such as a USB flash drive or an external hard drive. Simply locate the files you want to backup, right-click on them, and select “Copy.” Then, navigate to your external storage device and right-click again, selecting “Paste” to transfer the files.
Alternatively, you can use backup software or cloud storage services to automate the backup process. These tools allow you to schedule regular backups and ensure that your data is securely stored in case of any unforeseen issues during the installation.
Remember to include all important files, such as documents, photos, videos, and any other data that you don’t want to lose. It’s better to be safe than sorry, so take the time to thoroughly backup your data before proceeding with the clean installation of Windows 11 from a USB drive.
Create a Bootable USB Drive
To clean install Windows 11 from a USB drive, you will need to create a bootable USB drive first. This will allow you to install the operating system on a new or formatted hard drive.
Here are the steps to create a bootable USB drive:
- Download the Windows 11 ISO: Go to the official Microsoft website and download the Windows 11 ISO file. Make sure to choose the correct version for your system.
- Prepare the USB drive: Connect a USB drive with at least 8GB of storage to your computer. Make sure there is no important data on the drive, as it will be formatted during the process.
- Use a tool to create a bootable USB: There are several tools available that can help you create a bootable USB drive, such as Rufus or the Windows USB/DVD Download Tool. Download and install one of these tools.
- Open the tool and select the Windows 11 ISO: Open the tool you installed and select the Windows 11 ISO file you downloaded. Make sure to choose the correct USB drive as the destination.
- Create the bootable USB drive: Follow the instructions provided by the tool to create the bootable USB drive. This process may take some time.
- Eject the USB drive: Once the bootable USB drive is created, safely eject it from your computer.
Now you have a bootable USB drive ready to install Windows 11. You can proceed with the next steps of the installation process.
Installing Windows 11
Installing Windows 11 is a straightforward process that can be done using a USB drive. Here is a step-by-step guide on how to install Windows 11 from a USB:
- First, make sure you have a USB drive with at least 8GB of storage capacity.
- Download the Windows 11 ISO file from the official Microsoft website.
- Insert the USB drive into your computer.
- Open the Windows 11 ISO file and copy all the contents to the USB drive.
- Restart your computer and enter the BIOS settings.
- Change the boot order to prioritize the USB drive.
- Save the changes and exit the BIOS settings.
- Your computer will now boot from the USB drive.
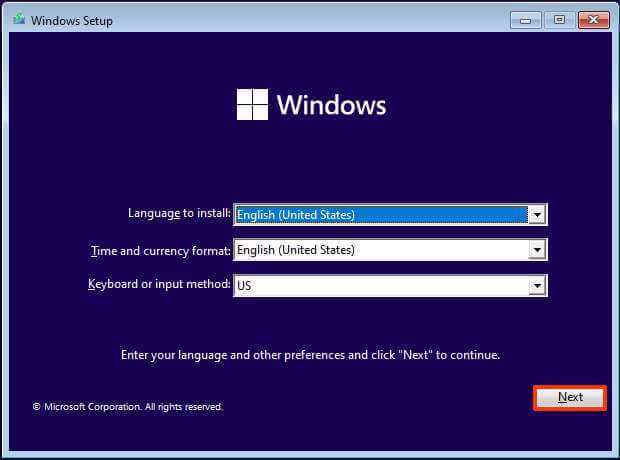
- Follow the on-screen instructions to install Windows 11.
- Choose your preferred language, time zone, and keyboard layout.
- Select “Custom installation” to perform a clean install of Windows 11.
- Select the partition where you want to install Windows 11.
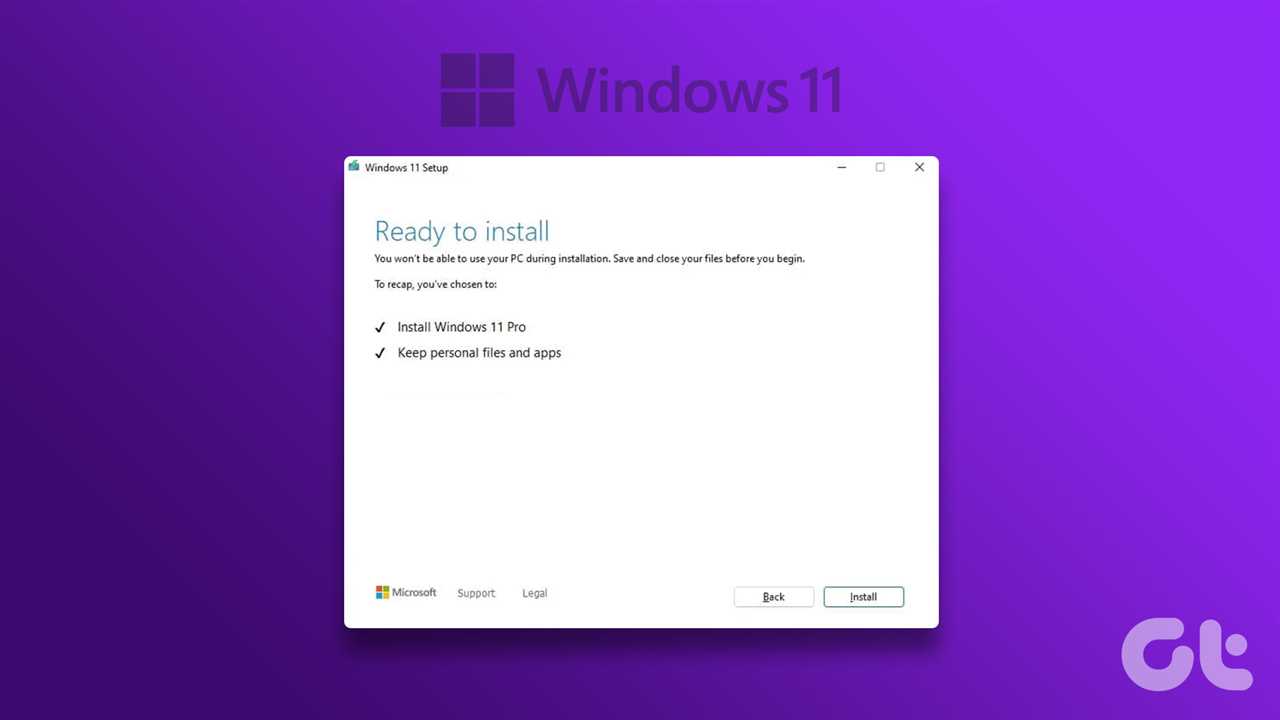
- Click “Next” to start the installation process.
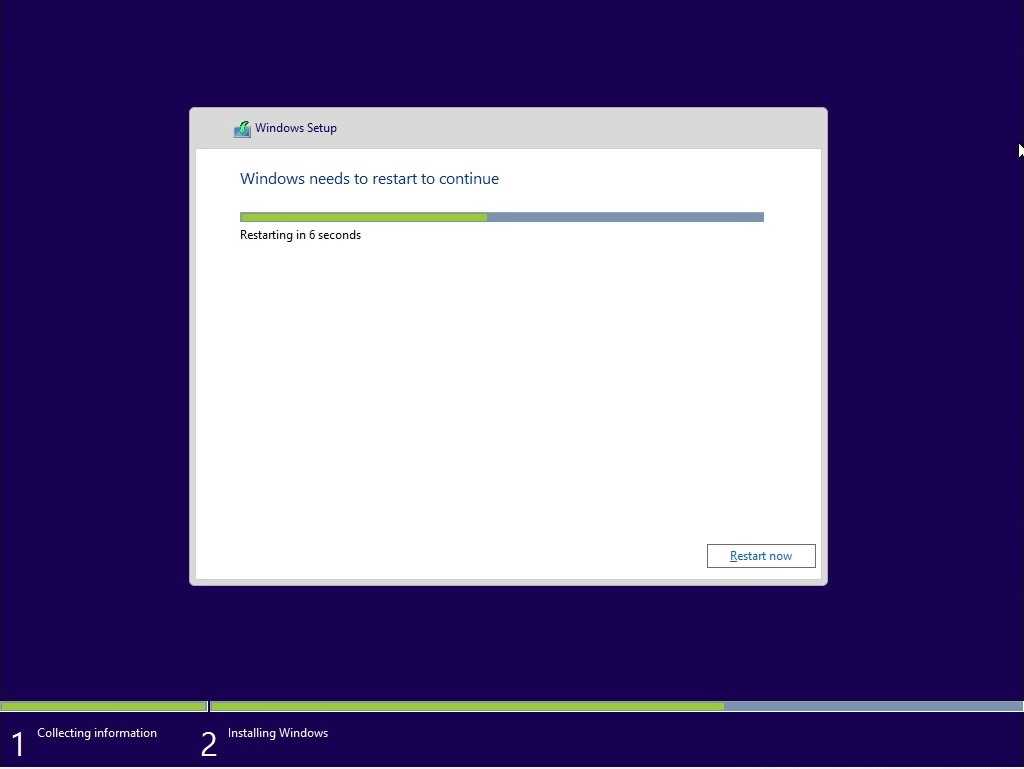
- Wait for the installation to complete.
- Once the installation is finished, your computer will restart.
- Remove the USB drive from your computer.
- Follow the on-screen instructions to set up Windows 11.
That’s it! You have successfully installed Windows 11 from a USB drive. Enjoy the new features and improvements of the latest Windows operating system.
Insert the USB Drive
Before you can begin the clean installation process of Windows 11, you will need to insert the USB drive that contains the installation files.
Make sure you have a USB drive with at least 8GB of storage capacity and that it is formatted correctly. If you haven’t done so already, you will need to create a bootable USB drive with the Windows 11 installation files.
To insert the USB drive, locate an available USB port on your computer. It is usually located on the front or back of the computer tower, or on the side of a laptop. Carefully insert the USB drive into the USB port until it is fully inserted.
Once the USB drive is inserted, you will need to restart your computer and boot from the USB drive to begin the installation process. This can usually be done by pressing a key (such as F12 or ESC) during the startup process to access the boot menu. From the boot menu, select the USB drive as the boot device and proceed with the installation.
Remember to back up any important files before proceeding with the clean installation, as it will erase all data on your computer’s hard drive. Once you have successfully installed Windows 11 from the USB drive, you can begin setting up your new operating system.
Boot from USB
To install Windows 11 from a USB drive, you need to boot your computer from the USB device. Here’s how:
- Connect the USB drive to your computer.
- Restart your computer.
- During the boot process, press the key (such as F12 or Esc) to access the boot menu.
- In the boot menu, select the USB drive as the boot device.
- Press Enter to confirm your selection.
Once you have successfully booted from the USB drive, the Windows 11 installation process will begin. Follow the on-screen instructions to complete the installation.


