Viruses can wreak havoc on your computer, causing it to slow down, crash, or even steal your personal information. Fortunately, there is a way to remove these pesky viruses using the Command Prompt (CMD) in Windows. In this step-by-step guide, we will show you how to effectively remove a virus using CMD.
Step 1: Open Command Prompt
To begin the virus removal process, you need to open the Command Prompt. You can do this by pressing the Windows key + R to open the Run dialog box, then type “cmd” and press Enter. Alternatively, you can search for “Command Prompt” in the Start menu and click on it.
Step 2: Run CMD as Administrator
Once the Command Prompt window is open, you need to run it as an administrator to have the necessary privileges to remove the virus. Right-click on the Command Prompt icon in the Start menu or on the desktop, then select “Run as administrator” from the context menu.
Step 3: Navigate to the Infected File or Folder
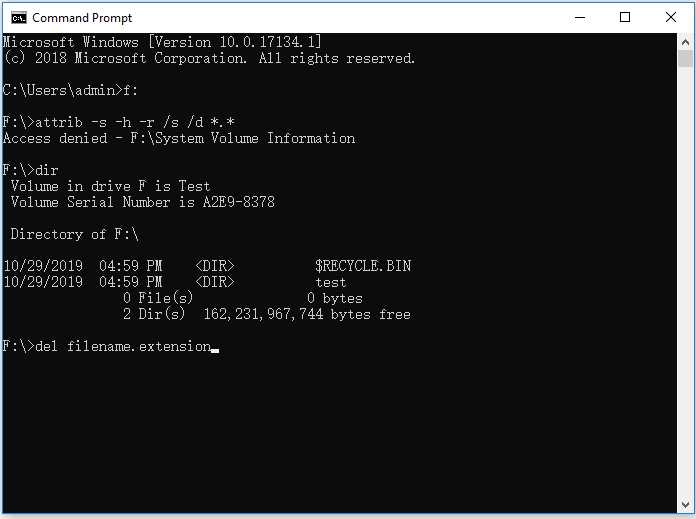
After opening CMD as an administrator, you need to navigate to the location of the infected file or folder. Use the “cd” command followed by the path of the file or folder. For example, if the infected file is located in the “Downloads” folder, you would type “cd C:\Users\YourUsername\Downloads” and press Enter.
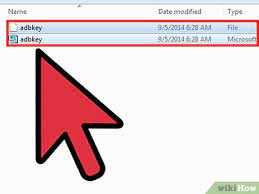
Step 4: Identify and Remove the Virus
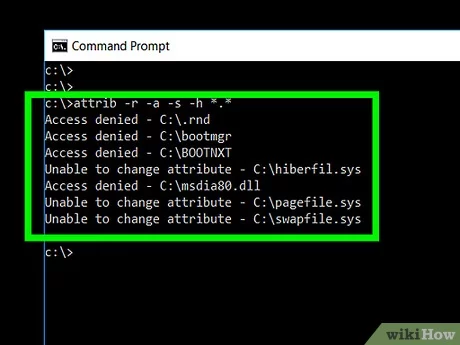
Once you are in the correct directory, you can use various CMD commands to identify and remove the virus. Some commonly used commands include “dir” to list all the files in the directory, “attrib” to view the attributes of a file, and “del” to delete a file. Make sure to use these commands carefully and only delete files that you are certain are infected with a virus.
Step 5: Scan Your Computer with Antivirus Software
While CMD can be a powerful tool for removing viruses, it is always recommended to scan your computer with antivirus software after using CMD. This will help ensure that all traces of the virus are completely removed from your system. There are many reputable antivirus programs available that can effectively detect and remove viruses.
By following these steps, you can remove a virus using CMD and regain control of your computer. Remember to exercise caution when using CMD and always double-check before deleting any files. With the right knowledge and tools, you can keep your computer safe and virus-free.
Step 1: Opening the Command Prompt
To remove a virus using the Command Prompt (cmd), you first need to open the Command Prompt on your computer. The Command Prompt is a powerful tool that allows you to execute commands and perform various tasks on your computer.
Here’s how you can open the Command Prompt:
- Press the Windows key on your keyboard or click on the Start menu.
- Type “cmd” in the search bar.
- Click on the Command Prompt app or press Enter.
Once the Command Prompt window opens, you are ready to proceed with the next steps to remove the virus from your computer.
Accessing the Start Menu

To remove a virus using the Command Prompt (CMD), you will need to access the Start Menu. The Start Menu is the central hub for accessing various features and programs on your computer. Here’s how you can access it:
Step 1: Press the Windows key on your keyboard or click on the Windows icon located at the bottom left corner of your screen. This will open the Start Menu.
Step 2: Once the Start Menu is open, you can navigate through the different options by using your mouse or the arrow keys on your keyboard. You will find various applications, settings, and features listed in the Start Menu.
Step 3: To access the Command Prompt, type “cmd” in the search bar located at the bottom of the Start Menu. As you type, you will see the Command Prompt application appear in the search results.
Step 4: Click on the Command Prompt application or press the Enter key on your keyboard to open the Command Prompt window.
By following these steps, you will be able to access the Start Menu and open the Command Prompt, which is essential for removing viruses using CMD.
Searching for Command Prompt
When it comes to using the Command Prompt (CMD) to remove a virus, the first step is to locate the Command Prompt application on your computer. Here’s how you can do it:
| Step 1: | Press the Windows key on your keyboard to open the Start menu. |
| Step 2: | Type “cmd” in the search bar. |
| Step 3: | Click on the Command Prompt application that appears in the search results. |
Once you have located and opened the Command Prompt, you are ready to proceed with the steps on how to remove the virus using CMD.
Opening Command Prompt as Administrator
To remove a virus using CMD, you need to open the Command Prompt as an administrator. Here are the steps to do it:
| Step 1: | Press the Windows key on your keyboard and type “cmd”. |
| Step 2: | Right-click on the Command Prompt app and select “Run as administrator”. |
| Step 3: | If prompted, click “Yes” to allow the app to make changes to your device. |
Once you have opened the Command Prompt as an administrator, you can proceed with the necessary commands to remove the virus from your system.
Step 2: Navigating to the Infected File Location
Once you have identified the virus that you want to remove, the next step is to navigate to the location of the infected file using the Command Prompt (CMD).
To do this, follow these steps:
- Open the Command Prompt by pressing the Windows key + R, typing “cmd” in the Run dialog box, and pressing Enter.
- Once the Command Prompt window opens, use the “cd” command to navigate to the folder where the infected file is located. For example, if the file is located in the “C:\Users\Username\Downloads” folder, you would type “cd C:\Users\Username\Downloads” and press Enter.
- After navigating to the correct folder, you can use the “dir” command to view the contents of the folder and verify that the infected file is present.
By navigating to the infected file location using CMD, you can easily access and manipulate the file to remove the virus.
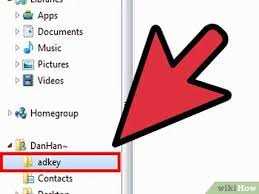
Understanding File Paths

When it comes to removing a virus using CMD, understanding file paths is crucial. A file path is the location of a file or folder on your computer. By navigating through file paths, you can access and manipulate files using the command prompt.
File paths consist of a series of directories and subdirectories that lead to the desired file. Each directory is separated by a backslash (\) in Windows operating systems. For example, if you want to access a file named “virus.exe” located in the “Documents” folder, the file path would be:
- C:\Users\YourUsername\Documents\virus.exe
Understanding file paths is essential because it allows you to locate and target specific files or folders infected by a virus. With the help of CMD, you can navigate to the infected file’s directory and remove the virus using various commands.
Here are some commonly used commands for navigating through file paths using CMD:
cd– Change directory: This command allows you to move to a different directory. For example,cd Documentswill take you to the “Documents” folder.dir– Directory: This command lists all the files and folders in the current directory.cd..– Move up one level: This command allows you to move up one level in the directory structure.cd\– Move to the root directory: This command takes you to the root directory of the drive.
By mastering these commands and understanding file paths, you can effectively navigate through your computer’s file system and remove viruses using CMD.
Using the “cd” Command
The “cd” command, short for “change directory,” is a powerful tool in the Windows Command Prompt (cmd) that allows you to navigate through different directories on your computer. By using the “cd” command, you can easily access the location where the virus is located and remove it.
To use the “cd” command, follow these steps:
- Open the Command Prompt by pressing the Windows key + R, typing “cmd” in the Run dialog box, and pressing Enter.
- Type “cd” followed by the path of the directory you want to navigate to. For example, if the virus is located in the “C:\Program Files\Virus” directory, you would type “cd C:\Program Files\Virus” and press Enter.
- Once you have navigated to the desired directory, you can use other commands to remove the virus. For example, you can use the “del” command to delete the virus file or the “rd” command to remove an entire directory containing the virus.
It is important to note that you should exercise caution when using the “cd” command, as navigating to system directories or deleting important files can cause serious issues with your computer. Make sure you know the exact location of the virus and double-check your commands before executing them.
By using the “cd” command in the Windows Command Prompt, you can effectively navigate to the location of the virus and remove it using other commands. This method provides a straightforward and efficient way to eliminate viruses from your computer.