Are you wondering how to install the latest version of Windows, Windows 11, on VirtualBox? Look no further! In this step-by-step guide, we will walk you through the process of installing Windows 11 on VirtualBox, a popular virtualization software.
VirtualBox is a free and open-source virtualization software that allows you to run multiple operating systems on a single machine. It provides a safe and isolated environment to test new operating systems or run software that is not compatible with your current system.
Windows 11 is the latest version of Microsoft’s operating system, featuring a new and modern design, improved performance, and enhanced security. By installing Windows 11 on VirtualBox, you can explore its features and functionalities without affecting your primary operating system.
So, let’s get started with the step-by-step guide on how to install Windows 11 on VirtualBox!
Requirements for Installing Windows 11 on VirtualBox
To install Windows 11 on VirtualBox, you will need:
1. VirtualBox: Make sure you have VirtualBox installed on your computer. VirtualBox is a free and open-source virtualization software that allows you to run multiple operating systems on a single machine.
2. Windows 11 ISO: Download the Windows 11 ISO file from the official Microsoft website or any trusted source. The ISO file contains the installation files for Windows 11.
3. Adequate System Requirements: Ensure that your computer meets the system requirements for running Windows 11 on VirtualBox. This includes having a compatible processor, sufficient RAM, and available storage space.
4. Sufficient Disk Space: Allocate enough disk space for the virtual machine that will run Windows 11. The recommended minimum disk space for Windows 11 is 64 GB, but it is advisable to allocate more if you plan to install additional software or store files.
5. Stable Internet Connection: A stable internet connection is necessary to download the Windows 11 ISO file and any updates during the installation process.
6. Virtualization Enabled: Ensure that virtualization is enabled in your computer’s BIOS settings. Virtualization allows VirtualBox to run virtual machines efficiently.
By meeting these requirements, you will be ready to proceed with the installation of Windows 11 on VirtualBox.
VirtualBox Installation
VirtualBox is a popular virtualization software that allows you to run multiple operating systems on your computer. In this guide, we will show you how to install Windows 11 on VirtualBox.
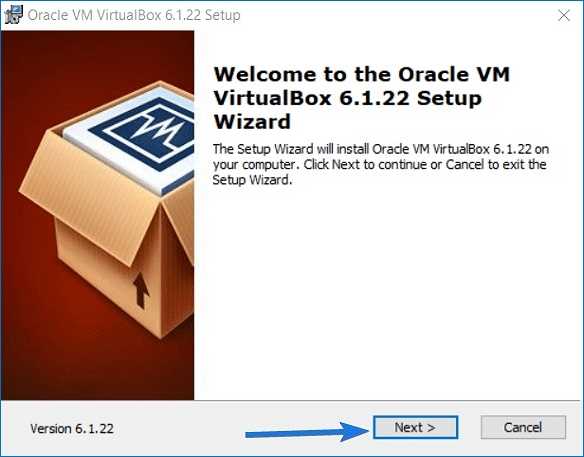
To begin, you will need to download and install VirtualBox on your computer. You can find the latest version of VirtualBox on the official website. Once the download is complete, run the installer and follow the on-screen instructions to install VirtualBox.
After VirtualBox is installed, open the application and click on the “New” button to create a new virtual machine. In the “Name” field, enter a name for your virtual machine, such as “Windows 11”. In the “Type” field, select “Microsoft Windows” and in the “Version” field, select “Windows 11 (64-bit)”.
Next, you will need to allocate memory to your virtual machine. The recommended amount of memory for Windows 11 is at least 4GB, but you can allocate more if you have a higher amount of RAM on your computer.
After allocating memory, you will need to create a virtual hard disk for your virtual machine. Select the “Create a virtual hard disk now” option and click on the “Create” button. Choose the “VDI (VirtualBox Disk Image)” option and click “Next”. Select the “Dynamically allocated” option and click “Next”. Finally, choose the size of the virtual hard disk. The recommended size for Windows 11 is at least 40GB, but you can allocate more if you have enough disk space on your computer.
Once the virtual hard disk is created, you can proceed with the installation of Windows 11. Click on your virtual machine in the VirtualBox main window and click on the “Start” button. In the next window, select the Windows 11 ISO file that you have downloaded and click “Start” to begin the installation process.
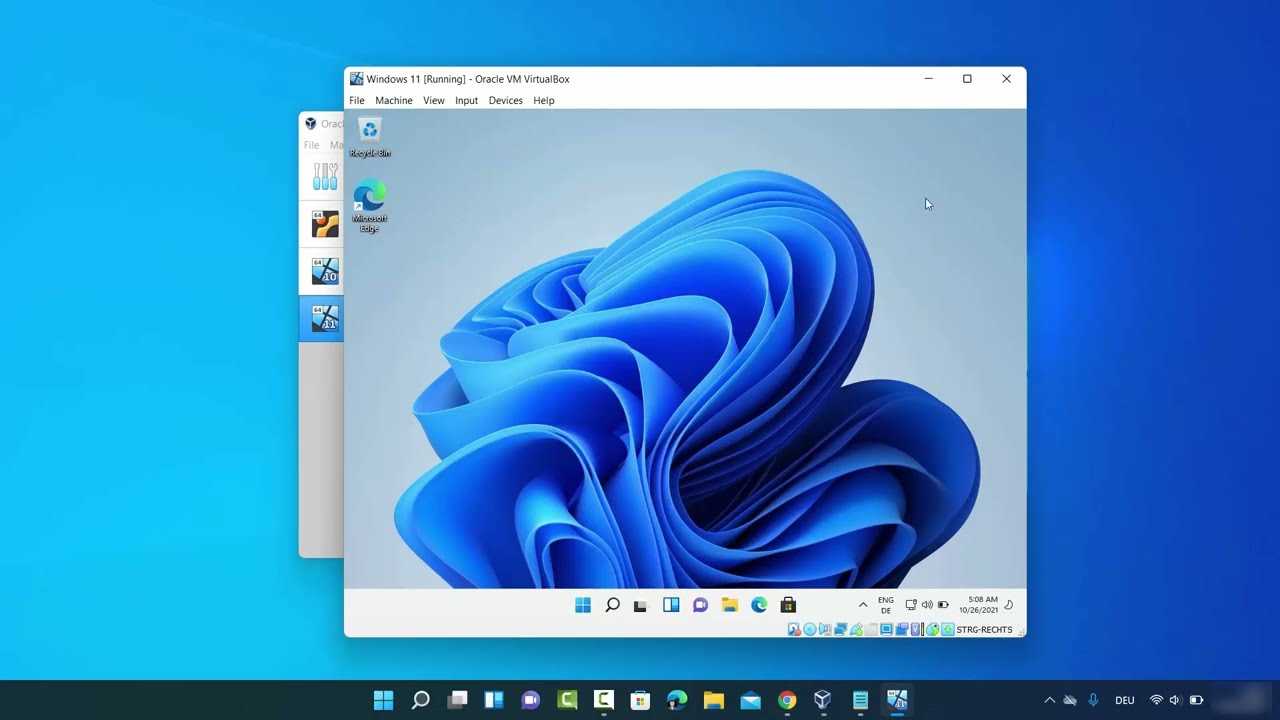
Follow the on-screen instructions to install Windows 11 on your virtual machine. Once the installation is complete, you can start using Windows 11 on VirtualBox.
That’s it! You have successfully installed Windows 11 on VirtualBox. Now you can enjoy all the features of Windows 11 without affecting your main operating system.
Windows 11 ISO File
To install Windows 11 on VirtualBox, you will need the Windows 11 ISO file. The ISO file is a disk image that contains all the necessary files for installing the operating system. It is essentially a virtual copy of a physical disk, allowing you to install Windows 11 on your virtual machine.
Before you can proceed with the installation, you need to obtain the Windows 11 ISO file. You can download it from the official Microsoft website or other trusted sources. Make sure to choose the correct version of Windows 11 that matches your system requirements.
Once you have downloaded the Windows 11 ISO file, you can proceed with the installation process on VirtualBox. This involves creating a new virtual machine, configuring its settings, and then booting from the ISO file to start the installation.
By following the step-by-step guide on how to install Windows 11 on VirtualBox, you can experience the new features and improvements of Windows 11 without affecting your main operating system. VirtualBox provides a safe and isolated environment for testing and exploring the new Windows version.
Note: It is important to have a valid Windows 11 license key to activate your virtual machine after the installation process. Without a valid license, you may encounter limitations or restrictions while using Windows 11.
Sufficient System Resources
Before you proceed with the installation of Windows 11 on VirtualBox, it is important to ensure that your system has sufficient resources to run the operating system smoothly. Here are the recommended system requirements:
| Component | Minimum Requirements |
|---|---|
| Processor | 1 GHz or faster with 2 or more cores on a compatible 64-bit processor |
| RAM | 4 GB or more |
| Storage | 64 GB or more available storage |
| Graphics Card | DirectX 12 compatible graphics or later with a WDDM 2.0 driver |
| Display | High definition (720p) display, 9″ or greater diagonal |
| Internet Connection | Internet connectivity is necessary to download updates and activate Windows 11 |
Make sure your system meets these requirements to ensure a smooth installation and optimal performance of Windows 11 on VirtualBox. If your system falls short of these requirements, you may experience performance issues or compatibility problems.
Step 1: Create a New Virtual Machine
To install Windows 11 on VirtualBox, you first need to create a new virtual machine. Follow the steps below to get started:
| 1. | Open VirtualBox and click on the “New” button in the top left corner of the window. |
| 2. | In the “Name” field, enter a name for your virtual machine, such as “Windows 11”. |
| 3. | Choose “Microsoft Windows” as the type and select “Windows 11 (64-bit)” as the version. |
| 4. | Allocate the desired amount of memory (RAM) for your virtual machine. It is recommended to allocate at least 4GB for Windows 11. |
| 5. | Create a new virtual hard disk by selecting “Create a virtual hard disk now” and click “Create”. |
| 6. | Choose the hard disk file type and click “Next”. The default option is usually fine. |
| 7. | Choose the storage type for your virtual hard disk. Again, the default option is usually fine. |
| 8. | Allocate the desired amount of storage space for your virtual hard disk. It is recommended to allocate at least 40GB for Windows 11. |
| 9. | Click “Create” to finish creating the virtual machine. |
Once you have created the virtual machine, you can proceed to the next step to install Windows 11 on VirtualBox.
Open VirtualBox

To begin the installation process, you need to open VirtualBox on your computer. VirtualBox is a virtualization software that allows you to run multiple operating systems on your computer simultaneously. If you haven’t installed VirtualBox yet, you can download it from the official website and follow the installation instructions.
Once VirtualBox is installed, locate the application on your computer and open it. You can usually find it in your Applications folder on macOS or in the Start menu on Windows.
When VirtualBox opens, you will see the main interface with a list of virtual machines on the left side. If you haven’t created any virtual machines yet, the list will be empty.
Now you are ready to proceed with the installation of Windows 11 on VirtualBox.
Click on “New” to Create a New Virtual Machine
Once you have installed VirtualBox on your computer and launched the application, you can proceed with creating a new virtual machine to install Windows 11. To do this, follow the steps below:
1. Open VirtualBox and click on the “New” button located in the top-left corner of the application window.
2. In the “Create Virtual Machine” window, enter a name for your virtual machine. You can choose any name you prefer, such as “Windows 11 VM”.
3. Select the operating system type and version. In this case, choose “Microsoft Windows” as the type and “Windows 10 (64-bit)” as the version. Although Windows 11 is not officially supported by VirtualBox, selecting the Windows 10 option should work fine.
4. Allocate the amount of memory (RAM) for your virtual machine. It is recommended to allocate at least 4 GB of RAM for Windows 11, but you can adjust this according to your computer’s specifications.
5. In the “Hard Disk” section, select “Create a virtual hard disk now” and click on the “Create” button.
6. Choose the hard disk file type. The default option, “VDI (VirtualBox Disk Image)”, should work fine.
7. Select the storage on physical hard disk. You can choose either “Dynamically allocated” or “Fixed size”. The dynamically allocated option allows the virtual hard disk to grow as needed, while the fixed size option allocates the entire disk space at once.
8. Specify the size of the virtual hard disk. It is recommended to allocate at least 40 GB of disk space for Windows 11, but you can adjust this according to your needs.
9. Once you have completed the above steps, click on the “Create” button to create your new virtual machine.
Now you have successfully created a new virtual machine in VirtualBox, and you can proceed with installing Windows 11 on it.
Configure the Virtual Machine Settings
Before you can install Windows 11 on VirtualBox, you need to configure the virtual machine settings to ensure optimal performance and compatibility.
First, open VirtualBox and select the virtual machine you created for installing Windows 11. Then, click on the “Settings” button to access the virtual machine settings.
In the settings window, navigate to the “System” tab. Here, you can adjust the amount of RAM allocated to the virtual machine. It is recommended to allocate at least 4GB of RAM for Windows 11 to run smoothly.
Next, go to the “Display” tab. Make sure the “Enable 3D Acceleration” option is checked to enable hardware acceleration for better graphics performance. You can also adjust the video memory to allocate more resources for graphics-intensive tasks.
Under the “Storage” tab, click on the “Empty” CD/DVD drive and then click on the small disk icon to the right. Select the Windows 11 ISO file that you downloaded earlier. This will make the ISO file available for installation during the setup process.
Finally, go to the “Network” tab and select the appropriate network adapter for your virtual machine. If you want to connect to the internet from within the virtual machine, choose the “Bridged Adapter” option. This will allow the virtual machine to use the host computer’s network connection.
Once you have configured the virtual machine settings, you are ready to proceed with the installation of Windows 11 on VirtualBox.
Step 2: Install Windows 11 on the Virtual Machine
Now that you have set up VirtualBox and created a virtual machine, it’s time to install Windows 11 on it. Follow the steps below to proceed:
Step 1: Start the VirtualBox application and select the virtual machine you created in Step 1.
Step 2: Click on the “Start” button to launch the virtual machine.
Step 3: In the VirtualBox window, you will see a black screen with a prompt to “Press any key to boot from CD or DVD.” Press any key on your keyboard to continue.
Step 4: The Windows 11 installation process will begin. Follow the on-screen instructions to select your language, time zone, and keyboard layout.
Step 5: When prompted, enter your product key to activate Windows 11. If you don’t have a product key, you can skip this step for now, but you will need to activate Windows 11 later.
Step 6: Select the installation type. If you are installing Windows 11 on a new virtual machine, choose “Custom: Install Windows only (advanced)”. If you are upgrading from a previous version of Windows, choose “Upgrade: Install Windows and keep files, settings, and applications”.
Step 7: Choose the partition where you want to install Windows 11. If you are installing on a new virtual machine, you will see unallocated space. Select the unallocated space and click “Next” to continue.
Step 8: The installation process will begin. Windows 11 will copy files, install features, and update settings. This may take some time, so be patient.
Step 9: Once the installation is complete, the virtual machine will restart. You may need to remove the installation media (ISO file) from the virtual machine before it restarts.
Step 10: After the virtual machine restarts, follow the on-screen instructions to set up Windows 11, including creating a user account, choosing privacy settings, and connecting to a network.
Congratulations! You have successfully installed Windows 11 on the Virtual Machine using VirtualBox. You can now enjoy exploring the new features and functionalities of Windows 11.