
Yarn, a popular package manager for JavaScript, has become an essential tool for developers. It simplifies the process of managing dependencies and installing packages, making it easier to build and maintain projects. But have you ever wondered where exactly Yarn installs these packages?
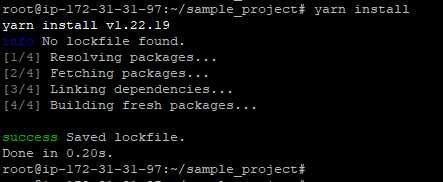
When you run the yarn install command, Yarn looks for a package.json file in your project’s root directory. This file contains a list of all the dependencies your project needs, along with their versions. Yarn then reads this file and installs the specified packages into a folder called node_modules.
The node_modules folder is created in the same directory as the package.json file. It serves as a local repository where Yarn stores all the installed packages. Each package is installed in its own subfolder within node_modules, with its name and version number as the folder name.
It’s important to note that the node_modules folder should not be included in your version control system, such as Git. Instead, you should add the node_modules folder to your project’s .gitignore file. This is because the node_modules folder can be quite large, and including it in your repository would make it unnecessarily bloated.
In conclusion, Yarn installs packages into a node_modules folder in your project’s root directory. This folder serves as a local repository for all the installed packages, making it easier for Yarn to manage dependencies and ensure that your project runs smoothly.
Understanding the Package Installation Process
When it comes to package management, Yarn is a popular choice among developers. Yarn provides a reliable and efficient way to install packages for your projects. But how exactly does Yarn install packages?
Yarn follows a straightforward process when installing packages. First, it checks if the package is already present in the local cache. If the package is found in the cache, Yarn will use the cached version, saving time and bandwidth.
If the package is not in the cache, Yarn will then check the package registry, such as the npm registry, to find the latest version of the package. Yarn will download the package tarball from the registry and extract it to the appropriate location in your project.
During the installation process, Yarn also resolves and installs any dependencies required by the package. Yarn uses a lockfile, typically named yarn.lock, to ensure that the same versions of dependencies are installed consistently across different environments.
Yarn also provides a mechanism for developers to specify the version range of a package they want to install. This allows for flexibility in choosing which version of a package to use, while still ensuring compatibility with other dependencies.
Overall, Yarn’s package installation process is designed to be efficient, reliable, and flexible. By leveraging the local cache, package registry, and lockfile, Yarn ensures that packages are installed correctly and consistently across different projects and environments.
How Yarn Installs Packages
Yarn is a package manager that allows developers to efficiently manage and install packages for their projects. When you run the yarn install command, Yarn looks for a package.json file in the current directory. This file contains a list of dependencies and their versions that your project requires.
Yarn then checks if the required packages are already installed in the node_modules directory. If they are not found, Yarn will download the packages from the package registry specified in the package.json file. By default, Yarn uses the npm registry, but you can also configure it to use other registries.
Yarn installs packages in a deterministic way, meaning that it tries to create the same node_modules directory across different machines and environments. It achieves this by using a yarn.lock file, which locks the versions of the installed packages. This ensures that everyone working on the project uses the same versions of the dependencies.
When Yarn installs packages, it also creates a yarn.lock file if it doesn’t already exist. This file is used to track the exact versions of the installed packages and their dependencies. It is recommended to commit this file to version control to ensure consistent builds across different environments.
Yarn installs packages in a parallel and incremental manner, which means that it can download and install multiple packages simultaneously. This can significantly speed up the installation process, especially for projects with a large number of dependencies.
In summary, Yarn installs packages by checking the package.json file for the required dependencies, downloading them from the package registry if necessary, and creating a yarn.lock file to lock the versions. It installs packages in a deterministic, parallel, and incremental manner to optimize the installation process.
The Default Package Installation Directory
When you use Yarn to install packages, it automatically installs them in a specific directory on your computer. This directory is known as the default package installation directory.
The default package installation directory is determined by the operating system you are using. For example, on Windows, the default directory is usually C:\Users\{username}\AppData\Local\Yarn\. On macOS, it is typically /Users/{username}/.yarn/. And on Linux, it is commonly /home/{username}/.yarn/.
It’s important to know where Yarn installs packages because you may need to access these packages directly for various reasons. For example, if you want to manually edit a package’s source code or view its documentation, you would need to know the location of the package installation directory.
Additionally, understanding the default package installation directory can be useful when you want to delete or update packages. By knowing where Yarn installs packages, you can easily locate and manage them.
However, it’s worth noting that you can customize the package installation directory if you prefer. Yarn provides a configuration option called modules-folder that allows you to specify a different directory for package installation. This can be useful if you want to keep your packages organized in a specific location.
In conclusion, Yarn installs packages by default in a specific directory on your computer, known as the default package installation directory. Knowing where this directory is located can help you access, manage, and customize your installed packages.
Customizing the Package Installation Location
By default, when you use Yarn to install packages, it installs them in a specific location on your computer. However, there may be cases where you want to customize the location where Yarn installs packages.
To customize the package installation location, you can use the --modules-folder flag when running the yarn install command. This flag allows you to specify a different folder where you want the packages to be installed.
For example, if you want to install the packages in a folder named my-packages instead of the default location, you can run the following command:
yarn install --modules-folder my-packagesThis will instruct Yarn to install the packages in the my-packages folder.
It’s important to note that when you customize the package installation location, Yarn will create a new folder if it doesn’t already exist. If the folder already exists, Yarn will use it to install the packages.
Customizing the package installation location can be useful in scenarios where you want to keep your packages separate from the rest of your project files, or if you want to have multiple installations of the same package with different configurations.
Overall, Yarn provides flexibility in customizing the package installation location, allowing you to organize your project’s dependencies in a way that suits your needs.
Changing the Default Installation Directory
By default, when you install packages using Yarn, they are installed in the node_modules directory of your project. However, there may be cases where you want to change the default installation directory to a different location.
To change the default installation directory, you can use the --modules-folder flag when running the yarn install command. This flag allows you to specify the path to the directory where you want the packages to be installed.
For example, if you want to install the packages in a directory called vendor instead of the default node_modules directory, you can run the following command:
yarn install --modules-folder vendorThis will install the packages in the vendor directory of your project.
It’s important to note that changing the default installation directory may have implications for the way your project is set up and how dependencies are resolved. Make sure to update any relevant configuration files or scripts to reflect the new installation directory.
Additionally, keep in mind that changing the default installation directory may not be recommended in all cases. The node_modules directory is a widely accepted convention in the JavaScript ecosystem, and deviating from it may cause compatibility issues with other tools or libraries.
In conclusion, if you need to change the default installation directory for Yarn packages, you can use the --modules-folder flag when running the yarn install command. However, be cautious and consider the potential implications before making this change.
Specifying a Custom Installation Directory
By default, when you install packages using Yarn, they are installed in the node_modules directory in the root of your project. However, there may be cases where you want to specify a custom installation directory for your packages.
To specify a custom installation directory, you can use the --modules-folder flag followed by the desired directory path when running the yarn install command. For example:
yarn install --modules-folder /path/to/custom-directory
This will install the packages in the specified custom directory instead of the default node_modules directory.
It’s important to note that when specifying a custom installation directory, you need to make sure that the directory path is valid and accessible. Otherwise, Yarn will throw an error.
Specifying a custom installation directory can be useful in scenarios where you want to keep your project dependencies separate from other files or when you want to have more control over the organization of your project’s packages.
Overall, Yarn provides flexibility in terms of where packages are installed, allowing you to specify a custom installation directory to suit your project’s needs.


