If you are a data scientist or a machine learning enthusiast, you are probably familiar with TensorFlow. TensorFlow is a powerful open-source library for numerical computation and machine learning, developed by Google. It allows you to build and train neural networks for various tasks, such as image recognition, natural language processing, and more.
While TensorFlow can be installed and used on a CPU, installing it on a GPU can significantly enhance its performance. GPUs are designed to handle parallel processing tasks, making them ideal for training and running complex machine learning models. In this step-by-step guide, we will show you how to install TensorFlow GPU to take advantage of your graphics card’s power.
Before we dive into the installation process, there are a few prerequisites you need to have in place. First, you will need a compatible GPU. TensorFlow supports NVIDIA GPUs with Compute Capability 3.5 or higher. You will also need to have the latest NVIDIA drivers installed on your system. Additionally, you will need to install CUDA, a parallel computing platform and programming model that enables developers to use GPUs for general-purpose computing. Lastly, you will need to install cuDNN, a GPU-accelerated library for deep neural networks.
Section 1: Preparing the Environment
Before you can install TensorFlow GPU and start enjoying its enhanced performance, you need to prepare your environment. Here’s how:
Step 1: Check if your computer meets the system requirements for TensorFlow GPU. Make sure you have a compatible GPU and the necessary drivers installed.
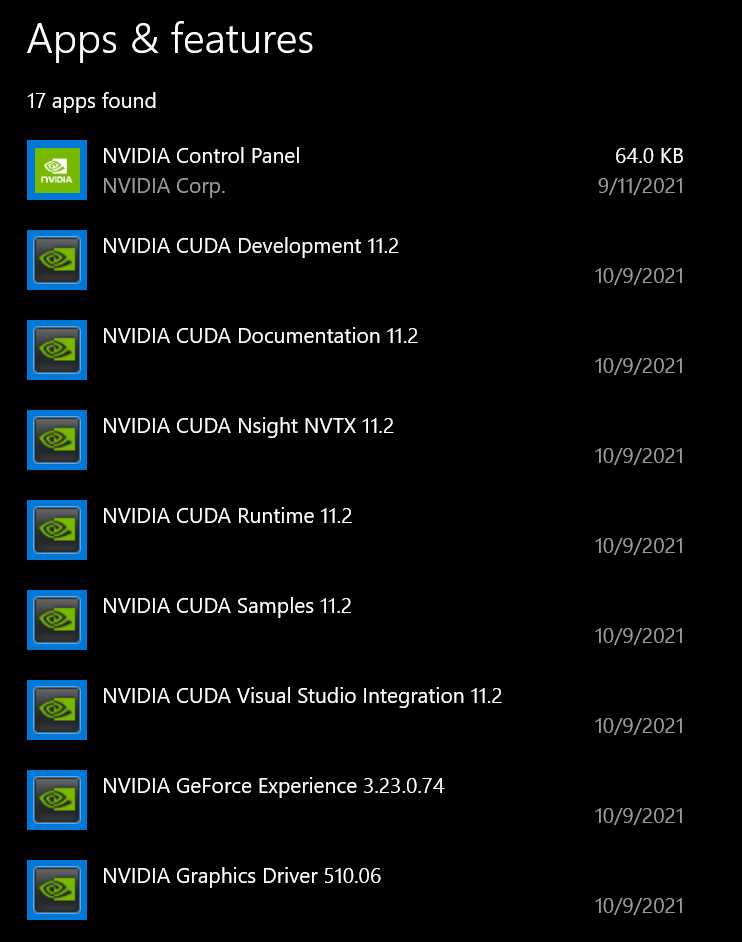
Step 2: Install the CUDA Toolkit. TensorFlow GPU requires CUDA, which is a parallel computing platform and application programming interface (API) model created by NVIDIA. You can download the CUDA Toolkit from the NVIDIA website and follow the installation instructions provided.
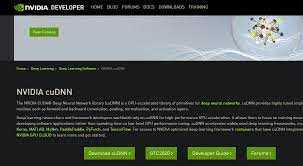
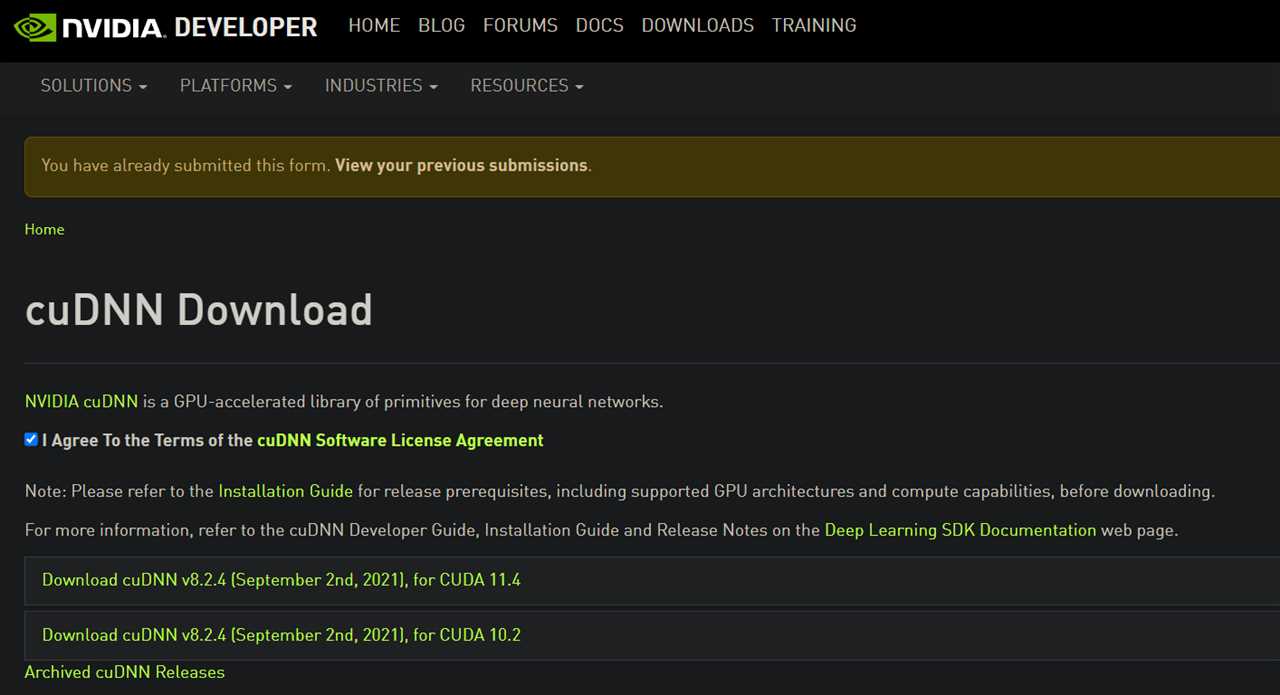
Step 3: Install cuDNN. cuDNN is a GPU-accelerated library for deep neural networks. It provides highly optimized implementations of various neural network primitives, such as convolutions and pooling. You can download cuDNN from the NVIDIA Developer website and follow the installation instructions provided.
Step 4: Set up the Anaconda environment. Anaconda is a popular Python distribution that includes many useful packages and tools for data science. You can download Anaconda from the Anaconda website and follow the installation instructions provided.
Step 5: Create a new conda environment. Open the Anaconda Prompt or your preferred terminal and run the following command to create a new environment named “tensorflow-gpu”:
conda create -n tensorflow-gpu
Step 6: Activate the new environment. Run the following command to activate the “tensorflow-gpu” environment:
conda activate tensorflow-gpu
Step 7: Install TensorFlow GPU. Run the following command to install TensorFlow GPU in the activated environment:
pip install tensorflow-gpu
Once you have completed these steps, your environment will be ready for TensorFlow GPU installation. You can now move on to the next section to learn how to verify the installation and start using TensorFlow GPU for enhanced performance.
Checking System Requirements
Before proceeding with the installation, it is important to check if your system meets the necessary requirements for installing TensorFlow GPU. This step ensures that you have the appropriate hardware and software configurations to successfully install and utilize TensorFlow GPU for enhanced performance.
Hardware Requirements:
1. NVIDIA GPU: TensorFlow GPU requires a compatible NVIDIA GPU with CUDA support. Check the NVIDIA website for a list of supported GPUs.
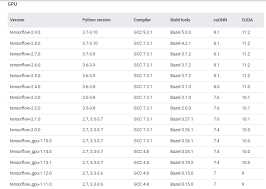
2. CUDA Toolkit: TensorFlow GPU relies on the CUDA Toolkit for GPU acceleration. Make sure you have the latest version of the CUDA Toolkit installed on your system.
3. cuDNN Library: The cuDNN library is also required for TensorFlow GPU. Ensure that you have the appropriate version of cuDNN installed.
Software Requirements:
1. Operating System: TensorFlow GPU is compatible with various operating systems, including Windows, Linux, and macOS. Check the TensorFlow documentation for the specific requirements of your operating system.
2. Python: TensorFlow GPU requires Python to be installed on your system. Make sure you have Python installed, preferably the latest version.
3. TensorFlow: Before installing TensorFlow GPU, it is recommended to have the CPU version of TensorFlow installed. This ensures that you have all the necessary dependencies and packages required for TensorFlow GPU.
By checking these system requirements, you can ensure a smooth installation process and avoid any compatibility issues. Once you have confirmed that your system meets all the requirements, you can proceed with the installation of TensorFlow GPU for enhanced performance.
Installing CUDA Toolkit
To enhance the performance of TensorFlow, it is recommended to install the CUDA Toolkit. CUDA is a parallel computing platform and programming model that allows TensorFlow to utilize the power of NVIDIA GPUs for faster computations.
Here is a step-by-step guide on how to install the CUDA Toolkit:
- Visit the NVIDIA CUDA Toolkit download page on the official NVIDIA website.
- Choose the appropriate version of the CUDA Toolkit for your operating system and GPU.
- Download the CUDA Toolkit installer.
- Run the installer and follow the on-screen instructions to complete the installation process.
- Once the installation is complete, open a command prompt or terminal window.
- Verify that the CUDA Toolkit is installed correctly by running the following command:
nvcc --version - If the CUDA Toolkit is installed correctly, you should see the version number of the CUDA Toolkit displayed in the output.
By installing the CUDA Toolkit, you will enable TensorFlow to take advantage of the powerful GPU capabilities, resulting in enhanced performance and faster training of deep learning models.
Installing cuDNN Library
To install the cuDNN library, follow these steps:
- Go to the NVIDIA Developer website and sign in or create an account.
- Once signed in, navigate to the cuDNN download page.
- Choose the appropriate version of cuDNN for your GPU and operating system.
- Download the cuDNN library package.
- Extract the contents of the package to a directory of your choice.
- Add the path to the cuDNN library to your system’s PATH environment variable.
- Verify the installation by running a sample cuDNN program.
Note: Installing the cuDNN library is crucial for utilizing the full power of your GPU when running TensorFlow. Make sure to follow the installation instructions carefully to ensure a successful installation.
Section 2: Setting Up TensorFlow GPU
Installing TensorFlow GPU can greatly enhance the performance of your machine learning models. In this section, we will guide you through the step-by-step process of setting up TensorFlow GPU on your system.
Before we begin, make sure you have a compatible GPU installed on your machine. TensorFlow GPU requires a CUDA-enabled GPU from NVIDIA. You can check the list of supported GPUs on the NVIDIA website.
Here are the steps to install TensorFlow GPU:
| Step 1: | Install CUDA Toolkit |
| Step 2: | Install cuDNN |
| Step 3: | Install TensorFlow GPU |
Step 1: Install CUDA Toolkit
The CUDA Toolkit is a software development kit provided by NVIDIA for GPU programming. To install CUDA Toolkit, follow these steps:
- Go to the NVIDIA Developer website and download the CUDA Toolkit installer for your operating system.
- Run the installer and follow the on-screen instructions to complete the installation.
- Make sure to add the CUDA Toolkit installation directory to your system’s PATH environment variable.
Step 2: Install cuDNN
cuDNN is a GPU-accelerated library for deep neural networks. To install cuDNN, follow these steps:
- Go to the NVIDIA Developer website and download the cuDNN library for your version of CUDA Toolkit.
- Extract the downloaded cuDNN package.
- Copy the extracted files to the corresponding directories in your CUDA Toolkit installation.
Step 3: Install TensorFlow GPU
Now that you have CUDA Toolkit and cuDNN installed, you can proceed to install TensorFlow GPU:
- Open a command prompt or terminal.
- Run the following command to install TensorFlow GPU using pip:
pip install tensorflow-gpuOnce the installation is complete, you can verify that TensorFlow GPU is installed correctly by importing it in a Python script and checking the available devices:
import tensorflow as tf
print(tf.config.list_physical_devices('GPU'))
If you see the details of your GPU listed, then TensorFlow GPU is successfully installed and ready to use.
That’s it! You have successfully set up TensorFlow GPU on your system. Now you can take advantage of the enhanced performance offered by GPU acceleration for your machine learning tasks.
Creating a Virtual Environment
Before you install TensorFlow, it is recommended to create a virtual environment to keep your project dependencies isolated. This ensures that the installation of TensorFlow does not interfere with other Python packages or versions that you may have installed on your system.
To create a virtual environment, follow these steps:
| Step 1: | Open a terminal or command prompt. |
| Step 2: | Navigate to the directory where you want to create the virtual environment. |
| Step 3: | Run the following command to create a virtual environment named “tensorflow”: |
python -m venv tensorflow |
|
| Step 4: | Activate the virtual environment by running the appropriate command for your operating system: |
|
Once the virtual environment is activated, you can proceed with the installation of TensorFlow. This ensures that TensorFlow and its dependencies are installed within the virtual environment, keeping your system clean and organized.
Installing TensorFlow GPU

If you want to take advantage of the enhanced performance that TensorFlow GPU can offer, you’ll need to follow a few steps to install it correctly. Here’s a step-by-step guide on how to install TensorFlow GPU:
- First, make sure you have a compatible GPU installed on your system. TensorFlow GPU requires a CUDA-enabled GPU from NVIDIA.
- Next, you’ll need to install the NVIDIA CUDA Toolkit. This toolkit provides the necessary libraries and tools for running TensorFlow GPU. You can download the CUDA Toolkit from the NVIDIA website and follow the installation instructions provided.
- After installing the CUDA Toolkit, you’ll need to install the cuDNN library. This library is also provided by NVIDIA and is required for TensorFlow GPU to work properly. You can download the cuDNN library from the NVIDIA website and follow the installation instructions provided.
- Once you have the CUDA Toolkit and cuDNN library installed, you can proceed to install TensorFlow GPU itself. You can do this by using pip, the Python package manager. Open a command prompt or terminal and run the following command:
pip install tensorflow-gpu. This will download and install the latest version of TensorFlow GPU. - After the installation is complete, you can verify that TensorFlow GPU is working correctly by running a simple test script. Open a Python interpreter or create a new Python script and enter the following code:
import tensorflow as tf
print(tf.test.is_gpu_available())
If the output of the script indicates that a GPU is available, then TensorFlow GPU has been successfully installed and is ready to use. You can now start taking advantage of the enhanced performance that TensorFlow GPU provides for your machine learning and deep learning projects.
Verifying the Installation
After you have successfully installed TensorFlow, it is important to verify that the installation was successful. This step ensures that TensorFlow is installed correctly and ready to use for enhanced performance.
To verify the installation, you can follow these steps:
- Open a terminal or command prompt: Depending on your operating system, open a terminal or command prompt.
- Activate the TensorFlow environment: If you have created a virtual environment for TensorFlow, activate it using the appropriate command.
- Launch Python: Type
pythonorpython3in the terminal or command prompt to launch the Python interpreter. - Import TensorFlow: In the Python interpreter, import TensorFlow using the following command:
import tensorflow as tf. - Check the TensorFlow version: To ensure that you have the latest version of TensorFlow installed, use the following command:
print(tf.__version__). - Create a simple TensorFlow program: To test TensorFlow, you can create a simple program that performs a basic mathematical operation, such as adding two numbers. Run the program and verify that it executes without any errors.
If you are able to complete these steps without encountering any errors, congratulations! You have successfully installed TensorFlow and verified its installation. You are now ready to start using TensorFlow for enhanced performance in your machine learning projects.
If you encounter any issues during the installation or verification process, refer to the official TensorFlow documentation or seek help from the TensorFlow community.