
Updating the BIOS on your Gigabyte motherboard is an essential task that can improve the performance and stability of your system. The BIOS, or Basic Input/Output System, is responsible for initializing and configuring the hardware components of your computer. By updating the BIOS, you can take advantage of new features, bug fixes, and compatibility improvements.
To update the BIOS on your Gigabyte motherboard, you will need to download the latest BIOS file from the official Gigabyte website. Make sure to choose the correct BIOS file for your specific motherboard model. Once you have downloaded the BIOS file, you can proceed with the update process.
Before you begin the update, it is important to back up any important data on your computer. Updating the BIOS carries a small risk of data loss, so it is always better to be safe than sorry. Additionally, make sure that your computer is connected to a reliable power source to prevent any interruptions during the update process.
Once you have taken the necessary precautions, you can start the BIOS update process. This typically involves running a utility provided by Gigabyte that will guide you through the update steps. Follow the instructions carefully and do not interrupt the update process. It may take a few minutes for the update to complete, and your computer may restart multiple times.
After the BIOS update is complete, you should restart your computer and enter the BIOS settings to verify that the update was successful. Look for the updated version number in the BIOS settings to confirm that the update was applied. If everything looks good, you can proceed with reinstalling any necessary drivers or software that may have been affected by the BIOS update.
Updating the BIOS on your Gigabyte motherboard may seem like a daunting task, but by following this step-by-step guide, you can ensure a smooth and successful update process. Remember to always double-check the compatibility of the BIOS file and to take the necessary precautions to protect your data. With an updated BIOS, you can enjoy improved performance and stability on your Gigabyte motherboard.
Understanding the Importance of BIOS Updates
Updating the BIOS on your Gigabyte motherboard is a crucial step in maintaining the performance and stability of your computer system. The BIOS, or Basic Input/Output System, is responsible for initializing and configuring the hardware components of your motherboard, ensuring that they work together harmoniously.
Over time, motherboard manufacturers like Gigabyte release BIOS updates to address various issues and improve the overall functionality of their products. These updates can include bug fixes, compatibility improvements, and performance optimizations. By updating your BIOS, you can ensure that your motherboard is running on the latest firmware, benefiting from these enhancements.
One of the key reasons to update your BIOS is to ensure compatibility with new hardware or software. As technology advances, new components and software applications may require specific BIOS versions to function properly. By keeping your BIOS up to date, you can avoid compatibility issues and ensure that your system runs smoothly.
Another important aspect of BIOS updates is security. Just like any other software, the BIOS can have vulnerabilities that may be exploited by malicious individuals. Manufacturers regularly release BIOS updates to patch these vulnerabilities and improve the security of their motherboards. By updating your BIOS, you can protect your system from potential security threats.
It is worth noting that updating the BIOS is a delicate process that should be approached with caution. Incorrectly flashing the BIOS can lead to irreversible damage to your motherboard. Therefore, it is essential to follow the manufacturer’s instructions carefully and ensure that you have a stable power source during the update process.
In conclusion, updating the BIOS on your Gigabyte motherboard is crucial for maintaining compatibility, improving performance, and enhancing security. By staying up to date with the latest BIOS version, you can ensure that your system runs smoothly and securely, while also taking advantage of any new features or optimizations provided by Gigabyte.
Why Update BIOS on Gigabyte Motherboard?

Updating the BIOS on your Gigabyte motherboard is an essential task that can bring several benefits to your system. BIOS, which stands for Basic Input/Output System, is a firmware that is responsible for initializing and controlling the hardware components of your motherboard.
Here are a few reasons why you should update the BIOS on your Gigabyte motherboard:
1. Improved Compatibility:
Updating the BIOS can ensure better compatibility with the latest hardware and software. Gigabyte releases BIOS updates regularly to address any compatibility issues and provide support for new processors, memory modules, and other devices.
2. Enhanced Performance:
Updating the BIOS can improve the overall performance of your system. Gigabyte often includes performance optimizations and bug fixes in their BIOS updates, which can result in better system stability, faster boot times, and improved overall responsiveness.
3. Security Fixes:
BIOS updates often include security fixes that address vulnerabilities and protect your system from potential threats. By keeping your BIOS up to date, you can ensure that your system is protected against the latest security risks.
4. New Features and Functionality:
Gigabyte may introduce new features and functionality through BIOS updates. These updates can unlock additional capabilities of your motherboard, such as support for new technologies or improved overclocking options.
5. Troubleshooting and Bug Fixes:
Updating the BIOS can help resolve various issues and bugs that you may encounter with your Gigabyte motherboard. Gigabyte actively listens to user feedback and releases BIOS updates to address reported problems, ensuring a smoother and more reliable computing experience.
Overall, updating the BIOS on your Gigabyte motherboard is a crucial step to ensure optimal performance, compatibility, security, and functionality. It is recommended to regularly check for BIOS updates on Gigabyte’s official website and follow the provided instructions to keep your system up to date.
Step 1: Checking the Current BIOS Version
Before you begin the process of updating the BIOS on your Gigabyte motherboard, it is important to check the current version of your BIOS. This will help you determine if an update is necessary and which version you need to download.
To check the current BIOS version on your Gigabyte motherboard, follow these steps:
| Step | Description |
|---|---|
| 1 | Start your computer and enter the BIOS setup by pressing the designated key during the boot process. The key may vary depending on your motherboard model, but it is usually Del, F2, or F10. |
| 2 | Navigate to the “Main” or “System Information” tab using the arrow keys on your keyboard. |
| 3 | Look for the “BIOS Version” or “Firmware Version” option. The current version of your BIOS will be displayed here. |
| 4 | Take note of the BIOS version and compare it to the latest version available on the Gigabyte website. If your current version is outdated, proceed to the next step. |
By checking the current BIOS version, you can ensure that you are downloading and installing the correct update for your Gigabyte motherboard. This will help improve system stability, compatibility, and performance.
Accessing BIOS Settings

In order to update the BIOS on your Gigabyte motherboard, you will need to access the BIOS settings. Here is a step-by-step guide on how to do it:
Step 1: Start by restarting your computer. As soon as it starts booting up, press the key that is indicated on the screen to enter the BIOS settings. This key is usually “Del” or “F2”, but it can vary depending on your motherboard model.
Step 2: Once you press the correct key, you will enter the BIOS settings menu. Here, you will see various options and settings that you can configure.
Step 3: Use the arrow keys on your keyboard to navigate through the menu. Look for the “BIOS Update” or “Firmware Update” option. It may be located under different sections, such as “Advanced” or “Tools”.
Step 4: Select the “BIOS Update” or “Firmware Update” option and press Enter. This will take you to a new screen where you can choose the method of updating the BIOS.
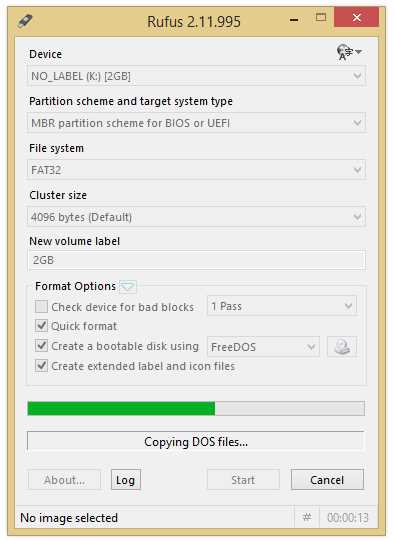
Step 5: Depending on your motherboard model, you may have different options for updating the BIOS. You can choose to update it from a USB drive, from the internet, or using a BIOS file that you have downloaded.
Step 6: Follow the on-screen instructions to complete the BIOS update process. Make sure to carefully read and follow the instructions provided by Gigabyte to avoid any issues.
Step 7: Once the BIOS update is complete, restart your computer to apply the changes. Your Gigabyte motherboard should now have the latest BIOS version installed.
Remember to always be cautious when updating the BIOS, as it is a critical component of your motherboard. If you are unsure about any step or encounter any issues, it is recommended to seek assistance from Gigabyte support or a professional.


