If you’re looking to create a Venn diagram in Word, you’re in luck! Microsoft Word offers a simple and straightforward way to make this popular diagram. Whether you need it for a school project, a business presentation, or just for fun, Word has got you covered. In this step-by-step guide, we’ll walk you through the process of creating a Venn diagram using the powerful features of Word.
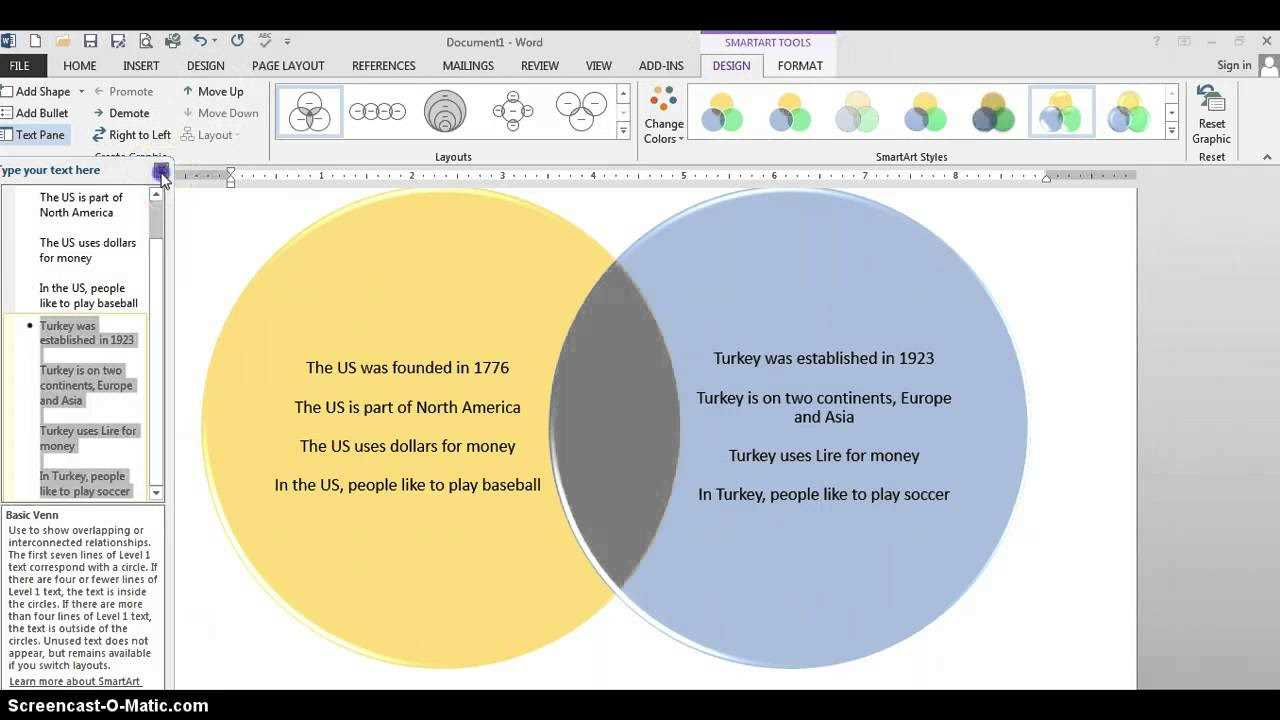
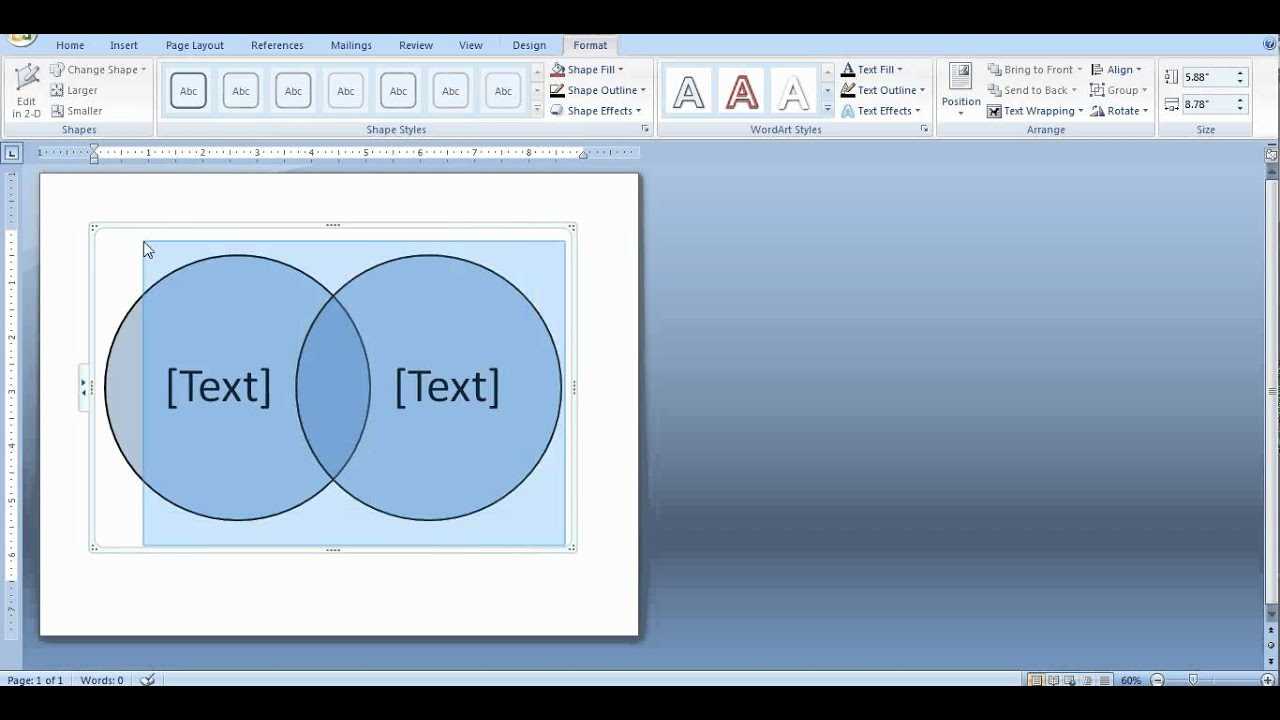
First, open Word and create a new document. Once you have a blank canvas, go to the “Insert” tab and click on the “SmartArt” button. A window will pop up with various diagram options. Scroll down until you find the “Relationship” category, and select the “Basic Venn” diagram. This will insert a default Venn diagram into your document.
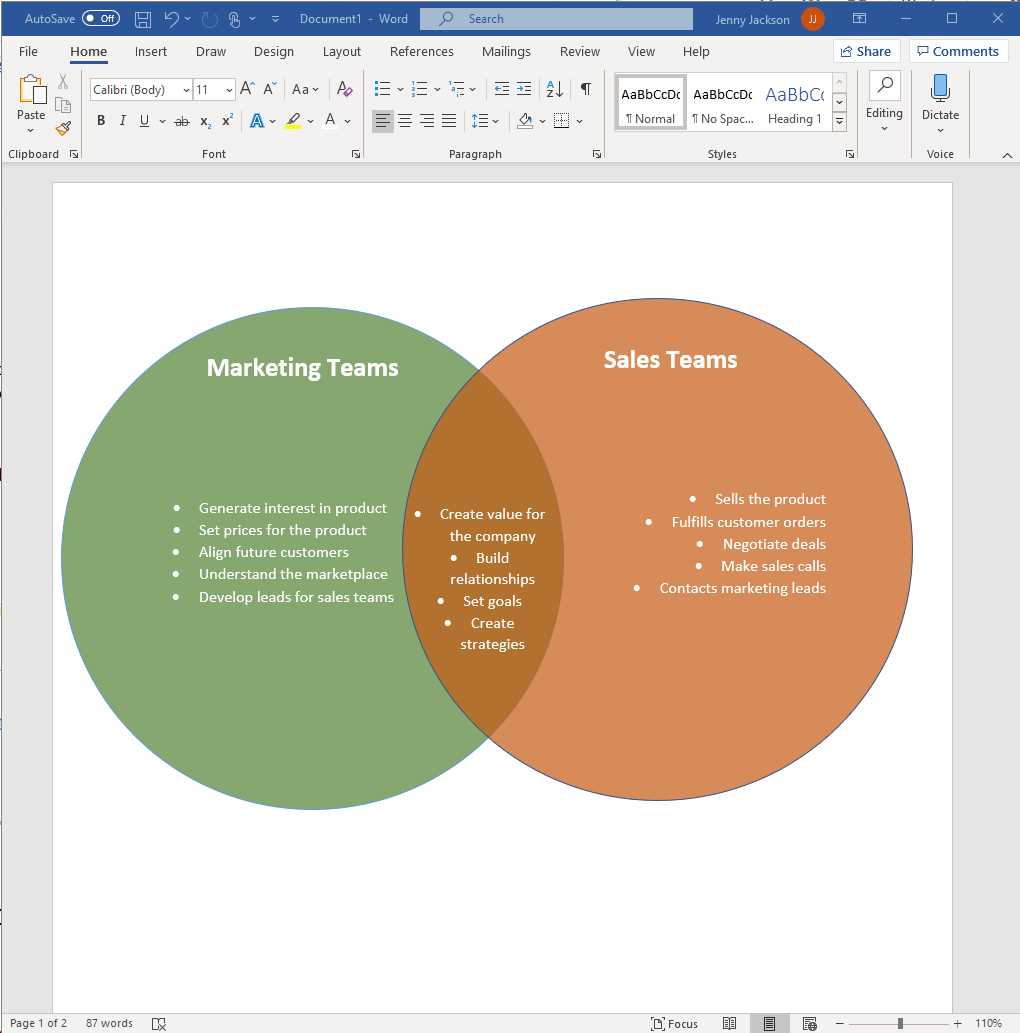
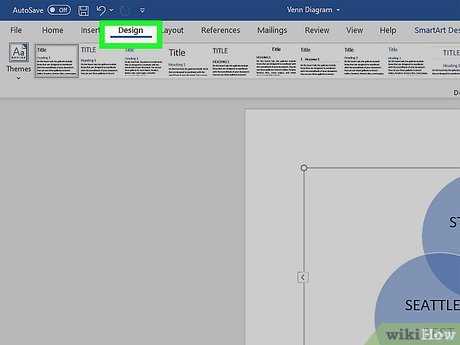
Now that you have the basic structure of the Venn diagram, it’s time to customize it to fit your needs. Click on the diagram to select it, and you’ll notice a new “Design” tab appearing in the toolbar. Here, you can change the colors, add text, and modify the layout of your Venn diagram. Experiment with different options until you’re satisfied with the look and feel of your diagram.
Once you’ve customized your Venn diagram, it’s time to add the content. Click on each circle in the diagram to select it, and then type in the text you want to display. You can use the “Text” pane on the left side of the screen to easily enter and edit the text for each circle. Make sure to use clear and concise labels that accurately represent the categories you’re comparing.
That’s it! You’ve successfully created a Venn diagram in Word. Now you can save your document, print it out, or share it with others. Whether you’re a student, a professional, or just someone who loves visualizing data, knowing how to make a Venn diagram in Word is a valuable skill that can come in handy in various situations.
What is a Venn Diagram?
A Venn diagram is a type of diagram that shows the relationships between different sets of items. It is named after the English logician John Venn, who introduced the concept in the late 19th century. Venn diagrams are commonly used to illustrate the similarities and differences between two or more sets of data.
In a Venn diagram, sets are represented by circles or other shapes, and the overlapping areas between the circles show the common elements or characteristics shared by the sets. The non-overlapping areas represent the unique elements or characteristics of each set.
Venn diagrams are a useful tool for organizing and visualizing information, making them popular in various fields such as mathematics, statistics, logic, and computer science. They can be created using various software programs, including Microsoft Word.
In Word, you can easily create a Venn diagram by using the SmartArt feature, which provides pre-designed templates for different types of diagrams, including Venn diagrams. This allows you to quickly and efficiently make a Venn diagram that suits your needs.
Whether you need to compare different data sets, analyze relationships between concepts, or simply organize information in a visual and concise manner, a Venn diagram can be a valuable tool to help you achieve your goals.
Why Use Word to Create a Venn Diagram?
When it comes to creating a Venn diagram, using Microsoft Word can be a convenient and efficient option. Word is a widely used word processing program that offers a range of features and tools for creating various types of documents, including diagrams.
One of the main advantages of using Word to make a Venn diagram is its accessibility. Most people are familiar with Word and already have it installed on their computers, making it easily accessible for creating diagrams without the need for additional software or tools.
Word also provides a user-friendly interface that allows you to create and customize your Venn diagram with ease. You can easily add shapes, text, and colors to your diagram, making it visually appealing and easy to understand.
Another benefit of using Word is its flexibility. You can easily resize and rearrange the elements of your Venn diagram, allowing you to create a diagram that fits your specific needs and requirements.
Additionally, Word offers various formatting options that allow you to enhance the appearance of your Venn diagram. You can add borders, shading, and other formatting elements to make your diagram stand out and effectively convey your information.
Overall, using Word to create a Venn diagram provides a convenient and user-friendly solution. Whether you need to create a simple or complex diagram, Word offers the necessary tools and features to help you make a visually appealing and informative Venn diagram.
Step 1: Open Microsoft Word
To make a Venn diagram in Microsoft Word, the first step is to open the Word application on your computer. You can do this by clicking on the Word icon in your desktop or by searching for “Word” in the start menu.
Once Word is open, you will be greeted with a blank document. This is where you will create your Venn diagram.
If you already have a Word document open, you can create a new document by clicking on the “File” tab in the top left corner of the screen, then selecting “New” from the drop-down menu. This will open a new blank document.
Now that you have Word open and a blank document ready, you can proceed to the next step of creating your Venn diagram.
Launch Microsoft Word
To make a Venn diagram in Word, you will need to launch Microsoft Word on your computer. Microsoft Word is a popular word processing program that allows you to create various types of documents, including diagrams and charts.
Once you have Microsoft Word open, you can start creating your Venn diagram by following the step-by-step guide. This guide will walk you through the process of creating a Venn diagram using the built-in features and tools available in Word.
Before you begin, make sure you have a clear understanding of the data or information you want to represent in your Venn diagram. This will help you determine the number of circles or sets you need to create and the overlapping areas.
Now that you have Microsoft Word open and your data or information ready, let’s move on to the next step in creating a Venn diagram in Word.
Create a New Blank Document
To make a Venn diagram in Word, you first need to create a new blank document. Here are the steps to follow:
- Open Microsoft Word on your computer.
- Click on the “File” tab in the top left corner of the screen.
- Select “New” from the drop-down menu.
- Choose “Blank Document” to create a new empty document.
Once you have created a new blank document, you can start making your Venn diagram by following the next steps in this guide.
Step 2: Insert Shapes

Once you have created a Venn diagram template in Word, the next step is to insert the shapes that will represent the different sets in your diagram. To do this, follow these simple steps:
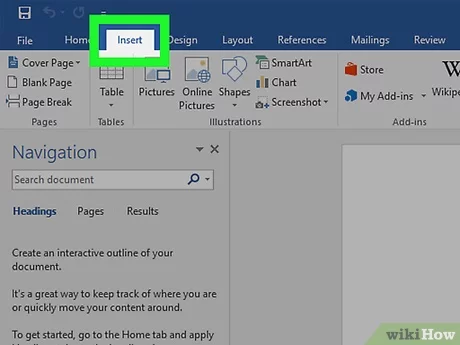
Step 1: Click on the “Insert” tab at the top of the Word window.
Step 2: In the “Illustrations” group, click on the “Shapes” button.
Step 3: A drop-down menu will appear with a variety of shapes to choose from. Scroll down and select the shape that you want to use for your Venn diagram.
Step 4: Click and drag your mouse on the Word document to draw the shape. You can resize and reposition the shape as needed.
Step 5: Repeat steps 3 and 4 to insert the shapes for the other sets in your Venn diagram.
Note: You can use different shapes for each set, or you can use the same shape for all sets. It’s up to you!
By following these steps, you can easily insert the shapes needed to create a Venn diagram in Word. Once you have inserted the shapes, you can move on to the next step of adding text and formatting your diagram.
Click on the “Insert” Tab
To create a Venn diagram in Microsoft Word, you need to start by opening a new or existing Word document. Once you have your document open, navigate to the “Insert” tab at the top of the Word window.
The “Insert” tab contains various options for adding different elements to your document, such as tables, pictures, shapes, and charts. To create a Venn diagram, we will be using the “Shapes” option.
Click on the “Shapes” button in the “Illustrations” group on the “Insert” tab. This will open a drop-down menu with a variety of shapes to choose from.
Scroll down the menu until you find the “Basic Shapes” section. In this section, you will see the shapes you need to create a Venn diagram, such as circles and rectangles.
Click on the circle shape to select it. This will allow you to draw a circle on your Word document, which will serve as one of the overlapping areas in your Venn diagram.
After selecting the circle shape, move your cursor to the location on the document where you want to place the circle. Click and drag your cursor to draw the circle to the desired size.
Repeat the process to create additional circles for the other overlapping areas in your Venn diagram. You can resize and reposition the circles as needed to achieve the desired layout.
Once you have created all the necessary circles, you can use the “Text Box” option in the “Text” group on the “Insert” tab to add labels or text inside each circle. This will help you identify the different sets or categories represented in your Venn diagram.
By following these steps and utilizing the tools available in Microsoft Word, you can easily create a Venn diagram to visually represent overlapping relationships between different sets of data or concepts.
Select the “Shapes” Option
To make a Venn diagram in Word, you will need to use the “Shapes” option. This feature allows you to create and customize various shapes, including circles, which are essential for creating a Venn diagram.
To access the “Shapes” option, open Microsoft Word and navigate to the “Insert” tab located at the top of the screen. Click on the “Shapes” button, which is usually found in the “Illustrations” group.
Once you click on the “Shapes” button, a drop-down menu will appear with a variety of shapes to choose from. Look for the circle shape, as it is the primary shape used in Venn diagrams. You can find the circle shape under the “Basic Shapes” section.
Click on the circle shape to select it. Your cursor will then turn into a crosshair. To create a circle on your Word document, click and drag your cursor to define the size of the circle. You can hold down the “Shift” key while dragging to create a perfect circle.
Repeat this process to create additional circles for your Venn diagram. Remember to position the circles in a way that represents the relationships between the different sets or categories you want to compare.
Once you have created the necessary circles, you can customize them by changing their size, color, and other properties. Right-click on a circle and select the “Format Shape” option to access the formatting options.
By selecting the “Shapes” option in Word, you can easily create and customize circles to make a Venn diagram that effectively represents your data or information.