
Welcome to our step-by-step guide on how to install Ubuntu Server with a graphical user interface (GUI). Ubuntu is a popular Linux distribution known for its stability, security, and ease of use. Installing Ubuntu Server with a GUI can provide a more user-friendly experience, especially for those who are new to Linux or prefer a visual interface.
Before we begin, it’s important to note that Ubuntu Server is designed for use in a server environment, where a GUI is typically not necessary. However, there may be situations where having a GUI can be beneficial, such as when managing a small home server or for certain administrative tasks.
To install Ubuntu Server with a GUI, you will need a computer or virtual machine with the necessary hardware requirements. You will also need a copy of the Ubuntu Server installation ISO, which can be downloaded from the official Ubuntu website. Once you have these prerequisites in place, you’re ready to begin the installation process.
Preparing for Installation
Before you can install Ubuntu Server with a GUI, you need to make sure you have the necessary hardware and software requirements. Here’s how to prepare for the installation:
1. Check Hardware Requirements: Ensure that your server meets the minimum hardware requirements for running Ubuntu Server with a GUI. This includes having a compatible processor, sufficient RAM, and enough disk space.
2. Download the Ubuntu Server ISO: Visit the official Ubuntu website and download the ISO image for Ubuntu Server with a GUI. Make sure to choose the correct version and architecture for your server.
3. Create a Bootable USB Drive: Use a tool like Rufus or Etcher to create a bootable USB drive from the downloaded ISO image. This will allow you to install Ubuntu Server with a GUI from the USB drive.
4. Backup Data: Before proceeding with the installation, it’s always a good idea to backup any important data on your server. This will help prevent data loss in case anything goes wrong during the installation process.
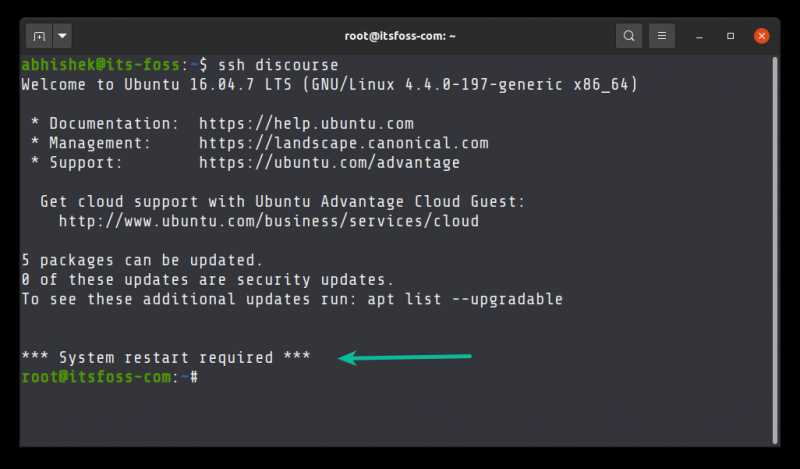
5. Connect to the Internet: Make sure your server is connected to the internet. This will allow you to download any necessary updates during the installation process.
By following these steps, you will be well-prepared to install Ubuntu Server with a GUI on your server. This will provide you with a user-friendly interface for managing your server and its resources.
Downloading Ubuntu Server ISO
To install Ubuntu Server with a graphical user interface (GUI), you will first need to download the Ubuntu Server ISO file. The ISO file contains the installation image for Ubuntu Server, which you can use to create a bootable USB or DVD.
Here is how you can download the Ubuntu Server ISO:
- Go to the official Ubuntu website at https://ubuntu.com.
- Click on the “Download” tab at the top of the page.
- Scroll down and click on the “Ubuntu Server” option.
- Choose the version of Ubuntu Server that you want to download. It is recommended to download the latest LTS (Long Term Support) version for stability and support.
- Click on the “Download” button next to the version you selected.
- Choose a mirror location to download the ISO file from. It is recommended to choose a mirror location that is geographically close to your location for faster download speeds.
- Once the ISO file is downloaded, you can proceed to the next step of creating a bootable USB or DVD to install Ubuntu Server with GUI.
Remember to always verify the integrity of the downloaded ISO file by checking its checksum before proceeding with the installation. This ensures that the file has not been tampered with and is safe to use.
Now that you have downloaded the Ubuntu Server ISO, you are ready to move on to the next step of the installation process.
Creating a Bootable USB Drive

To install Ubuntu Server with a GUI, you will need to create a bootable USB drive. This will allow you to easily install the server on your desired system.
Here are the steps to create a bootable USB drive:
| Step 1: | Download the Ubuntu Server ISO file from the official website. |
| Step 2: | Insert a USB drive with at least 2GB of storage capacity into your computer. |
| Step 3: | Open a terminal and run the following command to identify the USB drive: |
sudo fdisk -l |
|
| Step 4: | Make a note of the device name of the USB drive (e.g., /dev/sdb). |
| Step 5: | Unmount the USB drive by running the following command: |
sudo umount /dev/sdb |
|
| Step 6: | Use the following command to write the Ubuntu Server ISO file to the USB drive: |
sudo dd bs=4M if=/path/to/ubuntu-server.iso of=/dev/sdb status=progress && sync |
|
| Step 7: | Eject the USB drive from your computer. |
Now you have successfully created a bootable USB drive with Ubuntu Server and GUI. You can use this drive to install Ubuntu Server on any compatible system.
Configuring BIOS Settings
Before installing Ubuntu Server with a GUI, it is important to configure the BIOS settings on your server. The BIOS (Basic Input/Output System) is responsible for controlling the basic functions of your hardware, and it is necessary to ensure that your server is set up correctly.
Here is a step-by-step guide on how to configure the BIOS settings for Ubuntu Server:
- Power on your server and press the designated key to enter the BIOS setup. This key is usually displayed on the screen during the boot process, and it can vary depending on the manufacturer of your server.
- Navigate to the “Boot” tab using the arrow keys on your keyboard.
- Ensure that the boot mode is set to “UEFI” or “Legacy” depending on your server’s configuration. Ubuntu Server supports both modes, so choose the one that is appropriate for your setup.
- Next, go to the “Boot Order” or “Boot Priority” section.
- Set the first boot device to the media containing the Ubuntu Server installation files. This could be a USB drive or a DVD-ROM.
- Save the changes and exit the BIOS setup.
By configuring the BIOS settings correctly, you will be able to boot from the installation media and proceed with the installation of Ubuntu Server with a GUI. Make sure to follow the manufacturer’s instructions for your specific server model, as the steps may vary slightly.
Installing Ubuntu Server
Installing Ubuntu Server with a graphical user interface (GUI) is a straightforward process. This step-by-step guide will walk you through the installation process, ensuring that you have a functional Ubuntu Server with a GUI up and running.
To install Ubuntu Server with a GUI, follow these steps:
| Step 1: | Download the Ubuntu Server ISO from the official Ubuntu website. |
| Step 2: | Create a bootable USB drive or burn the ISO to a DVD. |
| Step 3: | Insert the bootable USB drive or DVD into the server and boot from it. |
| Step 4: | Follow the on-screen instructions to start the installation process. |
| Step 5: | Choose the language, keyboard layout, and other preferences. |
| Step 6: | Select “Install Ubuntu Server” from the installation menu. |
| Step 7: | Choose the installation type (e.g., erase disk and install Ubuntu Server). |
| Step 8: | Create a username and password for the administrator account. |
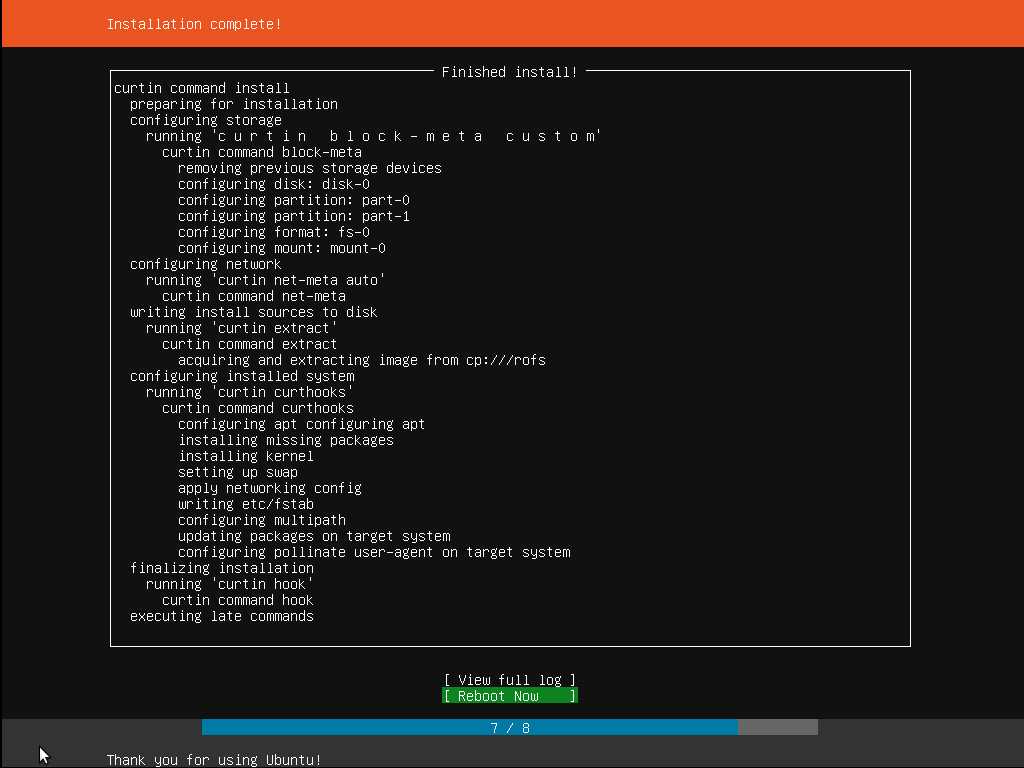
| Step 9: | Wait for the installation process to complete. |
| Step 10: | Reboot the server and log in with the administrator account. |
| Step 11: | Install the GUI by running the command “sudo apt-get install ubuntu-desktop”. |
| Step 12: | Wait for the GUI installation to complete. |
| Step 13: | Reboot the server again. |
| Step 14: | Log in to the server with the administrator account. |
| Step 15: | You now have a fully functional Ubuntu Server with a GUI installed! |
By following these steps, you can easily install Ubuntu Server with a GUI and enjoy the benefits of a user-friendly interface for managing your server.
Booting from USB Drive
To install Ubuntu Server with a GUI, you will need to boot your computer from a USB drive. Here is a step-by-step guide on how to do it:
Step 1: Download the Ubuntu Server ISO file from the official website.
Step 2: Create a bootable USB drive using software like Rufus or Etcher.
Step 3: Insert the USB drive into your computer’s USB port.
Step 4: Restart your computer and enter the BIOS settings.
Step 5: In the BIOS settings, change the boot order to prioritize the USB drive.
Step 6: Save the changes and exit the BIOS settings.
Step 7: Your computer will now boot from the USB drive.
Step 8: Follow the on-screen instructions to install Ubuntu Server with a GUI.
Note: Make sure to backup any important data before installing Ubuntu, as the installation process may erase your existing files.
By following these steps, you will be able to boot from a USB drive and install Ubuntu Server with a GUI.
Selecting Installation Options
When installing Ubuntu Server with a GUI, you have several options to choose from. Here’s a step-by-step guide on how to select the installation options:
- Boot your server from the Ubuntu Server installation media.
- Select your language and press Enter.
- Choose “Install Ubuntu Server” from the menu and press Enter.
- Select your language again and press Enter.
- Choose your location and press Enter.
- Select your keyboard layout and press Enter.
- Choose “Guided – use entire disk” or “Manual” for partitioning and press Enter.
- If you choose “Manual”, you will need to manually partition your disk. Follow the on-screen instructions to create partitions.
- Select the disk to install Ubuntu Server on and press Enter.
- Choose whether to encrypt your home directory and press Enter.
- Enter your username, password, and server name. Press Enter to continue.
- Review the installation summary and make any necessary changes.
- Choose “Install” and press Enter to begin the installation process.
- Wait for the installation to complete.
- Once the installation is finished, choose “Continue” and press Enter to reboot your server.
By following these steps, you will be able to successfully install Ubuntu Server with a GUI and customize the installation options to fit your needs.
Partitioning the Hard Drive
During the installation process of Ubuntu Server with GUI, you will need to partition your hard drive to allocate space for the operating system and any additional data or programs you plan to install. Partitioning allows you to divide your hard drive into separate sections, each with its own file system and storage capacity.
To begin the partitioning process, follow these steps:
- Boot from the Ubuntu Server installation media: Insert the installation media into your server and restart it. Make sure to set the boot order in the BIOS settings to prioritize the installation media.
- Select the installation language: Choose the language you want to use for the installation process.
- Choose the installation option: Select “Install Ubuntu Server with GUI” from the menu.
- Select the hard drive: Choose the hard drive where you want to install Ubuntu Server. If you have multiple hard drives, make sure to select the correct one.
- Choose the partitioning method: You can choose to use the entire disk or manually partition the disk. For this guide, we will focus on the manual partitioning method.
- Create partitions: Use the available options to create the desired partitions. You can create separate partitions for the root file system (“/”), swap space, and any other partitions you need.
- Assign file systems: After creating the partitions, assign the appropriate file systems to each partition. The most common file system for the root partition is ext4.
- Set mount points: Specify the mount points for each partition. The root partition (“/”) should be mounted as the root file system.
- Apply the changes: Review the partitioning layout and make any necessary adjustments. Once you are satisfied, apply the changes to begin the installation process.
By following these steps, you can successfully partition your hard drive during the installation of Ubuntu Server with GUI. This will ensure that your server has the necessary storage space and file systems to operate effectively.
Configuring Ubuntu Server
After successfully installing Ubuntu Server with GUI, it’s time to configure the server to meet your specific needs. Here are the steps to configure Ubuntu Server:
| Step | Description |
| 1 | Update the system by running the command sudo apt update followed by sudo apt upgrade. This will ensure that your server has the latest software updates and security patches. |
| 2 | Install any additional software or packages that you require for your server. You can use the apt package manager to search for and install packages. For example, to install Apache web server, you can run the command sudo apt install apache2. |
| 3 | Configure the network settings of your server. This includes setting a static IP address, configuring DNS servers, and setting up any necessary network interfaces. You can edit the network configuration file located at /etc/netplan/ to make these changes. |
| 4 | Secure your server by configuring firewall rules and enabling any necessary security features. Ubuntu Server comes with the ufw firewall utility, which you can use to manage firewall rules. You can also enable additional security features such as fail2ban to protect against brute-force attacks. |
| 5 | Set up user accounts and permissions. By default, Ubuntu Server creates a user account during installation. You can create additional user accounts and assign them appropriate permissions using the adduser and usermod commands. |
| 6 | Configure any services or daemons that you need to run on your server. This includes setting up web servers, database servers, and other services. You can use the systemctl command to manage services and start/stop them as needed. |
| 7 | Test your server configuration to ensure everything is working as expected. You can test web servers by accessing them from a web browser, test database servers by connecting to them using a database client, and test other services by using the appropriate tools or clients. |
By following these steps, you can configure your Ubuntu Server with GUI to suit your specific requirements and ensure that it is secure and functioning properly.


