Are you wondering how to install Word on your laptop? Look no further! In this step-by-step guide, we will walk you through the process of installing Microsoft Word on your laptop, so you can start creating documents, writing essays, and more.
Installing Word on your laptop is a straightforward process that can be completed in just a few simple steps. Whether you’re a student, a professional, or someone who simply needs a word processor, having Word on your laptop is essential for productivity and efficiency.
Before we begin, make sure you have a valid Microsoft Office license key or a subscription to Microsoft 365. This will ensure that you have the necessary credentials to activate and use Word on your laptop. Once you have your license key or subscription ready, let’s get started!
Section 1: Preparing for Installation

Before you can install Word on your laptop, there are a few steps you need to take to ensure a smooth installation process. Follow these instructions to prepare your laptop for the Word installation:
Step 1: Check your laptop’s system requirements. Make sure your laptop meets the minimum requirements for installing Word. This includes having enough storage space, memory, and a compatible operating system.
Step 2: Backup your important files. It’s always a good idea to create a backup of your important files before installing any new software. This will protect your data in case anything goes wrong during the installation process.
Step 3: Close all other applications. Before starting the installation, close any other applications or programs running on your laptop. This will free up system resources and prevent any conflicts during the installation process.
Step 4: Disable any antivirus software. Some antivirus programs can interfere with the installation process. Temporarily disable your antivirus software to avoid any potential issues. Just remember to re-enable it once the installation is complete.
Step 5: Connect to the internet. To install Word, you will need an internet connection. Make sure your laptop is connected to a stable internet connection before proceeding with the installation.
Step 6: Gather your product key. If you have purchased a copy of Word, you will need your product key to activate the software. Locate your product key and keep it handy for the installation process.
By following these steps, you will be well-prepared to install Word on your laptop. Once you have completed these preparations, you can move on to the next section to begin the installation process.
Check System Requirements
Before installing Word on your laptop, it is important to check if your system meets the necessary requirements. This will ensure that Word runs smoothly and without any issues.
To install Word on your laptop, you will need:
- A compatible operating system, such as Windows 10 or macOS Mojave.
- At least 4GB of RAM for optimal performance.
- A minimum of 4GB of available storage space on your hard drive.
- A stable internet connection for downloading and activating Word.
- A valid Microsoft account to sign in and access Word.
It is also recommended to have the latest updates installed for your operating system, as well as any necessary drivers for your laptop’s hardware.
By ensuring that your laptop meets these system requirements, you can proceed with confidence to install Word and enjoy its features and functionality.
Purchase or Download Microsoft Office

In order to install Microsoft Word on your laptop, you will need to purchase or download Microsoft Office. Microsoft Office is a suite of productivity software that includes Word, Excel, PowerPoint, and more. It is widely used for creating documents, spreadsheets, presentations, and other types of files.
There are a few different options for obtaining Microsoft Office. You can purchase a physical copy of the software from a retail store or online retailer. This typically comes in the form of a CD or DVD that you can insert into your laptop’s disc drive. Once inserted, you can follow the on-screen instructions to install the software.
If you prefer a digital download, you can visit the official Microsoft website or other authorized retailers to purchase a product key. This product key will allow you to download and install Microsoft Office directly onto your laptop. Simply follow the instructions provided and enter the product key when prompted.
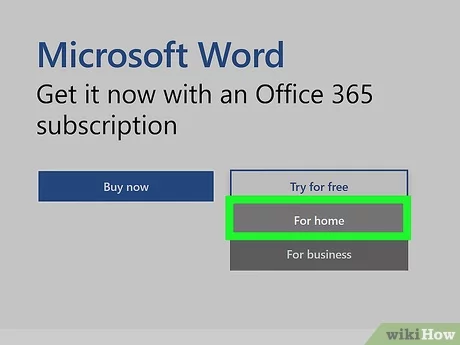
Another option is to subscribe to Microsoft Office 365, which is a cloud-based version of the software. With a subscription, you can access Microsoft Office applications online and install them on multiple devices, including your laptop. This option provides the added benefit of automatic updates, ensuring you always have the latest version of the software.
Regardless of which method you choose, it is important to ensure that your laptop meets the system requirements for Microsoft Office. This typically includes having a compatible operating system, sufficient storage space, and a reliable internet connection for downloading and installing the software.
Once you have purchased or downloaded Microsoft Office, you can proceed with the installation process. Follow the step-by-step guide provided by Microsoft to install Word and other applications onto your laptop. Once installed, you will be able to start using Microsoft Word to create and edit documents on your laptop.
Locate the Installation File

Before you can install Microsoft Word on your laptop, you need to locate the installation file. The installation file is a setup file that contains all the necessary files and instructions to install the Word application on your device.
To locate the installation file, you can follow these steps:
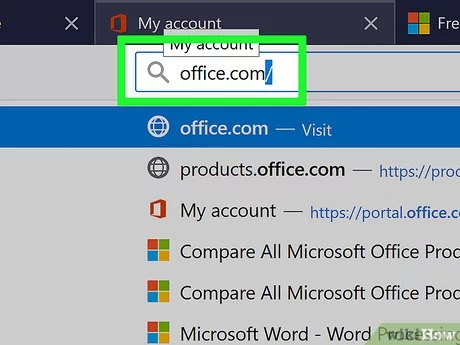
| Step 1: | Open your web browser and go to the official Microsoft website. |
| Step 2: | Navigate to the “Products” or “Downloads” section of the website. |
| Step 3: | Search for “Microsoft Word” or “Office Suite” in the search bar. |
| Step 4: | Click on the appropriate search result that matches your version of Word and operating system. |
| Step 5: | On the product page, look for a download button or link. |
| Step 6: | Click on the download button or link to start downloading the installation file. |
Once the download is complete, you will have the installation file ready to be installed on your laptop. Make sure to save the installation file in a location that is easily accessible, such as your desktop or downloads folder.
Now that you have located the installation file, you are ready to proceed with the installation process. The next step is to run the installation file and follow the on-screen instructions to install Microsoft Word on your laptop.
Section 2: Installing Word
Now that you have your laptop ready, it’s time to install Word. Follow these steps to get Word up and running on your device:
| Step 1: | Open your web browser and go to the official Microsoft website. |
| Step 2: | Search for “Word” in the search bar on the website. |
| Step 3: | Click on the download button next to the Word application. |
| Step 4: | Wait for the download to complete. |
| Step 5: | Once the download is finished, locate the downloaded file on your laptop. |
| Step 6: | Double-click on the file to start the installation process. |
| Step 7: | Follow the on-screen instructions to install Word. |
| Step 8: | After the installation is complete, launch Word from your laptop’s applications or desktop shortcut. |
Congratulations! You have successfully installed Word on your laptop. Now you can start creating and editing documents with ease.