If you’re looking to boost the performance of your computer, installing Windows 10 on an SSD (Solid State Drive) is a great way to go. With its faster read and write speeds, an SSD can significantly improve the overall speed and responsiveness of your system. In this step-by-step guide, we’ll walk you through the process of installing Windows 10 on an SSD, so you can enjoy a faster and more efficient computing experience.
Step 1: Prepare Your SSD
Before you begin the installation process, make sure your SSD is properly connected to your computer. If you’re replacing your existing hard drive with an SSD, you’ll need to physically install the SSD into your computer’s drive bay. If you’re adding an SSD as a secondary drive, you’ll need to connect it to an available SATA port on your motherboard. Once your SSD is properly connected, you can proceed to the next step.
Step 2: Create a Windows 10 Installation Media
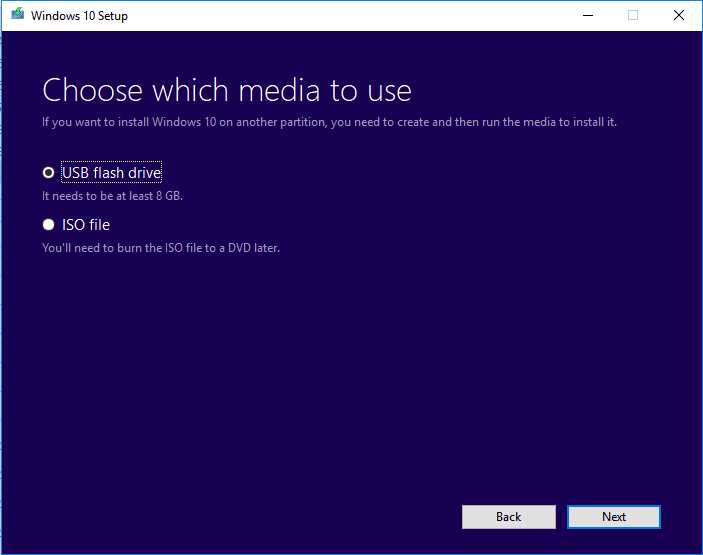
To install Windows 10 on your SSD, you’ll need to create a bootable USB drive or DVD with the Windows 10 installation files. You can download the Windows 10 ISO file from the official Microsoft website and use a tool like Rufus to create a bootable USB drive. Alternatively, you can use the Windows 10 Media Creation Tool to create a bootable USB drive or DVD. Once you have your installation media ready, you can move on to the next step.
Step 3: Install Windows 10 on Your SSD
Now that you have your installation media ready, you can start the installation process. Restart your computer and boot from the USB drive or DVD that contains the Windows 10 installation files. Follow the on-screen instructions to select your language, keyboard layout, and other preferences. When prompted, choose the SSD as the destination drive for the installation. Windows 10 will then begin installing on your SSD.
Note: Make sure to back up any important files on your computer before proceeding with the installation, as the process will erase all data on the destination drive.
Step 4: Complete the Installation
Once the installation process is complete, your computer will restart, and you’ll be prompted to set up Windows 10. Follow the on-screen instructions to customize your settings, create a user account, and connect to a network. After completing the initial setup, you’ll be able to enjoy the speed and performance benefits of Windows 10 on your SSD.
By following this step-by-step guide, you can easily install Windows 10 on an SSD and take advantage of its faster read and write speeds. Whether you’re upgrading your existing system or building a new one, installing Windows 10 on an SSD is a worthwhile investment that will greatly enhance your computing experience.
Preparation
Before you begin the installation process, there are a few things you need to prepare:
| Windows 10 installation media: | You will need a USB drive or DVD with the Windows 10 installation files. You can download the ISO file from the official Microsoft website and create a bootable USB drive using the Windows USB/DVD Download Tool. |
| SSD: | Make sure you have a compatible SSD for the installation. Check the specifications of your computer to determine the type of SSD you need. |
| Data backup: | It is highly recommended to back up all your important files and data before proceeding with the installation. This will ensure that you don’t lose any data in case of any issues during the installation process. |
| BIOS settings: | Access your computer’s BIOS settings and make sure that the SSD is set as the primary boot device. This will ensure that your computer boots from the SSD after the installation is complete. |
Once you have completed these preparations, you are ready to proceed with the installation process.
Check System Requirements
Before proceeding with the installation of Windows 10 on your SSD, it is important to ensure that your system meets the necessary requirements. This will help ensure a smooth and successful installation process.
Firstly, make sure that your SSD meets the minimum storage capacity required for Windows 10. Microsoft recommends a minimum of 32 GB of storage space for the 32-bit version, and 64 GB for the 64-bit version.
Additionally, check that your computer’s hardware meets the minimum requirements for Windows 10. This includes having a compatible processor, at least 1 GB of RAM for the 32-bit version, or 2 GB for the 64-bit version, and a DirectX 9 or later graphics card.
It is also important to ensure that your computer is running a compatible operating system. Windows 10 can be installed on computers running Windows 7 or later, so make sure that your current operating system meets this requirement.
Finally, ensure that you have a valid Windows 10 installation media, such as a USB drive or DVD, and a product key for activation. Without these, you will not be able to complete the installation process.
By checking these system requirements before proceeding with the installation, you can ensure that your computer is ready for Windows 10 and avoid any potential issues during the installation process.
Backup Your Data
Before you proceed with the installation of Windows 10 on your SSD, it is crucial to back up your data to ensure that you don’t lose any important files or documents. This step is essential as the installation process involves formatting the drive, which will erase all existing data.
To back up your data, follow these steps:
| 1. | Connect an external storage device, such as a USB flash drive or an external hard drive, to your computer. |
| 2. | Open the File Explorer by pressing the Windows key + E. |
| 3. | Navigate to the files and folders that you want to back up. |
| 4. | Select the files and folders by holding down the Ctrl key and clicking on each item. |
| 5. | Right-click on the selected items and choose “Copy” from the context menu. |
| 6. | Navigate to the external storage device in the File Explorer. |
| 7. | Right-click on an empty space and choose “Paste” from the context menu to copy the files and folders to the external storage device. |
| 8. | Wait for the copying process to complete. This may take some time depending on the size of your data. |
| 9. | Once the backup is finished, safely eject the external storage device from your computer. |
By following these steps, you can ensure that your data is safely backed up before proceeding with the installation of Windows 10 on your SSD. This will give you peace of mind knowing that your important files are protected and can be easily restored after the installation process.
Gather Necessary Tools

Before you can begin the process of installing Windows 10 on your SSD, you will need to gather a few essential tools. These tools will help ensure a smooth and successful installation. Here is a list of the tools you will need:
| Windows 10 Installation Media: | You will need a copy of the Windows 10 installation media. This can be either a USB flash drive or a DVD. Make sure you have a valid license key for Windows 10. |
| SSD: | You will need an SSD (Solid State Drive) to install Windows 10 on. Make sure the SSD has enough storage capacity to accommodate the operating system and any additional files or programs you plan to install. |
| SATA Cable: | You will need a SATA cable to connect the SSD to your computer. Make sure the cable is compatible with your SSD and motherboard. |
| SATA Power Cable: | You will also need a SATA power cable to provide power to the SSD. This cable should be included with your power supply unit. |
| Screwdriver: | You may need a screwdriver to secure the SSD in place if it does not come with a mounting bracket. |
Once you have gathered all of these tools, you will be ready to proceed with the installation process. Make sure to double-check that you have everything you need before getting started.
Installation
Installing Windows 10 on an SSD is a straightforward process that can greatly improve the performance of your computer. Follow these steps to install Windows 10 on your SSD:
1. First, make sure your SSD is properly connected to your computer. Check the connections and ensure that the SSD is recognized by your system.
2. Next, insert the Windows 10 installation media (such as a USB drive or DVD) into your computer and restart it.
3. During the boot process, you may need to enter the BIOS or UEFI settings to change the boot order. Set the SSD as the primary boot device to ensure that the installation media is booted from.
4. Once the installation media is booted, you will be prompted to choose your language, time zone, and keyboard layout. Make the appropriate selections and click “Next”.
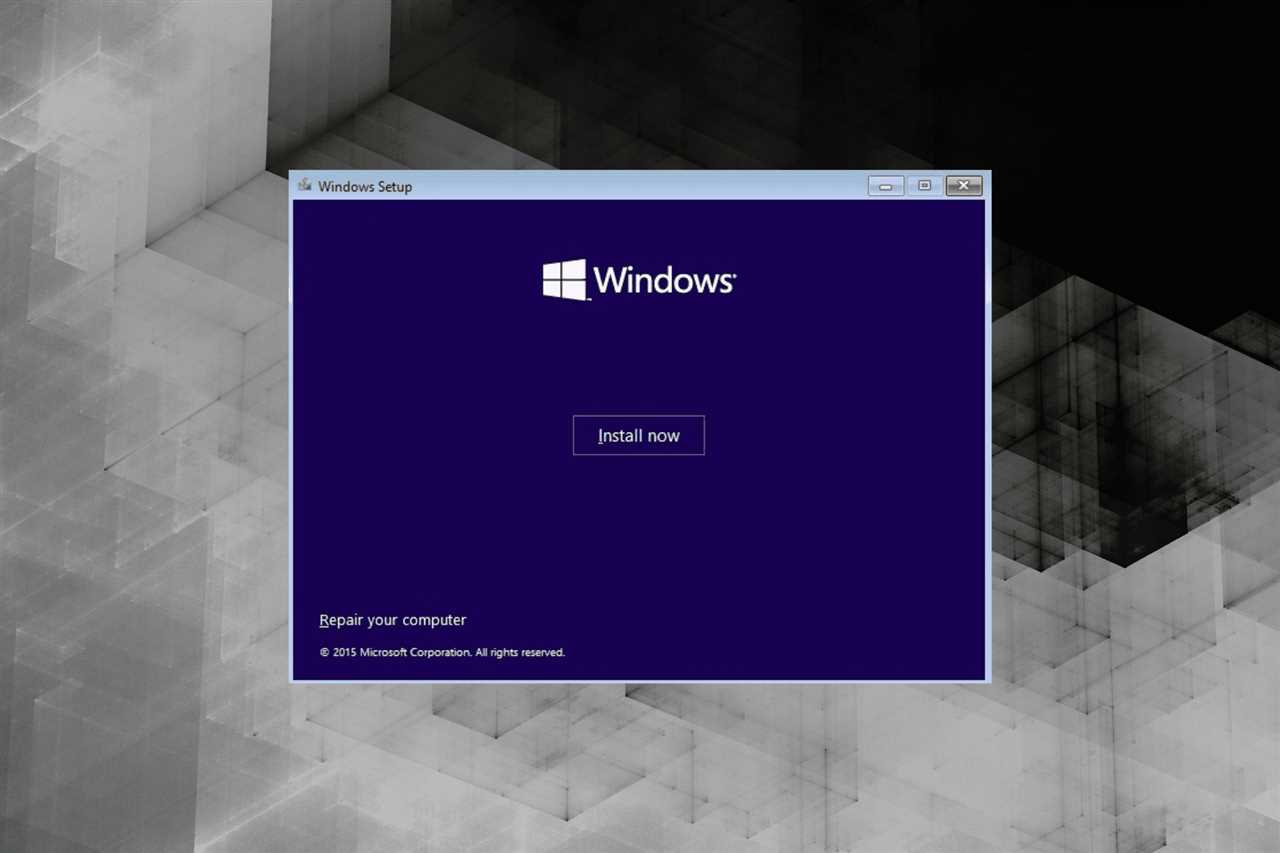
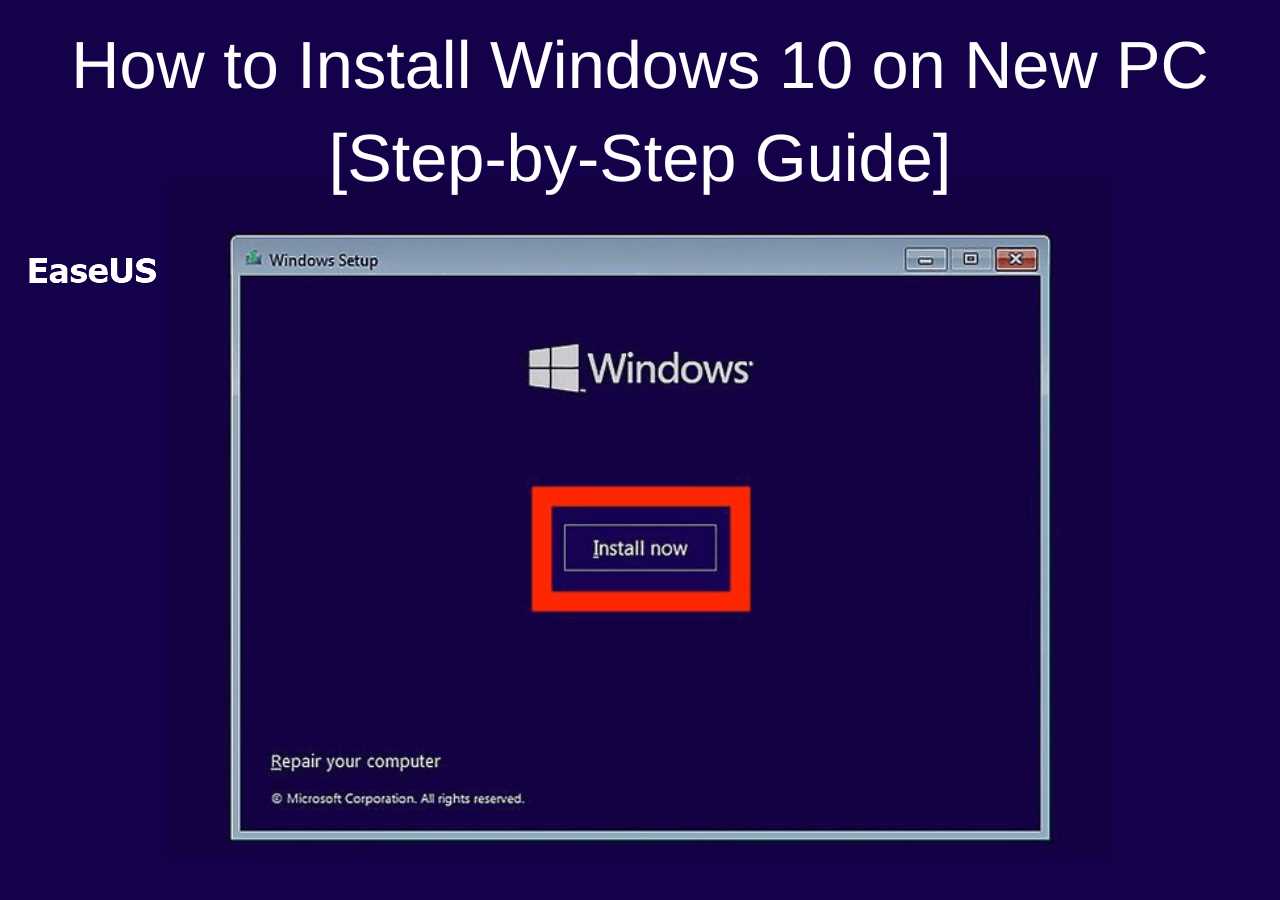
5. On the next screen, click “Install Now” to begin the installation process.
6. Read and accept the license terms, then click “Next”.
7. On the next screen, select “Custom: Install Windows only (advanced)”.
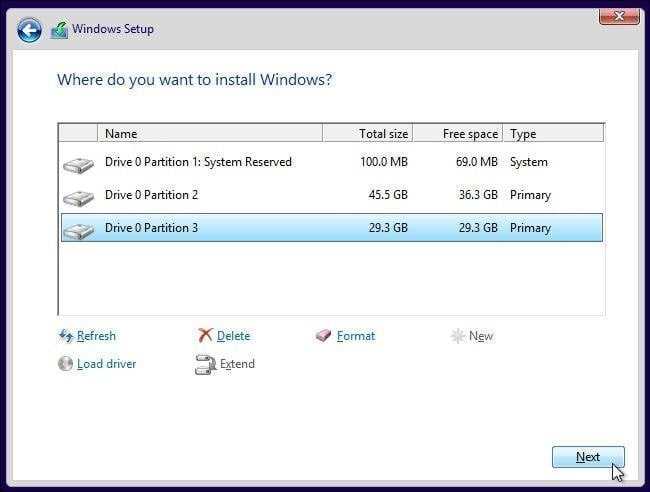
8. You will now see a list of available drives. Select your SSD and click “Next”.
9. Windows 10 will now begin installing on your SSD. This process may take some time, so be patient.
10. Once the installation is complete, your computer will restart. Remove the installation media from your computer.
11. On the initial setup screen, follow the prompts to configure your Windows 10 settings, such as creating a user account and connecting to a network.
12. After completing the setup process, you can begin using Windows 10 on your SSD. Enjoy the improved performance and faster boot times!
By following these steps, you can easily install Windows 10 on your SSD and take advantage of its benefits. Remember to back up any important data before proceeding with the installation process.
Create Bootable USB Drive
To install Windows 10 on your SSD, you will need to create a bootable USB drive. This will allow you to easily install the operating system on your new SSD.
Here are the steps to create a bootable USB drive:
- First, you will need to download the Windows 10 ISO file from the official Microsoft website. Make sure to select the correct version of Windows 10 that matches your system requirements.
- Once the ISO file is downloaded, insert a USB drive with at least 8GB of storage capacity into your computer.
- Next, open the Windows 10 ISO file using a program like WinRAR or 7-Zip. Extract all the files from the ISO file to a folder on your computer.
- Open the extracted folder and locate the “setup.exe” file. Right-click on the file and select “Run as administrator”.
- Follow the on-screen instructions to start the Windows 10 installation process. When prompted to choose the installation type, select “Custom: Install Windows only (advanced)”.
- On the next screen, select your SSD as the destination drive for the Windows 10 installation. Make sure to format the SSD before proceeding.
- Once the installation is complete, restart your computer and boot from the USB drive.
- Follow the on-screen instructions to complete the Windows 10 setup process. Make sure to enter your product key when prompted.
- After the setup is complete, you can remove the USB drive and start using Windows 10 on your SSD.
Creating a bootable USB drive is an essential step in installing Windows 10 on your SSD. It allows you to easily install the operating system and ensures a smooth and efficient installation process.
Configure BIOS Settings

Before installing Windows 10 on your SSD, it is important to configure the BIOS settings to ensure a smooth installation process. Here are the steps to configure the BIOS settings:
- Start by restarting your computer and accessing the BIOS menu. This can usually be done by pressing a specific key, such as F2 or Delete, during the boot process. Check your computer’s manual or look for on-screen prompts for the correct key.
- Once you are in the BIOS menu, navigate to the “Boot” or “Boot Order” section. This is where you can set the priority of boot devices.
- Make sure that your SSD is set as the first boot device. This will ensure that your computer boots from the SSD instead of the old hard drive.
- If necessary, disable any other boot devices that you do not want to use, such as the old hard drive or CD/DVD drive.
- Save your changes and exit the BIOS menu. This will restart your computer.
By configuring the BIOS settings correctly, you can ensure that your computer boots from the SSD and that the Windows 10 installation process goes smoothly.
Install Windows 10
If you have recently purchased a new SSD and want to take advantage of its speed and performance, installing Windows 10 on it is a great idea. Here is a step-by-step guide on how to install Windows 10 on an SSD:
Step 1: Prepare your SSD
Before installing Windows 10, make sure your SSD is properly connected to your computer. Check the cables and connections to ensure everything is secure.
Step 2: Create a Windows 10 installation media
You will need a bootable USB drive with the Windows 10 installation files. Download the Windows 10 ISO file from the official Microsoft website and use a tool like Rufus to create a bootable USB drive.
Step 3: Boot from the USB drive
Restart your computer and enter the BIOS settings. Set the USB drive as the primary boot device and save the changes. Restart your computer again, and it should boot from the USB drive.
Step 4: Install Windows 10
Follow the on-screen instructions to install Windows 10. Select your language, time zone, and keyboard layout. When prompted, choose the SSD as the installation location.
Step 5: Complete the installation
Once the installation process is complete, Windows 10 will restart. Follow the on-screen instructions to set up your computer, including creating a user account and choosing privacy settings.
Step 6: Update drivers and software
After installing Windows 10, it is important to update your drivers and software to ensure compatibility and optimal performance. Visit the manufacturer’s website to download the latest drivers for your hardware.
Step 7: Enjoy Windows 10 on your SSD
Congratulations! You have successfully installed Windows 10 on your SSD. Enjoy the improved speed and performance that an SSD can provide.
Note: Before installing Windows 10, make sure to back up any important files and data from your previous operating system.