
PHP is a popular programming language used for web development. It offers a wide range of functionalities, but sometimes you may need to install additional extensions to enhance its capabilities. In this step-by-step guide, we will show you how to install a PHP extension to your existing PHP installation.
Step 1: Check PHP Version
Before installing any PHP extension, it is important to check the version of PHP you are currently using. Different extensions may have different compatibility requirements, so make sure you have the correct version installed.
Step 2: Find the Extension
Next, you need to find the PHP extension you want to install. There are various sources where you can find extensions, such as the official PHP website or third-party repositories. Make sure to download the extension that matches your PHP version.
Step 3: Compile and Install
Once you have downloaded the extension, you will need to compile and install it. The exact steps may vary depending on the extension, but generally, you will need to extract the downloaded files, navigate to the extension’s directory, and run the necessary commands to compile and install it.
Step 4: Update PHP Configuration
After successfully installing the extension, you need to update your PHP configuration to enable it. This usually involves adding a line of code to the php.ini file or creating a new configuration file specifically for the extension.
Step 5: Test the Extension
Finally, you should test the newly installed extension to ensure it is working correctly. You can create a simple PHP script that utilizes the extension’s functionality and run it in your web browser. If everything is set up correctly, you should see the expected output.
By following these step-by-step instructions, you can easily install a PHP extension and enhance the capabilities of your PHP installation. Remember to always check the compatibility requirements and follow the specific instructions provided by the extension’s documentation.
Prerequisites for Installing PHP Extension
Before you can install a PHP extension, you need to ensure that you have the necessary tools and software installed on your system. Here are the prerequisites for installing a PHP extension:
1. PHP: Make sure you have PHP installed on your system. You can check if PHP is installed by running the following command in your terminal or command prompt:
php -v
If PHP is installed, you should see the version number displayed. If not, you can download and install PHP from the official PHP website.
2. Development Tools: You will need development tools, such as a compiler and build system, to install PHP extensions. The specific tools required may vary depending on your operating system. For example, on Linux, you may need to install the GCC compiler and make utility. On Windows, you can use tools like MinGW or Visual Studio.
3. Extension Dependencies: Some PHP extensions may have dependencies on other libraries or extensions. Make sure you have the necessary dependencies installed before attempting to install the extension. You can usually find information about the dependencies in the extension’s documentation or README file.
4. Package Manager: If your operating system has a package manager, such as apt-get for Ubuntu or Homebrew for macOS, you can use it to install PHP extensions. Package managers can automatically handle dependencies and ensure that the extension is installed correctly.
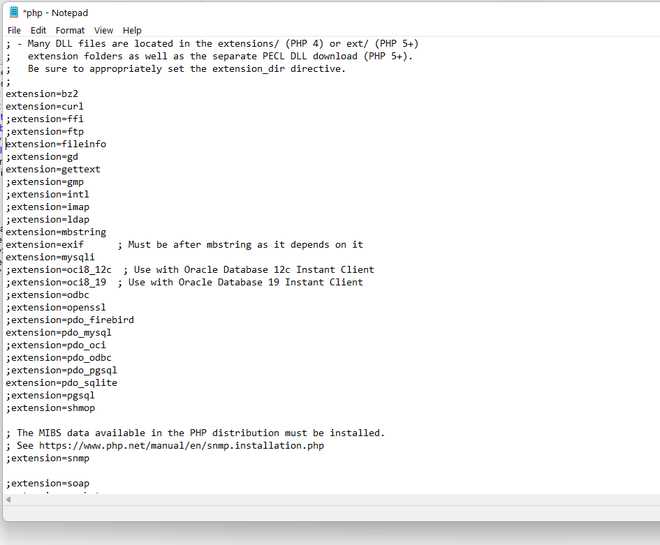
5. Configuration: Finally, you may need to modify your PHP configuration file to enable the extension. The configuration file is usually located in the PHP installation directory and is named php.ini. Open the file in a text editor and look for the section that lists the extensions. Uncomment the line for the extension you want to install by removing the semicolon (;) at the beginning of the line. Save the file and restart your web server for the changes to take effect.
Once you have met these prerequisites, you are ready to install a PHP extension and enhance the functionality of your PHP applications.
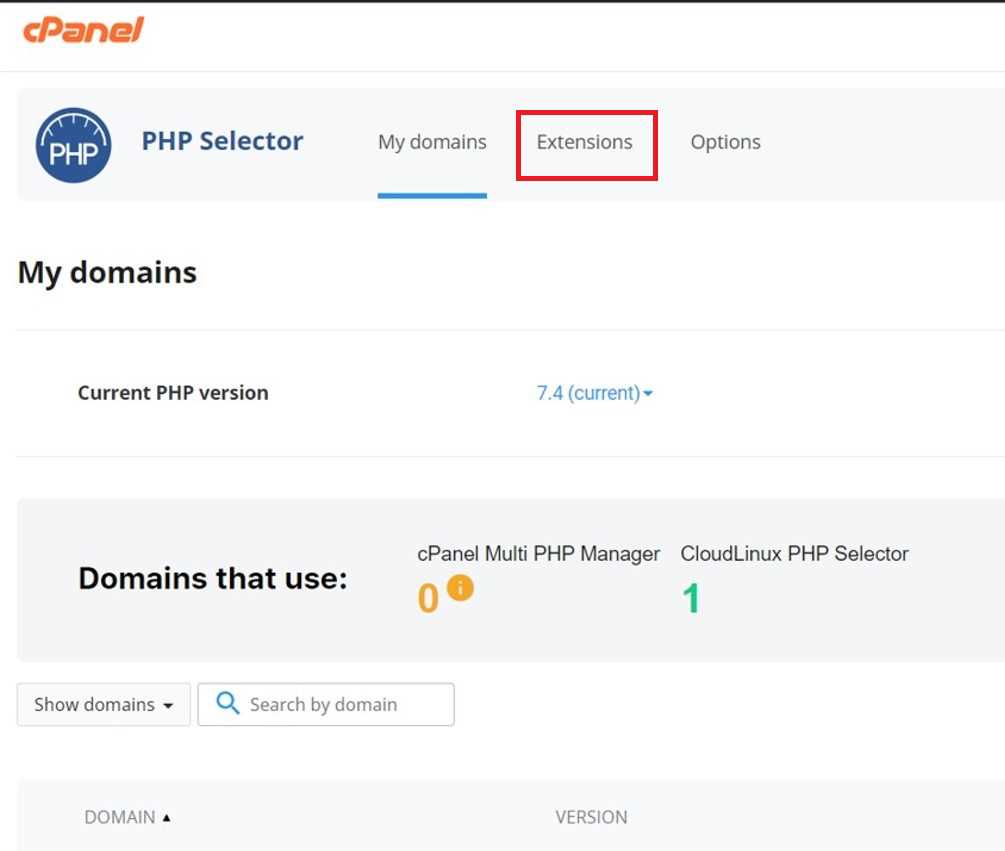
Check PHP Version
To install a PHP extension, it is important to first check the PHP version that is installed on your server. This is necessary because different PHP versions may require different installation methods or may not be compatible with certain extensions.
To check the PHP version, you can use the following code snippet:
<?php
phpinfo();
?>
This code will display a detailed information page about your PHP installation, including the PHP version. To check the PHP version, you can look for the “PHP Version” section on the page.
Once you have determined the PHP version, you can proceed with the installation of the extension. Make sure to choose the correct installation method and version of the extension that is compatible with your PHP version.
Install PHP Development Tools
If you want to start developing PHP applications, you’ll need to install the necessary tools. Here’s a step-by-step guide on how to install PHP development tools:
- First, make sure you have PHP installed on your system. You can check if PHP is installed by opening a terminal or command prompt and typing
php -v. If PHP is not installed, you can download and install it from the official PHP website. - Next, you’ll need a code editor or an integrated development environment (IDE) to write your PHP code. Some popular choices for PHP development include Visual Studio Code, PhpStorm, and Sublime Text. Choose the one that suits your preferences and install it on your system.
- In addition to a code editor or IDE, you may also want to install a local development server to test your PHP applications. One popular option is XAMPP, which includes Apache, MySQL, and PHP. XAMPP provides an easy way to set up a local development environment on your computer.
- Once you have your code editor or IDE and local development server installed, you’re ready to start developing PHP applications. Open your code editor or IDE and create a new PHP file to begin writing your code.
- As you develop your PHP applications, you may also need to install additional PHP extensions or libraries. These can be installed using the package manager for your operating system or by manually downloading and installing them. Make sure to follow the installation instructions provided by the extension or library you’re installing.
By following these steps, you’ll have the necessary tools installed to start developing PHP applications. Happy coding!
Verify Compiler and Build Tools
Before you start installing a PHP extension, it is important to verify that you have the necessary compiler and build tools installed on your system. These tools are required to compile and build the extension from source code.
To check if you have the necessary tools installed, you can open a terminal or command prompt and run the following commands:
gcc --version– This command checks if the GNU Compiler Collection (GCC) is installed. GCC is a compiler that is commonly used for building C and C++ programs.make --version– This command checks if the GNU Make utility is installed. Make is a build tool that is used to automate the building of programs.
If these commands return a version number or other information, it means that the respective tool is installed on your system. If the commands are not recognized or return an error message, it means that you need to install the missing tool.
Depending on your operating system, you can use package managers like apt, yum, or brew to install the necessary tools. For example, on Ubuntu, you can use the following commands to install GCC and Make:
sudo apt updatesudo apt install build-essential
Once you have verified that you have the necessary compiler and build tools installed, you can proceed with the installation of the PHP extension.
Downloading and Preparing the PHP Extension
Before you can install a PHP extension, you need to download it and prepare it for installation. Here’s how you can do it:
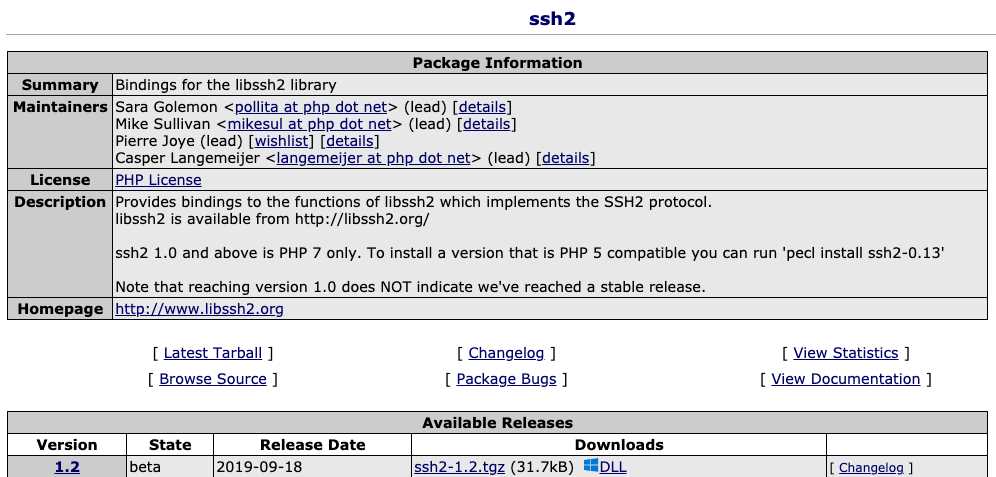
Step 1: Go to the official PHP website and locate the extension you want to download. Make sure to choose the version that is compatible with your PHP installation.
Step 2: Once you have found the extension, click on the download link to start the download process. Save the file to a location on your computer where you can easily access it.
Step 3: After the download is complete, navigate to the location where you saved the file. Extract the contents of the downloaded file using a file extraction tool like WinRAR or 7-Zip.
Step 4: Once the contents are extracted, you will find a folder containing the PHP extension files. Open this folder and locate the file with the “.dll” extension. This is the main file that you will need to install the extension.
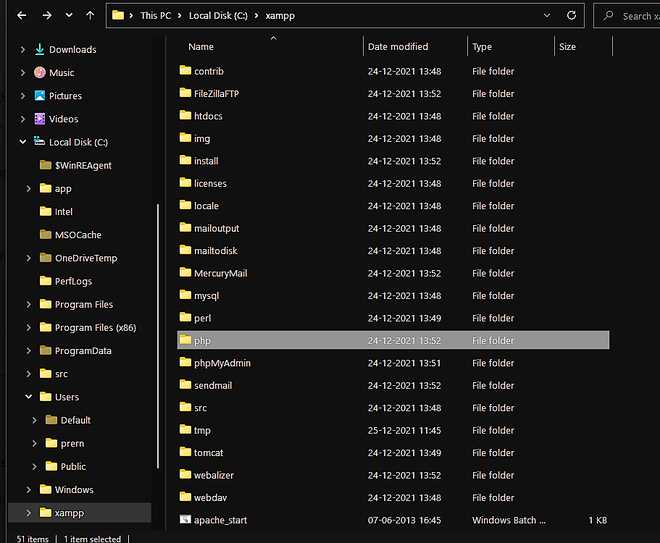
Step 5: Copy the “.dll” file to the appropriate directory in your PHP installation. The exact directory may vary depending on your operating system and PHP configuration. Typically, the extension files are placed in the “ext” folder within the PHP installation directory.
Step 6: Finally, you need to enable the extension in your PHP configuration file. Open the “php.ini” file in a text editor and locate the section for extensions. Add a new line that includes the name of the extension file, like this: extension=your_extension.dll. Save the changes and close the file.
Once you have completed these steps, the PHP extension should be downloaded and prepared for installation. You can now proceed to the next steps to install and configure the extension.
Find the Desired PHP Extension
Before you can install a PHP extension, you need to find the extension that you want to install. There are many PHP extensions available, so it’s important to find the one that meets your needs.
To find the desired PHP extension, you can:
- Search online for a list of available PHP extensions.
- Read documentation or tutorials to learn about different PHP extensions and their functionalities.
- Ask for recommendations from other developers or forums.
Once you have identified the PHP extension you want to install, you can proceed with the installation process.
Download the PHP Extension Source Code
To install a PHP extension, you first need to download the source code for the extension. The source code contains all the necessary files and instructions to compile and install the extension on your PHP installation.
There are several ways to download the PHP extension source code. One way is to visit the official PHP website and navigate to the extensions section. From there, you can find the extension you want to install and download the source code package.
Another way is to use a package manager like PECL (PHP Extension Community Library) to download and install extensions directly from the command line. This method is usually easier and more convenient, especially if you are familiar with the command line interface.
Once you have downloaded the source code package for the PHP extension you want to install, you can proceed to the next step, which is compiling and installing the extension.
Extract the Source Code
Before you can install a PHP extension, you need to extract the source code from the downloaded file. The source code contains all the necessary files and instructions for installing the extension on your PHP server.
To extract the source code, follow these steps:
- Locate the downloaded file on your computer. It is usually a compressed file with a .zip or .tar.gz extension.
- Right-click on the file and select “Extract” or “Extract Here” from the context menu. This will create a new folder with the same name as the file.
- Open the newly created folder and look for a file with a .php or .c extension. This is the main source code file for the extension.
Once you have extracted the source code, you are ready to proceed with the installation process. Make sure to follow the specific instructions provided with the extension to ensure a successful installation.


