
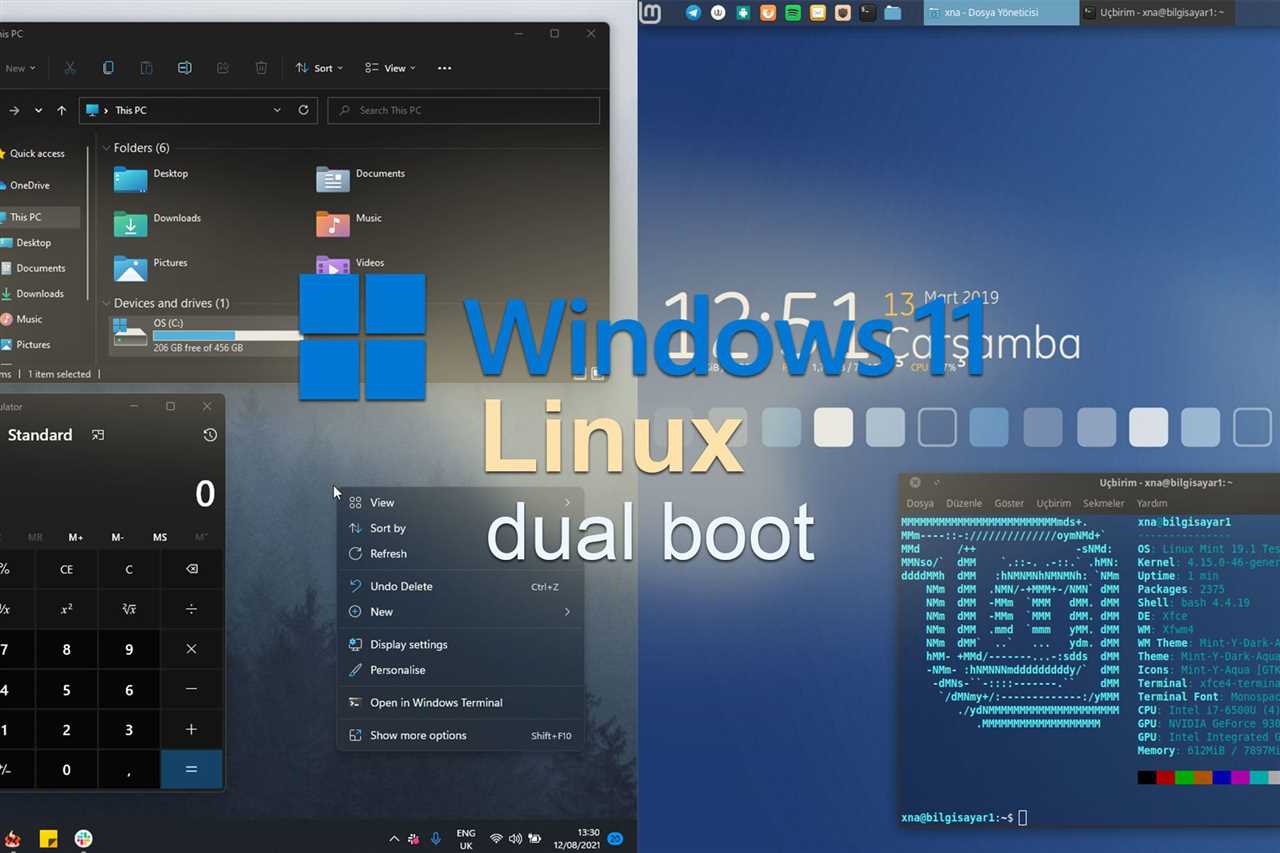
If you’re looking to install Ubuntu alongside your Windows 10 operating system, you’ve come to the right place. Dual booting allows you to have both Windows and Ubuntu on your computer, giving you the flexibility to choose which one to use at startup. In this step-by-step guide, we’ll walk you through the process of installing Ubuntu dual boot Windows 10.
Step 1: Prepare Your Computer
Before you begin the installation process, it’s important to make sure your computer meets the system requirements for Ubuntu. You’ll need at least 2GB of RAM, 25GB of free disk space, and a processor with a clock speed of 2 GHz or higher. Additionally, you’ll need a USB drive with at least 4GB of storage capacity to create a bootable Ubuntu installation media.
Step 2: Create a Bootable USB Drive
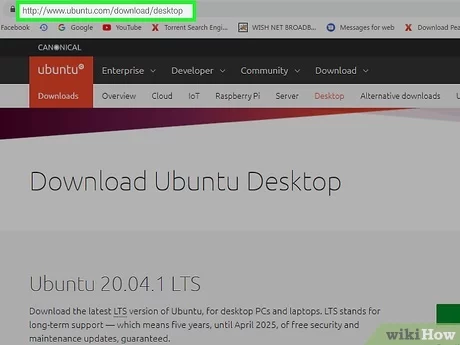
The next step is to create a bootable USB drive with the Ubuntu installation media. To do this, you’ll need to download the Ubuntu ISO file from the official website and use a tool like Rufus or Etcher to create the bootable USB drive. Make sure to select the correct USB drive and follow the instructions provided by the tool.
Step 3: Partition Your Hard Drive
Once you have the bootable USB drive ready, you’ll need to partition your hard drive to make space for Ubuntu. This can be done using the Disk Management tool in Windows 10. Simply shrink the existing Windows partition to create unallocated space, which will be used for the Ubuntu installation.
Step 4: Install Ubuntu
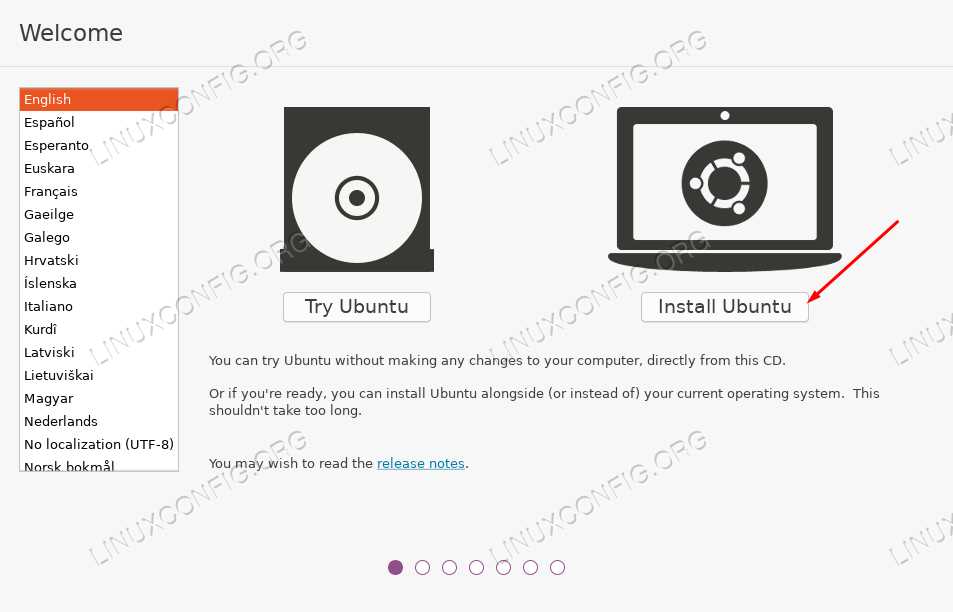
Now it’s time to install Ubuntu. Restart your computer and boot from the USB drive. You’ll be presented with the Ubuntu installation wizard. Follow the on-screen instructions to select your language, keyboard layout, and installation type. Choose the option to install Ubuntu alongside Windows 10, and select the unallocated space you created earlier as the installation location.
Step 5: Complete the Installation
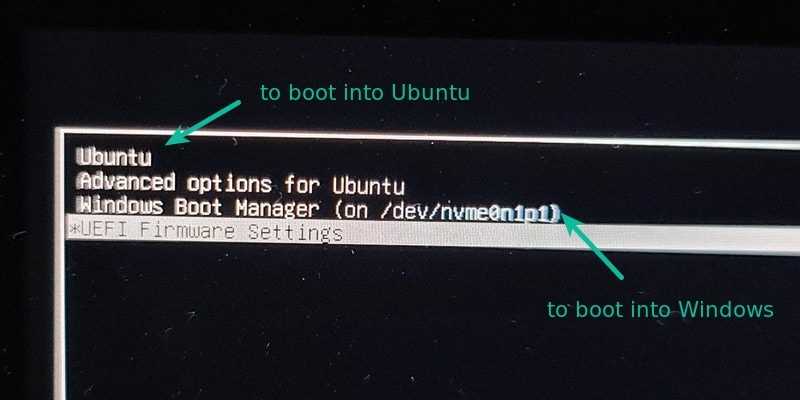
Once the installation process is complete, you’ll need to restart your computer. You’ll be prompted to choose between Windows 10 and Ubuntu at startup. Use the arrow keys to select Ubuntu and press Enter to boot into Ubuntu. Congratulations, you now have Ubuntu dual boot Windows 10!
Preparation
Before you can install Ubuntu as a dual boot with Windows 10, you need to make sure you have everything you need. Here is a checklist of what you should have:
| Item | Description |
| Bootable Ubuntu USB or DVD | You will need a bootable USB drive or DVD with the Ubuntu installation files. You can download the Ubuntu ISO file from the official website and create a bootable USB using tools like Rufus or Etcher. |
| Windows 10 installation media | If you don’t already have a Windows 10 installation media, you will need to create one. You can download the Windows 10 ISO file from the official Microsoft website and create a bootable USB using tools like Rufus or the Windows 10 Media Creation Tool. |
| Backup of important files | Before you proceed with the installation, it is always a good idea to backup any important files on your Windows 10 system. This will ensure that you don’t lose any data in case something goes wrong during the installation process. |
| Enough free disk space | You will need enough free disk space on your Windows 10 system to install Ubuntu. It is recommended to have at least 20GB of free space, but more is always better. You can check your disk space by going to “Settings” > “System” > “Storage” on your Windows 10 system. |
Once you have all the necessary items, you are ready to proceed with the installation process. Make sure to follow the steps carefully to avoid any issues.
Check System Requirements
Before you begin the installation process, it is important to check if your system meets the necessary requirements for dual booting Windows 10 and Ubuntu.
Here are the minimum system requirements:
- Processor: 1 GHz or faster
- RAM: 2 GB or more
- Storage: 25 GB of free space
- Graphics Card: DirectX 9 or later with WDDM 1.0 driver
- Display: 800×600 resolution or higher
It is also recommended to have a stable internet connection during the installation process to ensure that you have the latest updates and drivers for your system.
Make sure to backup any important data on your Windows 10 system before proceeding with the installation, as there is always a risk of data loss during the dual boot setup.
Once you have confirmed that your system meets the requirements, you can proceed with the installation process.
Backup Your Data
Before proceeding with the dual boot installation of Ubuntu 10 and Windows 10, it is highly recommended to backup all your important data. This step is crucial to ensure that you don’t lose any files during the installation process.
You can backup your data by following these steps:
| 1. | Connect an external hard drive or USB flash drive to your computer. |
| 2. | Open the File Explorer and navigate to the files and folders you want to backup. |
| 3. | Select the files and folders you want to backup by holding down the Ctrl key and clicking on each file or folder. |
| 4. | Right-click on the selected files and folders and choose “Copy”. |
| 5. | Navigate to the external hard drive or USB flash drive and right-click on an empty space. Choose “Paste” to copy the files and folders to the external storage device. |
| 6. | Wait for the copying process to complete. This may take some time depending on the size of the files and folders. |
| 7. | Once the backup is complete, safely eject the external storage device from your computer. |
By following these steps, you can ensure that your important data is safely backed up before proceeding with the installation of Ubuntu 10 alongside Windows 10. This will give you peace of mind and protect your files in case anything goes wrong during the installation process.
Create a Bootable USB Drive
To install Ubuntu dual boot with Windows 10, you will need to create a bootable USB drive. This USB drive will contain the Ubuntu installation files and allow you to boot into the Ubuntu installer.
Here are the steps to create a bootable USB drive:
| Step 1: | Download the Ubuntu ISO file from the official website. Make sure to choose the correct version that is compatible with your system. |
| Step 2: | Insert a USB drive with at least 4GB of storage capacity into your computer. |
| Step 3: | Open the Rufus software, which is a popular tool for creating bootable USB drives. |
| Step 4: | Select the USB drive you inserted from the “Device” dropdown menu in Rufus. |
| Step 5: | Under the “Boot selection” section, click on the “Select” button and navigate to the location where you downloaded the Ubuntu ISO file. |
| Step 6: | Click on the “Start” button in Rufus to begin creating the bootable USB drive. This process may take a few minutes. |
| Step 7: | Once the process is complete, you will have a bootable USB drive with the Ubuntu installation files. |
Now you are ready to proceed with the installation of Ubuntu alongside Windows 10. Make sure to backup any important data before proceeding, as the installation process may involve partitioning your hard drive.
Installation

To install Ubuntu dual boot with Windows 10, follow these steps:
- Prepare your computer: Before installing Ubuntu, make sure your computer meets the minimum system requirements. Back up any important data on your Windows 10 system to prevent data loss.
- Create a bootable USB drive: Download the Ubuntu ISO file from the official website. Use a tool like Rufus to create a bootable USB drive with the Ubuntu ISO.
- Partition your hard drive: Use the Disk Management tool in Windows 10 to create a new partition for Ubuntu. Make sure you have enough free space for the Ubuntu installation.
- Disable Secure Boot: Access your computer’s BIOS settings and disable Secure Boot. This will allow you to boot from the USB drive and install Ubuntu.
- Boot from the USB drive: Restart your computer and boot from the USB drive. You may need to change the boot order in the BIOS settings to prioritize the USB drive.
- Install Ubuntu: Follow the on-screen instructions to install Ubuntu. Choose the option to install Ubuntu alongside Windows 10, and select the partition you created earlier.
- Configure Ubuntu: Once the installation is complete, restart your computer and select Ubuntu from the boot menu. Follow the initial setup process to configure Ubuntu to your preferences.
- Enjoy dual booting: You can now choose between Windows 10 and Ubuntu when starting your computer. Use the boot menu to select the operating system you want to use.
Note: Dual booting Ubuntu with Windows 10 allows you to enjoy the benefits of both operating systems on the same computer. You can use Windows 10 for tasks that require specific software or compatibility, and Ubuntu for development, customization, and open-source software.
Boot from USB Drive
To install Ubuntu dual boot with Windows 10, you will need to boot your computer from a USB drive. Here is a step-by-step guide on how to do it:
- Insert the USB drive with the Ubuntu installation files into a USB port on your computer.
- Restart your computer.
- During the boot process, you will need to access the BIOS or UEFI settings. The key to access these settings may vary depending on your computer manufacturer, but it is usually one of the following: F2, F10, F12, or Del. Consult your computer’s manual or look for on-screen prompts to find the correct key.
- Once you are in the BIOS or UEFI settings, navigate to the “Boot” or “Boot Order” section.
- Change the boot order so that the USB drive is the first boot option. This will ensure that your computer boots from the USB drive instead of the internal hard drive.
- Save the changes and exit the BIOS or UEFI settings.
- Your computer will now boot from the USB drive.
- Follow the on-screen instructions to begin the Ubuntu installation process.
By booting from the USB drive, you will be able to install Ubuntu alongside Windows 10 and set up a dual boot configuration.
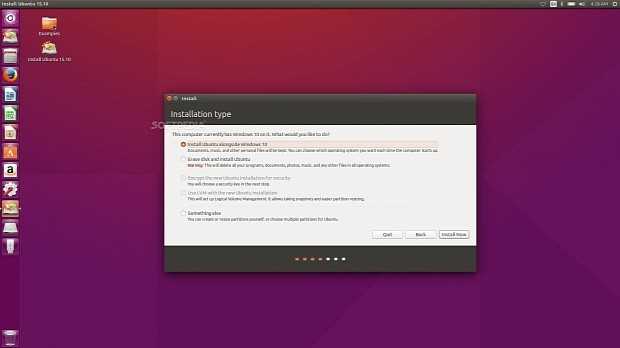
Choose Installation Type

Once you have successfully created a bootable USB drive with Ubuntu, it’s time to choose the installation type for your dual boot setup with Windows 10.
When you boot your computer from the USB drive, you will be presented with the Ubuntu installation menu. Here, you will have the option to either install Ubuntu alongside Windows 10 or replace Windows 10 with Ubuntu.
If you choose to install Ubuntu alongside Windows 10, you will be able to select the amount of disk space you want to allocate to each operating system. This allows you to have both Ubuntu and Windows 10 installed on your computer, giving you the flexibility to switch between the two whenever you want.
On the other hand, if you choose to replace Windows 10 with Ubuntu, the installation process will erase all the data on your Windows 10 partition and install Ubuntu in its place. This option is suitable if you no longer need Windows 10 and want to use Ubuntu as your primary operating system.
Before making a decision, it’s important to consider your needs and requirements. If you rely heavily on Windows 10 for certain applications or tasks, it may be best to install Ubuntu alongside Windows 10. However, if you are ready to fully embrace Ubuntu and no longer need Windows 10, replacing it with Ubuntu can simplify your system and free up disk space.
Once you have chosen the installation type that suits your needs, you can proceed with the installation process and follow the on-screen instructions to complete the dual boot setup of Ubuntu and Windows 10.
Allocate Disk Space
Before you can install Ubuntu as a dual boot with Windows 10, you need to allocate disk space on your hard drive for the Ubuntu installation. This will allow you to have both operating systems installed on your computer and choose which one to boot into at startup.
To allocate disk space, follow these steps:
- Open the Disk Management tool in Windows 10 by right-clicking on the Start button and selecting “Disk Management”.
- In the Disk Management window, you will see a list of all the drives and partitions on your computer. Locate the drive that you want to allocate space for Ubuntu on.
- Right-click on the drive and select “Shrink Volume”.
- In the Shrink window, enter the amount of space you want to allocate for Ubuntu in megabytes (MB). Keep in mind that Ubuntu requires at least 20 GB of disk space, but it is recommended to allocate more if you plan on installing additional software or storing files.
- Click “Shrink” to start the process. Windows will resize the partition and create unallocated space for Ubuntu.
Once you have allocated disk space for Ubuntu, you are ready to proceed with the installation process. Make sure to follow the next steps in the guide to complete the dual boot installation of Ubuntu and Windows 10.

