Are you ready to take the plunge and install Ubuntu on your computer? This step-by-step guide will walk you through the process of installing Ubuntu, one of the most popular Linux distributions, from a USB drive. Whether you’re a beginner or an experienced user, this guide will help you navigate the installation process with ease.
Step 1: Prepare your USB drive
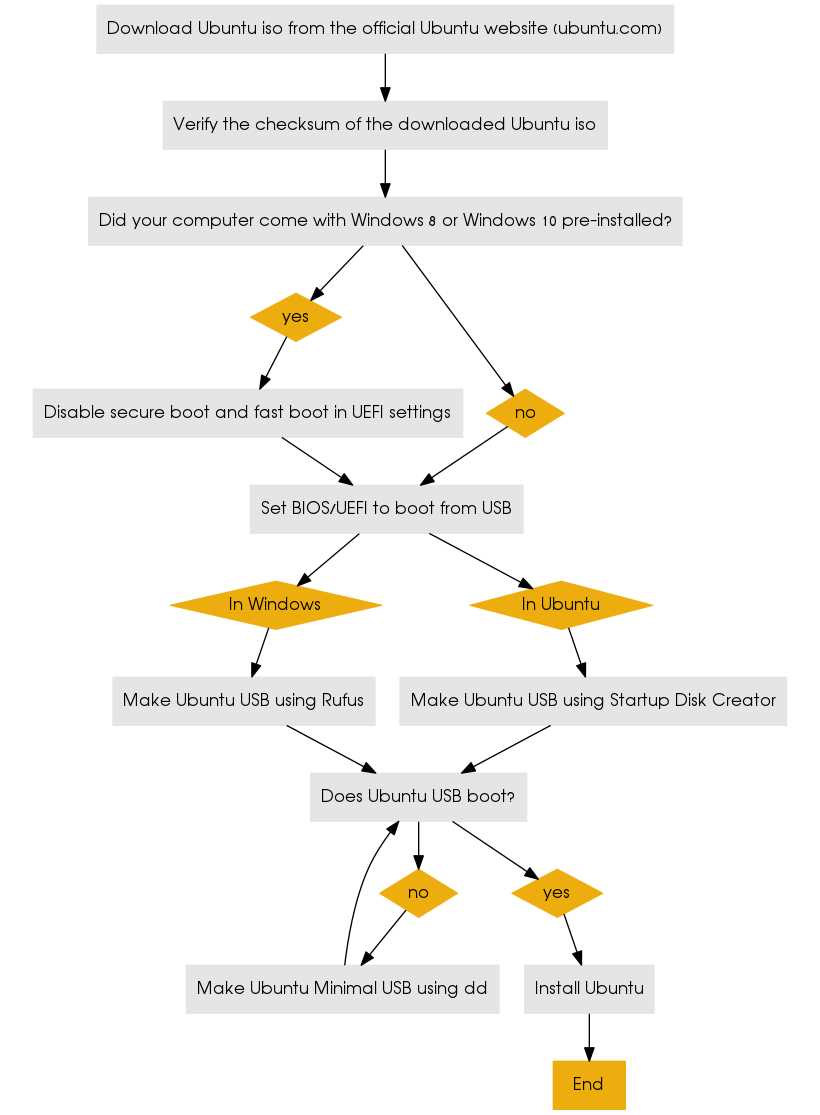
Before you can install Ubuntu from a USB drive, you’ll need to make sure your USB drive is properly prepared. First, download the Ubuntu ISO file from the official website. Then, use a tool like Rufus or Etcher to create a bootable USB drive. This will allow your computer to boot from the USB drive and start the Ubuntu installation process.
Step 2: Boot from the USB drive
Once your USB drive is ready, insert it into your computer and restart. As your computer boots up, you’ll need to access the boot menu. This can usually be done by pressing a key like F12 or Esc during the boot process. From the boot menu, select the option to boot from the USB drive.
Step 3: Begin the installation process
After booting from the USB drive, you’ll be presented with the Ubuntu installation menu. Select the “Install Ubuntu” option to begin the installation process. You’ll be guided through a series of steps, including selecting your language, keyboard layout, and time zone.
Step 4: Partition your hard drive
During the installation process, you’ll be prompted to partition your hard drive. If you’re new to Ubuntu, it’s recommended to select the option to install Ubuntu alongside your existing operating system. This will create a dual-boot setup, allowing you to choose between Ubuntu and your other operating system each time you start your computer.
Step 5: Complete the installation
Once you’ve partitioned your hard drive, you’ll need to select the installation location and create a username and password for your Ubuntu account. After that, the installation process will begin. Sit back and relax as Ubuntu is installed on your computer.
Installing Ubuntu from a USB drive is a straightforward process that can be completed by users of all experience levels. By following this step-by-step guide, you’ll be able to enjoy the power and flexibility of Ubuntu on your computer in no time.
Preparing for Installation
Before you can install Linux Ubuntu from a USB, you need to make sure you have the necessary tools and files. Here is a step-by-step guide on how to prepare for the installation:
1. Obtain a USB drive: You will need a USB drive with enough storage capacity to hold the Ubuntu installation files. Make sure the USB drive is formatted correctly and is empty.
2. Download the Ubuntu ISO: Go to the official Ubuntu website and download the latest version of the Ubuntu ISO file. This file contains the installation files for Ubuntu.
3. Create a bootable USB: Use a tool like Rufus or Etcher to create a bootable USB drive from the Ubuntu ISO file. This will allow you to boot into the Ubuntu installer from the USB drive.
4. Backup your data: Before proceeding with the installation, it is recommended to backup any important data on your computer. This will ensure that you don’t lose any files in case something goes wrong during the installation process.
5. Check system requirements: Make sure your computer meets the minimum system requirements for Ubuntu. This includes having enough RAM, storage space, and a compatible processor.
6. Disable secure boot: If your computer has secure boot enabled, you may need to disable it in the BIOS settings before you can install Ubuntu. Refer to your computer’s documentation for instructions on how to do this.
7. Familiarize yourself with the installation process: Take some time to read through the Ubuntu installation guide and familiarize yourself with the installation process. This will help you understand the steps involved and make the installation smoother.
By following these steps, you will be well-prepared to install Linux Ubuntu from a USB drive. Make sure to double-check everything before proceeding with the installation to avoid any issues.
Download Ubuntu ISO

To install Ubuntu from a USB drive, you will first need to download the Ubuntu ISO file. The ISO file contains all the necessary files and software to install Ubuntu on your computer.
To download the Ubuntu ISO, follow these steps:
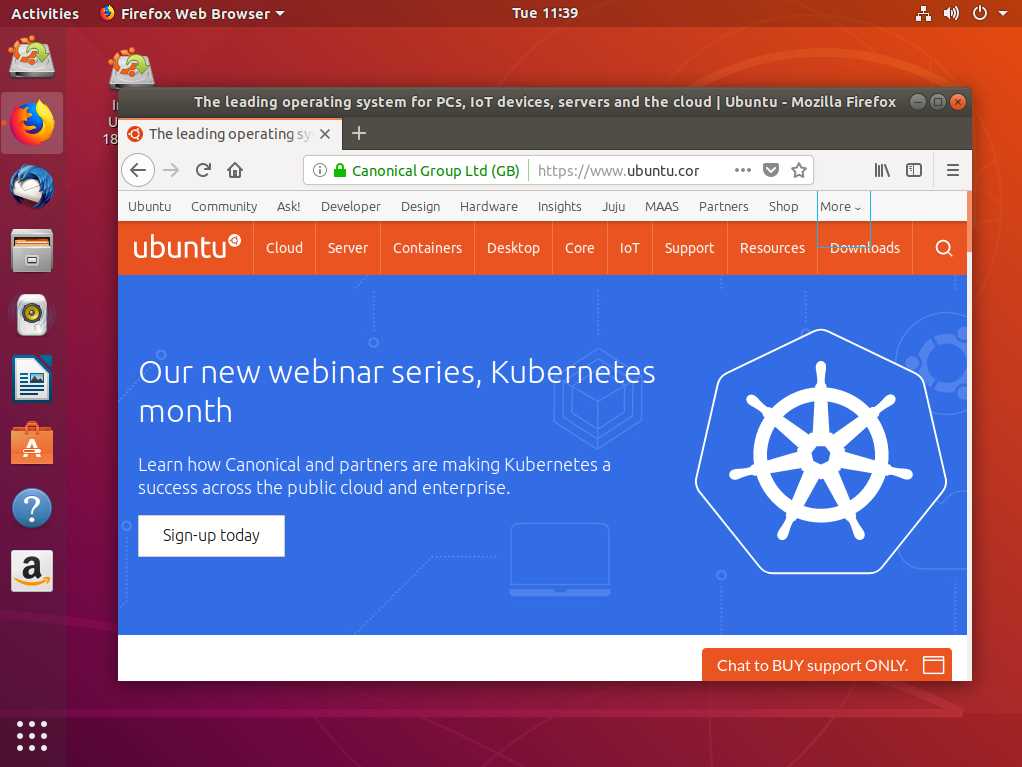
- Go to the official Ubuntu website at ubuntu.com/download.
- Click on the “Download” button.
- Choose the version of Ubuntu you want to install. You can select the LTS (Long Term Support) version or the latest version.
- Choose the appropriate architecture for your computer. Most modern computers use the 64-bit version, but if you have an older computer, you may need to select the 32-bit version.
- Click on the “Download” button to start the download.
Once the download is complete, you will have the Ubuntu ISO file ready to be used to create a bootable USB drive.
Note: Make sure you have a reliable internet connection and enough disk space to download the ISO file, as it can be quite large.
Create a Bootable USB Drive
Creating a bootable USB drive is an essential step in installing Linux Ubuntu from a USB. This process allows you to transfer the Ubuntu installation files from your computer to the USB drive, making it ready for installation on another computer.
To create a bootable USB drive, follow these steps:
| Step 1: | Insert a USB drive into your computer. |
| Step 2: | Download the Linux Ubuntu ISO file from the official website. |
| Step 3: | Open a terminal and run the command “lsblk” to identify the USB drive’s device name (e.g., /dev/sdb). |
| Step 4: | Unmount the USB drive by running the command “sudo umount /dev/sdb” (replace /dev/sdb with the actual device name). |
| Step 5: | Use the “dd” command to write the Ubuntu ISO file to the USB drive. The command should be in the format “sudo dd bs=4M if=/path/to/ubuntu.iso of=/dev/sdb” (replace /path/to/ubuntu.iso with the actual path to the ISO file and /dev/sdb with the actual device name). |
| Step 6: | Wait for the command to finish executing. This may take some time depending on the size of the ISO file. |
| Step 7: | Once the command is complete, you will have a bootable USB drive with Linux Ubuntu. |
Now you can use this bootable USB drive to install Linux Ubuntu on any computer by simply booting from the USB drive and following the installation instructions.
Backup Your Data
Before proceeding with the installation of Linux Ubuntu from USB, it is highly recommended to backup your data to ensure that you do not lose any important files or documents during the installation process. Here are the steps to backup your data:
- Connect an external storage device, such as a USB drive or an external hard drive, to your computer.
- Open the file manager on your current operating system.
- Create a new folder on the external storage device to store your backup files.
- Navigate to the folders or files that you want to backup.
- Select the folders or files and copy them to the newly created folder on the external storage device.
- Wait for the copying process to complete.
- Once the backup is finished, safely eject the external storage device from your computer.
By following these steps, you can ensure that your important data is safely backed up before proceeding with the installation of Linux Ubuntu from USB. This will give you peace of mind knowing that your files are secure and can be easily restored if needed.
Installing Ubuntu

To install Ubuntu on your computer, you will need a USB drive and a copy of the Ubuntu Linux operating system. Follow the steps below to install Ubuntu from a USB drive:
- Create a bootable USB drive: Download the Ubuntu ISO file from the official website and use a tool like Rufus or Etcher to create a bootable USB drive.
- Boot from the USB drive: Insert the USB drive into your computer and restart it. Press the appropriate key (usually F12 or Esc) to access the boot menu and select the USB drive as the boot device.
- Install Ubuntu: Once the computer boots from the USB drive, you will see the Ubuntu installation screen. Follow the on-screen instructions to choose your language, keyboard layout, and installation type.
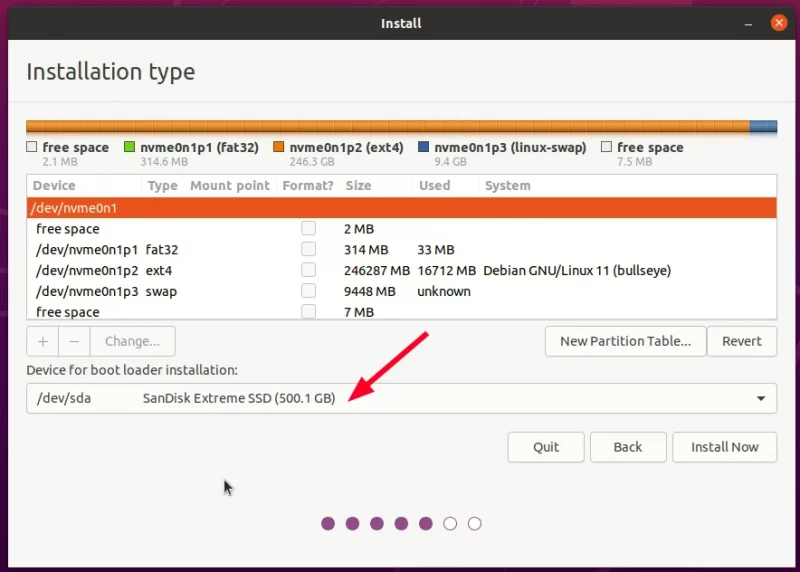
- Partition the disk: If you are installing Ubuntu alongside another operating system, you will need to partition your disk. Choose the option to install Ubuntu alongside the existing operating system, or manually partition the disk if you prefer.
- Configure Ubuntu: Set your username, password, and other preferences during the installation process. You can also choose to install updates and third-party software.
- Complete the installation: Once you have finished configuring Ubuntu, click the “Install” button to begin the installation process. The installer will copy the necessary files and configure your system.
- Restart your computer: After the installation is complete, you will be prompted to restart your computer. Remove the USB drive and boot into your newly installed Ubuntu system.
Congratulations! You have successfully installed Ubuntu Linux on your computer from a USB drive. Enjoy exploring the world of Linux!
Boot from USB
To install Ubuntu from a USB drive, you will need to boot your computer from the USB. Here is a step-by-step guide on how to do it:
- Insert the USB drive into a USB port on your computer.
- Restart your computer.
- During the startup process, look for a message that says “Press [key] to enter boot menu” or something similar. The key to press may vary depending on your computer’s manufacturer, but it is usually one of the function keys (e.g., F12, F10, F9).
- Press the corresponding key to enter the boot menu.
- In the boot menu, use the arrow keys to navigate to the option that allows you to boot from a USB device.
- Press Enter to select the USB device as the boot option.
- Your computer will now boot from the USB drive, and you will see the Ubuntu installation screen.
Follow the on-screen instructions to complete the installation of Ubuntu on your computer.
Select Installation Language
When installing Linux Ubuntu from a USB, the first step is to select the installation language. This will determine the language used throughout the installation process and the default language for the operating system once it is installed.
To select the installation language, follow these steps:
- Boot your computer from the USB drive that contains the Linux Ubuntu installation files.
- When the Ubuntu boot menu appears, use the arrow keys to navigate to the “Install Ubuntu” option and press Enter.
- The installation wizard will then load and display a welcome screen. Select your preferred language from the list provided.
- Once you have selected the language, click “Continue” to proceed with the installation process.
It is important to choose a language that you are comfortable with, as this will make it easier to navigate and use the Ubuntu operating system after installation. If you are unsure which language to choose, you can always select English, as it is widely supported and has a large user community for assistance.
After selecting the installation language, you can proceed to the next step of the installation process, which is configuring the keyboard layout.
Configure Installation Options
Before proceeding with the installation, it is important to configure the installation options according to your preferences. Here are the steps to configure the installation options:
- Choose the language for the installation process.
- Select your location and time zone.
- Choose the keyboard layout that you prefer.
- Decide whether to install third-party software for graphics and Wi-Fi hardware.
- Choose the installation type – whether to install Ubuntu alongside an existing operating system or to erase the disk and install Ubuntu as the sole operating system.
- Decide whether to encrypt the new Ubuntu installation for added security.
- Review the summary of the installation options and make any necessary changes.
By configuring these installation options, you can ensure that the Ubuntu installation is tailored to your specific needs and preferences. Once you have completed the configuration, you can proceed with the installation process.
Post-Installation Setup
Once you have successfully installed Ubuntu Linux from a USB drive, there are a few important steps you should take to ensure a smooth and secure experience.
1. Update Ubuntu: After the installation is complete, it is crucial to update your Ubuntu system to ensure that you have the latest security patches and software updates. Open the Terminal and run the following command:
sudo apt update && sudo apt upgrade
2. Install Additional Software: Ubuntu comes with a wide range of pre-installed software, but you may need to install additional software depending on your needs. You can use the Ubuntu Software Center or the Terminal to install new software packages.
3. Configure System Settings: Take some time to customize your Ubuntu system by adjusting system settings. You can access the system settings by clicking on the gear icon in the top-right corner of the screen. Here, you can personalize your desktop, change display settings, manage users and groups, and more.
4. Set Up User Accounts: It is recommended to create separate user accounts for each person who will be using the Ubuntu system. This helps to maintain privacy and security. To create a new user account, go to System Settings > User Accounts and click on the “+” button.
5. Install Additional Drivers: Ubuntu may not have all the necessary drivers for your hardware installed by default. To ensure optimal performance, you may need to install additional drivers. Go to System Settings > Software & Updates > Additional Drivers to check for and install any available proprietary drivers for your hardware.
6. Enable Firewall: Ubuntu has a built-in firewall called “ufw” (Uncomplicated Firewall) that can help protect your system from unauthorized access. To enable the firewall, open the Terminal and run the following command:
sudo ufw enable
7. Install Antivirus Software: While Linux is generally considered more secure than other operating systems, it is still a good idea to install an antivirus program to protect against potential threats. ClamAV is a popular open-source antivirus software that you can install on Ubuntu using the Terminal:
sudo apt install clamav
8. Backup Your Data: It is always important to regularly back up your data to prevent loss in case of hardware failure or other unforeseen events. Ubuntu provides a built-in backup tool called “Deja Dup” that you can use to schedule automatic backups of your important files and folders.
By following these post-installation steps, you can ensure that your Ubuntu system is up-to-date, secure, and tailored to your needs.