If you are a software developer working on Windows, it is important to keep your Node.js installation up to date. Updating Node.js not only ensures that you have access to the latest features and improvements, but it also helps to keep your system secure.
Updating Node.js in Windows is a straightforward process that can be done using the command prompt. Before you begin, make sure you have administrative privileges on your system. This guide will walk you through the steps to update Node.js to the latest version.
To update Node.js, you will first need to check the current version installed on your system. Open the command prompt by pressing the Windows key + R, then type “cmd” and hit enter. In the command prompt, type “node -v” and press enter. This will display the current version of Node.js installed on your system.
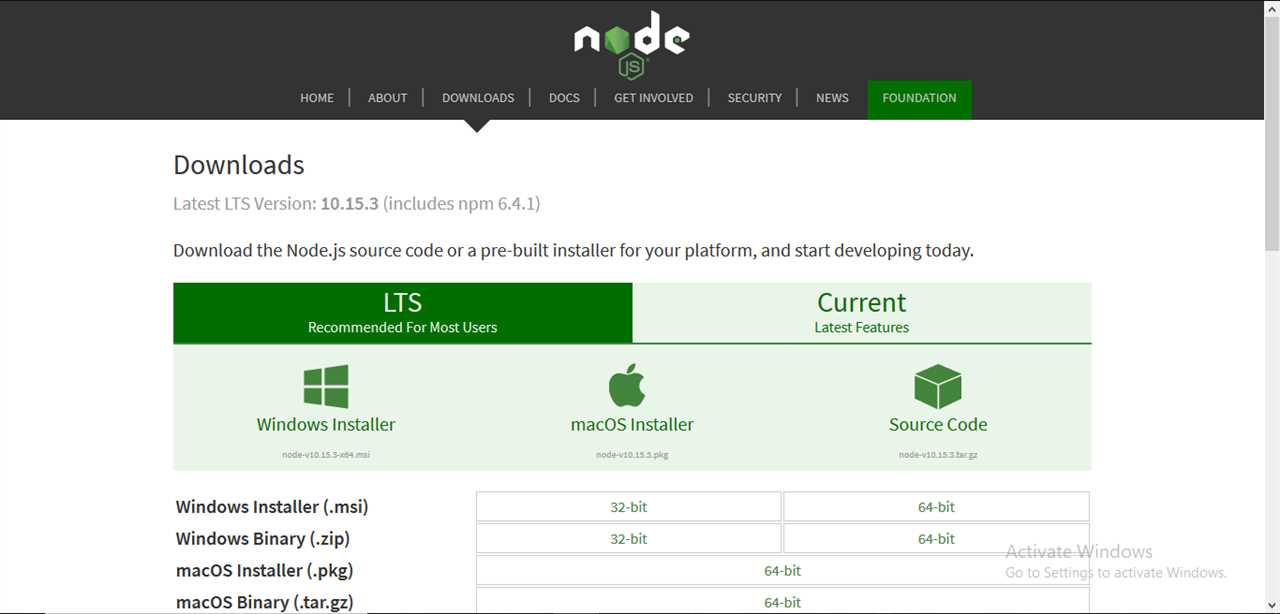
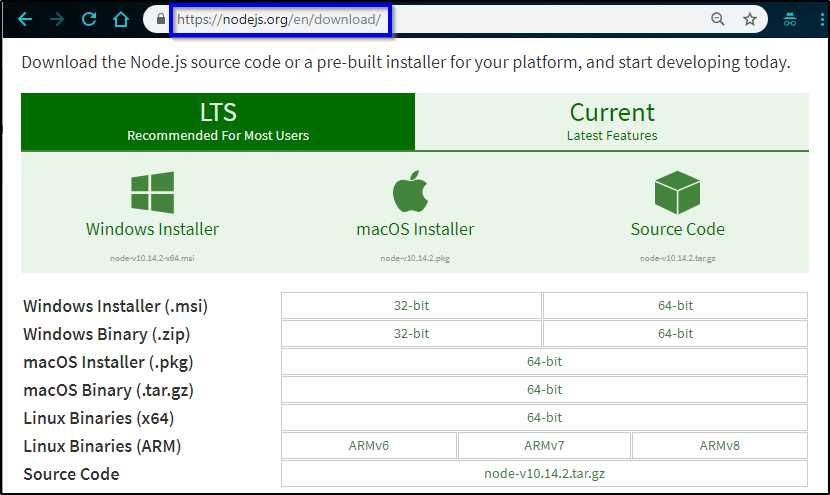
Once you have determined the current version, you can proceed with the upgrade. Open your preferred web browser and navigate to the official Node.js website. Download the latest version of Node.js for Windows and run the installation file. Follow the on-screen instructions to complete the installation process.
Why Update Node.js?
Updating Node.js on Windows is important for several reasons. Here are a few:
| New Features and Improvements | Each new version of Node.js comes with new features, improvements, and bug fixes. By updating Node.js, you can take advantage of these new features and ensure that your software is running on the latest and most stable version. |
| Security | Updating Node.js helps to keep your software secure. New versions often include security patches that address vulnerabilities found in previous versions. By staying up to date, you can protect your software and data from potential threats. |
| Compatibility | Updating Node.js ensures compatibility with other software and libraries. If you’re using a newer version of Node.js, you can avoid compatibility issues when working with other tools and frameworks that rely on specific Node.js features or APIs. |
| Performance | Node.js updates often include performance optimizations, which can improve the speed and efficiency of your applications. By updating Node.js, you can take advantage of these performance enhancements and provide a better experience for your users. |
Updating Node.js on Windows is a straightforward process that can be done using the command prompt or by using an installer. By keeping your Node.js version up to date, you can ensure that you have access to the latest features, security patches, and performance improvements.
Improved Performance
Updating your Node.js software can significantly improve its performance. The latest updates often include bug fixes, security patches, and performance enhancements that can make your applications run faster and more efficiently.
By upgrading to the latest version of Node.js, you can take advantage of the latest features and optimizations that have been implemented in the software. These updates can help your applications handle larger workloads, process data more quickly, and reduce response times.
When you update Node.js on Windows, the installation process may prompt you to enter commands in the command prompt. This is a simple process that involves running a few commands to upgrade your Node.js installation.
Once you have updated Node.js, you can test the improved performance by running your applications and comparing the results. You may notice faster response times, reduced CPU usage, and improved overall performance.
Updating Node.js is a crucial step to ensure that your software is up to date and running at its best. By regularly updating your Node.js installation, you can stay ahead of any potential security vulnerabilities and take advantage of the latest performance improvements.
Security Enhancements

Updating and upgrading Node.js is not only important for accessing the latest features and bug fixes, but it is also crucial for maintaining the security of your software. With each new version of Node.js, security enhancements are implemented to address potential vulnerabilities and protect your system from potential threats.
By keeping your Node.js installation up to date, you ensure that you have the latest security patches and improvements. These updates are often released in response to newly discovered vulnerabilities, so it is essential to stay current to protect your system from potential attacks.
To update Node.js and take advantage of the latest security enhancements, you can use the command prompt. Open the command prompt and enter the appropriate command to update your Node.js version. This will initiate the update process and download the latest version of Node.js from the official website.
Once the update is complete, you can verify the installation by checking the version number. By running the appropriate command in the command prompt, you can confirm that you are now using the latest version of Node.js, which includes the security enhancements.
Regularly updating your Node.js installation is a crucial step in maintaining the security of your software. By staying current with the latest version, you can ensure that your system is protected against potential threats and vulnerabilities.
Access to New Features

Updating your Node.js version on Windows is essential to gain access to new features and improvements in the software. With each new version release, the Node.js community introduces enhancements, bug fixes, and additional functionalities that can enhance your development experience.
By keeping your Node.js installation up to date, you ensure that you can take advantage of the latest features and improvements. These updates can include performance optimizations, security patches, and new APIs that can help you build better and more efficient applications.
When you upgrade Node.js on Windows, you can benefit from the latest advancements in the software, such as improved memory management, enhanced debugging capabilities, and better support for modern JavaScript syntax and features.
To update Node.js on Windows, you can use the Command Prompt or PowerShell to execute the necessary commands. By following the step-by-step guide mentioned earlier, you can easily upgrade your Node.js version and start leveraging the latest features and improvements.
By staying up to date with the latest Node.js version, you can ensure that your development environment is equipped with the most recent tools and technologies. This allows you to stay competitive in the rapidly evolving world of web development and take advantage of the latest advancements in the Node.js ecosystem.
So, don’t miss out on the new features and improvements that come with each Node.js version release. Keep your Node.js installation updated on Windows and unlock the full potential of this powerful software.
Step 1: Check Current Version
Before proceeding with the Node.js update, it is important to check the current version of Node.js installed on your Windows system. This will help you determine if an upgrade is necessary and which version you should install.
To check the current version of Node.js, open the command prompt on your Windows computer. You can do this by pressing the Windows key + R, typing “cmd” in the Run dialog box, and clicking “OK”.
Once the command prompt is open, type the following command and press Enter:
node -vThis command will display the current version of Node.js installed on your system. If you see a version number, such as “v12.18.3”, it means that Node.js is already installed. If you see an error message or no output, it means that Node.js is not installed on your system.
If Node.js is already installed, you can proceed to the next step. If not, you will need to install Node.js before you can upgrade to the latest version. You can download the latest version of Node.js from the official website and follow the installation instructions for Windows.
Open Command Prompt
To update Node.js on Windows, you will need to use the Command Prompt, a software that allows you to execute commands on your computer. The Command Prompt is a powerful tool that comes pre-installed with Windows.
To open the Command Prompt, follow these steps:
- Click on the Windows Start button.
- Type “Command Prompt” in the search bar.
- Click on the Command Prompt app from the search results.
Alternatively, you can also open the Command Prompt by pressing the Windows key + R to open the Run dialog box, then type “cmd” and press Enter.
Once the Command Prompt is open, you can proceed with the Node.js update process by executing the necessary commands to check your current version, download the latest version, and upgrade Node.js to the new version.
Enter “node -v”
After completing the Node.js installation or update on your Windows machine, you can verify the version by opening a command prompt. To do this, follow these steps:
- Click on the Windows Start button.
- Type “cmd” in the search bar and press Enter.
- A command prompt window will open.
- Type “node -v” (without quotes) and press Enter.
This command will display the installed version of Node.js on your system. If you have successfully installed or updated Node.js, the version number will be shown in the command prompt.
Checking the Node.js version is important to ensure that the installation or update process was successful. It also helps you to verify if you have the latest version of the software installed on your Windows machine.
If you see an older version number or an error message, it means that you need to perform an upgrade to the latest version of Node.js. You can follow the steps mentioned in this guide to update Node.js on your Windows system.
Note the Current Version
Before you begin the update process, it’s important to note the current version of Node.js installed on your Windows system. This will help you determine if an update is necessary and ensure that you are upgrading to the latest version.
To check the current version of Node.js, open the command prompt on your Windows machine. You can do this by pressing the Windows key + R, typing “cmd” in the Run dialog box, and pressing Enter.
In the command prompt, type the following command and press Enter:
node -v
This command will display the current version of Node.js installed on your Windows system. Make a note of this version so that you can compare it to the latest version available for installation.
Now that you have noted the current version of Node.js, you can proceed with the upgrade process to ensure that you have the latest features and security updates.
