If you’re looking to install Kali Linux, a powerful and versatile operating system for penetration testing and ethical hacking, you’ve come to the right place. In this step-by-step guide, we’ll show you how to install Kali Linux from a USB drive, allowing you to easily boot into the operating system and get started with your security testing.
Installing Kali Linux from a USB drive is a convenient and portable method that allows you to take your security toolkit with you wherever you go. Whether you’re a beginner or an experienced hacker, this guide will walk you through the process, ensuring a successful installation.
Before we begin, make sure you have a USB drive with at least 8GB of storage capacity. You’ll also need a computer with a USB port and access to the internet. With these prerequisites in place, let’s dive into the step-by-step installation process for Kali Linux.
Section 1: Preparing the USB Drive

Before you can install Kali Linux from a USB drive, you need to make sure the drive is properly prepared. Follow these steps to get your USB drive ready:
Step 1: Insert the USB drive into your computer’s USB port.
Step 2: Make sure the USB drive is empty, as all data on it will be erased during the installation process.
Step 3: Download the Kali Linux ISO file from the official website. This file contains the installation files for Kali Linux.
Step 4: Open a web browser and navigate to the official Kali Linux website.
Step 5: Locate the “Downloads” section on the website and click on it.
Step 6: Choose the appropriate version of Kali Linux for your system (32-bit or 64-bit) and click on the download link.
Step 7: Wait for the ISO file to finish downloading. This may take some time depending on your internet connection speed.
Step 8: Once the download is complete, open a file explorer and navigate to the location where the ISO file was saved.
Step 9: Right-click on the ISO file and select “Burn disc image” or a similar option. This will open a disc burning utility.
Step 10: Select your USB drive as the destination for the burned ISO file. Make sure you have selected the correct drive, as all data on it will be erased.
Step 11: Click on the “Burn” or “Start” button to begin the burning process. This may take some time depending on the size of the ISO file and the speed of your computer.
Step 12: Once the burning process is complete, safely eject the USB drive from your computer.
Now that your USB drive is prepared, you can proceed to the next section to learn how to install Kali Linux from the USB drive.
Step 1: Format the USB Drive

Before you can install Kali Linux from a USB drive, you need to format the drive to ensure it is compatible with the installation process. Here’s how to do it:
- Insert the USB drive into your computer.
- Open the Disk Management utility on your computer. This can usually be found by searching for “Disk Management” in the Start menu.
- Locate the USB drive in the list of available drives. Be careful to select the correct drive, as formatting will erase all data on it.
- Right-click on the USB drive and select “Format”.
- In the format dialog box, choose the file system as “FAT32”. This is the recommended file system for creating a bootable USB drive for Kali Linux.
- Click “Start” to begin the formatting process. This may take a few minutes.
- Once the formatting is complete, you can proceed to the next step of installing Kali Linux from the USB drive.
By formatting the USB drive to FAT32, you ensure that it is compatible with both Windows and Linux systems. This will allow you to easily install Kali Linux from the USB drive on any computer that supports booting from USB.
Step 2: Download Kali Linux ISO
Before you can install Kali Linux on your USB drive, you will need to download the Kali Linux ISO file. The ISO file contains the complete installation package for Kali Linux.
To download the Kali Linux ISO, follow these steps:
- Open your web browser and go to the official Kali Linux website.
- Navigate to the “Downloads” section of the website.
- Choose the appropriate version of Kali Linux for your system. There are different versions available for 32-bit and 64-bit systems.
- Click on the download link to start the download.
Once the download is complete, you will have the Kali Linux ISO file on your computer. This file will be used in the next steps to create a bootable USB drive.
Note: Make sure to download the ISO file from the official Kali Linux website to ensure that you are getting a legitimate and secure version of the operating system.
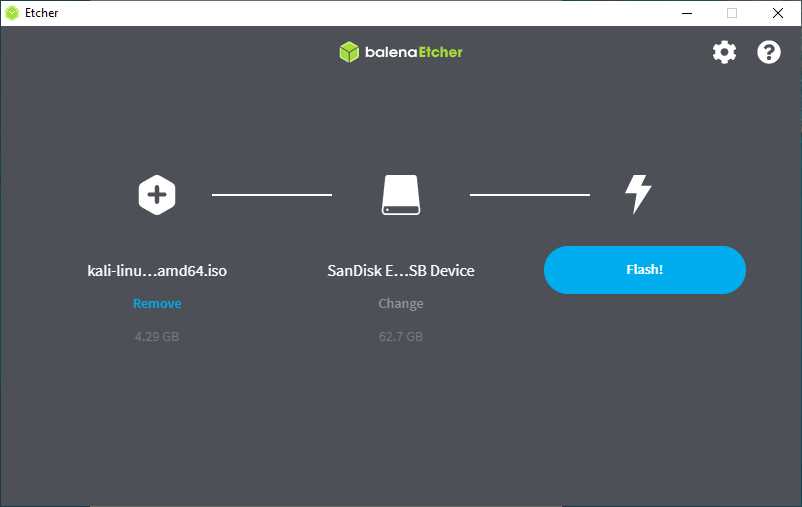
Step 3: Create a Bootable USB Drive

To install Kali Linux, you will need to create a bootable USB drive. This will allow you to boot into the Kali Linux installer and begin the installation process.
Here is how you can create a bootable USB drive:
- First, you will need to download the Kali Linux ISO file from the official website.
- Next, insert your USB drive into your computer.
- Open a terminal and run the command
lsblkto identify the device name of your USB drive. - Once you have identified the device name, run the command
sudo dd bs=4M if=path/to/kali-linux.iso of=/dev/sdX status=progress, replacingpath/to/kali-linux.isowith the path to the Kali Linux ISO file and/dev/sdXwith the device name of your USB drive. - Wait for the command to finish. This may take some time.
- Once the command has finished, your USB drive will be bootable.
Now you are ready to proceed to the next step and install Kali Linux from the USB drive.
Section 2: Configuring the BIOS
Before you can install Kali Linux from a USB drive, you need to configure your computer’s BIOS settings. The BIOS, or Basic Input/Output System, is responsible for initializing and controlling the hardware components of your computer.
To configure the BIOS, follow these steps:
| Step 1: | Start your computer and press the designated key to enter the BIOS setup. The key to access the BIOS may vary depending on your computer’s manufacturer, but it is usually one of the following: F2, F10, Delete, or Esc. Refer to your computer’s documentation for the specific key. |
| Step 2: | Navigate to the “Boot” or “Boot Order” section of the BIOS menu. This section controls the order in which your computer looks for bootable devices. |
| Step 3: | Move the USB drive to the top of the boot order list. This ensures that your computer will prioritize booting from the USB drive before other devices. |
| Step 4: | Save your changes and exit the BIOS setup. This will restart your computer. |
By configuring the BIOS to boot from the USB drive first, you will be able to install Kali Linux without any issues. Once you have completed these steps, you can proceed to the next section to begin the installation process.
Step 1: Access the BIOS Menu
Before you can install Kali Linux from a USB drive, you need to access the BIOS menu on your computer. The BIOS (Basic Input/Output System) is a firmware that is responsible for initializing hardware during the boot process.
To access the BIOS menu, you need to restart your computer and press a specific key or combination of keys during the boot process. The key or combination of keys varies depending on the manufacturer of your computer.
Typically, you can access the BIOS menu by pressing the Del or F2 key. However, some manufacturers use different keys, such as F1, F10, or Esc. You may need to consult your computer’s manual or the manufacturer’s website to determine the correct key or combination of keys.
Once you have identified the correct key or combination of keys, restart your computer and press the key(s) repeatedly until the BIOS menu appears. This may require some trial and error, as the timing can be tricky.
Once you are in the BIOS menu, navigate to the “Boot” or “Boot Order” section. In this section, you can change the boot order to prioritize the USB drive over the internal hard drive. This will allow your computer to boot from the USB drive and initiate the Kali Linux installation process.
Save your changes and exit the BIOS menu. Your computer will then restart and boot from the USB drive, allowing you to proceed with the installation of Kali Linux.
Step 2: Change the Boot Order

Before you can install Kali Linux from a USB, you need to change the boot order in your computer’s BIOS settings. By default, most computers are set to boot from the hard drive, so you’ll need to change this setting to prioritize booting from the USB drive.
Here’s how to change the boot order:
- Restart your computer and access the BIOS settings by pressing the designated key during startup. The key to access the BIOS settings varies depending on the manufacturer, but it is usually one of the function keys (e.g., F2, F10, or Del).
- Once you’re in the BIOS settings, navigate to the “Boot” or “Boot Order” section. This section may be located under different tabs depending on your BIOS version.
- Find the option that allows you to change the boot order. It may be labeled as “Boot Priority”, “Boot Sequence”, or something similar.
- Use the arrow keys to move the USB drive to the top of the boot order list. This will ensure that your computer boots from the USB drive first.
- Save your changes and exit the BIOS settings. This is usually done by pressing the F10 key or selecting the “Save and Exit” option.
Once you’ve changed the boot order, your computer will now prioritize booting from the USB drive. This will allow you to proceed with the installation of Kali Linux from the USB.
Step 3: Save and Exit BIOS

After configuring the boot order to prioritize the USB drive, you need to save the changes and exit the BIOS settings. This step is crucial to ensure that your computer boots from the USB drive and starts the installation process for Kali Linux.
To save and exit the BIOS, follow these steps:
- Press the key indicated on the screen to save and exit the BIOS. This key is usually F10 or F12, but it may vary depending on your computer’s manufacturer.
- A confirmation message will appear asking if you want to save the changes and exit. Use the arrow keys to select “Yes” and press Enter.
- Your computer will now restart and boot from the USB drive. Make sure to keep the USB drive connected until the installation process is complete.
By saving and exiting the BIOS, you have successfully configured your computer to boot from the USB drive and are ready to proceed with the installation of Kali Linux.
Section 3: Installing Kali Linux
Now that you have created a bootable USB drive with Kali Linux, it’s time to install the operating system on your computer. Follow these steps to complete the installation process:
- Insert the USB drive into a USB port on your computer.
- Restart your computer and enter the BIOS settings.
- Change the boot order to prioritize the USB drive.
- Save the changes and exit the BIOS settings.
- Your computer will now boot from the USB drive.
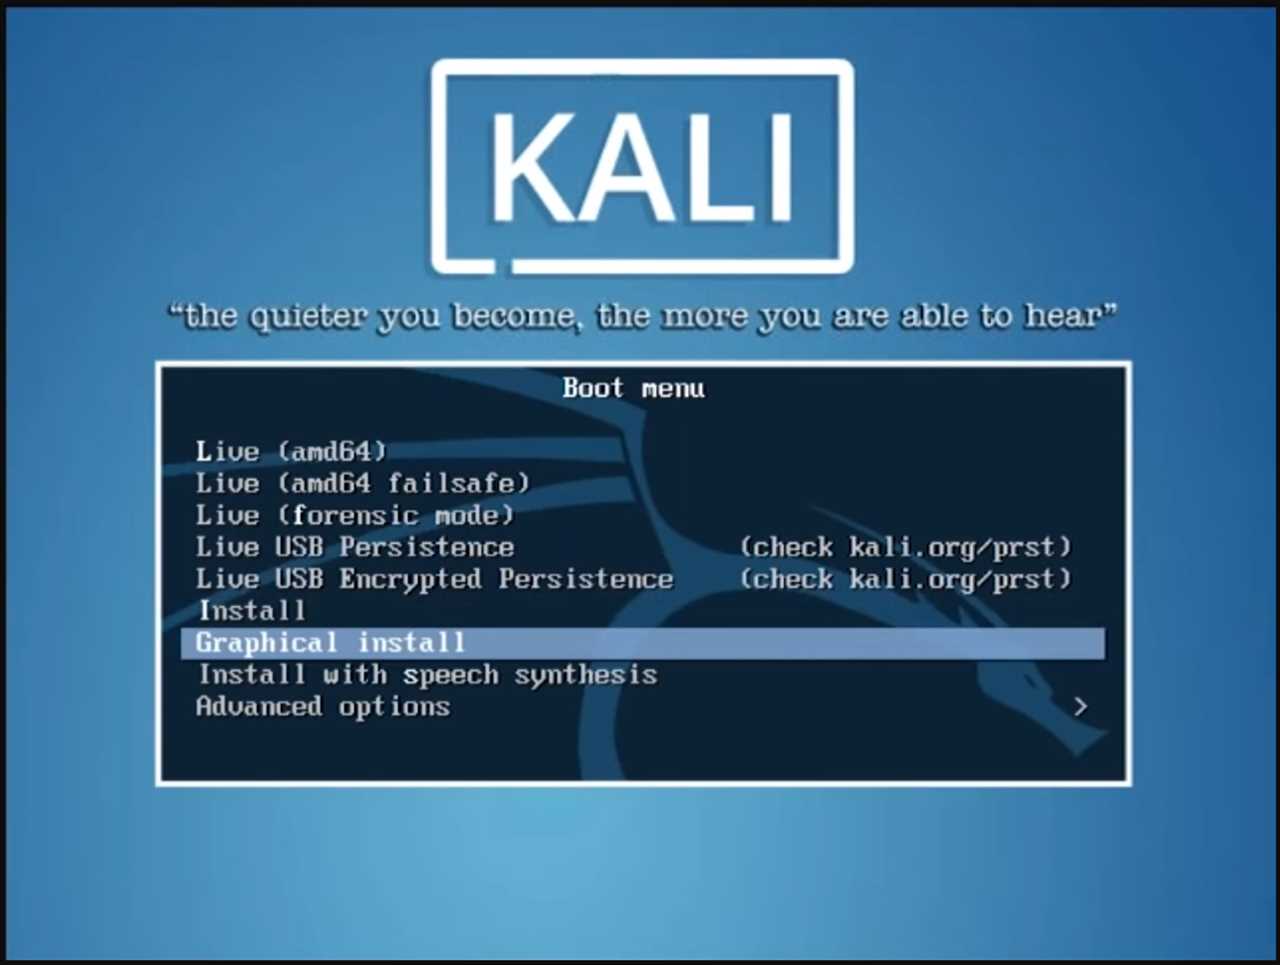
- Select the “Install” option from the Kali Linux boot menu.
- Choose your preferred language and click “Continue”.
- Select your location and click “Continue”.
- Configure your keyboard layout and click “Continue”.
- Set up a hostname for your computer and click “Continue”.
- Create a user account and password for your system and click “Continue”.
- Choose your time zone and click “Continue”.
- Partition your hard drive by selecting the appropriate option and click “Continue”.
- Confirm the changes to your hard drive and click “Continue”.
- Wait for the installation process to complete.
- Once the installation is finished, remove the USB drive and click “Restart”.
Congratulations! You have successfully installed Kali Linux on your computer. You can now start exploring the powerful tools and features that Kali Linux has to offer.