Installing files from GitHub can seem like a daunting task, especially for those who are new to the platform. However, with the right guidance, the process can be straightforward and hassle-free. In this step-by-step guide, we will walk you through the process of installing GitHub files, ensuring that you have all the necessary tools and knowledge to successfully complete the installation.
Step 1: First, you need to have a GitHub account. If you don’t have one already, head over to the GitHub website and sign up for a free account. This will give you access to a wide range of open-source projects and repositories.
Step 2: Once you have your GitHub account set up, you’ll need to find the files you want to install. GitHub hosts millions of repositories, so you can search for specific files or browse through different projects to find what you’re looking for. Use the search bar at the top of the GitHub homepage to search for keywords related to the files you need.
Step 3: After you’ve found the files you want to install, navigate to the repository that contains them. Each repository on GitHub has its own unique URL, which you can find in the address bar of your web browser. Copy the URL of the repository.
Step 4: Now that you have the repository URL, you can choose how you want to install the files. There are several options available, including downloading the files as a ZIP archive or cloning the repository using Git. Choose the option that best suits your needs and follow the instructions provided.
Step 5: Once you have downloaded or cloned the files, you can now access them on your local machine. Depending on the file type, you may need to use specific software or tools to open and use the files. Make sure you have the necessary software installed on your computer before proceeding.
By following these step-by-step instructions, you should now have a clear understanding of how to install GitHub files. Remember to always read the documentation provided by the repository owner and to reach out to the GitHub community for help if you encounter any issues. Happy installing!
Preparing for Installation
Before you can install the files, you need to make sure you have everything you need. Here’s a step-by-step guide on how to prepare for the installation:
- Make sure you have the necessary software installed on your computer. This may include a text editor, a command line interface, and a version control system.
- Check if you have the correct version of the software. Some files may require specific versions to work properly.
- Ensure that you have a stable internet connection. This is important for downloading the files from GitHub.
- Take the time to read the documentation or README file provided with the files. This will give you important information on how to install and use the files.
- Create a new folder on your computer where you will store the files. This will make it easier to organize and locate the files during the installation process.
- Backup any existing files or data that may be affected by the installation. This will help prevent any loss of important information.
By following these steps, you will be well-prepared to install the GitHub files and start using them.
Create a GitHub Account

If you want to start using GitHub and access its features, the first step is to create a GitHub account. Follow the steps below to create your account:
- Go to the GitHub website at github.com.
- Click on the “Sign up” button located in the top-right corner of the page.
- Fill in the required information, including your username, email address, and password.
- Choose a unique username that represents you or your organization.
- Verify your email address by clicking on the link sent to your inbox.
- Once your email is verified, you can start using your GitHub account to upload and manage your files.
Creating a GitHub account is essential to collaborate with others, contribute to open-source projects, and share your own projects with the community. Now that you have your GitHub account, you can proceed to the next steps on how to install GitHub files.
Install Git on Your Computer

If you want to work with GitHub files, you’ll need to have Git installed on your computer. Git is a version control system that allows you to track changes in your files and collaborate with others. Here’s how to install Git:
1. Go to the official Git website at https://git-scm.com/downloads.
2. Choose the appropriate version of Git for your operating system (Windows, macOS, or Linux) and click on the download link.
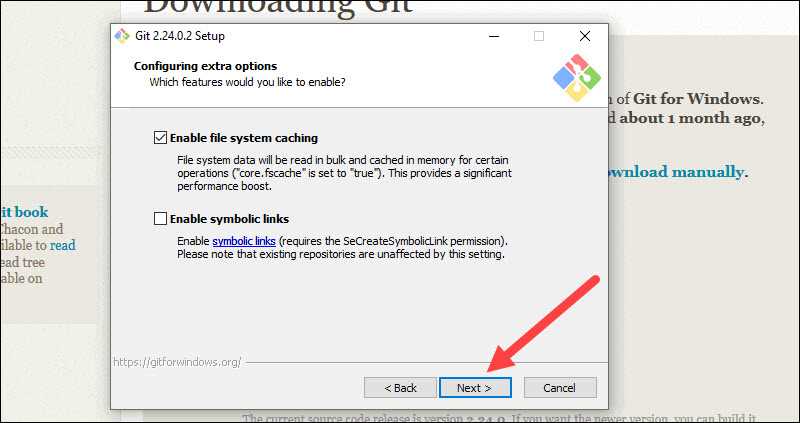
3. Once the download is complete, run the installer and follow the on-screen instructions.
4. During the installation process, you may be asked to choose the default editor, adjust the PATH environment, or configure other settings. Make your selections based on your preferences.
5. After the installation is finished, open a command prompt or terminal window and type git --version to verify that Git is installed correctly. You should see the version number of Git displayed.
Now that you have Git installed on your computer, you’re ready to start working with GitHub files and repositories. You can clone repositories, make changes, and push your changes back to GitHub using Git commands. Happy coding!
Set Up SSH Key

Setting up an SSH key is an important step in the process of installing GitHub files. SSH, or Secure Shell, is a cryptographic network protocol that allows secure communication between two devices. By setting up an SSH key, you can securely connect to your GitHub account without having to enter your username and password every time.
To set up an SSH key, follow these steps:
- Open your terminal or command prompt.
- Generate a new SSH key by running the following command:
ssh-keygen -t rsa -b 4096 -C "your_email@example.com". Make sure to replace “your_email@example.com” with your own email address. - When prompted to enter a file in which to save the key, press Enter to accept the default location.
- Enter a passphrase for your SSH key. This passphrase adds an extra layer of security to your key. Make sure to choose a strong passphrase that is easy for you to remember but difficult for others to guess.
- Once the key is generated, you will see a message indicating that the key has been saved.
- Next, you need to add your SSH key to your GitHub account. Copy the contents of the public key file by running the following command:
cat ~/.ssh/id_rsa.pub. - Go to your GitHub account settings and navigate to the SSH and GPG keys section.
- Click on the “New SSH key” button.
- Give your SSH key a title and paste the contents of the public key file into the “Key” field.
- Click on the “Add SSH key” button to save your key.
Once you have set up your SSH key, you will be able to securely connect to your GitHub account and install GitHub files without having to enter your username and password each time.
Installing GitHub Files

To install GitHub files, follow these step-by-step instructions:
- First, navigate to the GitHub repository where the files are located.
- Click on the “Code” button to reveal the dropdown menu.
- Choose the desired method to download the files. You can either download them as a ZIP file or clone the repository using Git.
- If you choose to download the files as a ZIP file, click on the “Download ZIP” button and save the file to your computer.
- If you choose to clone the repository using Git, copy the repository URL provided in the dropdown menu.
- Open your preferred Git client and navigate to the directory where you want to install the files.
- Run the following command in your Git client:
git clone [repository URL](replace [repository URL] with the actual URL you copied). - Wait for the cloning process to complete. Once it’s done, you will have the GitHub files installed on your local machine.
Now you have successfully installed the GitHub files and can start using them for your projects.