Are you tired of spending too much time on Facebook? Do you want to take a break from social media or permanently delete your account? If so, you’ve come to the right place. In this step-by-step guide, we will show you how to delete your Facebook account on your computer.
Deleting your Facebook account is a straightforward process, but it’s important to note that once you delete your account, you won’t be able to reactivate it or retrieve any of your data. Therefore, it’s crucial to make sure you have a backup of any important information or photos before proceeding.
To delete your Facebook account on your computer, follow these simple steps:
Step 1: Log in to your Facebook account on your computer. Make sure you are using the account you want to delete.
Step 2: Go to the Facebook Help Center by clicking on the question mark icon in the top-right corner of the Facebook homepage.
Step 3: In the search bar at the top of the Help Center page, type “delete account” and press enter.
Step 4: Click on the first result that appears, which should be a link titled “How do I permanently delete my account?”.
Step 5: On the “Delete Account” page, click on the “Delete Account” button.
Step 6: A pop-up window will appear asking you to enter your password and complete a security check. Follow the instructions and click on the “Continue” button.
Step 7: After completing the security check, click on the “Delete Account” button to confirm the deletion of your Facebook account.
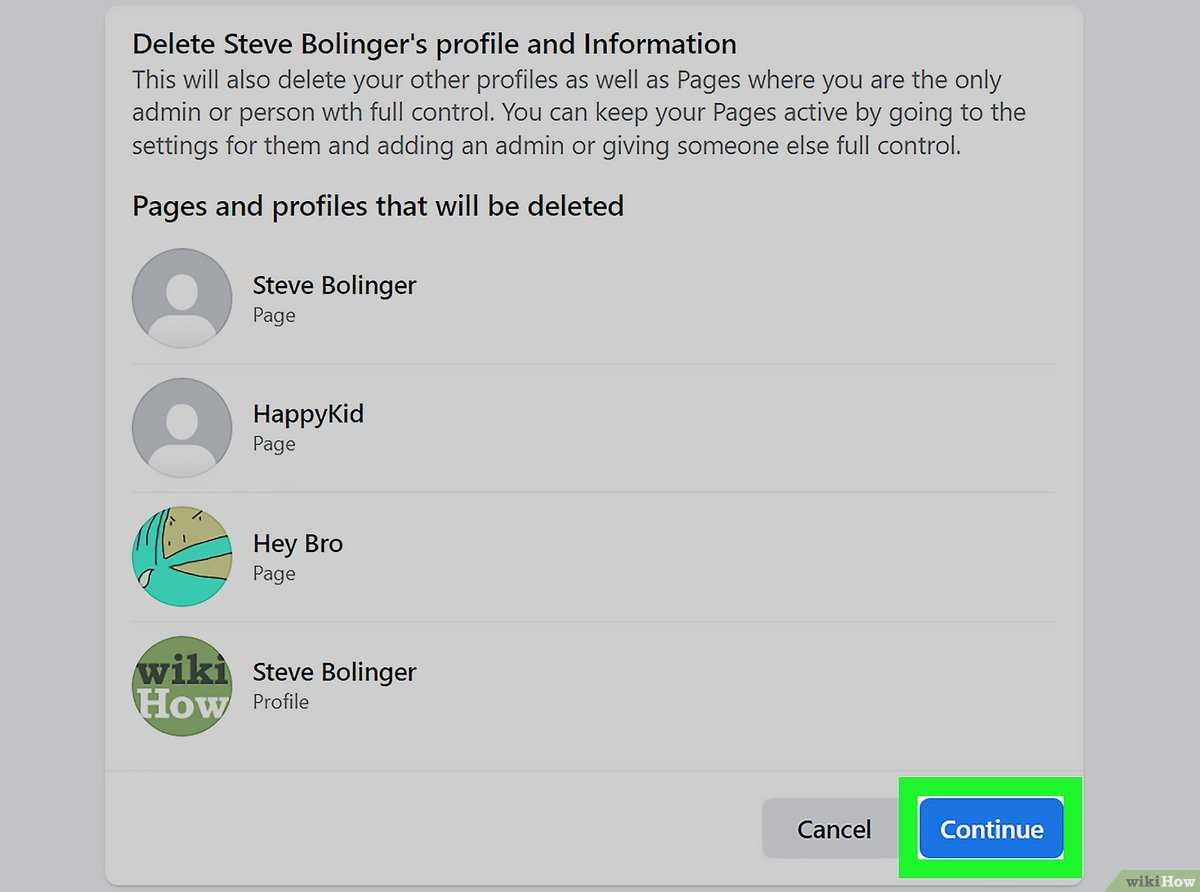
Remember, once you delete your Facebook account, all of your data will be permanently deleted, and you will no longer have access to your account or any associated information. Make sure you have considered all the consequences before proceeding with the deletion.
By following these simple steps, you can delete your Facebook account on your computer and take a step towards regaining control of your time and privacy. Whether you’re looking for a temporary break or a permanent exit from the world of social media, deleting your Facebook account is a powerful decision that can help you reclaim your online presence.
Section 1: Preparing to Delete Your Facebook Account
Before you proceed with deleting your Facebook account, it’s important to make sure you have everything you need and understand the consequences of deleting your account. Follow these steps to prepare:
- Back up your data: Before you delete your Facebook account, it’s a good idea to download a copy of your data. This includes photos, videos, messages, and any other information you want to keep. To do this, go to the “Settings” menu on Facebook, click on “Your Facebook Information,” and then select “Download Your Information.”
- Inform your friends: Let your friends know that you will be deleting your Facebook account. You can do this by posting a status update or sending a message to your close contacts. This way, they can stay in touch with you through other means if they want to.
- Update your linked accounts: If you have used your Facebook account to log in to other websites or apps, make sure to update your login information for those accounts. This will prevent any issues with accessing those accounts after deleting your Facebook account.
- Save important information: If there is any important information or content on your Facebook account that you want to keep, make sure to save it elsewhere. This could include important messages, contact information, or any other data that you might need in the future.
- Consider deactivating instead: If you’re unsure about permanently deleting your Facebook account, you can choose to deactivate it instead. Deactivating your account will temporarily hide your profile and all your information, but you can reactivate it at any time by logging back in.
By following these steps, you can ensure that you are fully prepared to delete your Facebook account and minimize any potential issues or loss of data.
Backing Up Your Facebook Data
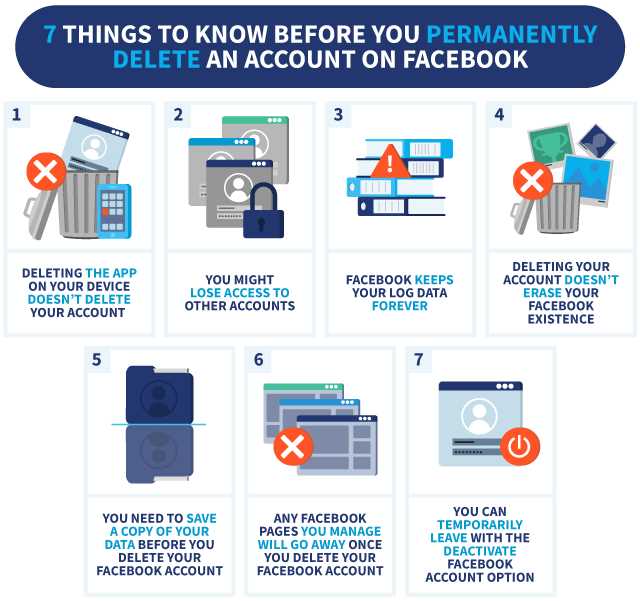
Before you delete your Facebook account, it’s important to back up any data you want to keep. Facebook provides a way for you to download a copy of your information, including photos, posts, messages, and more.
To back up your Facebook data, follow these steps:
- Log in to your Facebook account.
- Click on the downward arrow in the top-right corner of the Facebook page.
- Select “Settings & Privacy” from the dropdown menu.
- In the left-hand column, click on “Your Facebook Information”.
- Click on “Download Your Information”.
- Choose the data you want to include in your backup by selecting the specific categories or date range.
- Click on “Create File”.
- Facebook will then prepare your data and notify you when it’s ready to be downloaded.
- Once you receive the notification, return to the “Download Your Information” page and click on “Download”.
- Save the downloaded file to a secure location on your computer or an external storage device.
By following these steps, you can ensure that you have a copy of your Facebook data before deleting your account. This way, you won’t lose any important information or memories that you may want to access in the future.
Note: It’s important to keep your downloaded Facebook data secure and protected. Make sure to store it in a safe place and consider encrypting the file if you have sensitive information included.
Reviewing Your Facebook Privacy Settings
Before you proceed to delete your Facebook account on your computer, it is important to review your privacy settings to ensure that your personal information is protected. Facebook collects a significant amount of data from its users, and it is crucial to understand how this data is used and shared.
Start by clicking on the downward arrow located at the top right corner of your Facebook account. From the drop-down menu, select “Settings & Privacy” and then click on “Settings”.
In the left-hand menu, click on “Privacy”. Here, you will find various options to control who can see your posts, who can send you friend requests, and who can look you up using your email address or phone number.
Take the time to go through each section and adjust the settings according to your preferences. You can choose to make your posts visible to everyone, friends only, or customize the audience for each individual post. You can also limit who can send you friend requests and who can look you up on Facebook.
Additionally, you can review and manage the information that Facebook uses to show you personalized ads. Click on “Ads” in the left-hand menu to access these settings. Here, you can control the types of ads you see and manage the information that Facebook uses to show you targeted ads.
It is also worth checking the “Apps and Websites” section to see which third-party apps and websites have access to your Facebook account. You can remove any apps or websites that you no longer use or trust.
By reviewing and adjusting your Facebook privacy settings, you can have more control over your personal information and ensure that it is only shared with the people and entities you choose.
Disconnecting Linked Apps and Services
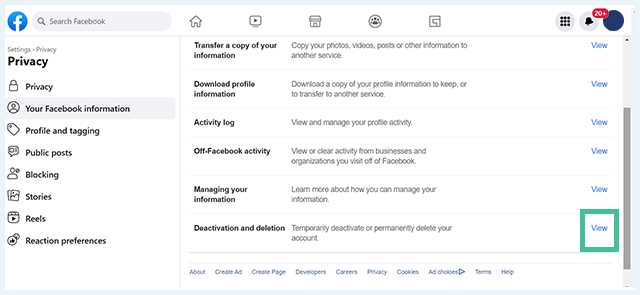
If you have connected your Facebook account to various apps and services on your computer, you will need to disconnect them before deleting your account. This is an important step to ensure that your personal information is not shared or accessed by these apps and services after your Facebook account is deleted.
To disconnect linked apps and services, follow these steps:
- Open your Facebook account on your computer.
- Click on the downward arrow in the top right corner of the Facebook page.
- Select “Settings & Privacy” from the dropdown menu.
- In the left sidebar, click on “Apps and Websites”.
- You will see a list of apps and services that are linked to your Facebook account.
- Review the list and click on the app or service that you want to disconnect.
- Click on the “Remove” button next to the app or service.
- A confirmation pop-up will appear. Click on “Remove” to confirm the disconnection.
- Repeat steps 6-8 for each app or service you want to disconnect.
By disconnecting linked apps and services, you can ensure that your personal information remains private and secure even after deleting your Facebook account.
Section 2: Deactivating Your Facebook Account
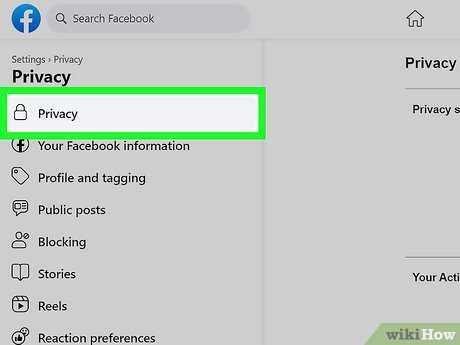
If you no longer wish to use your Facebook account and want to delete it, you can follow these steps to deactivate your account:
1. Open Facebook on your computer and log in to your account.
2. Click on the downward arrow in the top-right corner of the Facebook homepage.
3. From the dropdown menu, select “Settings & Privacy” and then click on “Settings”.
4. In the left-hand column, click on “Your Facebook Information”.
5. Click on “Deactivation and Deletion”.
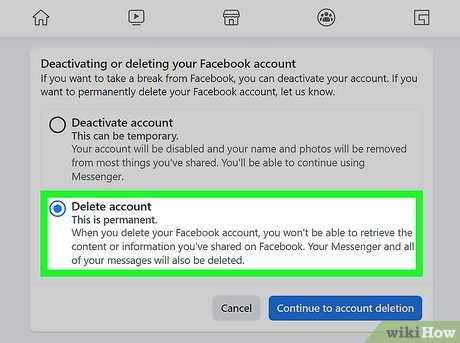
6. Select “Deactivate Account” and then click on “Continue to Account Deactivation”.
7. You will be asked to enter your password to confirm the deactivation.
8. After entering your password, click on “Continue” to proceed with the deactivation.
9. You will be shown some information about what happens when you deactivate your account. Read through it and then click on “Deactivate Now”.
10. Your Facebook account will now be deactivated. You can reactivate it at any time by logging in with your email and password.
Remember, deactivating your account will temporarily hide your profile and remove your name and photos from most things you’ve shared on Facebook. However, some information may still be visible to others, such as messages you’ve sent.
Accessing the Facebook Account Settings
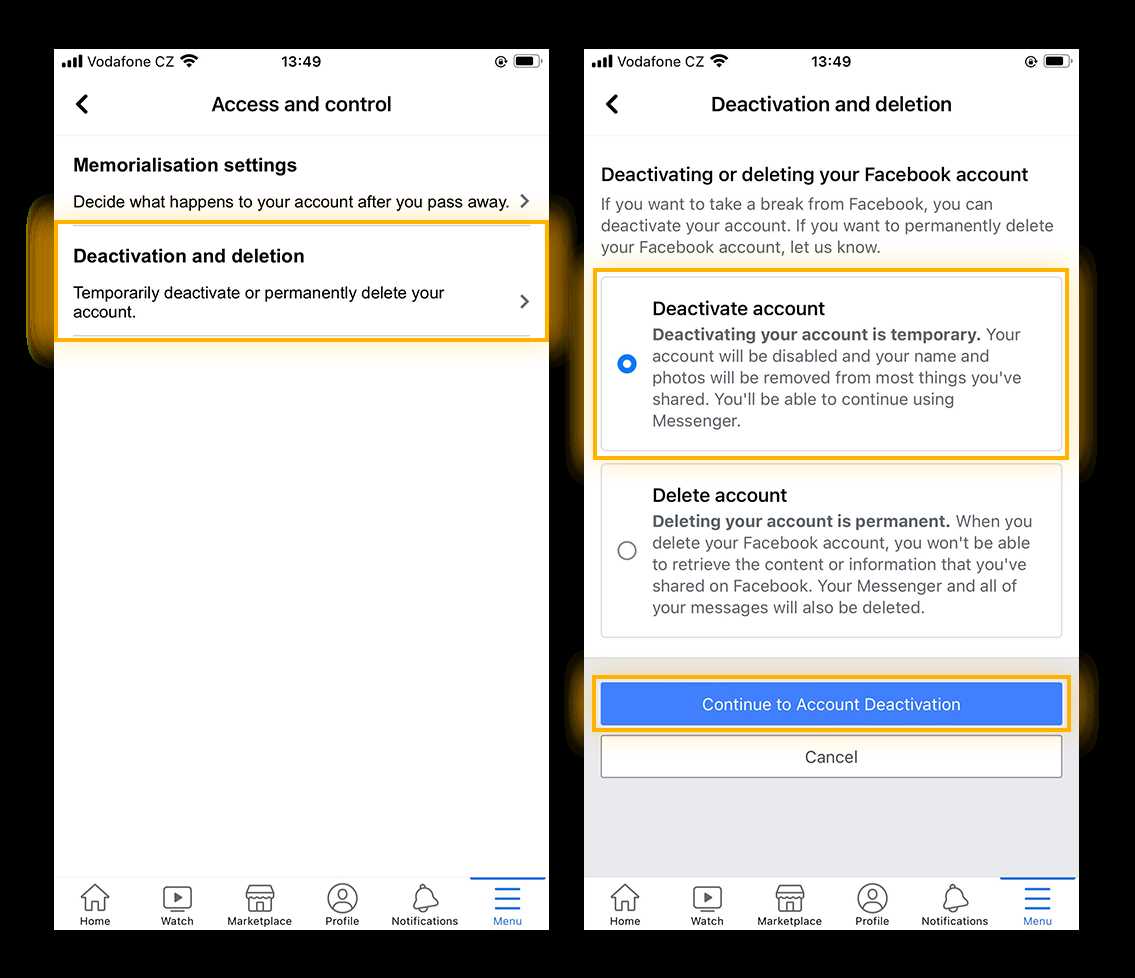
To delete your Facebook account on your computer, you will need to access the account settings. Follow these steps:
- Open your web browser and go to the Facebook website.
- Log in to your Facebook account using your username and password.
- Once you are logged in, click on the downward arrow icon located at the top right corner of the Facebook page.
- In the dropdown menu, click on “Settings & Privacy”.
- From the expanded menu, select “Settings”.
- On the left side of the Settings page, click on “Your Facebook Information”.
- Scroll down to the “Delete Your Account and Information” section.
- Click on “View” next to “Deactivation and Deletion”.
- Choose the option to “Permanently Delete Account” and click on “Continue to Account Deletion”.
- Follow the on-screen instructions to confirm the deletion of your Facebook account.
Once you have completed these steps, your Facebook account will be permanently deleted. Remember to download any important data or information from your account before deleting it, as it cannot be recovered once the deletion process is complete.
Selecting the Deactivate Account Option
Once you have logged into your Facebook account on your computer, you can proceed to deactivate your account. To do this, follow these steps:
| 1. | Click on the downward arrow icon located in the top-right corner of the Facebook page. |
| 2. | A drop-down menu will appear. From the menu, select the “Settings & Privacy” option. |
| 3. | Another menu will appear. From this menu, click on the “Settings” option. |
| 4. | On the left-hand side of the page, you will see a list of options. Click on the “Your Facebook Information” option. |
| 5. | Scroll down until you find the “Deactivation and Deletion” section. |
| 6. | Click on the “View” link next to the “Deactivate Account” option. |
| 7. | A pop-up window will appear, asking you to confirm your decision to deactivate your account. Read the information provided and click on the “Deactivate” button to proceed. |
By following these steps, you will be able to select the deactivate account option on Facebook and begin the process of deleting your account.
Confirming the Deactivation Process
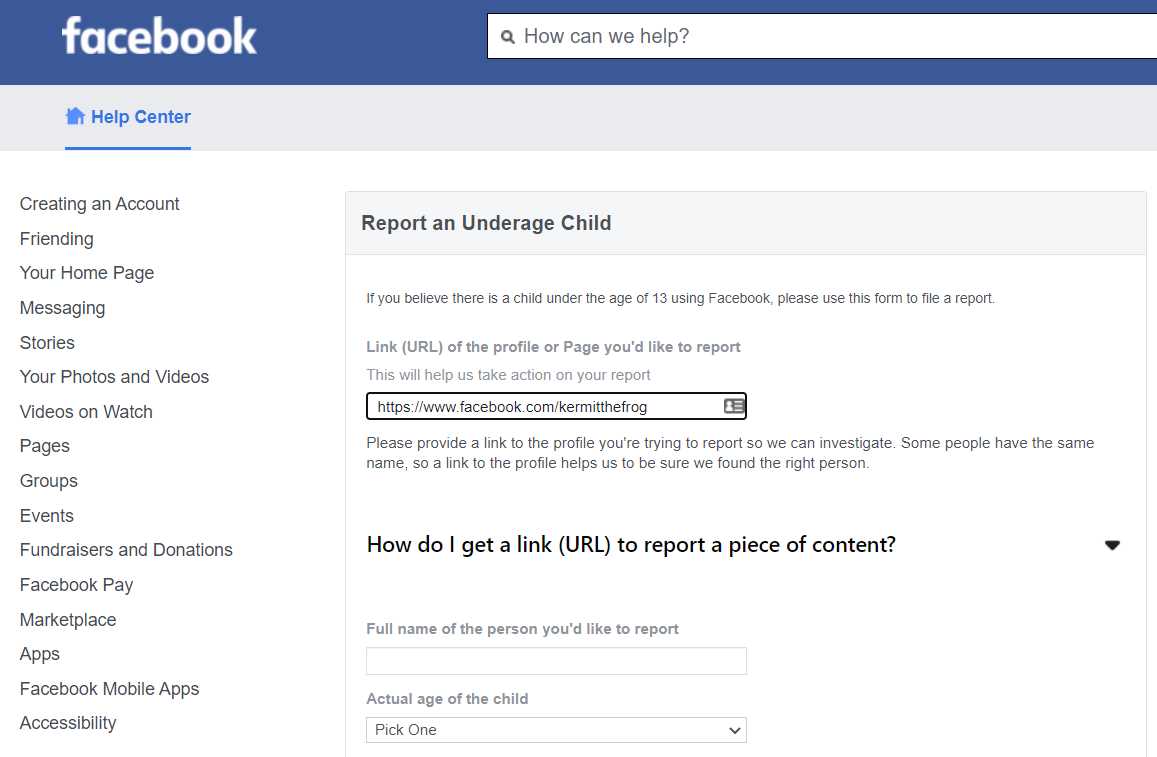
Once you have followed the steps to delete your Facebook account on your computer, it is important to confirm the deactivation process. This ensures that your account is permanently deleted and cannot be accessed again.
To confirm the deactivation process, you will need to enter your password and complete any additional security measures that Facebook may require. This is to ensure that you are the rightful owner of the account and that the deactivation request is legitimate.
After confirming the deactivation process, Facebook will begin the process of permanently deleting your account. This may take some time, so it is important to be patient. During this time, you will no longer have access to your account and all of your data will be permanently deleted.
It is important to note that once your account is deleted, it cannot be recovered. This means that all of your photos, posts, and messages will be lost forever. Therefore, it is important to make sure that you have backed up any important data before deleting your account.
Confirming the deactivation process is the final step in deleting your Facebook account on your computer. Once this step is completed, you can rest assured that your account is permanently deleted and your data is no longer accessible.

