PyCharm is a powerful integrated development environment (IDE) for Python programming. It provides a wide range of features and tools that make coding in Python easier and more efficient. One important aspect of using PyCharm is keeping your Python version up to date. In this step-by-step guide, we will show you how to update Python in PyCharm.
Updating Python in PyCharm is essential to ensure that you have access to the latest features and improvements in the Python language. It also helps to keep your code compatible with newer versions of Python and ensures that you can take advantage of any bug fixes or security patches.
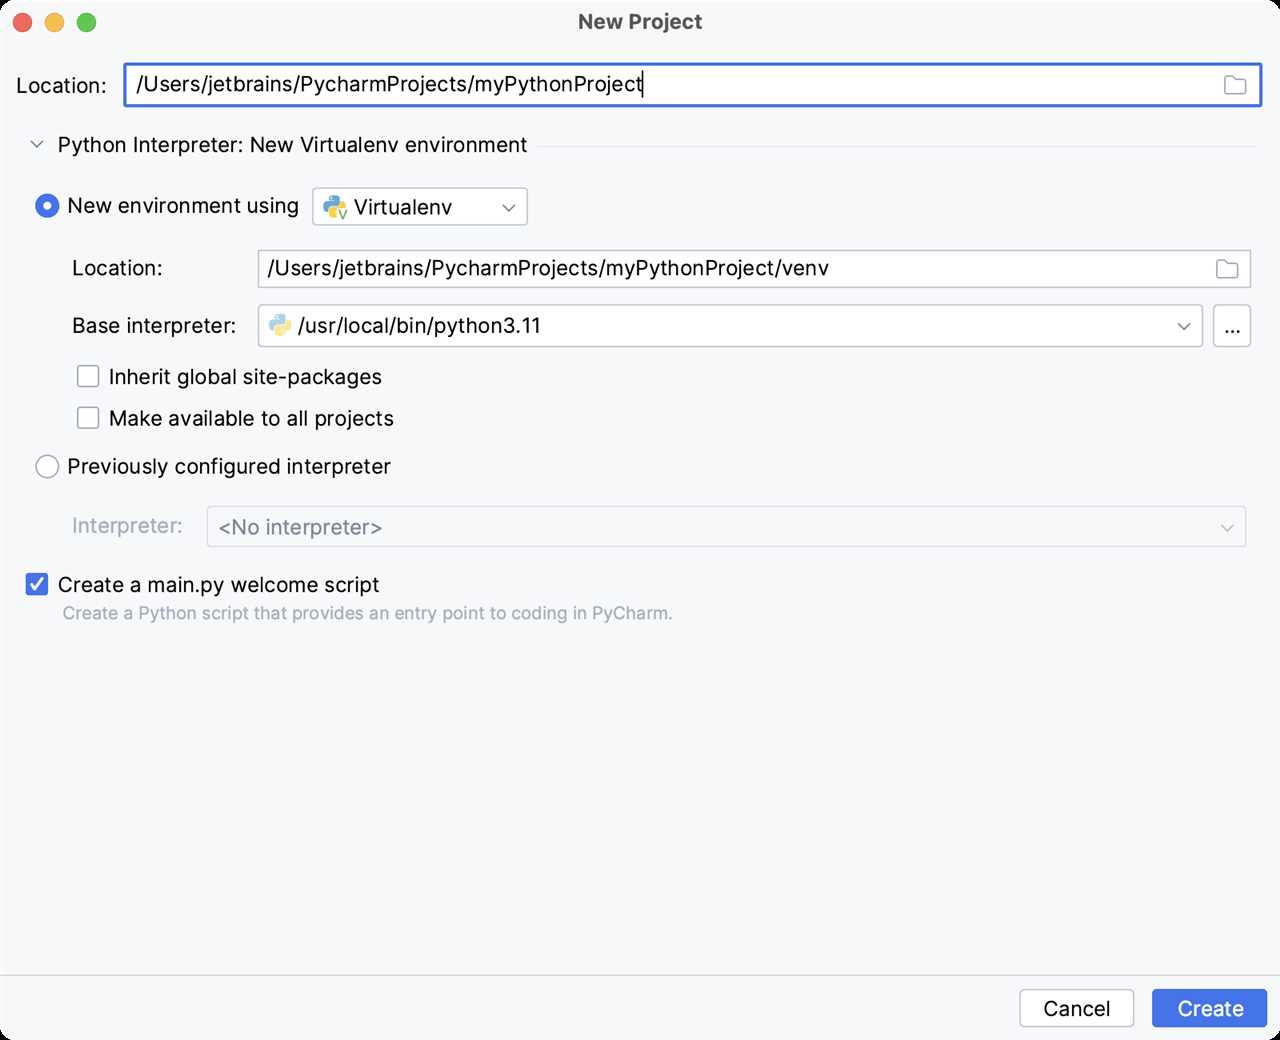
To update Python in PyCharm, you need to follow a few simple steps. First, you need to check the current version of Python that you have installed. You can do this by opening PyCharm and going to the “Settings” menu. From there, navigate to the “Project Interpreter” section and you will see the current version of Python listed.
Once you have determined the current version of Python, you can proceed with updating it. PyCharm provides an easy way to update Python by using its built-in package manager. Simply select the desired Python version from the list of available interpreters and click on the “Install Package” button. PyCharm will then download and install the selected Python version for you.
Section 1: Checking Current Python Version
To update Python in PyCharm, it is important to first check the current version of Python that is being used. This will help ensure that the update process is carried out smoothly and without any issues.
To check the current Python version in PyCharm, follow these steps:
- Open PyCharm on your computer.
- Create a new Python project or open an existing one.
- Click on the “File” menu at the top of the PyCharm window.
- Select “Settings” from the drop-down menu.
- In the left sidebar of the Settings window, click on “Project: [project name]”.
- Click on “Project Interpreter”.
- The current Python version will be displayed under the “Project Interpreter” section.
It is important to note that PyCharm allows you to have multiple Python interpreters installed on your system. Therefore, it is possible to have different Python versions for different projects. Make sure to check the Python version for the specific project you want to update.
Once you have checked the current Python version, you can proceed with the update process to ensure that you are using the latest version of Python in PyCharm.
Open PyCharm and Go to Settings
To update Python in PyCharm, you need to open the PyCharm IDE and go to the settings. Here is a step-by-step guide on how to do it:
Step 1: Launch PyCharm on your computer.
Step 2: Once PyCharm is open, go to the top menu and click on “File”.
Step 3: From the dropdown menu, select “Settings”.
Step 4: In the settings window, navigate to the “Project” section.
Step 5: Under the “Project” section, click on “Project Interpreter”.
Step 6: In the project interpreter window, you will see a list of installed interpreters.
Step 7: Find the Python interpreter that you want to update and select it.
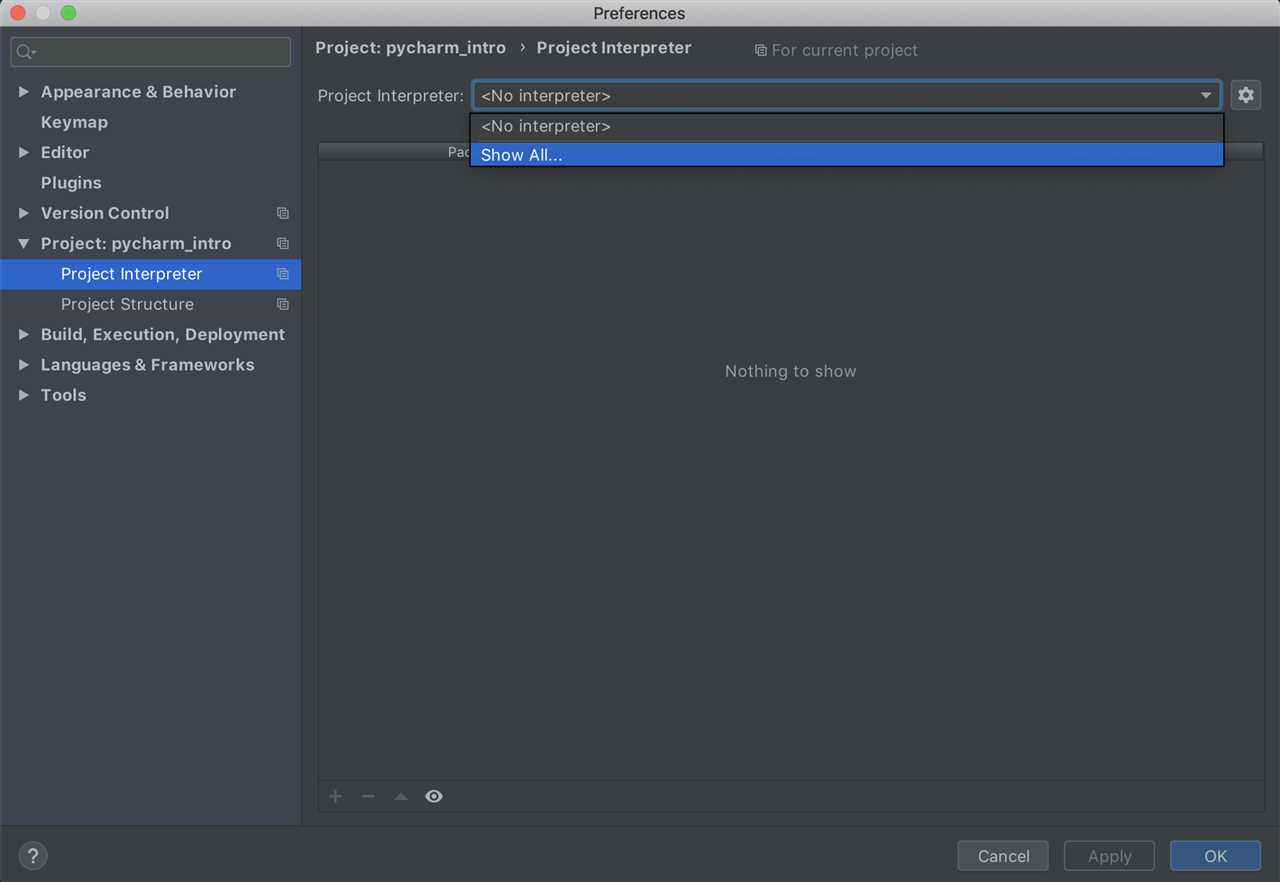
Step 8: Click on the “Settings” icon next to the interpreter dropdown.
Step 9: From the dropdown menu, select “Show All…”.
Step 10: In the “Available Packages” tab, you will see a list of packages that can be updated.
Step 11: Find the Python package that you want to update and select it.
Step 12: Click on the “Update” button to update the selected package.
By following these steps, you will be able to update Python in PyCharm and ensure that you have the latest version of Python installed on your system.
Navigate to “Project Interpreter”
To update Python in PyCharm, you need to navigate to the “Project Interpreter” settings. Here’s how:
1. Open PyCharm and open your project.
2. Click on “File” in the top menu bar.
3. Select “Settings” from the dropdown menu.
4. In the settings window, expand the “Project” section.
5. Click on “Project Interpreter”.
Once you are in the “Project Interpreter” settings, you can update Python to the latest version. This will ensure that you have the most up-to-date features and bug fixes.
Check Current Python Version
To update Python in PyCharm, it is important to first check the current version of Python that is installed on your system. This step is crucial as it will help you determine if an update is necessary and which version you should update to.
To check the current Python version, follow these steps:
- Open PyCharm and go to the “File” menu.
- Select “Settings” from the dropdown menu.
- In the settings window, navigate to “Project: [project name]” and click on it.
- Under the “Project Interpreter” section, you will see the current Python version listed.
- Take note of the version number, as this will be useful when updating Python.
Once you have checked the current Python version, you can proceed with the update process.
Section 2: Updating Python in PyCharm
To update Python in PyCharm, follow these steps:
1. Open PyCharm and go to the “Settings” menu.
2. In the settings menu, click on “Project Interpreter”.
3. In the project interpreter window, you will see a list of installed Python interpreters. Find the interpreter you want to update.
4. Select the interpreter and click on the “Settings” icon.
5. In the settings window, click on the “Show All” button to see all available Python versions.
6. Find the version of Python you want to update to and select it.
7. Click on the “Apply” button to update the Python interpreter in PyCharm.
8. PyCharm will download and install the selected Python version.
9. Once the update is complete, you can start using the updated Python version in your PyCharm projects.
By following these steps, you can easily update Python in PyCharm to the latest version or any specific version you want.
Download and Install the Latest Python Version
If you are using PyCharm and want to update your Python version, here is a step-by-step guide on how to do it:
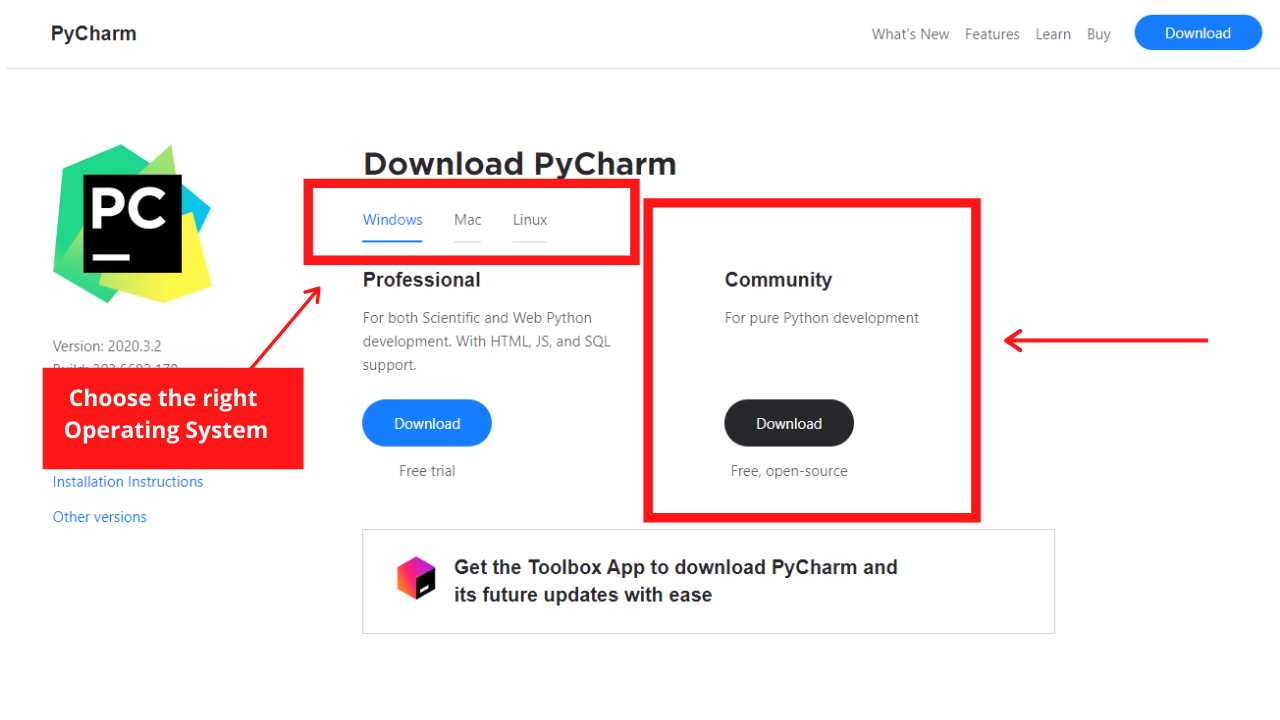
- Go to the official Python website at https://www.python.org/downloads/.
- On the Python downloads page, you will see the latest stable version of Python available for download. Click on the download link for your operating system (Windows, macOS, or Linux).
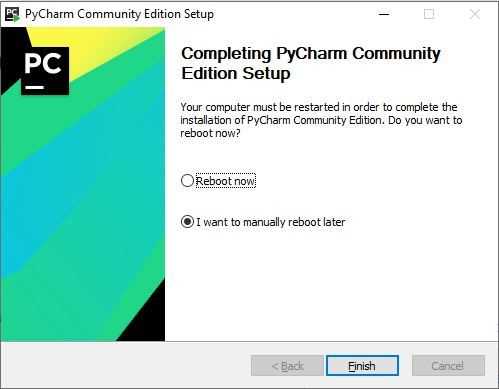
- Once the download is complete, locate the downloaded file and run the installer.
- Follow the installation wizard instructions to install Python on your system. Make sure to select the option to add Python to your system’s PATH.
- After the installation is complete, open PyCharm.
- In PyCharm, go to File > Settings.
- In the Settings window, navigate to the Project Interpreter section.
- Click on the gear icon and select “Add…” to add a new Python interpreter.
- In the Add Python Interpreter window, select “System Interpreter” and choose the newly installed Python version from the dropdown menu.
- Click “OK” to save the changes.
Now you have successfully downloaded and installed the latest version of Python. You can start using the updated Python version in PyCharm for your projects.