Creating an index in Word can be a useful tool for organizing and navigating through a lengthy document. Whether you’re working on a research paper, a thesis, or a book, an index can help your readers quickly find the information they need. In this step-by-step guide, we’ll walk you through the process of creating an index in Word.
Step 1: Marking the Entries
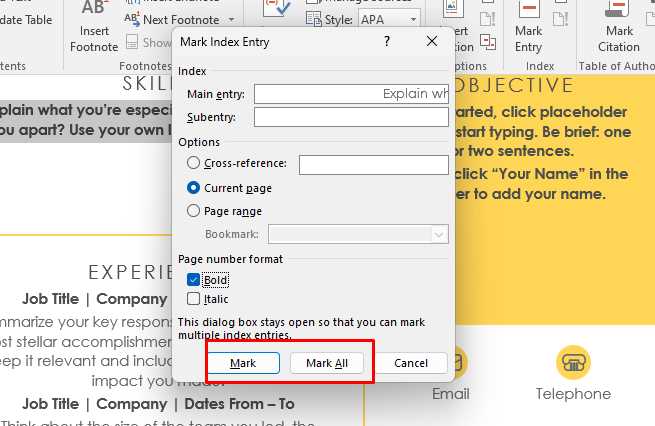
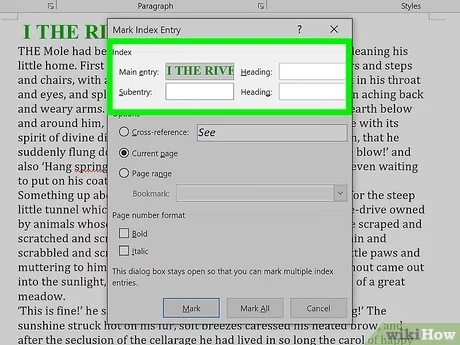
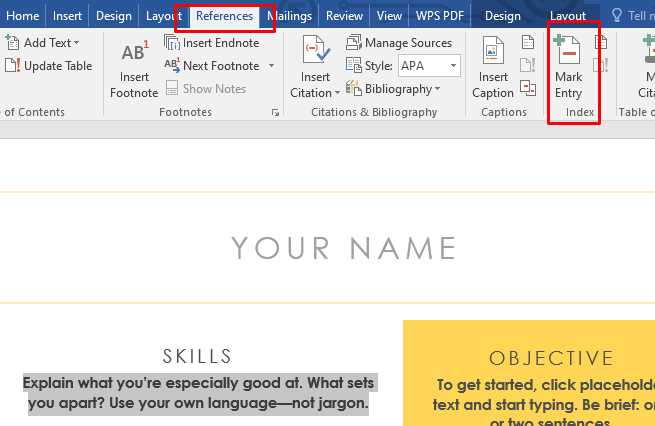
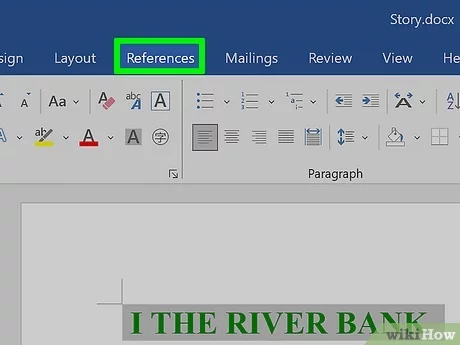
The first step in creating an index is to mark the entries that you want to include. To do this, you’ll need to select the text that you want to include in the index and then navigate to the “References” tab in Word. From there, click on the “Mark Entry” button to open the “Mark Index Entry” dialog box.
Note: You can mark individual words, phrases, or entire paragraphs as index entries.
Step 2: Formatting the Index
Once you’ve marked all the entries, it’s time to format the index. To do this, place your cursor where you want the index to appear in your document and navigate to the “References” tab. From there, click on the “Insert Index” button to open the “Index” dialog box.
Note: In the “Index” dialog box, you can customize the appearance of your index by choosing different formats, styles, and columns.
Step 3: Updating the Index
After you’ve formatted the index, it’s important to keep it up to date as you make changes to your document. To update the index, simply click on it to select it and then navigate to the “References” tab. From there, click on the “Update Index” button to update the index with any new entries or changes you’ve made.
Note: You can also choose to update the entire index or just update the page numbers.
By following these simple steps, you can easily create an index in Word that will help your readers navigate through your document with ease. So, why not give it a try and see how an index can improve the usability of your document?
Section 1: Setting up the Document
Before you can create an index in Word, you need to set up your document properly. Follow these steps to ensure that your document is ready for indexing:
| Step 1: | Open Microsoft Word and create a new document or open an existing document that you want to index. |
| Step 2: | Organize your document into sections, if necessary. Sections can be used to divide your document into different parts, such as chapters or sections, which can make it easier to create an index later on. |
| Step 3: | Apply consistent formatting to your document. This includes using the same font, font size, and paragraph spacing throughout the document. Consistent formatting will help ensure that your index looks professional and is easy to read. |
| Step 4: | Add headings and subheadings to your document. Headings and subheadings will serve as the entries in your index. Make sure to use descriptive and specific headings that accurately reflect the content of each section. |
| Step 5: | Consider using styles to format your headings. Styles can help you apply consistent formatting to your headings and make it easier to create an index later on. Word provides a variety of built-in styles that you can use or customize to suit your needs. |
By following these steps, you will be able to set up your document in Word in preparation for creating an index. Once your document is properly organized and formatted, you can proceed to the next section to learn how to create an index.
Adjusting the Document Layout
When you create an index in Word, it’s important to ensure that your document layout is properly adjusted to accommodate the index. This will help make the index more readable and user-friendly.
Here are a few tips for adjusting the document layout:
1. Margins: Make sure your document has sufficient margins to accommodate the index. You may need to adjust the margins to create more space for the index entries.
2. Font size and style: Choose a font size and style that is easy to read. It’s recommended to use a standard font like Arial or Times New Roman, and a font size of 12 or 14 points.
3. Line spacing: Use appropriate line spacing to make the index entries more legible. You can adjust the line spacing by selecting the text and going to the “Line spacing” option in the “Paragraph” section of the Home tab.
4. Page breaks: Insert page breaks as needed to ensure that the index starts on a new page. This will make it easier for readers to navigate to the index.
5. Headers and footers: Consider adding headers or footers to your document to provide additional information or navigation aids. For example, you can include the document title or page numbers in the header or footer.
By adjusting the document layout, you can create an index that is well-organized and easy to navigate. This will enhance the overall readability and usability of your document.
Adding Headings and Subheadings
When creating an index in Word, it’s important to have clear headings and subheadings to organize your document. Headings and subheadings help readers navigate through your document and find specific information quickly.
To create headings and subheadings in Word, follow these steps:
- Select the text you want to turn into a heading or subheading.
- Go to the “Home” tab in the Word toolbar.
- In the “Styles” section, you’ll see a list of different heading styles. Choose the appropriate heading style for your text.
- Click on the heading style to apply it to your selected text.
- Repeat these steps for each heading or subheading you want to create.
By using headings and subheadings, you can easily create a well-structured document that is easy to navigate. This will make it easier for readers to find the information they need when using the index.
Formatting the Text
When creating an index in Word, it’s important to properly format the text to ensure clarity and readability. Here are some tips for formatting the text in your index:
1. Use consistent formatting: Make sure that the formatting of your index entries is consistent throughout the document. This includes using the same font, font size, and font color for all entries.
2. Use headings and subheadings: To organize your index, consider using headings and subheadings to group related entries together. This can make it easier for readers to navigate and find the information they’re looking for.
3. Use bold or italic text: To make certain entries stand out, you can use bold or italic text. This can help draw attention to important terms or concepts in your index.
4. Include page numbers: In your index, be sure to include the page numbers where each entry can be found. This allows readers to quickly locate the information they need.
5. Use cross-references: If there are related terms or concepts that readers may want to explore further, consider including cross-references in your index. These can help readers navigate between different entries and find additional information.
By following these formatting tips, you can create a well-organized and easy-to-use index in Word. Remember to proofread your index carefully to ensure accuracy and consistency.
Section 2: Creating the Index
Once you have finished writing your document, it’s time to create an index to help your readers easily navigate through the content. An index is a list of keywords or phrases with corresponding page numbers, allowing readers to quickly find specific information.
To create an index in Word, follow these steps:
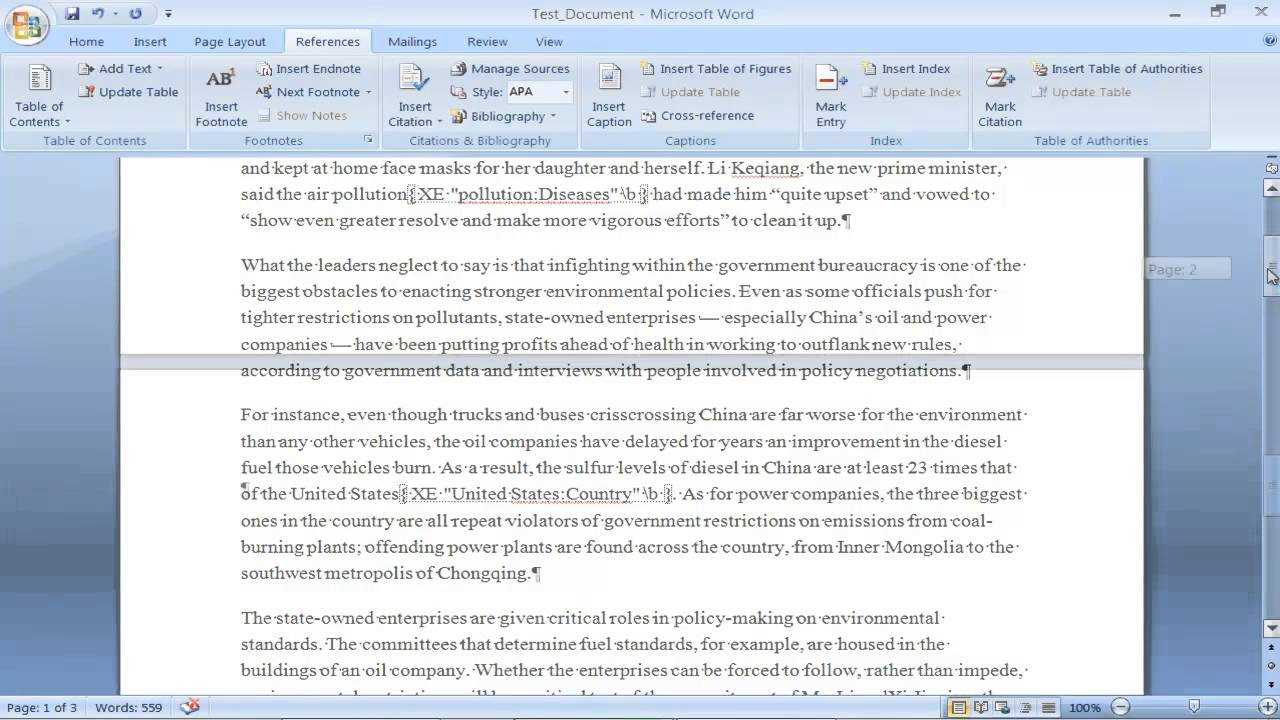
| Step 1: | Select the text you want to include in the index. This can be specific words, phrases, or even entire paragraphs. |
| Step 2: | Go to the “References” tab in the Word toolbar. |
| Step 3: | Click on the “Mark Entry” button in the “Index” group. A dialog box will appear. |
| Step 4: | In the dialog box, specify the main entry for the index. This is the word or phrase that will appear in the index itself. |
| Step 5: | Choose the options for formatting the index entry, such as the page number format and the style of the index entry. |
| Step 6: | Click “Mark” to add the index entry to your document. |
| Step 7: | Repeat steps 1-6 for each word or phrase you want to include in the index. |
| Step 8: | Once you have marked all the entries, place the cursor where you want the index to appear in your document. |
| Step 9: | Go to the “References” tab and click on the “Insert Index” button in the “Index” group. A dialog box will appear. |
| Step 10: | In the dialog box, choose the options for formatting the index, such as the number of columns and the style of the index. |
| Step 11: | Click “OK” to insert the index into your document. |
Once the index is created, you can update it whenever you make changes to the document by selecting the index and clicking on the “Update Index” button in the “Index” group on the “References” tab.
Creating an index in Word is a simple and effective way to organize and navigate through your document. By following these steps, you can easily create an index that will enhance the usability of your document for your readers.