
In today’s digital age, it is essential to know how to efficiently manage and share files. One popular method of file compression is using zip files. Zipping files allows you to reduce their size, making them easier to store and transfer. If you’re wondering how to zip files in Word, you’ve come to the right place. In this step-by-step guide, we will walk you through the process of zipping files in Word.
Step 1: Select the Files
The first step in zipping files in Word is to select the files you want to include in the zip file. You can select multiple files by holding down the Ctrl key while clicking on each file. Alternatively, you can select a range of files by clicking on the first file, holding down the Shift key, and then clicking on the last file in the range.
Step 2: Right-Click and Choose “Send to”
Once you have selected the files, right-click on one of the selected files. A context menu will appear. From the context menu, hover your mouse over the “Send to” option. Another menu will appear, and you should select “Compressed (zipped) folder” from the options. This will create a new zip file with the selected files.
Step 3: Rename the Zip File
By default, the zip file will be named based on the first file you selected. However, you can easily rename the zip file to something more descriptive. Simply right-click on the zip file, select “Rename” from the context menu, and enter the desired name for the zip file.
Step 4: Access the Zip File
Once you have successfully zipped the files in Word, you can access the zip file by double-clicking on it. This will open the zip file, allowing you to view its contents. You can also extract the files from the zip file by dragging and dropping them to a desired location on your computer.
Now that you know how to zip files in Word, you can easily compress and share multiple files with ease. Whether you’re sending files via email or storing them on a cloud storage service, zipping files can help save time and space. Start zipping your files today and experience the benefits of file compression!
Preparing to Zip Files

Before you can zip files in Word, you need to make sure you have all the necessary files and folders ready. Here are the steps to prepare for zipping files:
- Gather all the files you want to zip together. Make sure they are saved in a location that is easily accessible.
- Create a new folder to store the zipped files. This will help keep everything organized.
- Give the new folder a descriptive name that reflects the content of the files you are zipping.
- Open Microsoft Word and navigate to the location where you want to insert the zipped files.
- Click on the “Insert” tab in the Word toolbar.
- Select “Object” from the drop-down menu.
- In the Object dialog box, choose the “Create from File” tab.
- Click on the “Browse” button and navigate to the location of the new folder you created.
- Select the folder and click on the “Insert” button.
- Check the box that says “Display as icon” to ensure the zipped files are displayed as an icon in Word.
- Click on the “OK” button to insert the zipped files into your Word document.
Now that you have prepared the files and inserted them into Word, you are ready to zip them together using Word’s built-in compression feature.
Gather the Files You Want to Zip
Before you can zip files in Word, you need to gather all the files you want to include in the zip folder. This can be done by locating the files on your computer or network drive.
Make sure you have the correct files selected and ready to be zipped. You can select multiple files by holding down the Ctrl key while clicking on each file. Alternatively, you can select a range of files by clicking on the first file, holding down the Shift key, and then clicking on the last file in the range.
Once you have gathered all the files you want to zip, you can proceed to the next step to learn how to zip them using Word.
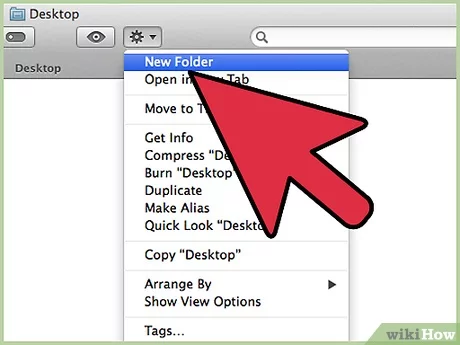
Create a New Folder for the Zipped Files

Before you can zip files in Word, you need to create a new folder to store the zipped files. This will help keep your files organized and make it easier to find them later.
To create a new folder, follow these steps:
- Open the File Explorer on your computer.
- Navigate to the location where you want to create the new folder.
- Right-click on an empty space in the File Explorer window.
- Select “New” from the context menu.
- Choose “Folder” from the submenu.
- A new folder will appear in the File Explorer window, with the default name “New Folder”.
- Double-click on the folder to rename it.
- Type a descriptive name for the folder, such as “Zipped Files”.
- Press Enter to save the new folder name.
Now that you have created a new folder for the zipped files, you can easily locate and manage them when you zip files in Word. Remember to save your zipped files in this folder to keep everything organized.
Organize the Files in the New Folder
Once you have learned how to zip files in Word, it’s important to organize the files in the new folder to ensure easy access and efficient file management. Here are some steps to help you organize your files:
- Start by creating a new folder on your computer or cloud storage platform where you want to store the zipped files.
- Give the folder a descriptive name that reflects the content or purpose of the files.
- Open the folder and move all the files you want to zip into this new folder.
- If necessary, create subfolders within the main folder to further categorize and organize the files.
- Consider renaming the files within the folder to make them easier to identify and locate.
- Arrange the files in a logical order, such as alphabetical or chronological, to facilitate quick access.
- Remove any duplicate or unnecessary files to keep the folder clean and clutter-free.
- Regularly review and update the folder to ensure that it remains organized and up to date.
By following these steps, you can effectively organize your files in the new folder and make it easier to manage and locate them when needed. This will save you time and effort in the long run, especially when working with a large number of files.
Zipping Files in Word
Word is a powerful tool that allows you to create and edit documents, but did you know that you can also zip files in Word? Zipping files is a great way to compress multiple files into a single, smaller file, making it easier to send or store. In this guide, we will show you how to zip files in Word step-by-step.
Step 1: Select the files you want to zip
To zip files in Word, you first need to select the files you want to include in the zip file. You can do this by holding down the Ctrl key and clicking on each file you want to select. Alternatively, you can click and drag to select multiple files at once.
Step 2: Right-click and choose “Send to” option
Once you have selected the files, right-click on one of the selected files. In the context menu that appears, hover over the “Send to” option. This will open a sub-menu with additional options.
Step 3: Choose “Compressed (zipped) folder”
In the “Send to” sub-menu, click on the “Compressed (zipped) folder” option. This will create a new zip file with the selected files. The zip file will be named based on the first selected file, but you can rename it if desired.
Step 4: Access the zip file
Once the zip file is created, you can access it by navigating to the location where you saved it. The zip file will have a .zip extension and can be opened using a file compression program.
Step 5: Extract files from the zip file
If you need to extract the files from the zip file, simply right-click on the zip file and choose the “Extract All” option. This will extract the files to a new folder in the same location as the zip file.
That’s it! Now you know how to zip files in Word. Zipping files can help you save space and make it easier to share or store multiple files. Give it a try next time you need to send or organize your files!
Open Microsoft Word

To zip files in Microsoft Word, you will need to have the program open on your computer. If you don’t already have Microsoft Word installed, you can download it from the official Microsoft website or use an alternative word processing program that supports zipping files.
Once you have Microsoft Word open, you can begin the process of zipping your files. This can be done by following a few simple steps within the program.
- First, locate the files that you want to zip. These can be Word documents, images, or any other type of file that you want to compress.
- Next, select the files that you want to zip. You can do this by clicking and dragging your mouse over the files, or by holding down the Ctrl key and clicking on each file individually.
- After selecting the files, right-click on one of the selected files and choose the “Send to” option from the context menu. Then, select “Compressed (zipped) folder” from the submenu.
- A new compressed folder will be created in the same location as the original files. You can rename this folder if desired.
- To add more files to the compressed folder, simply drag and drop them into the folder or repeat the previous steps to create a new compressed folder.
By following these steps, you can easily zip files in Microsoft Word and reduce their size for easier storage or sharing.
Click on the “File” Tab
To zip files in Word, you will need to start by clicking on the “File” tab at the top left corner of the Word application. This tab is located next to the “Home” tab and is represented by a small icon that looks like a folder.
Once you click on the “File” tab, a drop-down menu will appear. This menu contains various options and settings related to your Word document. You will need to navigate through this menu to find the option for zipping files.
Depending on the version of Word you are using, the option for zipping files may be located in different places within the “File” tab menu. Look for options such as “Save As,” “Export,” or “Compress Pictures.” These options may vary, so it’s important to carefully explore the menu to find the specific option for zipping files.
Once you locate the option for zipping files, click on it to proceed. This will open a new window or dialog box where you can select the files you want to zip and specify any additional settings or preferences.
After selecting the files and configuring the settings, click on the “Zip” or “OK” button to initiate the zipping process. Word will then compress the selected files into a single zip file, which you can save to your desired location on your computer.
By following these steps and clicking on the “File” tab in Word, you can easily zip files and reduce their size for easier storage or sharing.


