Welcome to our step-by-step guide on how to install Windows 11 on a new PC using a USB drive. Windows 11 is the latest operating system from Microsoft, offering a sleek and modern user interface along with enhanced performance and security features. Whether you’re building a new PC or upgrading your existing system, this guide will walk you through the installation process, ensuring a smooth and hassle-free experience.
Before we begin, make sure you have a USB drive with at least 8GB of storage capacity. This will be used to create a bootable USB installation media for Windows 11. Additionally, ensure that your new PC meets the minimum system requirements for Windows 11, including a compatible processor, sufficient RAM, and available storage space.
To start the installation process, insert the USB drive into a USB port on your new PC. Power on the PC and access the BIOS settings by pressing the designated key during the startup process (usually Del or F2). In the BIOS settings, navigate to the Boot tab and set the USB drive as the primary boot device. Save the changes and exit the BIOS settings.
Once your PC restarts, it will boot from the USB drive and display the Windows 11 installation screen. Follow the on-screen instructions to select your language, time zone, and keyboard layout. Next, click on the “Install now” button to begin the installation process. You may be prompted to enter your product key, so make sure you have it handy.
During the installation, you’ll be asked to choose the installation type. Select the “Custom: Install Windows only (advanced)” option to perform a clean installation of Windows 11. This will erase all data on the selected drive, so make sure to back up any important files beforehand. Choose the drive where you want to install Windows 11 and click on the “Next” button to proceed.
Windows 11 will now be installed on your new PC. The installation process may take some time, so be patient. Once the installation is complete, your PC will restart, and you’ll be greeted with the Windows 11 setup screen. Follow the on-screen instructions to personalize your PC, create user accounts, and set up your preferences.
Congratulations! You have successfully installed Windows 11 on your new PC using a USB drive. Enjoy the new features and improved performance that Windows 11 has to offer. If you encounter any issues during the installation process, refer to the official Microsoft documentation or seek assistance from the Windows community.
Preparing the USB Drive
Before you can install Windows 11 on your new PC, you’ll need to prepare a USB drive. This USB drive will serve as the installation media for the operating system.
Here are the steps to prepare the USB drive:
- Format the USB drive: Connect the USB drive to your PC and make sure there are no important files on it. Open the File Explorer and right-click on the USB drive. Select the “Format” option and choose the file system as “FAT32”. Click on “Start” to begin the formatting process.
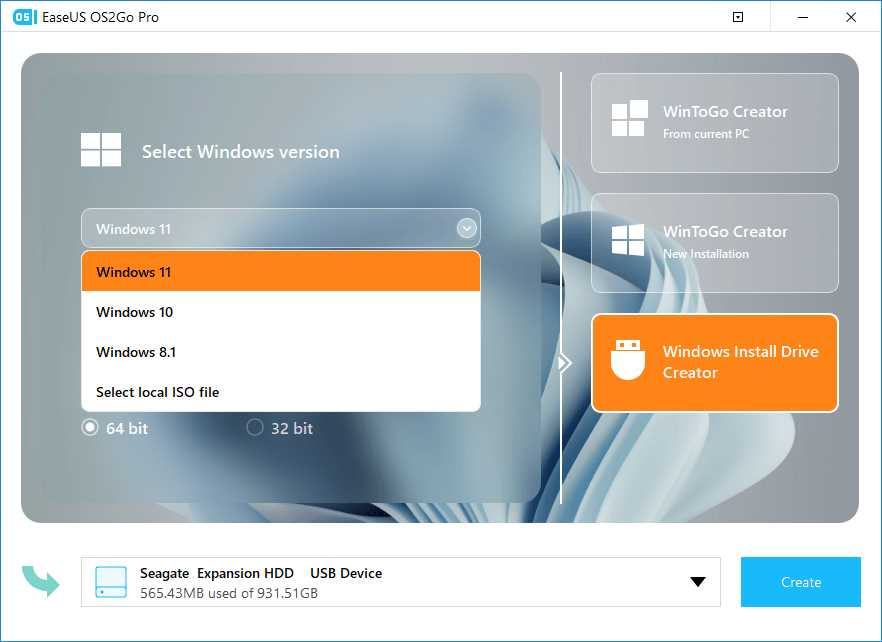
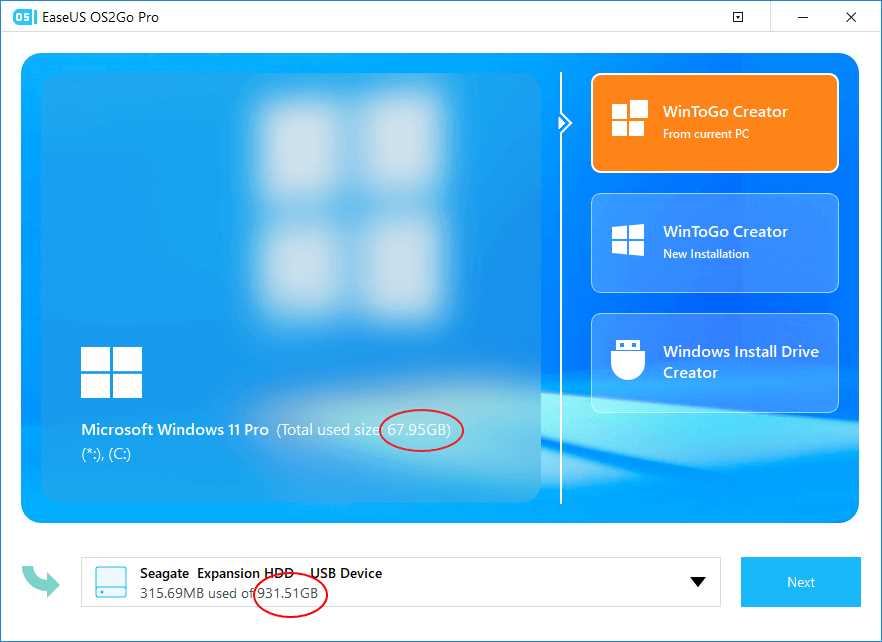
- Create a bootable USB drive: Once the USB drive is formatted, you’ll need to make it bootable. Download the Windows 11 ISO file from the official Microsoft website. Then, download and install a tool like Rufus. Open Rufus and select the USB drive as the target device. Choose the Windows 11 ISO file as the source and click on “Start” to create the bootable USB drive.
- Set the boot order: Restart your PC and enter the BIOS settings. Look for the “Boot” or “Boot Order” section and set the USB drive as the first boot device. Save the changes and exit the BIOS settings.
Once you’ve prepared the USB drive, you’re ready to install Windows 11 on your new PC. Make sure to back up any important files before proceeding with the installation process.
Format the USB Drive

Before you can install Windows 11 on your new PC using a USB drive, you need to format the USB drive to ensure it is compatible with the installation process. Here are the steps to format the USB drive:
- Insert the USB drive into a USB port on your computer.
- Open File Explorer and locate the USB drive.
- Right-click on the USB drive and select “Format” from the context menu.
- In the Format window, choose the file system as “FAT32” or “NTFS”.
- Ensure that the “Quick Format” option is selected.
- Click on the “Start” button to begin the formatting process.
- Wait for the formatting process to complete.
- Once the USB drive is formatted, you can proceed with the installation of Windows 11.
Formatting the USB drive will erase all the data on it, so make sure to backup any important files before proceeding. Additionally, ensure that the USB drive has enough storage capacity to hold the Windows 11 installation files.
Create a Bootable USB Drive

To install Windows 11 on a new PC, you will need a bootable USB drive. Follow these steps to create one:
- Insert a USB drive with at least 8GB of storage into your PC.
- Open the Windows 11 installation media creation tool.
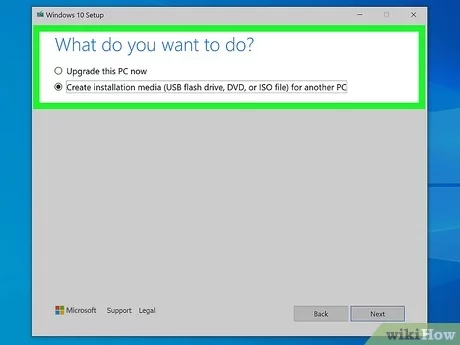
- Select “Create installation media (USB flash drive, DVD, or ISO file) for another PC” and click “Next”.
- Choose the language, edition, and architecture (32-bit or 64-bit) of Windows 11 that you want to install.
- Select “USB flash drive” as the media to use.
- Choose the USB drive you inserted earlier and click “Next”.
- Wait for the tool to download and create the bootable USB drive. This may take some time.
- Once the process is complete, you will have a bootable USB drive with Windows 11.
Now you can use this USB drive to install Windows 11 on your new PC. Make sure to set your PC to boot from the USB drive in the BIOS settings before starting the installation process.
Copy Windows 11 Installation Files to the USB Drive

Before you can install Windows 11 on your new PC, you’ll need to copy the installation files to a USB drive. This will allow you to easily boot from the USB drive and start the installation process.
To begin, you’ll need a USB drive with enough storage space to hold the Windows 11 installation files. Make sure the USB drive is formatted correctly and is empty, as the installation files will take up a significant amount of space.
Next, you’ll need to download the Windows 11 installation files from the official Microsoft website. These files will come in the form of an ISO image, which you can easily mount and extract using a program like WinRAR or 7-Zip.
Once you have the ISO image extracted, simply copy all of the files and folders to the root directory of your USB drive. This can be done by selecting all of the files and folders, right-clicking, and choosing “Copy”. Then, navigate to your USB drive, right-click, and choose “Paste”.
It’s important to note that simply copying the ISO image file to the USB drive will not work. You need to extract the files from the ISO image and copy them to the USB drive.
After the files have finished copying, you can safely eject the USB drive from your computer. Your USB drive is now ready to be used as a bootable device for installing Windows 11 on your new PC.
Tip: It’s always a good idea to double-check that all of the files have been successfully copied to the USB drive before proceeding with the installation. This will help ensure a smooth and error-free installation process.
Installing Windows 11

Installing Windows 11 on a new PC is a straightforward process that can be done using a USB drive. By following these step-by-step instructions, you can have Windows 11 up and running on your new computer in no time.
To begin, you will need a USB drive with at least 8GB of storage capacity. Make sure to back up any important data on the USB drive, as it will be formatted during the installation process.
Here are the steps to install Windows 11 from a USB drive:
| Step 1 | Insert the USB drive into an available USB port on your new PC. |
| Step 2 | Power on your PC and press the key to access the boot menu. This key is usually displayed on the startup screen and may vary depending on your PC manufacturer. |
| Step 3 | In the boot menu, select the USB drive as the boot device. This will allow your PC to boot from the USB drive and start the Windows 11 installation process. |
| Step 4 | Follow the on-screen instructions to complete the Windows 11 installation. You will be prompted to select your language, region, and keyboard layout. |
| Step 5 | When prompted, enter your product key to activate Windows 11. If you don’t have a product key, you can skip this step and activate Windows later. |
| Step 6 | Choose the type of installation you want to perform. You can either perform a clean installation, which will erase all data on your PC, or choose to keep your files and apps. |
| Step 7 | Wait for the installation process to complete. This may take some time, so be patient. |
| Step 8 | Once the installation is finished, your PC will restart and Windows 11 will be ready to use. |
That’s it! You have successfully installed Windows 11 on your new PC using a USB drive. Enjoy the new features and improved performance of Windows 11!
Insert the USB Drive into the New PC
Before you can install Windows 11 on your new PC, you’ll need to insert the USB drive that contains the installation files. Make sure your PC is turned off before proceeding.
Locate an available USB port on your new PC and insert the USB drive. It’s important to use a USB drive that has enough storage capacity to hold the Windows 11 installation files. A minimum of 8GB is recommended, but it’s always better to use a larger capacity drive to ensure you have enough space.
Once the USB drive is inserted, you can proceed to power on your PC. Make sure to set the USB drive as the primary boot device in the BIOS settings. This will ensure that your PC boots from the USB drive and starts the Windows 11 installation process.
After setting the USB drive as the primary boot device, save the changes and exit the BIOS settings. Your PC will then restart and begin the Windows 11 installation process from the USB drive.
Note: If your new PC doesn’t automatically boot from the USB drive, you may need to manually select the USB drive as the boot device during startup. This can usually be done by pressing a key (such as F12 or Esc) to access the boot menu.
Once the Windows 11 installation process begins, follow the on-screen prompts to complete the installation. Make sure to select the appropriate options for language, time zone, and keyboard layout.
Once the installation is complete, your new PC will restart and you’ll be greeted with the Windows 11 setup screen. From here, you can customize your settings and get started with your new Windows 11 installation.
Remember to remove the USB drive from your PC after the installation is complete to avoid any issues during future boot-ups.

