Are you tired of the bloated size of the standard Windows 10 operating system? Do you want a more streamlined and efficient version that takes up less space on your computer? Look no further than the tiny Windows 10 ISO!
Installing the tiny version of Windows 10 is a breeze. Simply download the compact ISO file and follow the step-by-step instructions to install it on your device. With its reduced size, this version of Windows 10 is perfect for those who have limited storage space or prefer a faster and more lightweight operating system.
Don’t let the small size fool you – the tiny Windows 10 ISO still packs a punch. It includes all the essential features and functionalities of the standard version, but with a smaller footprint. Whether you’re a casual user or a power user, this compact version of Windows 10 will meet your needs without sacrificing performance.
So why wait? Download the tiny Windows 10 ISO now and experience the benefits of a smaller, more efficient operating system. Say goodbye to unnecessary bloat and hello to a streamlined computing experience. Upgrade to the tiny version of Windows 10 today!
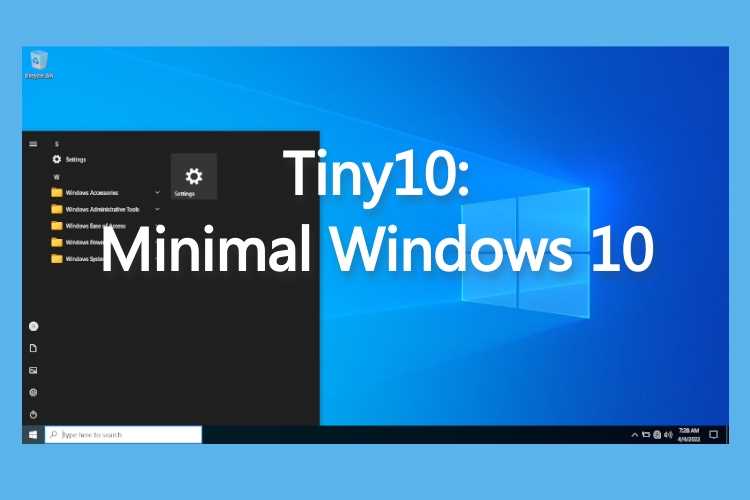
What is Tiny Windows 10 ISO?
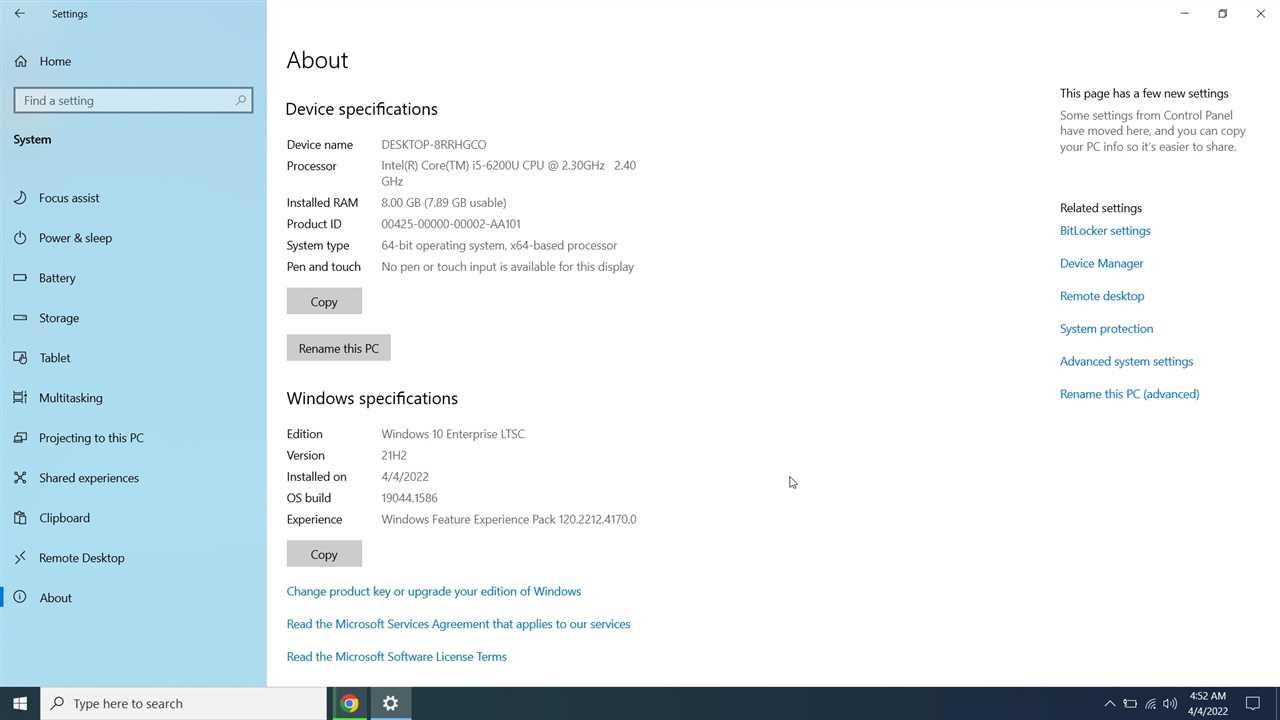
Tiny Windows 10 ISO is a compact version of the Windows 10 operating system. It is a smaller and more streamlined version of the regular Windows 10 ISO, designed to take up less space on your computer’s hard drive and require fewer system resources to run.
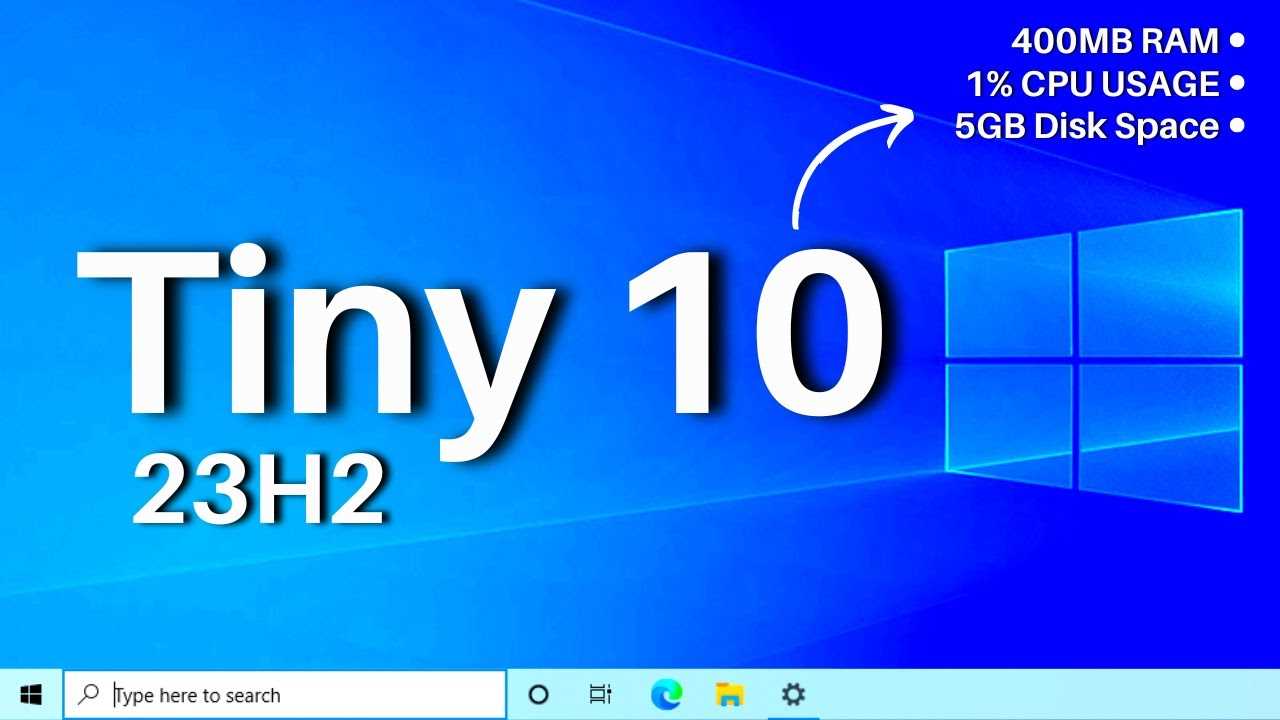
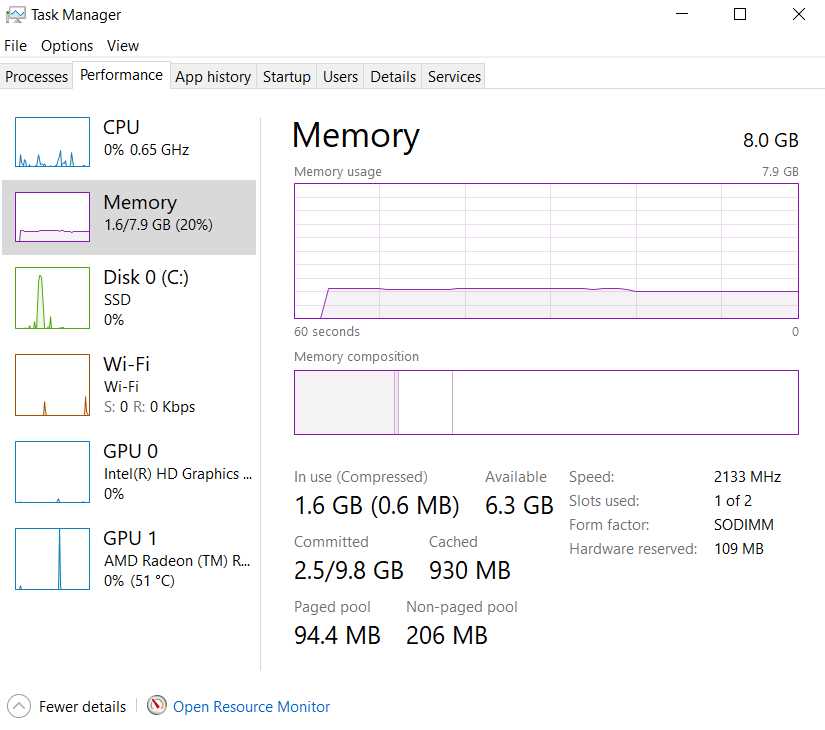
The main advantage of using a Tiny Windows 10 ISO is its smaller size. The regular Windows 10 ISO can be quite large, often exceeding several gigabytes in size. This can be a problem if you have limited storage space on your computer or if you need to install Windows 10 on a device with limited resources.
By using a Tiny Windows 10 ISO, you can significantly reduce the amount of disk space required to install the operating system. This can be especially useful if you are using a small solid-state drive (SSD) or if you are installing Windows 10 on a device with limited storage capacity.
Despite its smaller size, the Tiny Windows 10 ISO still includes all the essential features and functionality of the regular Windows 10 version. You will still have access to the Windows Store, Microsoft Edge browser, and all the other built-in apps and features that come with Windows 10.
Overall, the Tiny Windows 10 ISO is a great option for those who want to install Windows 10 on a device with limited storage space or resources. It offers a smaller footprint without sacrificing any of the essential features and functionality of the full version of Windows 10.
Benefits of Using Tiny Windows 10 ISO
Downloading and installing the tiny version of Windows 10 ISO offers several benefits. Here are some of the advantages:
| 1. Reduced Size | The tiny Windows 10 ISO version has a significantly smaller size compared to the standard version. This means that you can save valuable disk space on your computer. |
| 2. Faster Download | Due to its smaller size, downloading the tiny Windows 10 ISO is much faster compared to the standard version. This is especially beneficial for users with slow internet connections. |
| 3. Efficient Installation | The installation process of the tiny Windows 10 ISO is quicker and more efficient. It requires less time and resources, allowing you to start using your Windows 10 system sooner. |
| 4. Customizable | The tiny Windows 10 ISO version allows for greater customization. You can choose which features and components to include or exclude during the installation process, tailoring the system to your specific needs. |
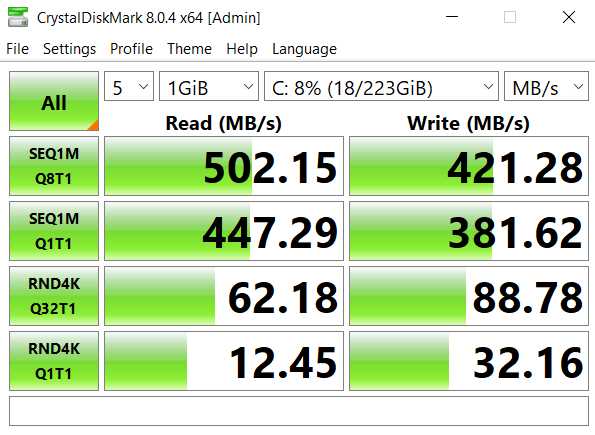
| 5. Improved Performance | With a smaller installation size, the tiny Windows 10 ISO can improve the overall performance of your system. It requires fewer system resources, resulting in faster boot times and smoother operation. |
Overall, using the tiny Windows 10 ISO version provides a more streamlined and efficient experience, offering benefits such as reduced size, faster download, efficient installation, customization options, and improved performance.
How to Obtain Tiny Windows 10 ISO
If you are looking for a compact version of the Windows 10 operating system to install on your computer, you may be interested in obtaining a tiny Windows 10 ISO. This tiny version of Windows 10 is specifically designed to have a smaller size compared to the standard version, making it ideal for devices with limited storage space or for those who prefer a lightweight operating system.
To obtain a tiny Windows 10 ISO, you can follow these steps:
- Visit the official Microsoft website.
- Navigate to the Windows 10 download page.
- Choose the version of Windows 10 you want to download. Make sure to select the “tiny” version if available.
- Click on the download button to start the download process.
- Once the download is complete, you will have the tiny Windows 10 ISO file on your computer.
It is important to note that the availability of a tiny Windows 10 ISO may vary depending on the version and edition of Windows 10. Some versions may not have a specific “tiny” version available, but you can still customize the installation to reduce the size of the operating system.
When installing the tiny Windows 10 ISO, you can choose to remove unnecessary features, apps, and components to further reduce the size of the installation. This can be done during the installation process or by using tools and scripts specifically designed for customizing Windows 10 installations.
By obtaining a tiny Windows 10 ISO, you can enjoy the benefits of a smaller operating system size without compromising on the essential features and functionality of Windows 10. Whether you have a device with limited storage space or simply prefer a lightweight operating system, the tiny Windows 10 ISO can be a great option for you.
Preparing for Installation
Before you can install the compact version of Windows 10, you need to make sure you have the necessary files and tools. Here are the steps to prepare for the installation:
- Check your current Windows version: Make sure you are running a compatible version of Windows to install the compact version. The compact installation is only available for certain versions of Windows 10.
- Download the compact ISO file: Visit the official Microsoft website or trusted sources to download the compact ISO file. This file contains the necessary files to install the compact version of Windows 10.
- Check the size of the ISO file: Before downloading, check the size of the ISO file to ensure you have enough storage space on your computer. The compact ISO file is smaller in size compared to the full version of Windows 10.
- Prepare a USB drive or DVD: Once you have downloaded the compact ISO file, you will need to create a bootable USB drive or burn it to a DVD. This will be used to install the compact version of Windows 10 on your computer.
- Backup your data: Before proceeding with the installation, it is recommended to backup all your important files and data. This will ensure that you don’t lose any data during the installation process.
By following these steps, you will be well-prepared for the installation of the compact version of Windows 10. Make sure to double-check all the requirements and have everything ready before proceeding with the installation.
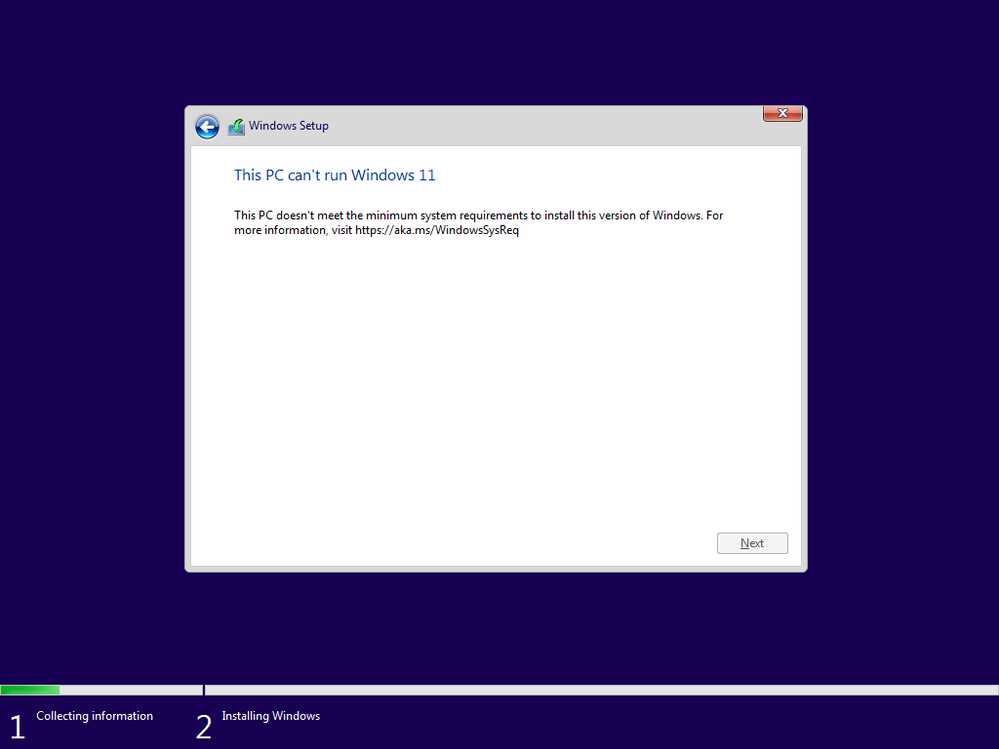
System Requirements for Tiny Windows 10 ISO
To download and install the tiny version of Windows 10 ISO, your system must meet the following requirements:
Operating System: Windows 10
ISO Version: Tiny Windows 10 ISO
Download Size: Compact size
Installation: Custom installation process
The tiny Windows 10 ISO is specifically designed for users who want a smaller and more streamlined version of the operating system. It is ideal for devices with limited storage space or for those who prefer a minimalist setup.
By using the tiny Windows 10 ISO, you can enjoy the essential features and functionalities of Windows 10 while minimizing the disk space usage. This version removes unnecessary components and applications, resulting in a smaller installation size.
Before downloading and installing the tiny Windows 10 ISO, make sure your system meets the requirements mentioned above. This will ensure a smooth and efficient installation process.
Once you have the tiny Windows 10 ISO downloaded, you can proceed with the installation process. Follow the instructions provided by the ISO creator to install the customized version of Windows 10 on your device.
Remember, the tiny Windows 10 ISO may have certain limitations compared to the full version of Windows 10. However, it offers a lightweight and efficient solution for users who prioritize disk space and performance.
Note: It is important to backup your data before installing any new operating system or making significant changes to your current setup.
Backing Up Your Data
Before installing the tiny version of Windows 10, it is important to back up your data to ensure that you do not lose any important files or documents. Here are some steps to help you back up your data:
- Create a backup of your files: Copy all your important files and documents to an external hard drive or a cloud storage service. This will ensure that you have a copy of your data in case anything goes wrong during the installation process.
- Use a backup software: Consider using a backup software to automate the process of backing up your data. There are many options available, such as Windows Backup and Restore, Macrium Reflect, or Acronis True Image. These tools can help you create a full system backup or selectively backup specific files and folders.
- Verify the backup: After creating the backup, it is important to verify that the files have been successfully copied. Check the destination drive or cloud storage to ensure that all the files are present and accessible.
- Test the backup: To be extra cautious, you can test the backup by restoring a few files to a different location and checking if they open and function correctly. This will give you peace of mind knowing that your backup is reliable.
By following these steps, you can ensure that your data is safe and secure before proceeding with the installation of the tiny Windows 10 ISO. Remember, it is always better to be safe than sorry when it comes to your important files and documents.
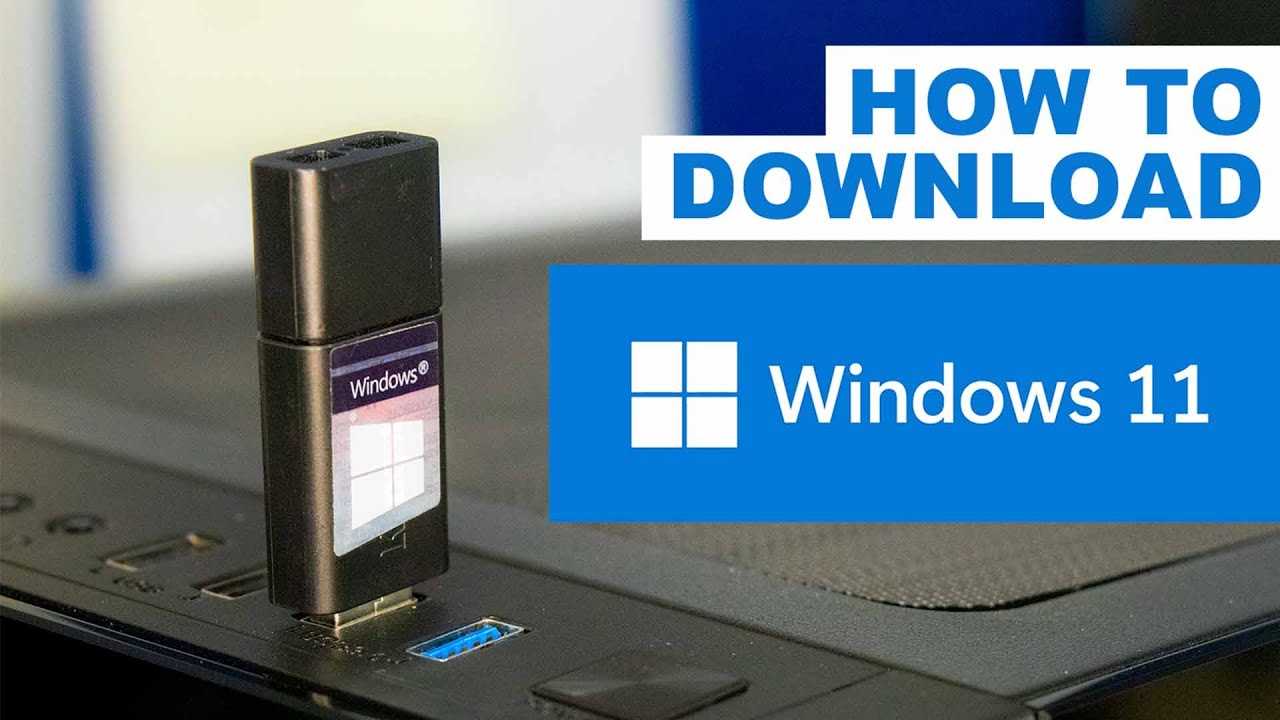
Creating a Bootable USB Drive
To install the tiny version of Windows 10, you will need to create a bootable USB drive. This will allow you to easily install the operating system on your computer. Here are the steps to create a bootable USB drive:
- Download the tiny Windows 10 ISO file from a trusted source.
- Insert a USB drive with at least 8GB of storage capacity into your computer.
- Open the downloaded ISO file using a program like WinRAR or 7-Zip.
- Extract the contents of the ISO file to a folder on your computer.
- Open the extracted folder and locate the “setup.exe” file.
- Right-click on the “setup.exe” file and select “Run as administrator”.
- Follow the on-screen instructions to install the tiny version of Windows 10 onto your USB drive.
- Once the installation is complete, restart your computer and enter the BIOS settings.
- Change the boot order to prioritize the USB drive as the first boot device.
- Save the changes and exit the BIOS settings.
- Restart your computer and it will boot from the USB drive.
- Follow the on-screen instructions to complete the installation of the tiny version of Windows 10.
After the installation is complete, you will have a fully functional version of Windows 10 on your computer. Enjoy the benefits of a compact and efficient operating system!
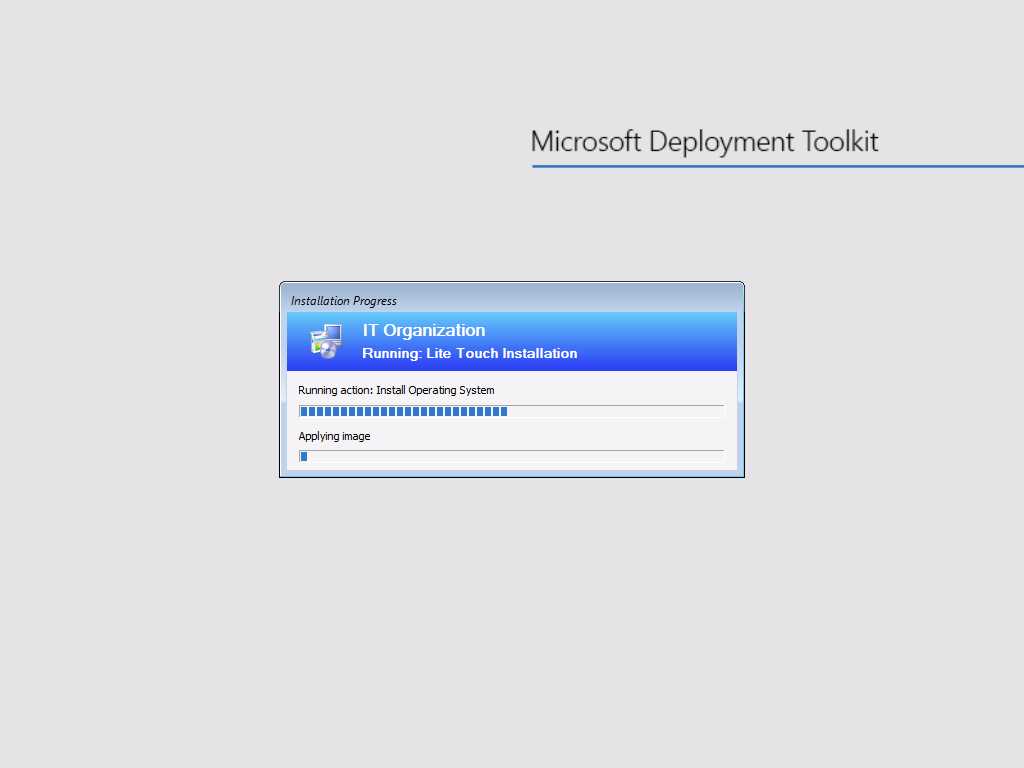
Installing Tiny Windows 10 ISO
Installing the tiny version of Windows 10 is a great way to save space on your computer’s hard drive. With a smaller file size compared to the regular version, the tiny Windows 10 ISO is perfect for those who have limited storage capacity.
To begin the installation process, you will first need to download the tiny Windows 10 ISO file. This can be done by visiting the official Microsoft website or other trusted sources. Make sure to choose the appropriate version of Windows 10 that suits your needs.
Once you have downloaded the tiny Windows 10 ISO file, you can proceed with the installation. This can be done by either burning the ISO file to a DVD or creating a bootable USB drive. Both methods require specific software, such as Rufus or Windows USB/DVD Download Tool.
After creating the bootable media, you can now install the tiny Windows 10 version on your computer. Simply insert the DVD or connect the USB drive to your computer and restart it. Make sure to set the boot order in the BIOS settings to prioritize the DVD or USB drive.
During the installation process, you will be prompted to choose the installation language, time zone, and keyboard layout. Follow the on-screen instructions and select the appropriate options. You may also be asked to enter the product key, so make sure to have it ready.
Once the installation is complete, you can start using the tiny Windows 10 operating system. Despite its smaller size, this version still offers all the essential features and functionalities of the regular Windows 10 version. You can customize the settings, install software, and enjoy a smooth user experience.
In conclusion, installing the tiny Windows 10 ISO is a convenient way to have a compact and efficient operating system. With a smaller file size, it is easier to download and install, making it ideal for devices with limited storage capacity. Follow the steps mentioned above, and you’ll be up and running with the tiny Windows 10 version in no time.
Booting from the USB Drive
Once you have downloaded the tiny Windows 10 ISO file, you will need to create a bootable USB drive to install the operating system. This is a necessary step as the tiny version of Windows 10 is not available as a standalone installation.
To create a bootable USB drive, you will need a USB flash drive with sufficient storage capacity. The size of the USB drive will depend on the version of Windows 10 you are installing, but it is recommended to use a drive with at least 8GB of storage.
First, insert the USB drive into your computer. Then, open a file explorer and locate the downloaded tiny Windows 10 ISO file. Right-click on the file and select “Burn disc image” or a similar option.
A new window will appear, allowing you to select the USB drive as the destination for the bootable image. Make sure to double-check that you have selected the correct drive, as all data on the drive will be erased during the process.
Click “Burn” or a similar button to start the process. The ISO file will be copied to the USB drive, creating a bootable installation media for the tiny Windows 10 version.
Once the process is complete, you can remove the USB drive from your computer. It is now ready to be used for booting and installing the tiny Windows 10 operating system on your desired device.
Note: It is important to remember that booting from a USB drive may require changing the boot order in your computer’s BIOS settings. Consult your device’s manual or manufacturer’s website for instructions on how to access the BIOS and change the boot order.