If you are a developer working on a Windows setup, you may have encountered the need to install and manage multiple versions of Node.js on your system. This is where NVM (Node Version Manager) comes in handy. NVM allows you to easily switch between different versions of Node.js, making it a valuable tool for managing your development environment.
Installing NVM on Windows is a straightforward process, but it does require a few steps. In this step-by-step guide, we will walk you through the installation process, so you can start using NVM in no time.
To begin, you will need to open a terminal or command line window on your Windows machine. This can be done by searching for “Command Prompt” or “PowerShell” in the Start menu. Once you have opened the terminal, you can proceed with the installation process.
First, you will need to download the NVM installation script from the official NVM repository on GitHub. This script will automate the installation process for you. Simply copy the command provided on the NVM GitHub page and paste it into your terminal window. Press Enter to execute the command.
Step-by-Step Guide: How to Install NVM on Windows
To install NVM on Windows, follow these steps:
1. Download the NVM setup file from the official website.
2. Open the command line terminal on your Windows machine.
3. Navigate to the directory where the NVM setup file is downloaded.
4. Run the NVM setup file to start the installation process.
5. Follow the on-screen instructions to complete the installation.
6. Once the installation is finished, open a new command line terminal.
7. Type “nvm” in the command line to verify that NVM is installed correctly.
8. You can now use NVM to install and manage different versions of Node.js on your Windows machine.
By following these steps, you can easily install NVM on your Windows system and take advantage of its features for managing Node.js versions.
What is NVM?
NVM stands for Node Version Manager. It is a command-line tool that allows you to easily download, install, and manage multiple versions of Node.js on your Windows environment.
Node.js is a popular JavaScript runtime built on Chrome’s V8 JavaScript engine. It allows you to run JavaScript code outside of a web browser, making it ideal for server-side and command-line applications.
However, installing and managing different versions of Node.js can be a hassle, especially if you need to switch between versions for different projects. This is where NVM comes in.
NVM provides an easy way to install and switch between different versions of Node.js using simple command-line commands. It allows you to keep your Node.js environment clean and organized, without the need to manually download and install different versions.
With NVM, you can easily install the latest stable version of Node.js or choose a specific version that is required for your project. It also allows you to switch between versions with a single command, making it convenient for development and testing purposes.
Overall, NVM simplifies the process of managing Node.js versions on Windows, making it an essential tool for any developer working with Node.js.
Why Install NVM on Windows?

Installing NVM (Node Version Manager) on Windows allows you to easily manage and switch between different versions of Node.js on your machine. This is particularly useful for developers who work on multiple projects that require different versions of Node.js.
By installing NVM, you can download and setup multiple versions of Node.js with just a few command lines. This ensures that you have the right version of Node.js installed for each project, without having to manually uninstall and reinstall Node.js each time.
NVM also provides an isolated environment for each version of Node.js, allowing you to keep your main Windows environment clean and organized. This means that you can easily switch between different versions of Node.js without affecting your other projects or applications.
Additionally, NVM provides a convenient command line interface for managing your Node.js versions. You can easily install new versions, switch between them, and set a default version for your projects. This makes it easy to keep your development environment up to date and compatible with the latest Node.js features and libraries.
In summary, installing NVM on Windows is a great way to manage your Node.js versions and keep your development environment organized. It allows you to easily download and setup different versions of Node.js, provides an isolated environment for each version, and offers a convenient command line interface for managing your Node.js versions.
Installation Process

To install NVM on Windows, follow these step-by-step instructions:
1. Download the NVM setup file from the official website.
2. Open the command line in Windows.
3. Navigate to the directory where the NVM setup file is located.
4. Run the setup file to start the installation process.
5. Follow the on-screen instructions to complete the installation.
6. Once the installation is complete, open the command line again.
7. Type “nvm install” followed by the version of Node.js you want to install.
8. Press Enter to start the installation of the selected Node.js version.
9. Wait for the installation to finish.
10. Verify the installation by typing “node -v” in the command line.
11. If the installation was successful, the version of Node.js you installed will be displayed.
12. Congratulations! You have successfully installed NVM and Node.js on your Windows environment.
Step 1: Download NVM
The first step in installing NVM on Windows is to download the setup file. NVM, or Node Version Manager, is a command-line tool that allows you to easily install and manage multiple versions of Node.js on your computer.
To download NVM, you need to open a terminal or command prompt window on your Windows machine. You can do this by pressing the Windows key + R, typing “cmd” or “powershell”, and then pressing Enter.
Once the terminal or command prompt window is open, you can use the following command to download the NVM setup file:
| nvm-setup.zip |
After the download is complete, you can proceed to the next step to install NVM and set up your development environment.
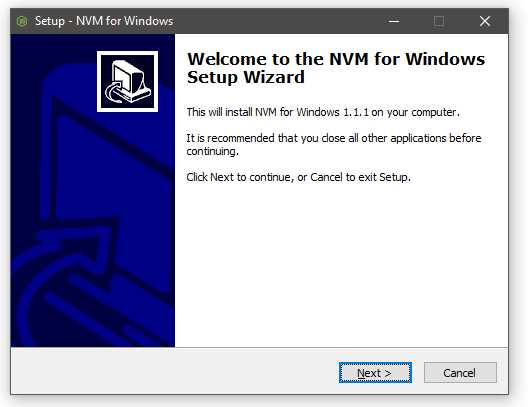
Step 2: Run the Installer
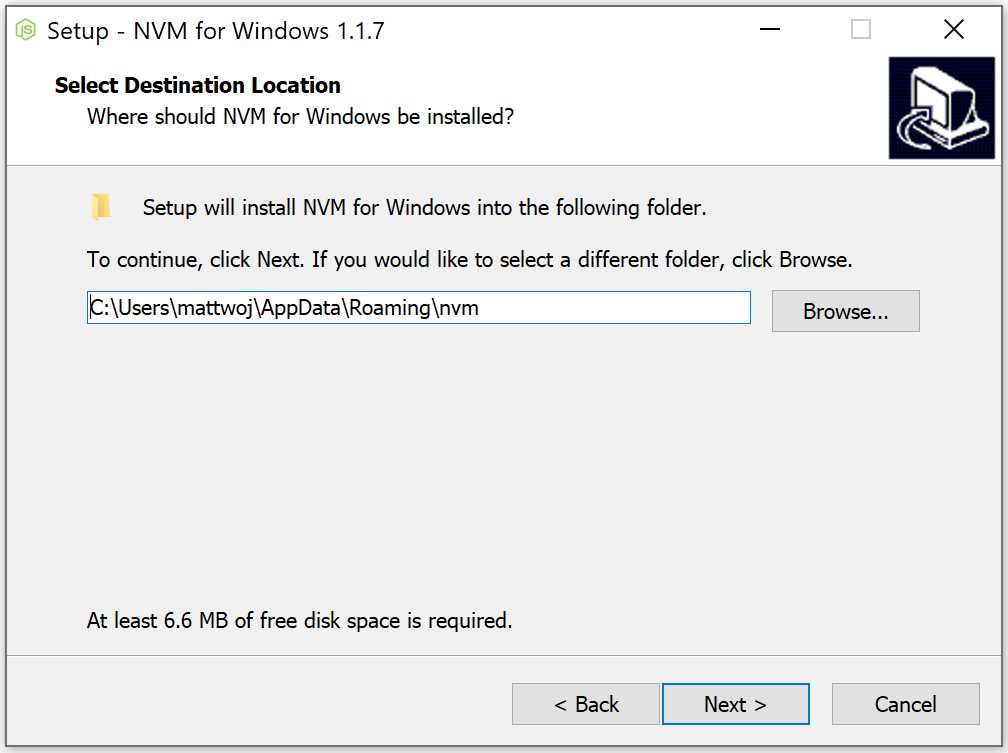
Once you have downloaded the NVM setup file for Windows, you are ready to run the installer and set up NVM on your system.
To begin the installation process, open the command terminal on your Windows machine. You can do this by pressing the Windows key + R, typing “cmd” in the Run dialog box, and then pressing Enter.
In the command terminal, navigate to the directory where you downloaded the NVM setup file. You can use the “cd” command followed by the directory path to change directories. For example, if you downloaded the file to your Downloads folder, you would use the following command:
cd C:\Users\YourUsername\Downloads
Once you are in the correct directory, run the NVM setup file by typing its name followed by the “.exe” extension. For example, if the setup file is named “nvm-setup.exe”, you would use the following command:
nvm-setup.exe
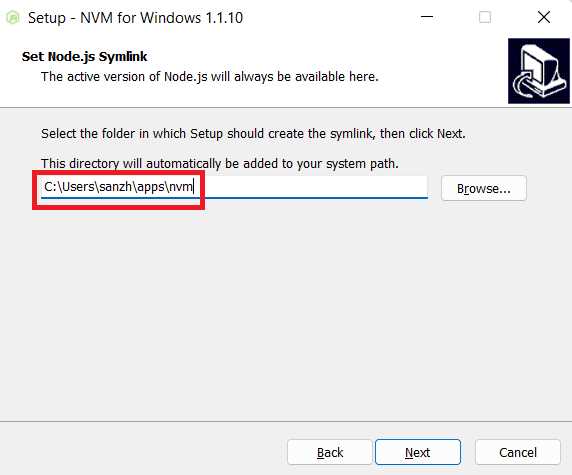
This will launch the NVM installer, which will guide you through the installation process. Follow the on-screen instructions to complete the installation.
After the installation is complete, you will have NVM installed on your Windows machine and ready to use. You can now proceed to the next step to set up your Node.js environment using NVM.
Step 3: Configure NVM
After successfully installing NVM on your Windows system, the next step is to configure it. This will allow you to easily switch between different Node.js versions.
To configure NVM, open a command terminal or PowerShell window and type the following command:
| Command | Description |
|---|---|
| nvm install [version] | Installs the specified version of Node.js |
| nvm use [version] | Sets the specified version of Node.js as the active version |
| nvm list | Lists all installed versions of Node.js |
| nvm alias [name] [version] | Creates an alias for a specific version of Node.js |
By using these commands, you can easily manage and switch between different versions of Node.js on your Windows system. This is especially useful when working on projects that require specific Node.js versions.
Now that NVM is configured, you are ready to start using it to install and manage Node.js versions on your Windows machine.