Are you ready to upgrade to the latest version of Windows? Installing Windows 11 is a straightforward process, and with the help of Rufus, a popular tool for creating bootable USB drives, you can easily get started. In this step-by-step guide, we will walk you through the process of using Rufus to install Windows 11 on your computer.
What is Rufus?
Rufus is a free and open-source tool that allows you to create bootable USB drives from ISO images. It is widely used by both beginners and advanced users for its simplicity and reliability. With Rufus, you can quickly and easily create a bootable USB drive that can be used to install Windows 11.
Why use Rufus?
While there are other tools available for creating bootable USB drives, Rufus stands out for its speed and compatibility. It supports a wide range of ISO images, including Windows installation files, Linux distributions, and other utilities. Rufus also offers various options and settings that allow you to customize the installation process according to your needs.
So, if you’re ready to install Windows 11 and want a reliable and efficient tool to create a bootable USB drive, Rufus is the way to go. Follow the step-by-step guide below to get started with the installation process.
Preparing for Installation
Before you can install Windows 11 using Rufus, there are a few steps you need to take to ensure a smooth installation process. Follow these steps to prepare for the installation:
| Step 1: | Make sure you have a USB drive with at least 8GB of storage capacity. This USB drive will be used to create a bootable Windows 11 installation media. |
| Step 2: | Download the Windows 11 ISO file from the official Microsoft website or any other trusted source. |
| Step 3: | Download and install Rufus, a free and open-source tool for creating bootable USB drives. |
| Step 4: | Connect the USB drive to your computer and launch Rufus. |
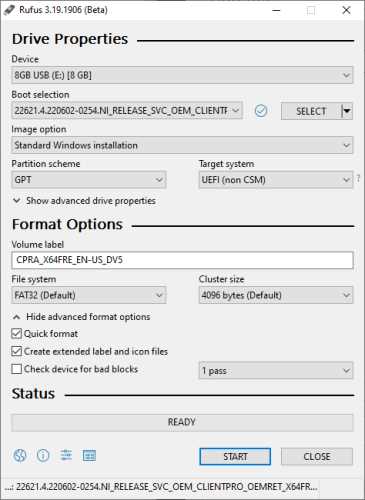
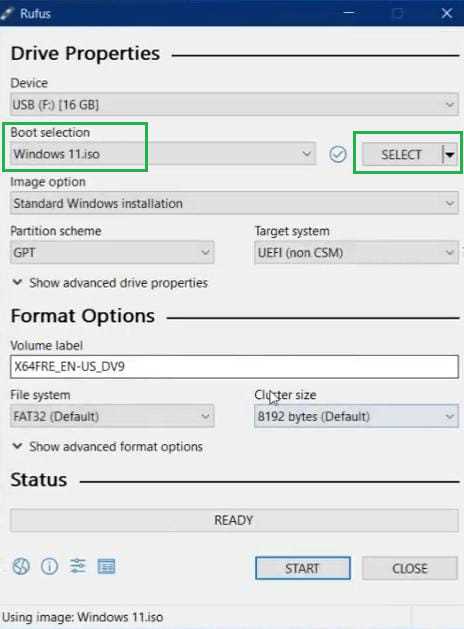
| Step 5: | In Rufus, select the USB drive you connected as the “Device” and the Windows 11 ISO file you downloaded as the “Boot selection”. |
| Step 6: | Choose the partition scheme and target system type according to your computer’s specifications. |
| Step 7: | Leave the other settings as default and click on the “Start” button to begin the process of creating a bootable USB drive. |
| Step 8: | Once Rufus finishes creating the bootable USB drive, you are now ready to proceed with the installation of Windows 11. |
By following these steps, you will have a bootable USB drive with Windows 11 ready for installation using Rufus.
Check System Requirements
Before using Rufus to install Windows 11, it is important to check if your system meets the minimum requirements. Windows 11 has specific hardware requirements that need to be met in order to ensure a smooth installation and optimal performance.
Some of the key system requirements for Windows 11 include:
- Processor: 1 gigahertz (GHz) or faster with 2 or more cores on a compatible 64-bit processor
- RAM: 4 gigabytes (GB) or more
- Storage: 64 GB or more
- Graphics Card: DirectX 12 compatible graphics / WDDM 2.x
- Display: A screen with at least 720p resolution
- Internet Connection: Internet connectivity is necessary to download updates and activate Windows 11
It is important to note that these are the minimum requirements, and for the best experience, it is recommended to have a more powerful system. Once you have confirmed that your system meets the requirements, you can proceed with using Rufus to install Windows 11.
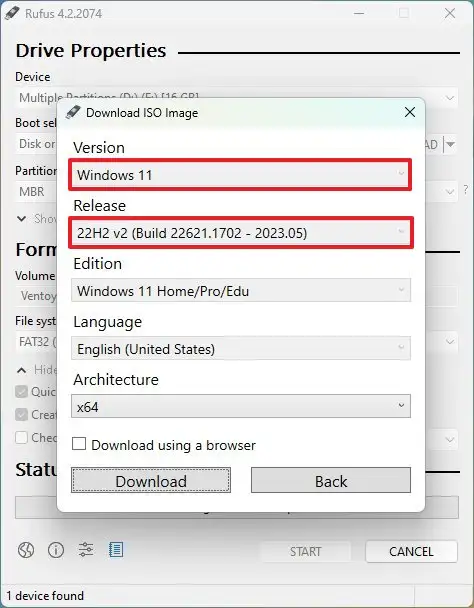
Download Windows 11 ISO
Using Rufus, you can easily install Windows 11 on your computer. However, before you can begin the installation process, you need to download the Windows 11 ISO file.
The ISO file contains all the necessary files and data to install Windows 11 on your system. It is a disk image file that can be used to create a bootable USB drive or DVD.
To download the Windows 11 ISO file, you can visit the official Microsoft website or use other trusted sources. Make sure to download the ISO file that matches your system architecture (32-bit or 64-bit).
Once you have downloaded the Windows 11 ISO file, you can proceed with the installation process using Rufus. Rufus is a free and lightweight tool that allows you to create bootable USB drives from ISO files.
With Rufus, you can easily create a bootable USB drive with the Windows 11 ISO file. This USB drive can then be used to install Windows 11 on your computer.
Before proceeding with the installation, make sure to back up any important data on your computer. Installing Windows 11 will erase all the data on your system drive.
Now that you have downloaded the Windows 11 ISO file, you are ready to proceed with the installation process using Rufus.
Download Rufus
To install Windows 11 using Rufus, you will first need to download the Rufus software. Rufus is a free and open-source tool that allows you to create bootable USB drives. It is a lightweight program that is easy to use and compatible with Windows operating systems.
To download Rufus, follow these steps:
- Open your preferred web browser.
- Go to the official Rufus website.
- Click on the “Download” button.
- Choose the appropriate version of Rufus for your Windows operating system (32-bit or 64-bit).
- Click on the download link to start the download.
Once the download is complete, you can proceed to the next step of installing Windows 11 with Rufus.
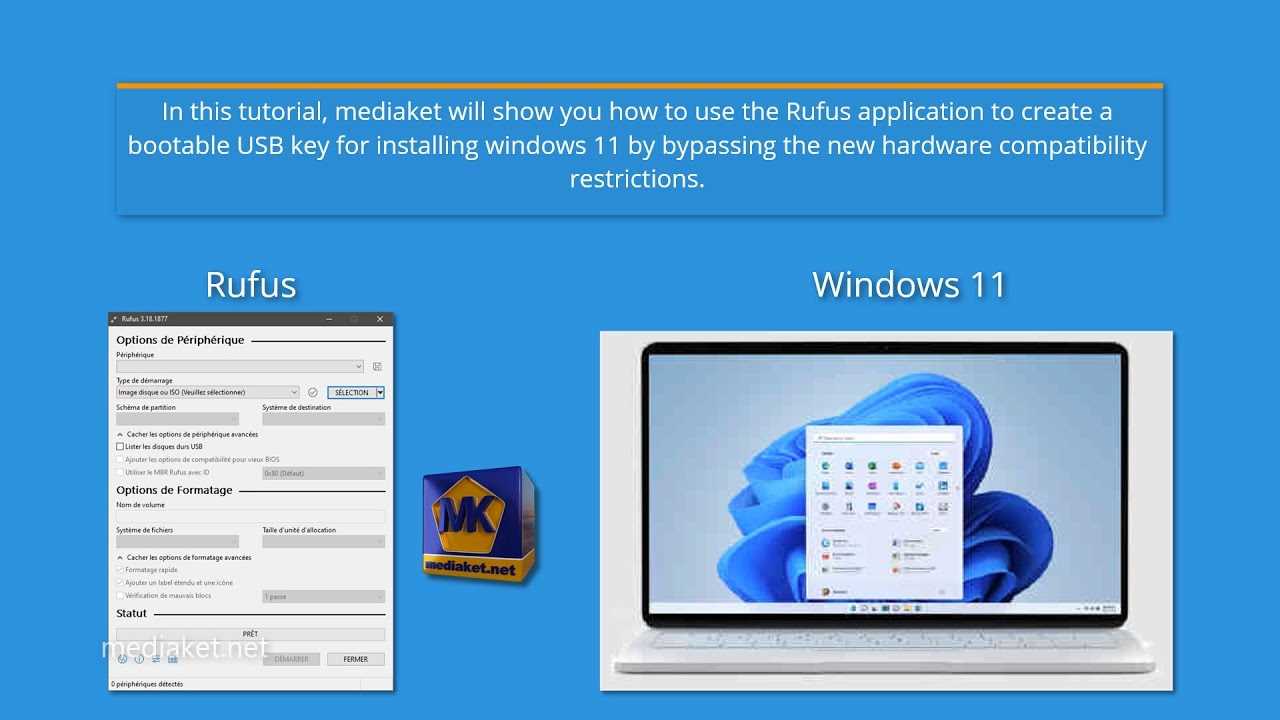
Creating a Bootable USB Drive
To install Windows 11, you will need to create a bootable USB drive using Rufus. A bootable USB drive allows you to install the operating system on your computer without the need for a CD or DVD.
Step 1: Download Rufus from the official website and install it on your computer.
Step 2: Insert a USB drive with at least 8GB of storage into your computer.
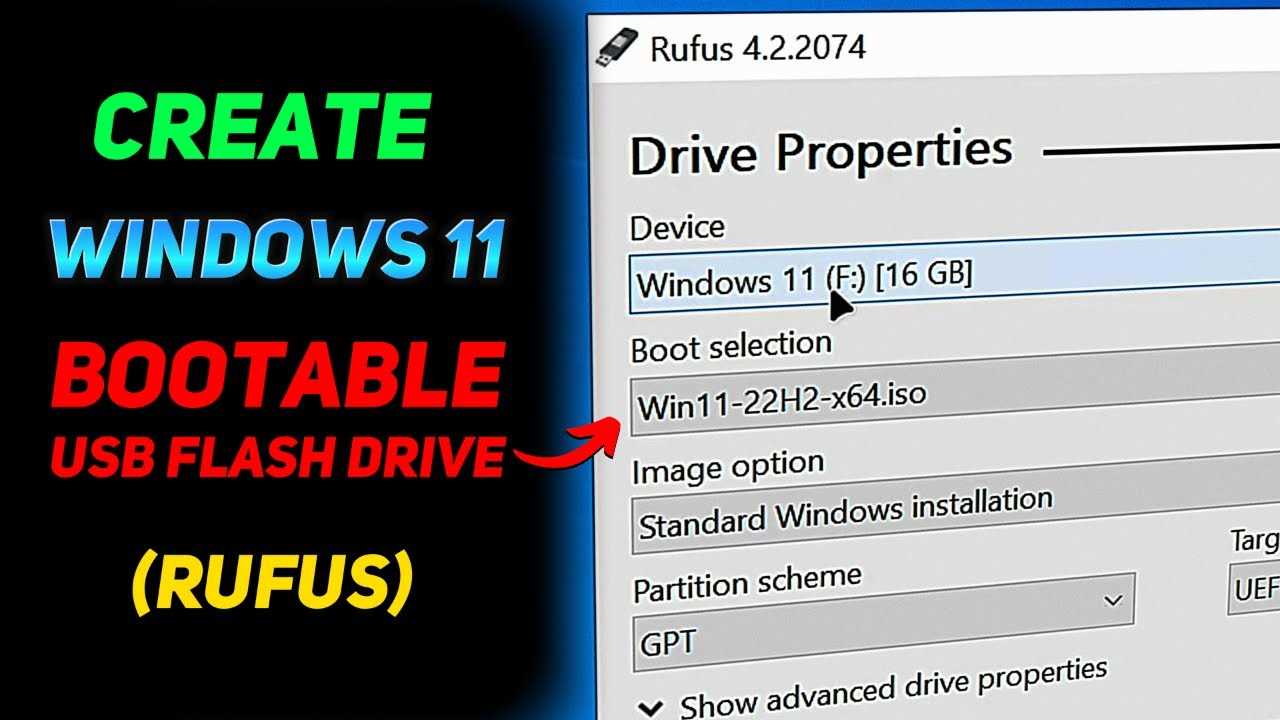
Step 3: Open Rufus and select the USB drive you inserted from the “Device” dropdown menu.
Step 4: Under the “Boot selection” section, click on the “Select” button and navigate to the location where you have the Windows 11 ISO file saved on your computer.
Step 5: Once you have selected the Windows 11 ISO file, Rufus will automatically detect the appropriate settings for creating a bootable USB drive.
Step 6: Double-check that the settings are correct, such as the partition scheme (GPT is recommended for UEFI systems), file system (NTFS is recommended), and cluster size.
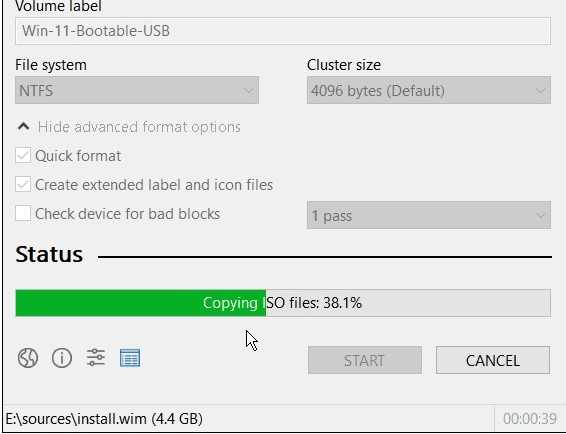
Step 7: Click on the “Start” button to begin the process of creating the bootable USB drive. Rufus will format the USB drive and copy the necessary files from the Windows 11 ISO file.
Step 8: Once the process is complete, you will have a bootable USB drive with Windows 11 ready to install on your computer.
Note: Creating a bootable USB drive will erase all data on the USB drive, so make sure to backup any important files before proceeding.
Insert USB Drive

Before you can install Windows 11 using Rufus, you will need to insert a USB drive into your computer. This USB drive will be used to create a bootable installation media for Windows 11.
Make sure you have a USB drive with at least 8GB of storage capacity. It’s also important to note that any data on the USB drive will be erased during the Rufus process, so make sure to back up any important files.
Once you have your USB drive ready, connect it to your computer’s USB port. Ensure that the USB drive is properly inserted and recognized by your computer.
Now you are ready to proceed with the installation process using Rufus and create a bootable USB drive for installing Windows 11.
Open Rufus
To install Windows 11 using Rufus, you first need to open the Rufus application on your computer. Rufus is a popular tool that allows you to create bootable USB drives for installing operating systems, including Windows 11.
Once you have downloaded and installed Rufus on your computer, launch the application by double-clicking on the Rufus icon. You may need to grant administrative privileges if prompted.
Rufus provides a user-friendly interface that makes it easy to create bootable USB drives. It supports various file systems and partition schemes, making it compatible with different Windows installation media.
With Rufus open, you are now ready to proceed with the next steps to install Windows 11 on your computer.
Select Windows 11 ISO

To install Windows 11 using Rufus, you will need to have the Windows 11 ISO file. The ISO file contains all the necessary files and data for the installation process. Make sure you have a valid and genuine Windows 11 ISO file before proceeding.
You can download the Windows 11 ISO file from the official Microsoft website or other trusted sources. Ensure that you select the correct version of Windows 11 that matches your system requirements.
Once you have downloaded the Windows 11 ISO file, locate it on your computer. Remember the location as you will need to browse to it in Rufus during the installation process.
Note: It is important to use a genuine and unmodified Windows 11 ISO file to ensure a smooth and secure installation process. Using unauthorized or modified ISO files can lead to compatibility issues and potential security risks.