
Are you wondering how to install Ubuntu without a USB drive? Look no further! In this step-by-step guide, we will walk you through the process of installing Ubuntu on your computer without the need for a USB drive.
Installing Ubuntu without a USB drive can be a convenient option for those who don’t have access to a USB drive or prefer not to use one. Whether you’re a beginner or an experienced user, this guide will provide you with all the necessary steps to successfully install Ubuntu on your computer.
Step 1: Prepare your computer
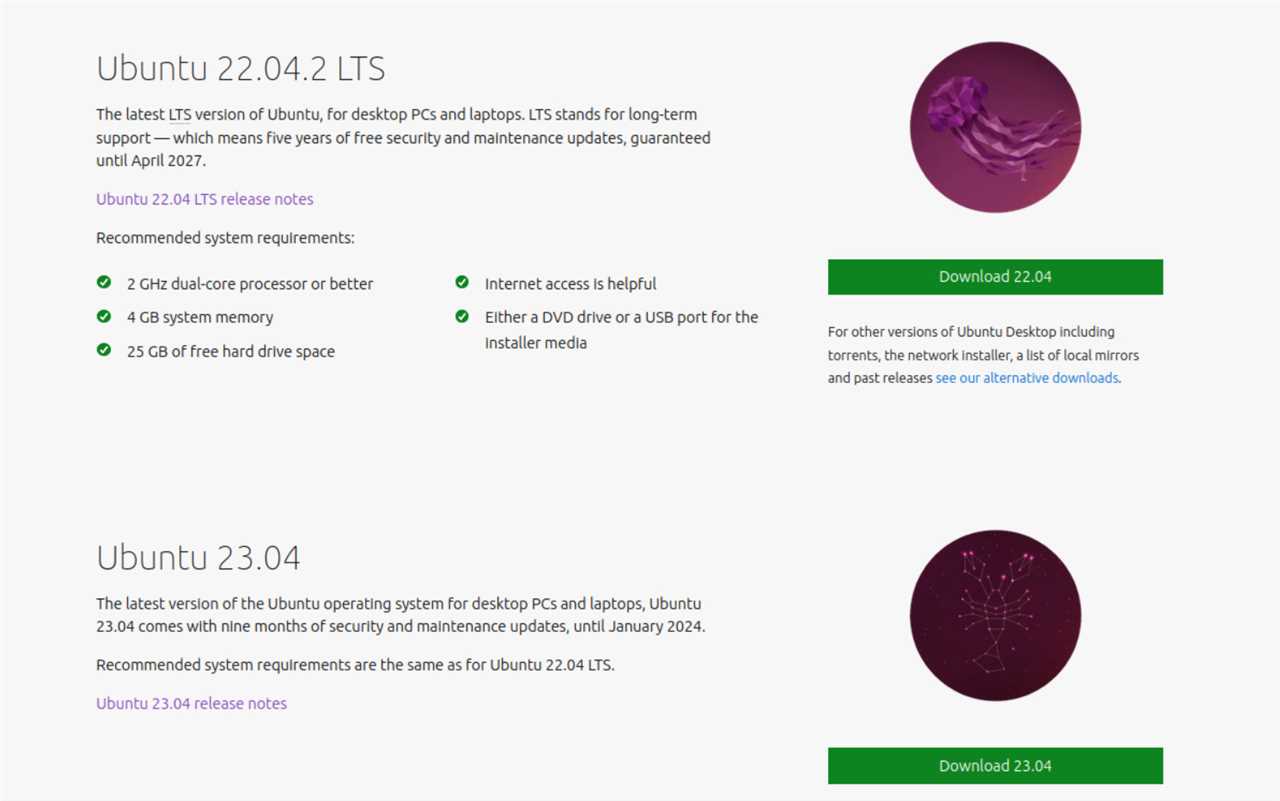
Before you begin the installation process, make sure your computer meets the system requirements for Ubuntu. Check the Ubuntu website for the latest system requirements and download the appropriate version of Ubuntu for your computer.
Step 2: Create a bootable DVD or CD
Instead of using a USB drive, you can create a bootable DVD or CD to install Ubuntu. Insert a blank DVD or CD into your computer’s optical drive and use a burning software to create a bootable disc from the downloaded Ubuntu ISO file.
Step 3: Boot from the bootable disc
Once you have created the bootable disc, restart your computer and enter the BIOS settings. Set the boot priority to boot from the optical drive first. Save the changes and exit the BIOS settings. Your computer will now boot from the bootable disc.
Step 4: Install Ubuntu
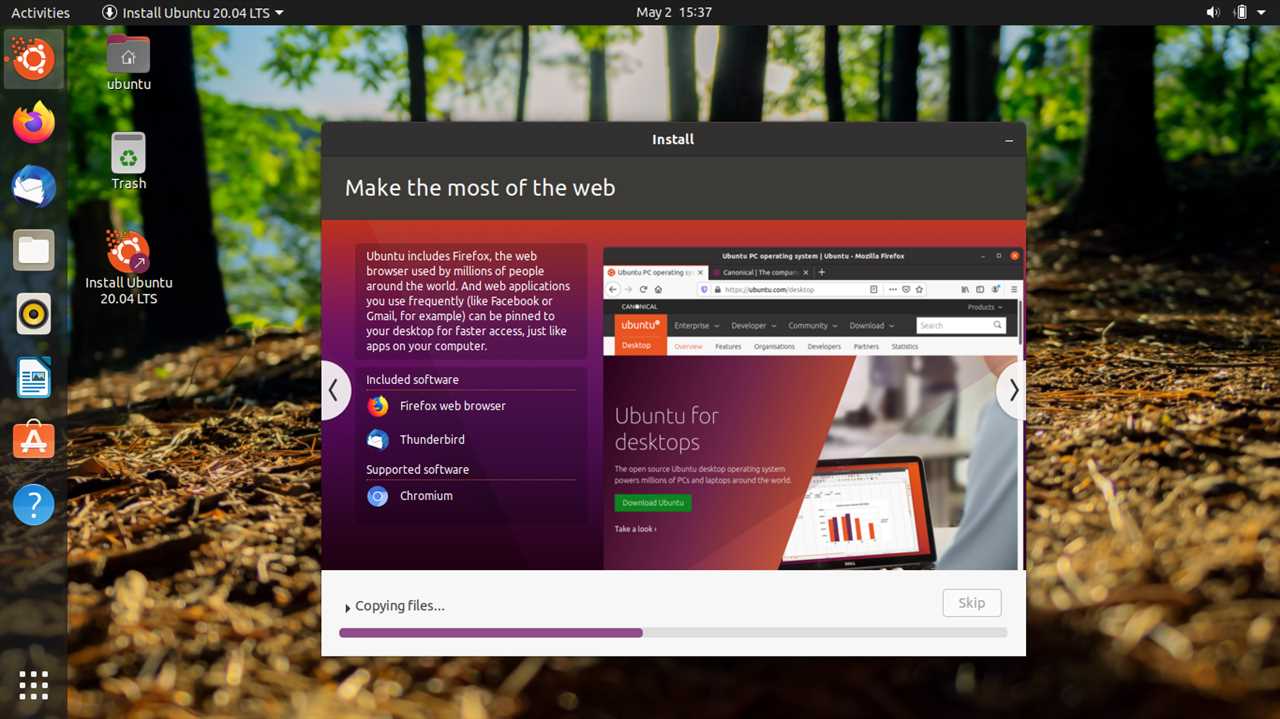
Follow the on-screen instructions to install Ubuntu on your computer. You can choose to install Ubuntu alongside your existing operating system or replace it entirely. Make sure to select the correct options and partitions during the installation process.
Step 5: Complete the installation
Once the installation is complete, restart your computer and remove the bootable disc. Your computer will now boot into Ubuntu. Follow the on-screen instructions to set up your Ubuntu system and customize it to your liking.
That’s it! You have successfully installed Ubuntu on your computer without the need for a USB drive. Enjoy exploring the world of Ubuntu and all the amazing features it has to offer!
Preparing Your Computer
Before you can install Ubuntu without a USB, you need to make sure your computer meets the necessary requirements. Here is a step-by-step guide on how to prepare your computer:
1. Check the minimum system requirements for Ubuntu. Make sure your computer has enough RAM, storage space, and processing power to run Ubuntu smoothly.
2. Backup your important files. Installing Ubuntu will erase all the data on your computer, so it’s important to back up any important files or documents to an external storage device or cloud storage.
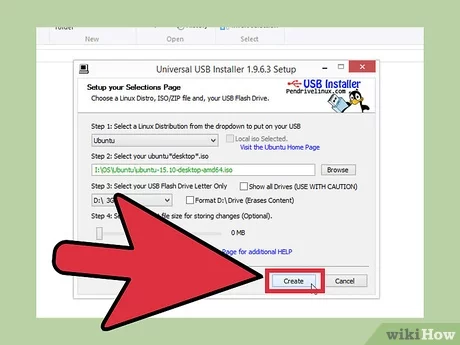
3. Create a bootable Ubuntu installation media. You will need a bootable DVD or a bootable USB drive with the Ubuntu installation files. Follow the instructions on the Ubuntu website to create a bootable USB or DVD.
4. Restart your computer and access the BIOS settings. To do this, press the appropriate key (usually F2, F10, or Del) during the startup process. In the BIOS settings, change the boot order to prioritize the bootable USB or DVD drive.
5. Save the changes and exit the BIOS settings. Your computer will now restart and boot from the bootable Ubuntu installation media.
Now that your computer is prepared, you are ready to install Ubuntu without a USB. Follow the next steps in the installation guide to complete the installation process.
Checking System Requirements
Before proceeding with the installation of Ubuntu without using a USB, it is important to ensure that your system meets the necessary requirements. This will help ensure a smooth and successful installation process.
1. Processor: Ubuntu requires a 64-bit processor. Check your system specifications to ensure that you have a compatible processor.
2. Memory: Ubuntu recommends a minimum of 2GB of RAM for a standard installation. However, if you plan to run resource-intensive applications, it is recommended to have at least 4GB or more.
3. Storage: Ubuntu requires a minimum of 25GB of free disk space for installation. Ensure that you have enough space available on your hard drive.
4. Graphics Card: Ubuntu supports most modern graphics cards. However, if you plan to use advanced graphics features or gaming, it is recommended to check if your graphics card is compatible with Ubuntu.
5. Internet Connection: While not mandatory, having an internet connection during the installation process can be beneficial as it allows for updates and additional software to be downloaded and installed.
By checking these system requirements, you can ensure that your system is ready to install Ubuntu without the need for a USB. Once you have confirmed that your system meets the requirements, you can proceed with the installation process.
Backing Up Your Data
Before proceeding with the installation of Ubuntu without a USB, it is highly recommended to back up your data to ensure that you do not lose any important files or documents. Here is a step-by-step guide on how to back up your data:
- Create a backup folder on an external hard drive or cloud storage service.
- Identify the files and folders that you want to back up. This may include documents, photos, videos, music, and any other important files.
- Copy and paste the selected files and folders into the backup folder.
- Double-check that all the necessary files have been successfully copied to the backup folder.
- Verify the integrity of the backup by opening a few files to ensure they can be accessed and are not corrupted.
- Once you have confirmed that your data is safely backed up, you can proceed with the installation of Ubuntu without a USB.
By following these steps, you can ensure that your data is protected and can be easily restored if anything goes wrong during the installation process.
Creating a Bootable DVD
If you want to install Ubuntu without using a USB drive, you can create a bootable DVD instead. Here’s how:
- Download the Ubuntu ISO file from the official website.
- Insert a blank DVD into your computer’s DVD drive.
- Open your preferred DVD burning software.
- Select the option to create a new data DVD.
- Choose the Ubuntu ISO file you downloaded as the source file.
- Click on the “Burn” or “Create” button to start the burning process.
- Wait for the DVD burning process to complete.
- Eject the DVD from your computer’s DVD drive.
Now you have a bootable DVD with the Ubuntu installation files. You can use this DVD to install Ubuntu on any computer without the need for a USB drive.
Downloading Ubuntu ISO
To install Ubuntu without using a USB, you will need to download the Ubuntu ISO file directly to your computer. The ISO file contains the complete installation package for Ubuntu.
Here are the steps to download the Ubuntu ISO:
- Open a web browser and go to the official Ubuntu website.
- Navigate to the “Download” section of the website.
- Choose the version of Ubuntu you want to install. Make sure to select the correct architecture (32-bit or 64-bit) for your computer.
- Click on the download link to start the download.
- Wait for the download to complete. The download time will depend on your internet connection speed.
- Once the download is finished, you will have the Ubuntu ISO file saved on your computer.
Now that you have downloaded the Ubuntu ISO file, you can proceed to the next step of the installation process.
Burning ISO to DVD
If you want to install Ubuntu without using a USB drive, you can burn the ISO file to a DVD. This method allows you to create a bootable DVD that you can use to install Ubuntu on your computer.
To burn the ISO file to a DVD, you will need a blank DVD and a DVD burning software. Here are the steps to follow:
- Insert the blank DVD into your computer’s DVD drive.
- Open the DVD burning software.
- Select the option to create a new data disc.
- Locate the Ubuntu ISO file on your computer.
- Drag and drop the ISO file into the DVD burning software.
- Click on the “Burn” button to start the burning process.
- Wait for the burning process to complete.
- Once the burning process is finished, you will have a bootable DVD with the Ubuntu ISO file.
Now you can use this DVD to install Ubuntu on any computer without the need for a USB drive. Simply insert the DVD into the computer’s DVD drive, restart the computer, and follow the on-screen instructions to install Ubuntu.
Booting from DVD
If you want to install Ubuntu without using a USB drive, you can also boot from a DVD. Here’s how to do it:
Step 1: Insert the Ubuntu installation DVD into your computer’s DVD drive.
Step 2: Restart your computer and access the boot menu. The key to access the boot menu may vary depending on your computer’s manufacturer, but it is usually one of the function keys (F1, F2, F12) or the ESC key. Consult your computer’s manual or do a quick internet search to find out the specific key for your computer.
Step 3: Once you are in the boot menu, use the arrow keys to navigate to the option that allows you to boot from the DVD drive. This option is usually labeled as “DVD” or “CD/DVD”. Press Enter to select it.
Step 4: Your computer will now boot from the Ubuntu installation DVD. You will see a screen with the Ubuntu logo and some options. Use the arrow keys to select the “Install Ubuntu” option and press Enter.
Step 5: Follow the on-screen instructions to complete the installation process. Make sure to choose the appropriate options for your installation, such as language, keyboard layout, and disk partitioning.
Step 6: Once the installation is complete, restart your computer and remove the Ubuntu installation DVD from the DVD drive.
Note: Booting from a DVD may take longer than booting from a USB drive, so be patient during the boot process.
By following these steps, you can install Ubuntu without the need for a USB drive. This method is especially useful if you don’t have a USB drive or if you prefer using a DVD for installation.
Changing Boot Order in BIOS

When installing Ubuntu without a USB, it is important to change the boot order in the BIOS settings. This will ensure that your computer boots from the installation media instead of the USB drive. Here is a step-by-step guide on how to change the boot order in BIOS:
- Restart your computer and press the appropriate key to enter the BIOS settings. This key is usually displayed on the screen during startup, and it can vary depending on your computer’s manufacturer. Common keys include F2, F10, and Delete.
- Navigate to the “Boot” or “Boot Order” section in the BIOS settings. The exact location may vary depending on your BIOS version.
- Use the arrow keys to highlight the option that corresponds to your USB drive or installation media.
- Move the selected option to the top of the boot order list using the appropriate key (usually F5 or F6). This will ensure that the computer boots from the USB drive first.
- Save the changes and exit the BIOS settings. This is typically done by pressing the F10 key.
Once you have changed the boot order in the BIOS settings, your computer will automatically boot from the installation media when you restart it. This will allow you to proceed with the installation of Ubuntu without using a USB drive.
Starting Ubuntu Installation
To install Ubuntu without a USB, you will need to follow these steps:
- First, make sure you have a working internet connection on the computer you want to install Ubuntu on.
- Next, download the Ubuntu ISO file from the official Ubuntu website. Choose the appropriate version for your system.
- Once the ISO file is downloaded, open the terminal on your computer.
- Use the “cd” command to navigate to the directory where the ISO file is located.
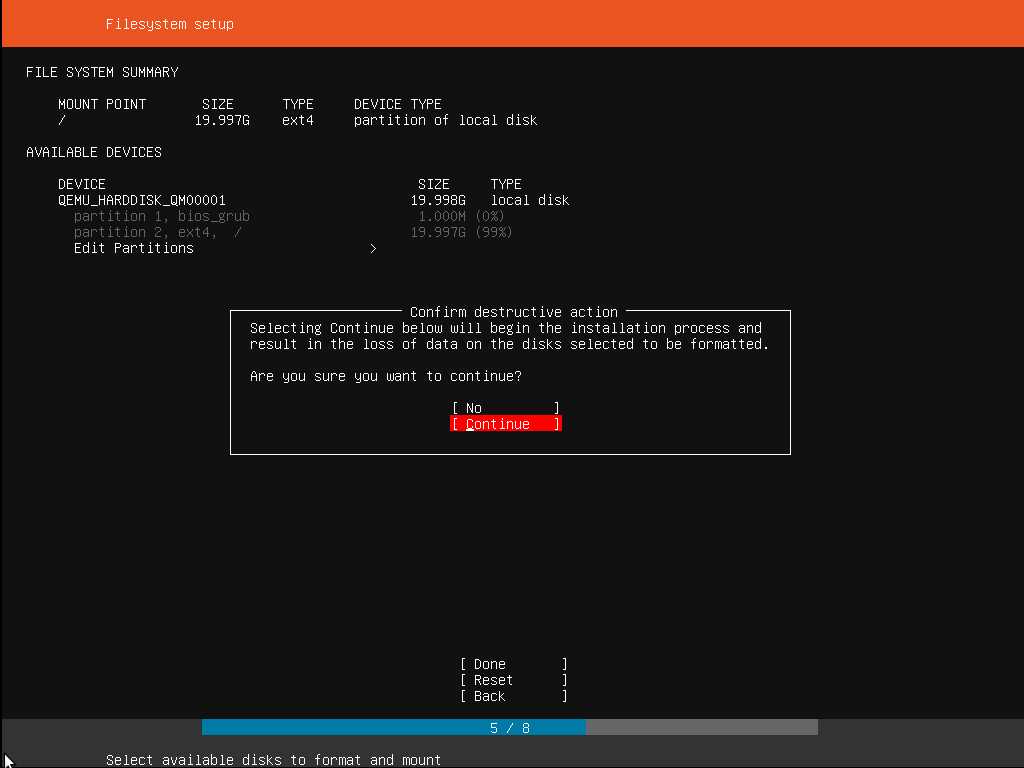
- Now, you need to create a new partition on your hard drive to install Ubuntu. Use the “fdisk” command to do this.
- Format the new partition using the “mkfs” command.
- Mount the new partition using the “mount” command.
- Extract the contents of the Ubuntu ISO file to the new partition using the “tar” command.
- Finally, configure the bootloader to boot from the new partition.
Once you have completed these steps, you should be able to start the Ubuntu installation without a USB. Follow the on-screen instructions to complete the installation process.


