
If you are a server administrator working with Windows Server 2019, you may be looking for a convenient way to install and manage software packages on your server. Fortunately, Microsoft has introduced a new command-line tool called winget, which allows you to install, uninstall, and update applications with just a few simple commands.
Winget is a package manager for Windows that makes it easy to install software from the command line. It provides a simple and consistent way to install applications, and it can save you a lot of time and effort when setting up and managing your server.
In this step-by-step guide, we will walk you through the process of installing winget on your Windows Server 2019 machine. We will cover everything from downloading the installer to configuring the tool for first-time use. By the end of this guide, you will have a fully functional winget installation on your server, ready to help you streamline your software management tasks.
Section 1: Preparing the Environment
Before you can install winget on your Windows Server 2019, you need to make sure that your environment is properly set up. Here are the steps to prepare your environment:
- Ensure that you are running Windows Server 2019 or a later version.
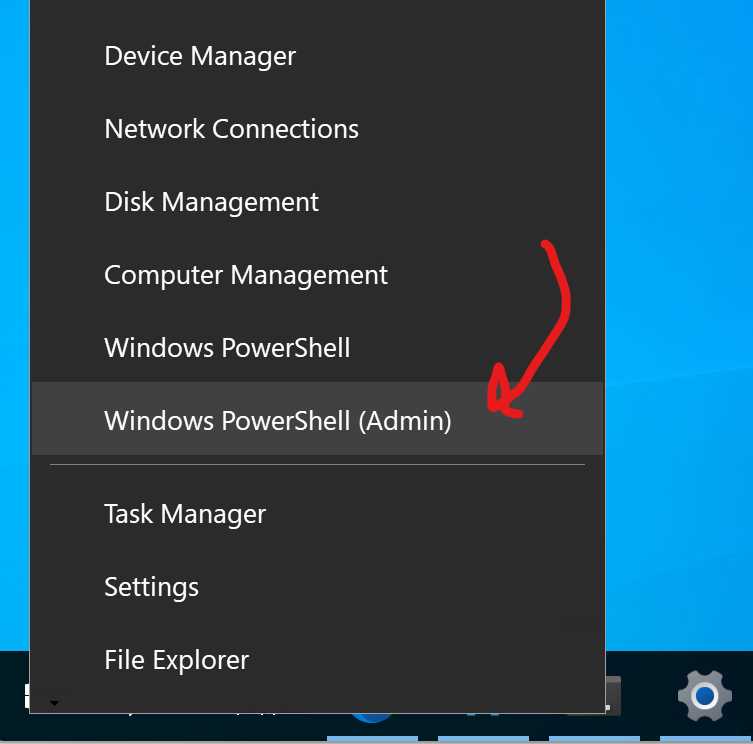
- Make sure that you have administrative privileges on the server.
- Check if the Windows Package Manager (winget) is already installed on your system by opening a command prompt and typing “winget”. If it is installed, you will see the winget command prompt interface.
- If winget is not installed, you will need to download and install it. To do this, open a web browser and search for “winget download”.
- Click on the official Microsoft website link for winget and download the installer.
- Once the installer is downloaded, double-click on it to run the installation wizard.
- Follow the prompts in the installation wizard to complete the installation process.
- After the installation is complete, open a command prompt and type “winget” to verify that it is now installed and working correctly.
By following these steps, you will have successfully prepared your environment for installing winget on your Windows Server 2019.
Checking the Windows Server Version
Before installing winget on your Windows Server 2019, it is important to check the version of your server to ensure compatibility. To do this, follow the steps below:
| Step | Description |
|---|---|
| 1 | Open the Start menu by clicking on the Windows icon in the bottom left corner of the screen. |
| 2 | Type “winver” in the search bar and press Enter. |
| 3 | A window will appear displaying the version and build number of your Windows Server. Look for the version number that includes “2019” to confirm that you are using Windows Server 2019. |
If your server is running Windows Server 2019, you can proceed with the installation of winget. If not, you may need to upgrade your server to a compatible version before continuing.
Enabling the Windows Subsystem for Linux (WSL)
To install and use the Windows Subsystem for Linux (WSL) on your Windows Server 2019, follow these steps:
- Open the Server Manager by clicking on the Start button and selecting Server Manager.
- In the Server Manager window, click on Manage and select Add Roles and Features.
- The Add Roles and Features Wizard will open. Click Next to proceed.
- On the Installation Type page, select Role-based or feature-based installation and click Next.
- On the Server Selection page, select the server you want to install WSL on and click Next.
- On the Server Roles page, click Next without selecting any roles.
- On the Features page, scroll down and check the box next to Windows Subsystem for Linux.
- A pop-up window will appear asking you to install the required features. Click Add Features to proceed.
- Click Next on the Features page.
- On the Confirmation page, review your selections and click Install to begin the installation.
- Wait for the installation to complete, and then click Close.
Once you have enabled the Windows Subsystem for Linux (WSL), you can proceed with the installation of winget on your Windows Server 2019.
Installing the Windows Package Manager Preview
To install the Windows Package Manager Preview, follow these steps:
- Open a command prompt or PowerShell window on your Windows Server 2019.
- Download the Windows Package Manager Preview installer by running the following command:
wget https://github.com/microsoft/winget-cli/releases/download/v0.1.4381-preview/Microsoft.DesktopAppInstaller_8wekyb3d8bbwe.appxbundle
- Once the download is complete, navigate to the folder where the installer is located.
- Run the installer by executing the following command:
Add-AppxPackage -Path "Microsoft.DesktopAppInstaller_8wekyb3d8bbwe.appxbundle"
Wait for the installation process to finish. You will see a progress bar indicating the installation status.
- After the installation is complete, you can verify that winget is installed by running the following command:
winget --version
If the command returns the version number of winget, then the installation was successful.
Note: The Windows Package Manager Preview is currently in development and may have some limitations or bugs. Make sure to check for updates regularly to get the latest features and fixes.
Section 2: Installing Applications with winget

Once you have winget installed on your Windows Server 2019, you can start using it to easily install applications. Winget is a command-line tool that allows you to search for and install applications from the Microsoft Store or other sources.
To install an application using winget, open a command prompt or PowerShell window and type the following command:
| Command | Description |
|---|---|
| winget search [app name] | Searches for the specified application in the winget repository. |
| winget install [app name] | Installs the specified application from the winget repository. |
For example, if you want to install Google Chrome, you can use the following command:
winget install Google.Chrome
Winget will then search for the application in its repository and install it on your server. You can also use the search command to find the exact name of the application you want to install:
winget search Chrome
This will display a list of applications that match the search term “Chrome”. Once you have the correct name, you can use the install command to install the application.
Using winget to install applications on your Windows Server 2019 is a convenient and efficient way to manage software installations. It eliminates the need to manually download and install applications, saving you time and effort.
Searching for Available Applications
Once you have installed winget on your Windows Server 2019, you can start searching for available applications to install. Winget provides a command-line interface that allows you to search for applications using keywords or specific criteria.
To search for available applications, open the command prompt and type the following command:
winget search <keyword>
Replace <keyword> with the name or a keyword related to the application you are looking for. Winget will then display a list of applications that match your search criteria.
You can also use additional options to narrow down your search. For example, you can use the --id option to search for applications by their unique identifier, or the --exact option to search for applications with an exact match to your keyword.
Once you have found the application you want to install, you can use the winget install command followed by the application’s name or unique identifier to install it on your Windows Server 2019.
Searching for available applications with winget is a convenient way to find and install software on your server without the need to manually search for and download installers from various websites.

