If you’re a Windows 11 user and want to explore the world of Linux without giving up your current operating system, dual booting is the way to go. By installing Linux alongside Windows 11, you can enjoy the best of both worlds and switch between the two as needed.
Installing Linux on Windows 11 in a dual boot configuration may seem daunting, but with this step-by-step guide, you’ll be up and running in no time. Whether you’re a beginner or an experienced user, we’ll walk you through the process, ensuring a smooth installation.
First, you’ll need to choose a Linux distribution that suits your needs. There are many options available, such as Ubuntu, Fedora, and Linux Mint. Each distribution has its own strengths and weaknesses, so take some time to research and find the one that aligns with your preferences.
Once you’ve decided on a Linux distribution, you’ll need to create a bootable USB drive. This will allow you to install Linux on your Windows 11 system. You can use tools like Rufus or Etcher to create the bootable USB drive. Make sure to back up any important data on your Windows system before proceeding.
Section 1: Preparing Your Computer
Before you can install Linux on your Windows 11 computer in a dual boot setup, you need to make sure your computer is ready for the installation process. Here’s a step-by-step guide on how to prepare your computer:
- Backup your data: It’s always a good idea to back up your important files and data before making any changes to your system. This will ensure that you don’t lose any important data during the installation process.
- Check system requirements: Make sure your computer meets the system requirements for both Windows 11 and the Linux distribution you want to install. This includes checking the minimum hardware specifications and available disk space.
- Create a bootable USB drive: You’ll need a bootable USB drive with the Linux distribution you want to install. You can create a bootable USB drive using tools like Rufus or Etcher. Make sure to download the ISO file for the Linux distribution from a trusted source.
- Free up disk space: Before installing Linux, it’s a good idea to free up some disk space on your Windows 11 computer. You can do this by uninstalling unnecessary programs, deleting temporary files, and cleaning up your disk using tools like Disk Cleanup.
- Disable Secure Boot: Secure Boot is a feature in Windows 11 that prevents unauthorized operating systems from loading during the boot process. To install Linux in dual boot mode, you’ll need to disable Secure Boot in your computer’s BIOS settings. The exact steps to do this may vary depending on your computer’s manufacturer.
- Enable UEFI mode: Most modern computers use UEFI (Unified Extensible Firmware Interface) instead of the traditional BIOS. To install Linux in dual boot mode, you’ll need to enable UEFI mode in your computer’s BIOS settings. Again, the steps to do this may vary depending on your computer’s manufacturer.
Once you have completed these steps, your computer will be ready for the Linux installation process. In the next section, we will guide you through the steps to install Linux on your Windows 11 computer in dual boot mode.
Checking System Requirements
Before you begin the installation process, it is important to check if your system meets the necessary requirements for dual booting Linux on Windows 11. Here are the steps to check the system requirements:
- Make sure your computer is running Windows 11. Dual booting Linux on Windows 11 is only possible if you have the latest version of Windows installed.
- Check the available disk space on your computer. You will need enough free space to install Linux alongside Windows 11. It is recommended to have at least 20GB of free space.
- Verify if your computer supports UEFI boot mode. Most modern computers support UEFI, but it is important to check this as some older systems may still use Legacy BIOS.
- Ensure that Secure Boot is disabled in your system’s BIOS settings. Secure Boot can prevent the installation of Linux alongside Windows 11, so it needs to be turned off.
- Check if your computer has a compatible processor. Linux can run on a wide range of processors, but it is always a good idea to verify if your processor is supported.
- Make sure you have a stable internet connection. During the installation process, you may need to download additional packages and updates, so a reliable internet connection is essential.
By following these steps, you can ensure that your system meets the necessary requirements for dual booting Linux on Windows 11. Once you have confirmed that your system is compatible, you can proceed with the installation process.
Creating a Backup
Before proceeding with the installation of Linux on Windows 11 dual boot, it is highly recommended to create a backup of your important files and data. This will ensure that you have a copy of everything in case anything goes wrong during the installation process.
Here is a step-by-step guide on how to create a backup:
- Open the File Explorer on your Windows 11 system.
- Navigate to the location where your important files and data are stored.
- Select the files and folders that you want to backup.
- Right-click on the selected items and choose the “Copy” option.
- Create a new folder in a safe location where you want to store the backup.
- Open the newly created folder and right-click inside it.
- Choose the “Paste” option to paste the copied files and folders into the backup folder.
- Wait for the copying process to complete. This may take some time depending on the size of your files.
- Once the copying is finished, verify that all the files and folders have been successfully copied to the backup folder.
By following these steps, you will have created a backup of your important files and data. This backup will serve as a safety net in case anything goes wrong during the installation of Linux on Windows 11 dual boot.
Freeing Up Disk Space
Before you can install Linux on Windows 11 in a dual boot setup, you’ll need to free up some disk space on your computer. This is necessary to create a separate partition for the Linux operating system.
Here’s how you can free up disk space:
- Open the Windows 11 Start menu and click on “Settings”.
- In the Settings window, click on “System”.
- Under the System settings, click on “Storage”.
- In the Storage settings, you’ll see a breakdown of the disk space usage on your computer. Look for the section labeled “Local Disk (C:)” or the drive where your Windows operating system is installed.
- Click on “Temporary files”.
- Check the boxes next to the types of files you want to delete to free up space. You can select options like “Temporary files”, “Downloads”, “Recycle Bin”, and others.
- Click on “Remove files” to delete the selected files and free up disk space.
- Repeat this process for any other drives you want to free up space on.
By following these steps, you’ll be able to free up disk space on your Windows 11 computer, making room for the Linux installation in the dual boot configuration.
Section 2: Downloading and Preparing Linux
Once you have decided to install Linux on your Windows 11 dual boot system, you will need to download and prepare the Linux distribution of your choice. Here is a step-by-step guide on how to do it:
- Choose a Linux distribution: There are many different Linux distributions available, each with its own unique features and user interface. Research and select the one that best suits your needs.
- Download the ISO file: Visit the official website of the Linux distribution you have chosen and download the ISO file. Make sure to select the version that is compatible with your system architecture (32-bit or 64-bit).
- Create a bootable USB drive: To install Linux on your Windows 11 system, you will need to create a bootable USB drive. You can use tools like Rufus or Etcher to create the bootable drive. Follow the instructions provided by the tool to create the bootable USB drive.
- Backup your data: Before proceeding with the installation, it is always a good idea to backup your important data. This will ensure that you don’t lose any files in case something goes wrong during the installation process.
- Prepare your system: Restart your Windows 11 system and enter the BIOS settings. Change the boot order to prioritize the USB drive. Save the changes and exit the BIOS settings.
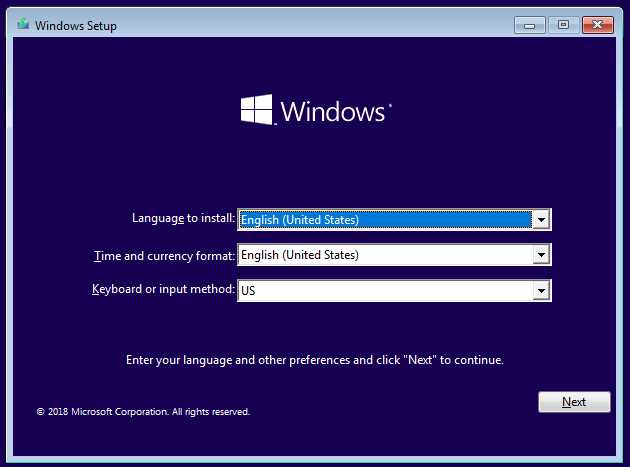
- Boot from the USB drive: Insert the bootable USB drive into your system and restart it. Your system should now boot from the USB drive.
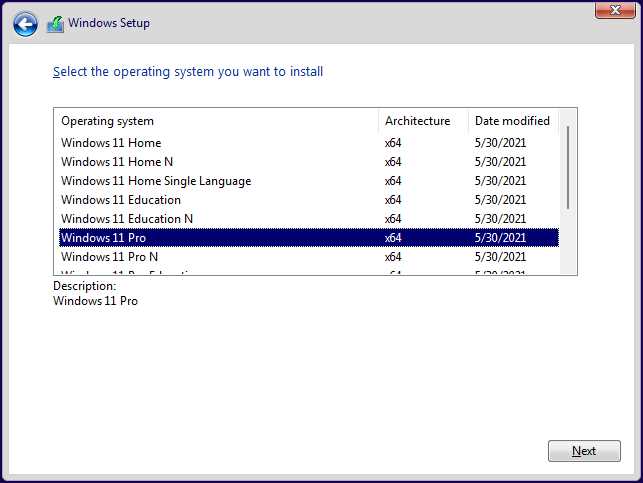
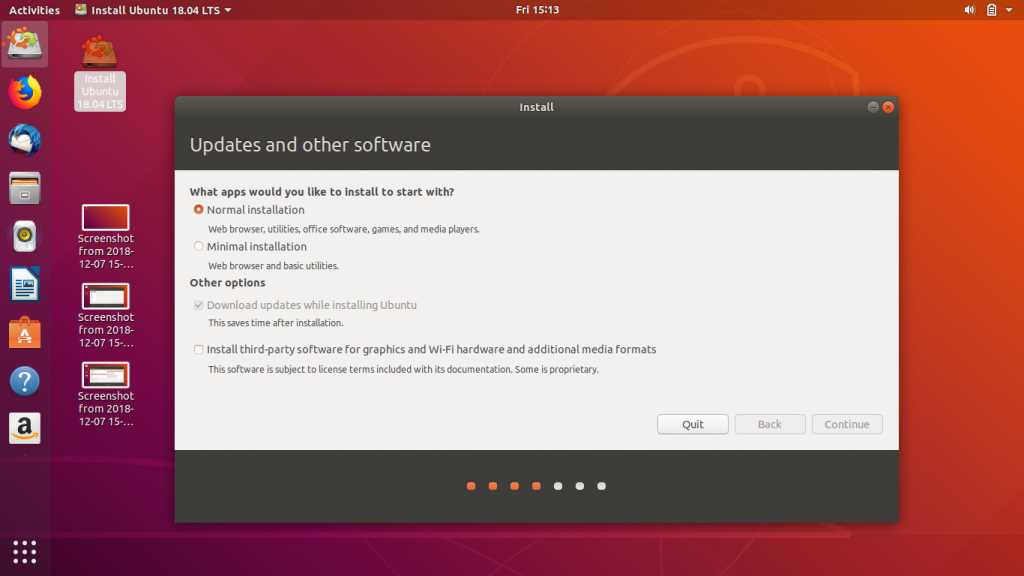
- Install Linux: Follow the on-screen instructions to install Linux on your system. Make sure to select the dual boot option when prompted, so that you can choose between Windows 11 and Linux each time you start your system.
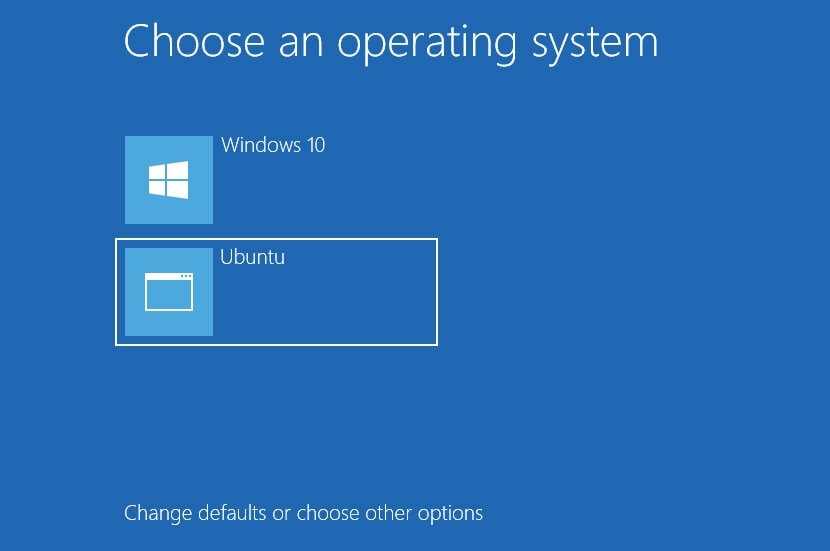
- Complete the installation: Once the installation is complete, restart your system. You should now see a boot menu that allows you to choose between Windows 11 and Linux.
With these steps, you can easily download and prepare Linux for your Windows 11 dual boot system. Now you can enjoy the benefits of both operating systems on a single machine!
Choosing a Linux Distribution
When it comes to installing Linux on Windows 11 in a dual boot setup, one of the first decisions you’ll need to make is which Linux distribution to choose. There are many different distributions available, each with its own strengths and weaknesses.
Here are a few factors to consider when selecting a Linux distribution:
- Compatibility: Make sure the distribution you choose is compatible with your hardware and software requirements. Some distributions may have better support for certain devices or software packages.
- User-Friendliness: If you’re new to Linux, you may want to choose a distribution that is known for being user-friendly and easy to install. Look for distributions that have a graphical installer and a user-friendly interface.
- Package Management: Consider the package management system used by the distribution. Some distributions use package managers like apt or yum, while others use different systems. Choose a distribution that has a package management system that you are comfortable with.
- Community and Support: Look for a distribution that has an active and helpful community. This can be especially important if you run into any issues during the installation process or while using Linux.
- Desktop Environment: Consider the desktop environment that comes with the distribution. Different desktop environments have different looks and feels, so choose one that suits your preferences.
Ultimately, the best Linux distribution for you will depend on your specific needs and preferences. It’s a good idea to try out a few different distributions in a live environment before making a decision. This will give you a chance to see how each distribution performs and whether it meets your requirements.
Once you’ve chosen a Linux distribution, you can proceed with the installation process to set up a dual boot system with Windows 11. Following a step-by-step guide will ensure that you install Linux correctly and avoid any potential issues.
Downloading the ISO Image
Before you can install Linux on Windows 11 in a dual boot configuration, you will need to download the ISO image of the Linux distribution you want to install. The ISO image contains all the necessary files to install and run Linux on your computer.
To download the ISO image, follow these steps:
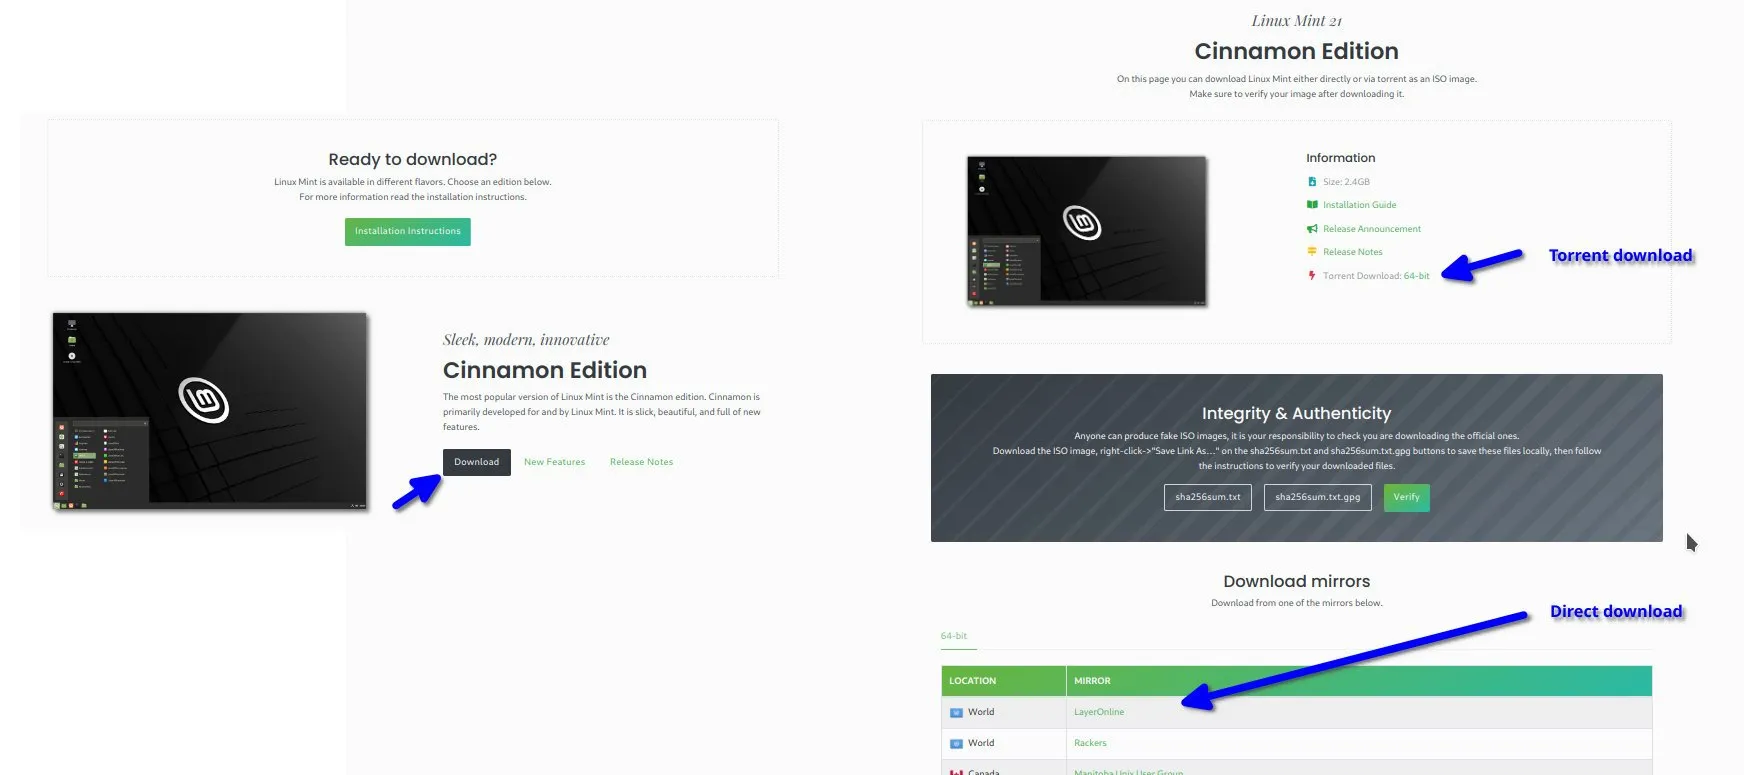
- Open your web browser and go to the official website of the Linux distribution you want to install. For example, if you want to install Ubuntu, go to https://ubuntu.com/download.
- On the website, you will find the download section. Look for the download button or link that corresponds to the version of Linux you want to install. Make sure to select the version that is compatible with your computer’s architecture (32-bit or 64-bit).
- Click on the download button or link to start the download. The ISO image file may be several gigabytes in size, so it may take some time depending on your internet connection speed.
- Once the download is complete, you will have the ISO image file saved on your computer. You can now proceed to the next step, which is creating a bootable USB drive or DVD from the ISO image.
Downloading the ISO image is an essential step in the process of installing Linux on Windows 11 in a dual boot configuration. Make sure to download the ISO image from a trusted source to ensure the integrity and security of the installation files.
Creating a Bootable USB Drive
To install Linux on Windows 11 in a dual boot configuration, you will need to create a bootable USB drive. This USB drive will contain the necessary files to install Linux alongside your existing Windows 11 installation.
Here are the steps to create a bootable USB drive:
| Step 1: | Download the Linux distribution you want to install. Make sure to choose a version that is compatible with your system. |
| Step 2: | Insert a USB drive with at least 4GB of storage capacity into your computer. |
| Step 3: | Open the downloaded Linux distribution file and locate the installation ISO file. |
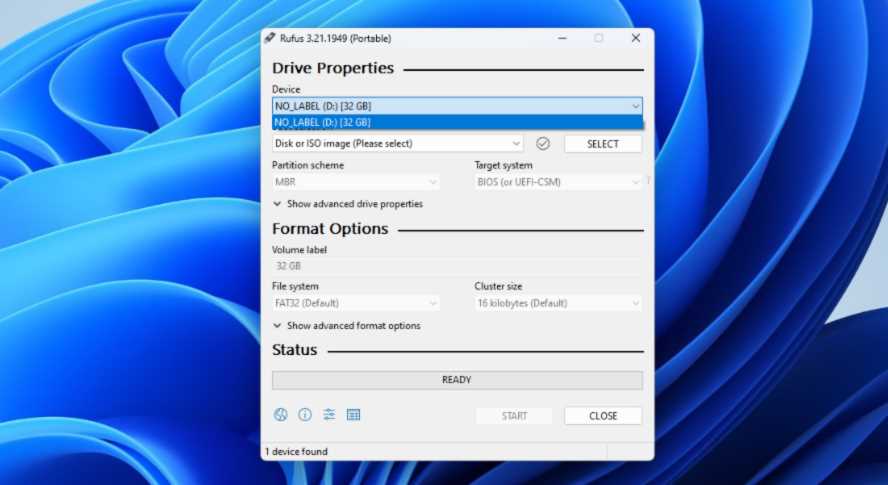
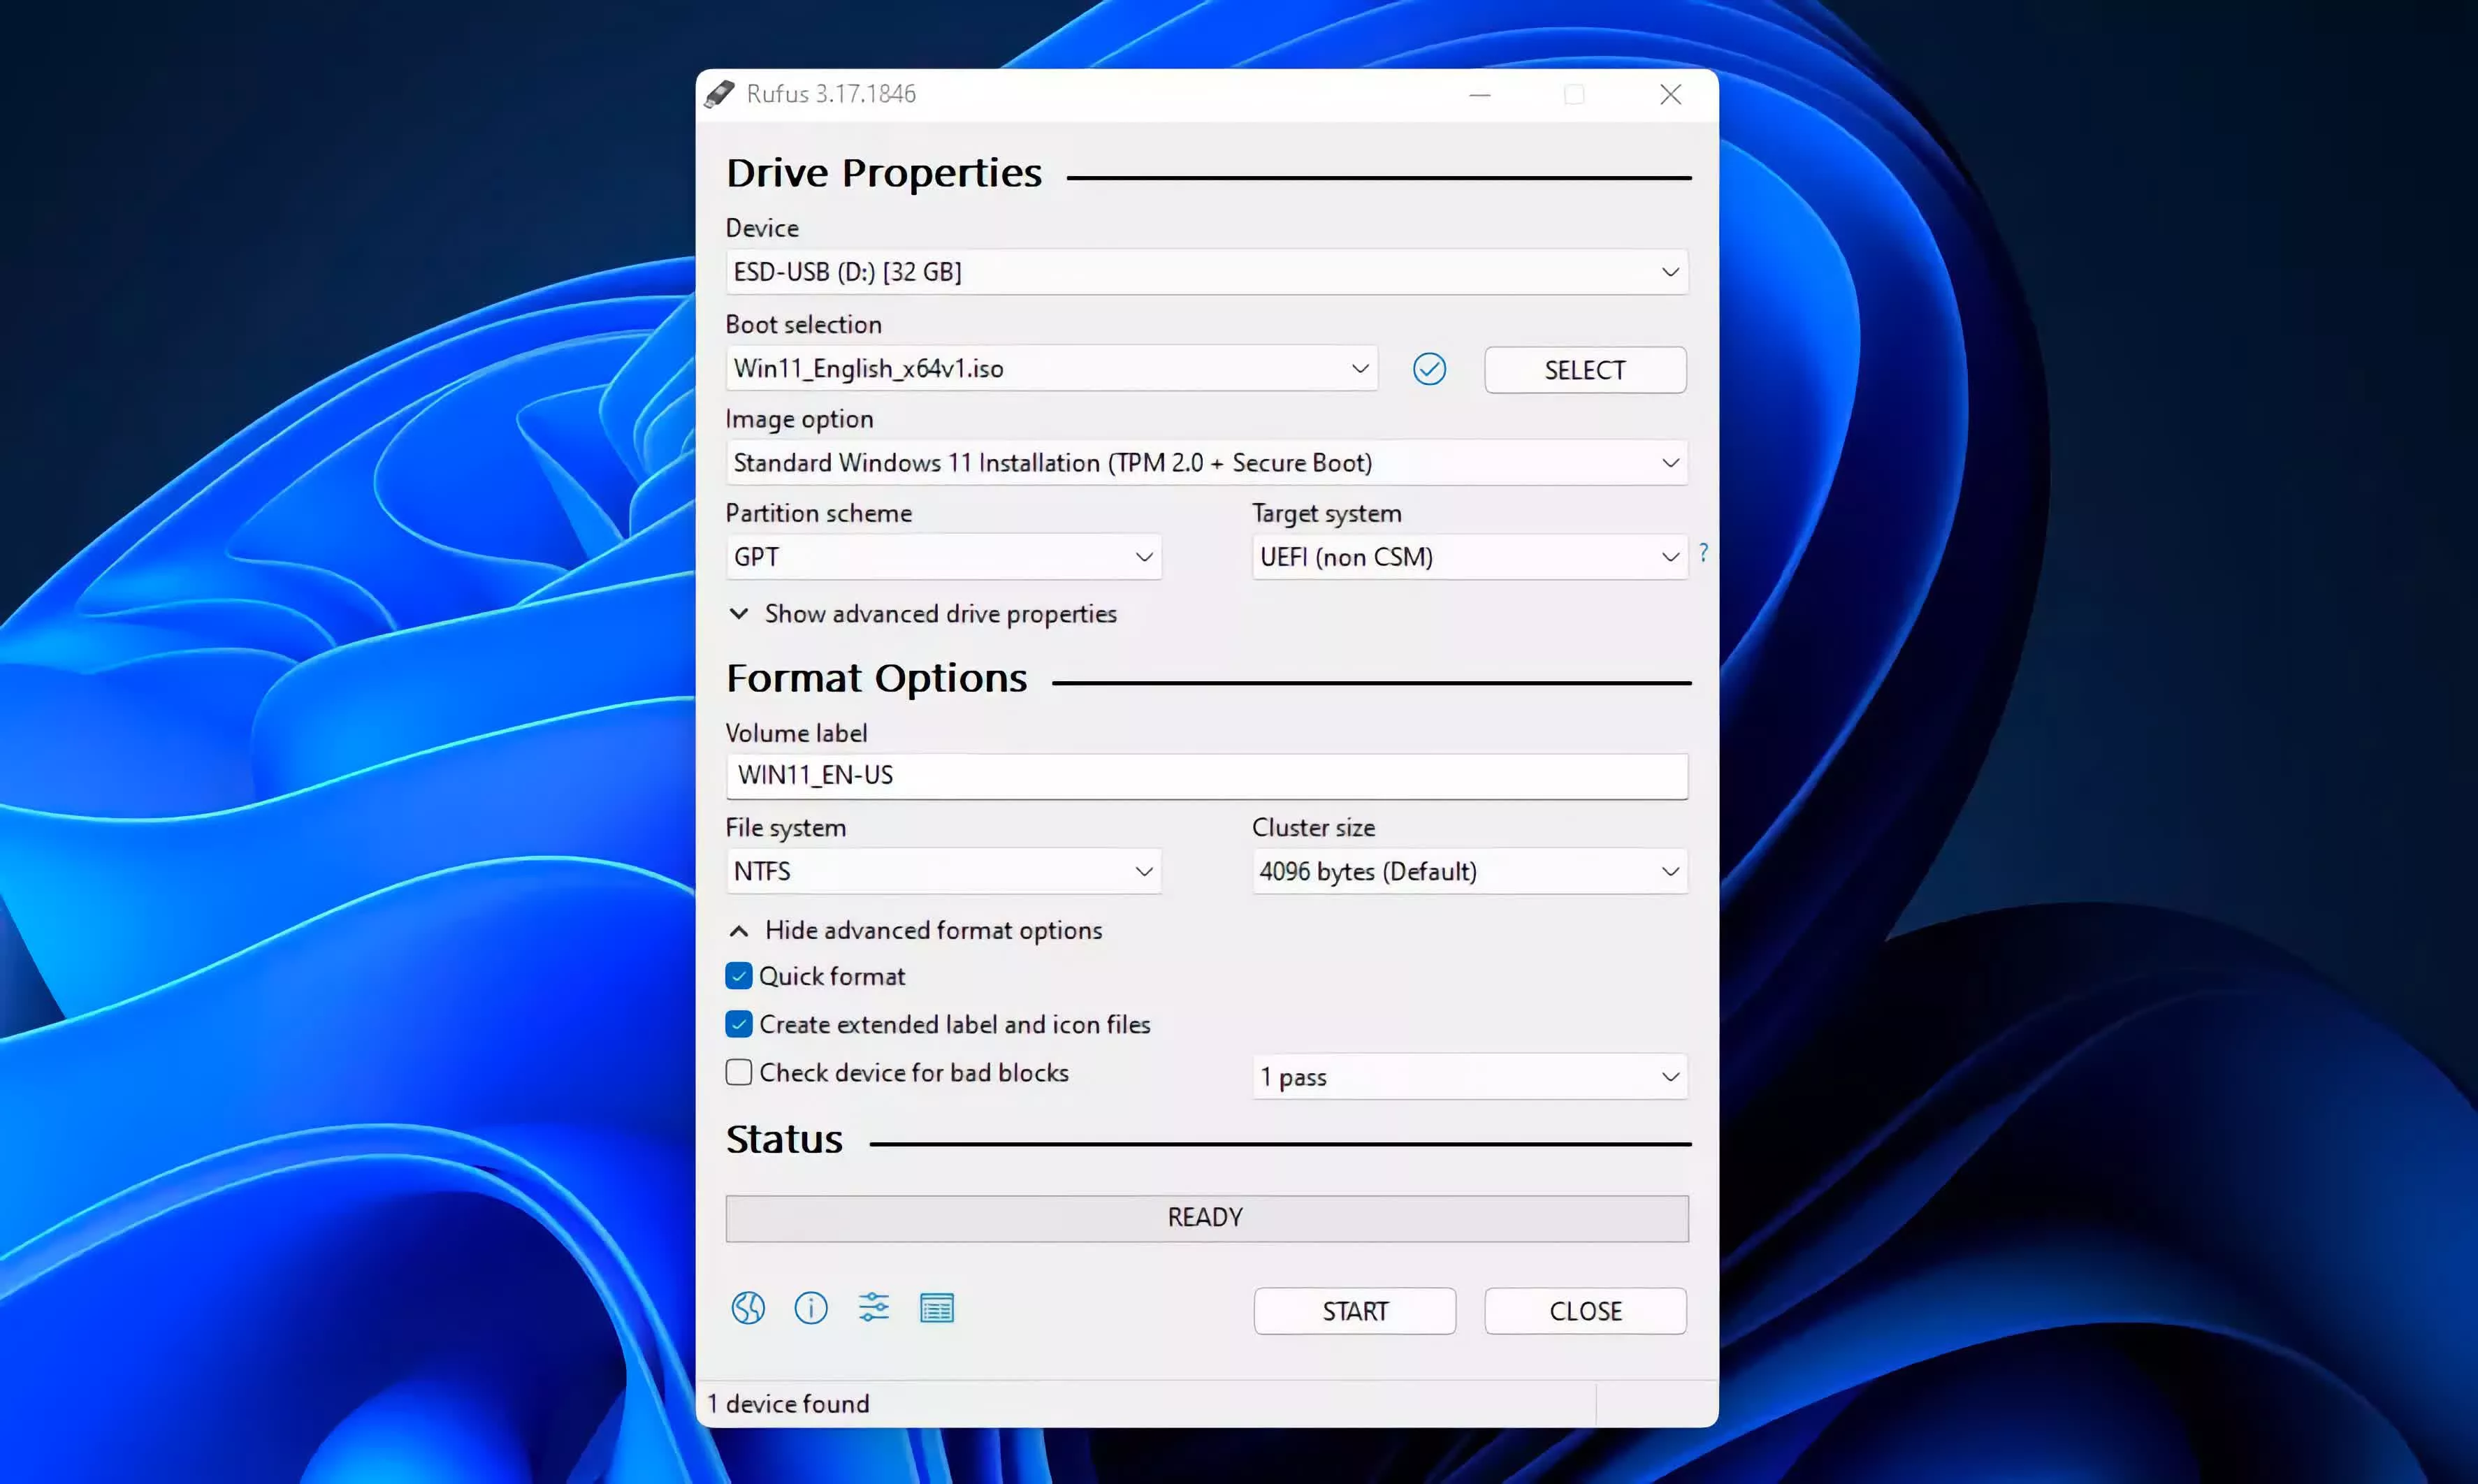
| Step 4: | Download a tool like Rufus or Etcher that can create a bootable USB drive. |
| Step 5: | Open the tool and select the USB drive you inserted in Step 2 as the target device. |
| Step 6: | Browse for the Linux ISO file you located in Step 3 and select it as the source file. |
| Step 7: | Configure any additional settings or options in the tool, such as partition scheme or file system. |
| Step 8: | Click on the “Start” or “Create” button to begin the process of creating the bootable USB drive. |
| Step 9: | Wait for the tool to finish creating the bootable USB drive. This may take a few minutes. |
| Step 10: | Once the process is complete, safely eject the USB drive from your computer. |
Now you have a bootable USB drive that you can use to install Linux on Windows 11 in a dual boot configuration. You can proceed to the next step of the installation process, which is booting from the USB drive and starting the Linux installation.
Section 3: Installing Linux alongside Windows 11
Now that you have Windows 11 up and running, you may want to explore the world of Linux and take advantage of its powerful features. Luckily, you can easily install Linux alongside Windows 11 in a dual-boot configuration. This will allow you to switch between the two operating systems whenever you want.
Here’s how to install Linux alongside Windows 11:
- Choose a Linux distribution: There are many different Linux distributions to choose from, such as Ubuntu, Fedora, and Debian. Research and select the one that best suits your needs.
- Create a bootable Linux USB drive: Download the ISO file for your chosen Linux distribution and use a tool like Rufus or Etcher to create a bootable USB drive.
- Partition your hard drive: Open the Disk Management tool in Windows 11 and shrink your existing Windows partition to make space for Linux. Create a new partition for Linux.
- Boot from the Linux USB drive: Restart your computer and boot from the USB drive. This may require changing the boot order in your computer’s BIOS settings.
- Install Linux: Follow the on-screen instructions to install Linux on the newly created partition. Choose the option to install alongside Windows 11.
- Configure the dual-boot: Once the installation is complete, restart your computer. You should now see a boot menu that allows you to choose between Windows 11 and Linux.
That’s it! You have successfully installed Linux alongside Windows 11 in a dual-boot configuration. Now you can enjoy the best of both worlds and explore the endless possibilities that Linux has to offer.