If you’re looking to explore a new operating system or simply want to try something different, installing Ubuntu on your computer is a great option. Ubuntu is a popular open-source operating system that offers a user-friendly interface and a wide range of software options. In this step-by-step guide, we’ll walk you through the process of installing Ubuntu on your computer.
Step 1: Download Ubuntu
The first step to installing Ubuntu is to download the installation files. You can do this by visiting the official Ubuntu website and selecting the version of Ubuntu you want to install. Make sure to choose the appropriate version for your computer’s architecture (32-bit or 64-bit).
Step 2: Create a Bootable USB Drive
Once you’ve downloaded the Ubuntu installation files, you’ll need to create a bootable USB drive. This will allow you to install Ubuntu on your computer. There are several tools available that can help you create a bootable USB drive, such as Rufus or Etcher. Follow the instructions provided by the tool of your choice to create the bootable USB drive.
Step 3: Boot from the USB Drive
After creating the bootable USB drive, you’ll need to restart your computer and boot from the USB drive. To do this, you may need to change the boot order in your computer’s BIOS settings. Consult your computer’s documentation or do a quick internet search to find out how to access the BIOS settings on your specific computer.
Step 4: Install Ubuntu
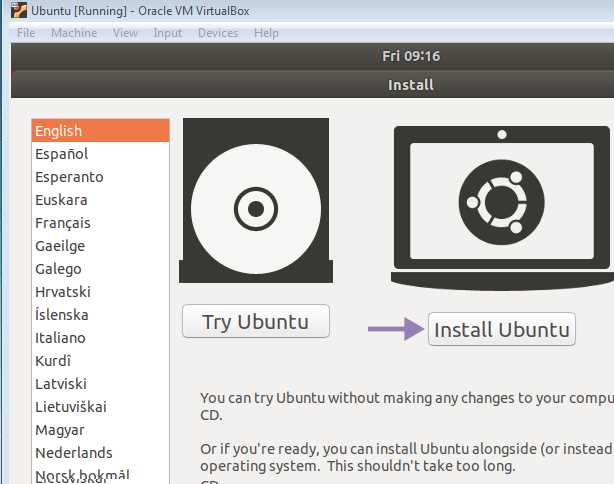
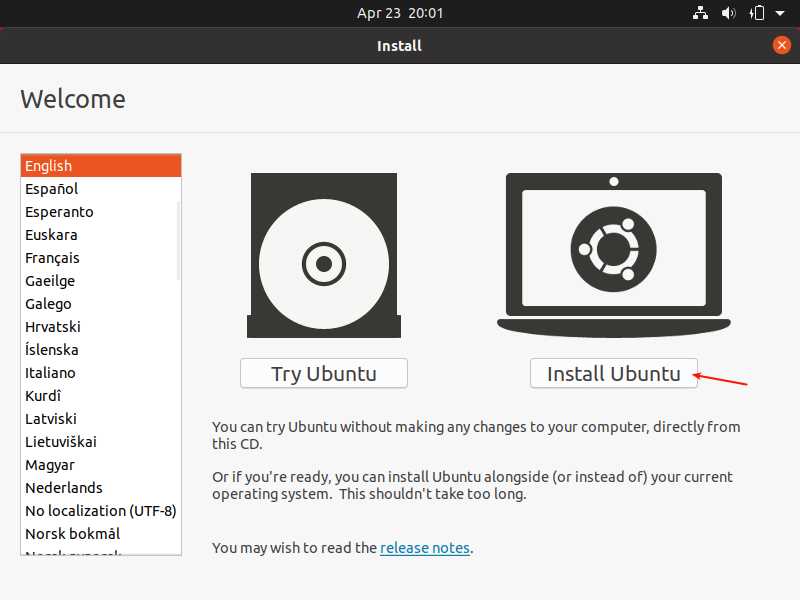
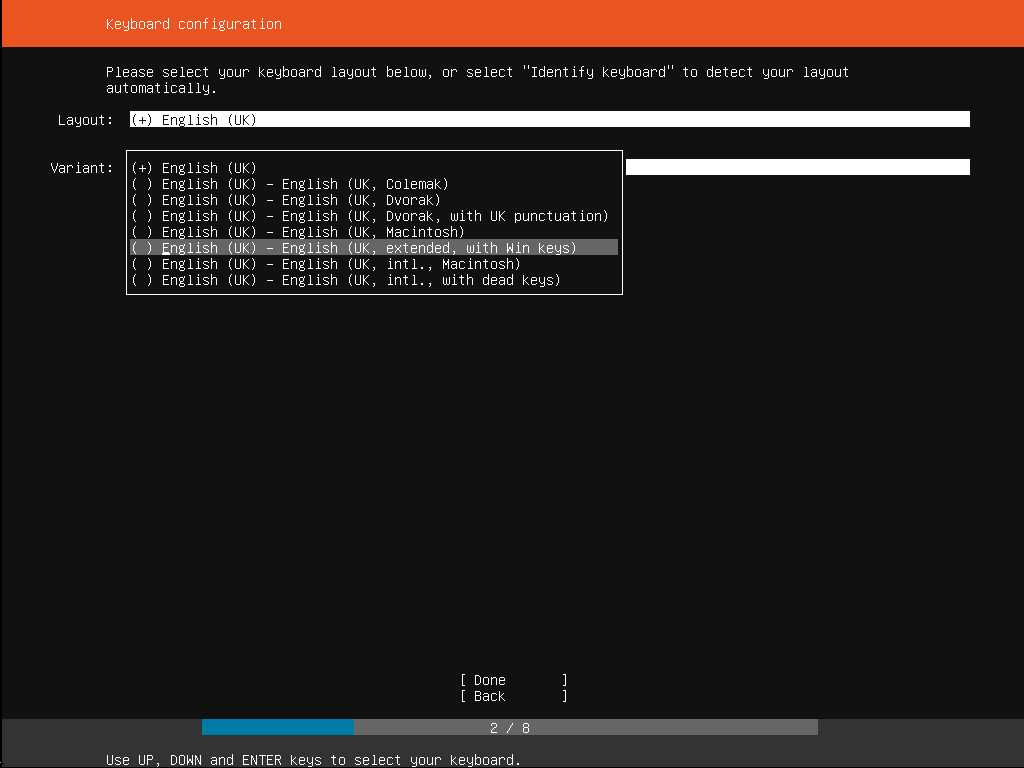
Once you’ve successfully booted from the USB drive, you’ll be presented with the Ubuntu installation wizard. Follow the on-screen instructions to select your language, keyboard layout, and installation type. You’ll also need to choose whether to install Ubuntu alongside your existing operating system or replace it entirely. Make your selections and click “Install” to begin the installation process.
Step 5: Complete the Installation
During the installation process, you’ll be prompted to enter your username, password, and other personal information. Make sure to choose a strong password to protect your Ubuntu installation. Once you’ve entered all the required information, click “Continue” to complete the installation. Your computer will restart, and you’ll be ready to start using Ubuntu!
Installing Ubuntu on your computer is a straightforward process that can be completed in just a few steps. By following this step-by-step guide, you’ll be able to experience all the benefits that Ubuntu has to offer. Whether you’re a beginner or an experienced user, Ubuntu provides a reliable and user-friendly operating system that can enhance your computing experience.
Preparing for Installation

Before you can install Ubuntu on your computer, there are a few steps you need to take to ensure a smooth installation process.
1. Back up your data: It’s always a good idea to back up any important files or documents before installing a new operating system. This way, you won’t risk losing any data during the installation process.
2. Check system requirements: Make sure your computer meets the minimum system requirements to install Ubuntu. This includes having enough disk space, RAM, and a compatible processor.
3. Download the Ubuntu ISO: Go to the official Ubuntu website and download the ISO file for the version of Ubuntu you want to install. Make sure to choose the correct architecture (32-bit or 64-bit) for your computer.
4. Create a bootable USB drive: Once you have the Ubuntu ISO file, you’ll need to create a bootable USB drive. This will allow you to install Ubuntu from the USB drive instead of using a CD or DVD. There are several tools available that can help you create a bootable USB drive, such as Rufus or Etcher.
5. Backup your current operating system: If you’re planning to dual-boot Ubuntu with your current operating system, it’s a good idea to create a backup of your current system. This way, you can easily restore it if anything goes wrong during the installation process.
6. Familiarize yourself with the installation process: Before you start the installation, take some time to read through the Ubuntu installation guide. This will give you a better understanding of the steps involved and any potential issues you may encounter.
By following these steps, you’ll be well-prepared to install Ubuntu on your computer and start enjoying all the benefits of this popular operating system.
Checking System Requirements
Before you begin the installation process, it is important to ensure that your computer meets the necessary system requirements to run Ubuntu smoothly. Here’s how you can check:
1. Make sure your computer has a minimum of 2GB RAM. Ubuntu recommends 4GB or more for optimal performance.
2. Check if your computer has at least 25GB of free disk space. This will ensure that you have enough room to install Ubuntu and any additional software or files you may need.
3. Verify that your computer’s processor is compatible with Ubuntu. Most modern processors should work fine, but it’s always a good idea to double-check.
4. Ensure that your computer has a stable internet connection. This is important as you will need to download the Ubuntu installation files during the process.
By checking these system requirements, you can ensure a smooth installation process and a better overall experience with Ubuntu.
Downloading Ubuntu ISO
To install Ubuntu on your computer, you will need to download the Ubuntu ISO file. The ISO file contains the complete installation package for Ubuntu, including all the necessary files and software.
Here is a step-by-step guide on how to download the Ubuntu ISO:
- Go to the official Ubuntu website at https://ubuntu.com/download.
- On the download page, you will see different versions of Ubuntu available. Choose the version that is compatible with your computer’s architecture. If you are not sure, you can select the 64-bit version, as it is compatible with most modern computers.
- Once you have selected the version, click on the “Download” button next to it.
- Your browser will start downloading the Ubuntu ISO file. The download time may vary depending on your internet connection speed.
- After the download is complete, you will have the Ubuntu ISO file saved on your computer. You can now proceed to the next step of the installation process.
Downloading the Ubuntu ISO is an essential step in the installation process. Make sure to choose the correct version and follow the steps carefully to ensure a successful installation of Ubuntu on your computer.
Creating a Bootable USB Drive
To install Ubuntu on your computer, you will need to create a bootable USB drive. This will allow you to run the Ubuntu installer and install the operating system on your machine. Here is a step-by-step guide on how to create a bootable USB drive:
1. Download the Ubuntu ISO file from the official website. Make sure to choose the correct version and architecture for your computer.
2. Insert a USB drive into your computer. Make sure it has enough storage capacity to hold the Ubuntu installer.
3. Open a terminal window and run the following command to identify the USB drive:
sudo fdisk -l
4. Take note of the device name of the USB drive. It will be something like /dev/sdb.
5. Run the following command to format the USB drive:
sudo mkfs.ext4 /dev/sdb
Replace /dev/sdb with the actual device name of your USB drive.
6. Download and install the UNetbootin tool from the official website.
7. Launch UNetbootin and select the Ubuntu ISO file you downloaded earlier.
8. Choose the USB drive as the destination for the installation.
9. Click the “OK” button to start the installation process. This may take a few minutes.
10. Once the installation is complete, restart your computer and boot from the USB drive.
11. Follow the on-screen instructions to install Ubuntu on your computer.
By following these steps, you will be able to create a bootable USB drive and install Ubuntu on your computer. Enjoy your new operating system!
Installing Ubuntu
Installing Ubuntu is a straightforward process that can be done by following a few simple steps. Here is a step-by-step guide on how to install Ubuntu on your computer:
Step 1: Download the Ubuntu installation file from the official website. Make sure to choose the correct version for your computer.
Step 2: Create a bootable USB drive or DVD using the downloaded installation file. This will allow you to install Ubuntu on your computer.
Step 3: Insert the bootable USB drive or DVD into your computer and restart it.
Step 4: During the boot process, you will see a prompt asking you to choose the language and whether to try Ubuntu or install it. Select the desired options.
Step 5: Follow the on-screen instructions to configure the installation settings, such as the keyboard layout and network connection.
Step 6: Choose the installation type. You can either install Ubuntu alongside your existing operating system or replace it entirely.
Step 7: Select the partition where you want to install Ubuntu. If you are unsure, you can choose the option to install Ubuntu on the entire disk.
Step 8: Set up your username and password for the Ubuntu system.
Step 9: Wait for the installation process to complete. This may take some time, so be patient.
Step 10: Once the installation is finished, restart your computer and remove the bootable USB drive or DVD.
Congratulations! You have successfully installed Ubuntu on your computer. Now you can enjoy all the features and benefits of this popular operating system.
Booting from USB Drive
To install Ubuntu on your computer, you will need to boot from a USB drive. Follow these steps to boot from a USB drive:
- Insert the USB drive into a USB port on your computer.
- Restart your computer.
- While your computer is starting up, access the BIOS settings by pressing the appropriate key (usually F2, F10, or Del) displayed on the screen.
- In the BIOS settings, navigate to the “Boot” or “Boot Order” section.
- Change the boot order to prioritize the USB drive. Move the USB drive to the top of the boot order list.
- Save the changes and exit the BIOS settings.
- Your computer will now restart and boot from the USB drive.
Once your computer has booted from the USB drive, you can proceed with the installation of Ubuntu. Follow the on-screen instructions to complete the installation process.
Choosing Installation Options
When installing Ubuntu, you have several options to choose from to customize your installation. These options allow you to tailor the installation to your specific needs and preferences.
First, you need to decide whether you want to install Ubuntu alongside your existing operating system or replace it entirely. If you choose to install alongside, you will have the option to dual boot, meaning you can choose which operating system to use each time you start your computer. If you choose to replace your existing operating system, Ubuntu will be the only operating system on your computer.
Next, you can choose whether to download updates while installing Ubuntu. It is recommended to select this option as it ensures that you have the latest security patches and bug fixes. However, if you have a slow internet connection or limited data, you may choose to skip this step and download updates later.
Additionally, you can choose whether to install third-party software, such as media codecs and drivers, during the installation process. This option allows you to have a more complete and functional system right from the start. If you plan to use Ubuntu for multimedia purposes or need specific hardware support, it is recommended to select this option.
Finally, you can choose whether to encrypt your home folder. Encrypting your home folder adds an extra layer of security to your personal files and folders. This option is especially useful if you are concerned about the privacy of your data.
By carefully considering these installation options, you can ensure that your Ubuntu installation meets your specific requirements and preferences.