
If you’re looking to enhance the storage capacity of your PS5, installing an NVMe (Non-Volatile Memory Express) drive is the way to go. With an NVMe drive, you can enjoy faster load times, smoother gameplay, and more space for your favorite games and media. In this step-by-step guide, we’ll walk you through the process of installing an NVMe drive in your PS5.
Step 1: Prepare Your PS5
Before you begin, make sure your PS5 is turned off and unplugged from the power source. It’s also a good idea to remove any discs or USB devices that may be connected to the console. This will ensure a safe and smooth installation process.
Step 2: Choose the Right NVMe Drive
Not all NVMe drives are compatible with the PS5, so it’s important to choose the right one. Look for an NVMe drive that meets the PS5’s requirements, such as PCIe 4.0 support and a capacity of at least 250GB. Additionally, make sure the drive has a heat sink or is compatible with the PS5’s cooling system to prevent overheating.
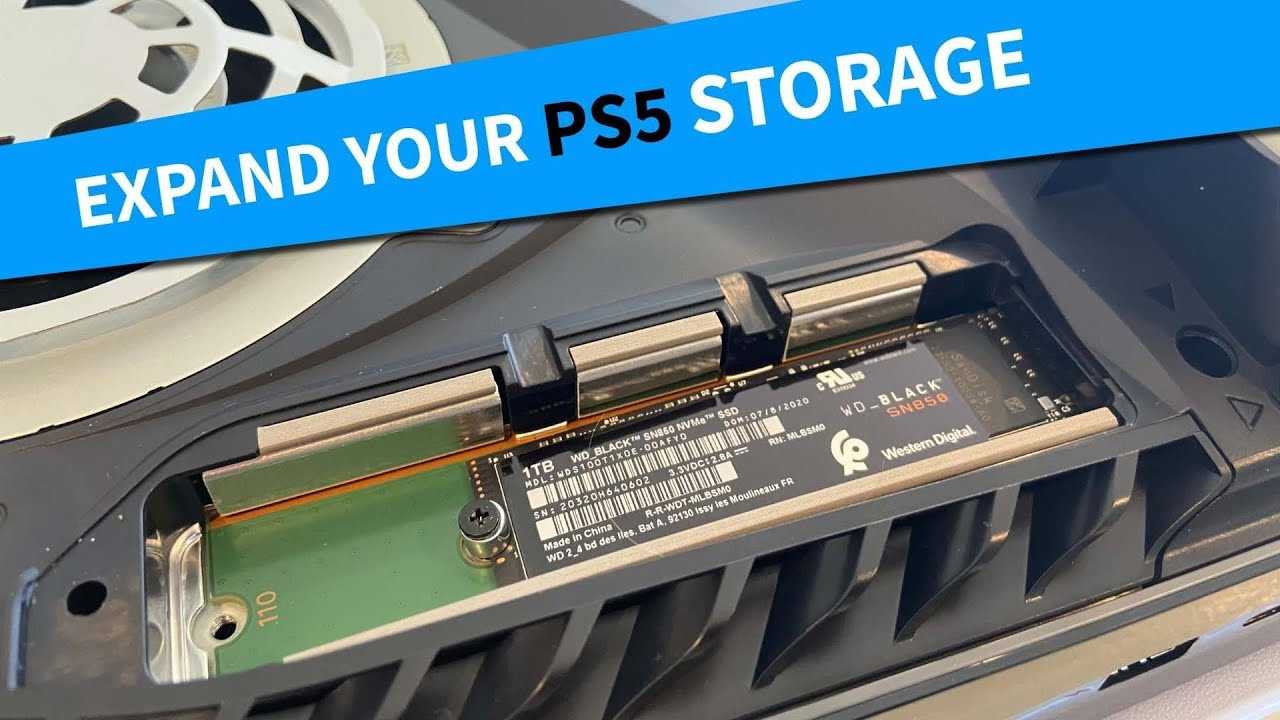
Step 3: Open the PS5’s Expansion Slot
Locate the expansion slot on the PS5. It’s located on the back of the console, behind a removable panel. Use a screwdriver to remove the screw that holds the panel in place, then gently pull the panel off to reveal the expansion slot.
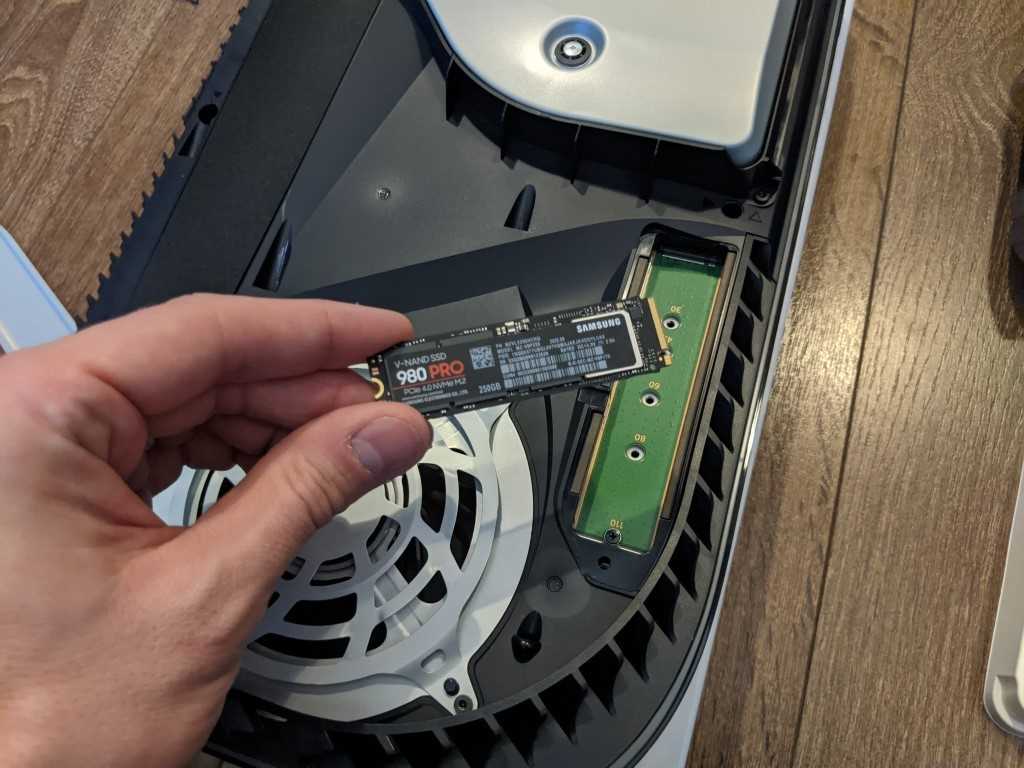
Step 4: Insert the NVMe Drive
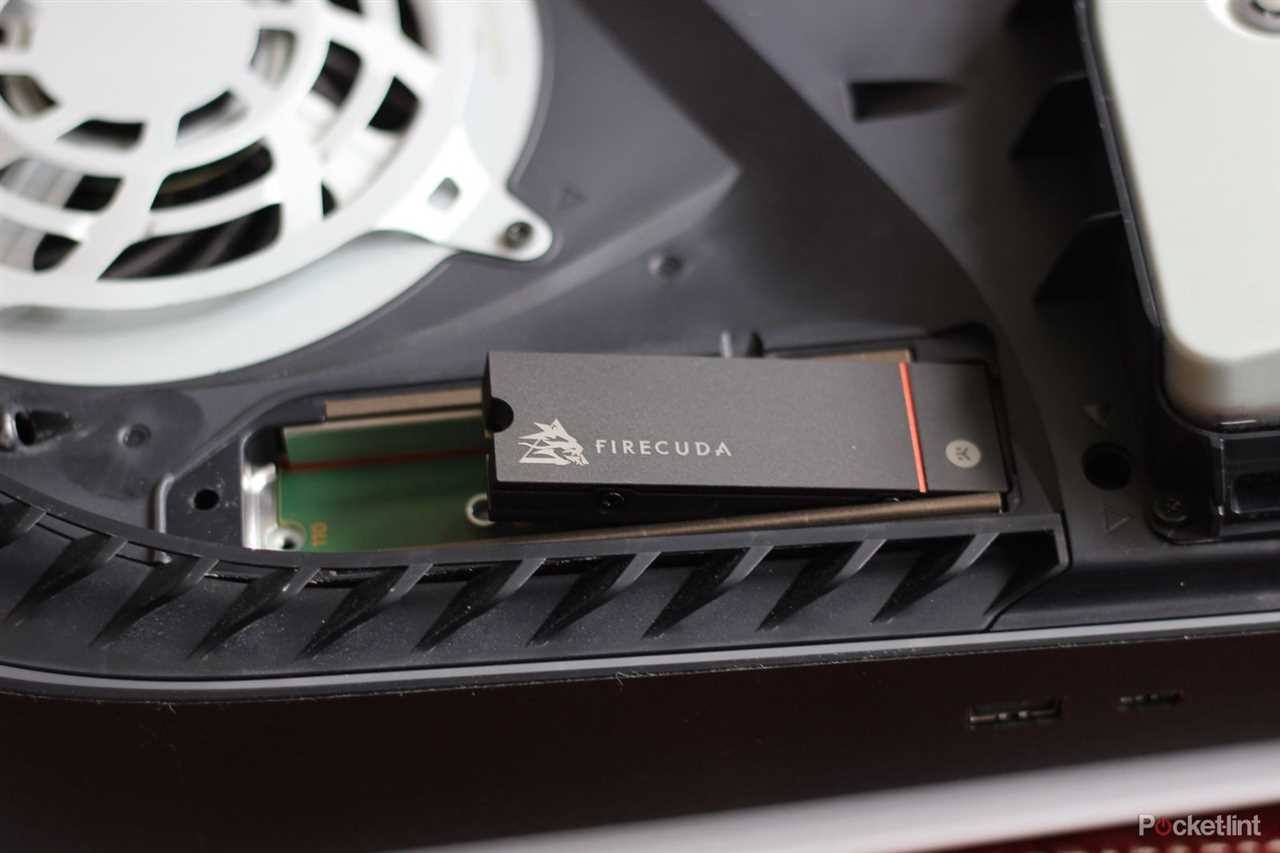
Take your NVMe drive and carefully insert it into the expansion slot. Make sure the connectors on the drive align with the slot, then gently push the drive in until it’s fully seated. Be careful not to force it or apply too much pressure.
Step 5: Secure the NVMe Drive
Once the NVMe drive is inserted, use the screw that you removed earlier to secure it in place. This will ensure that the drive stays securely connected to the PS5 and doesn’t come loose during use.
Step 6: Replace the Panel
After securing the NVMe drive, carefully place the panel back onto the PS5 and use the screwdriver to tighten the screw. Make sure the panel is aligned properly and sits flush with the console.
Step 7: Power On and Format the Drive
Now that the NVMe drive is installed, plug in your PS5 and power it on. The console should recognize the new drive and prompt you to format it. Follow the on-screen instructions to format the drive and make it ready for use.
Congratulations! You’ve successfully installed an NVMe drive in your PS5. Enjoy the increased storage capacity and improved performance for your gaming and media needs!
What is NVMe?
NVMe stands for Non-Volatile Memory Express, which is a communication protocol designed specifically for solid-state drives (SSDs). It is a high-performance interface that allows for faster data transfer between the storage device and the computer system.
With the release of the PS5, Sony has provided users with the option to expand the console’s storage capacity by installing an additional SSD using the NVMe interface. This allows players to store more games, apps, and media on their console without having to delete existing content.
Installing an NVMe drive in the PS5 is a relatively simple process that involves opening the console, inserting the drive into the dedicated slot, and securing it in place. Once installed, the PS5 will recognize the new storage device, and users can begin transferring data or installing games onto it.
Overall, NVMe is a crucial component in expanding the storage capacity of the PS5, providing users with a faster and more efficient way to store and access their data.
Why Install NVMe in PS5?
Installing an NVMe in your PS5 can greatly enhance your gaming experience. The PS5 comes with a limited amount of storage space, and as games continue to increase in size, it’s easy to run out of space quickly. By installing an NVMe, you can expand the storage capacity of your PS5, allowing you to install more games and have quicker access to your data.
NVMe drives are known for their fast read and write speeds, which means that games will load faster, reducing loading times and allowing you to jump into the action more quickly. Additionally, NVMe drives have lower latency compared to traditional hard drives, resulting in smoother gameplay and reduced lag.
Furthermore, installing an NVMe in your PS5 is a relatively straightforward process. With a few simple steps, you can have additional storage space and improved performance in no time. Whether you’re a casual gamer or a hardcore enthusiast, installing an NVMe in your PS5 is a worthwhile investment that will enhance your gaming experience.
Step 1: Check Compatibility

Before proceeding with the installation of an NVMe in your PS5, it is important to check the compatibility of the NVMe drive with your console. Not all NVMe drives are compatible with the PS5, so it is crucial to ensure that the drive you choose meets the necessary requirements.
To check the compatibility, you can refer to the official PlayStation website or consult the user manual of your PS5. Look for the specifications and requirements section to find information about the supported NVMe drives.
Make sure that the NVMe drive you have or plan to purchase is compatible with the PS5. This will ensure that the installation process goes smoothly and that you can take full advantage of the benefits that an NVMe drive can provide.
| Compatibility Checklist: |
|---|
| 1. Check the official PlayStation website for compatibility information. |
| 2. Consult the user manual of your PS5 for compatibility details. |
| 3. Look for the specifications and requirements section. |
| 4. Ensure that the NVMe drive meets the necessary requirements. |
PS5 NVMe Compatibility List
One of the most exciting features of the PS5 is its ability to expand storage using NVMe drives. However, not all NVMe drives are compatible with the PS5. It’s important to know which drives will work before making a purchase.
Here is a step-by-step guide on how to check if an NVMe drive is compatible with the PS5:
- Check the Size: The PS5 only supports M.2 NVMe drives that are 22mm wide and 80mm long. Make sure the drive you choose fits these dimensions.
- Check the Interface: The PS5 requires an NVMe drive with a PCIe 4.0 interface. This ensures maximum performance and compatibility.
- Check the Speed: The PS5 requires an NVMe drive with a minimum sequential read speed of 5,500MB/s. This ensures fast loading times and smooth gameplay.
- Check the Capacity: The PS5 supports NVMe drives with a capacity of at least 250GB and up to 4TB. Choose a drive that suits your storage needs.
- Check the Cooling: The PS5 has specific cooling requirements for NVMe drives. Make sure the drive you choose has a built-in heatsink or is compatible with aftermarket cooling solutions.
By following these steps, you can ensure that the NVMe drive you choose is compatible with your PS5. Remember to consult the official PS5 documentation for a list of recommended drives before making a purchase.

