
If you’re looking to boost the performance of your computer, installing an NVMe SSD is a great way to do it. NVMe, or Non-Volatile Memory Express, is a type of storage technology that provides faster data transfer speeds compared to traditional hard drives. In this step-by-step guide, we will walk you through the process of installing an NVMe SSD into your computer.
Step 1: Gather the necessary tools and materials.
Before you begin the installation process, make sure you have all the tools and materials you need. You will need an NVMe SSD, a screwdriver, and an available M.2 slot on your motherboard. It’s also a good idea to have an anti-static wrist strap to protect your components from static electricity.
Step 2: Prepare your computer.
Before you open your computer case, make sure to shut down your computer and unplug it from the power source. This will help prevent any accidental damage to your components. Once your computer is powered off, you can proceed to open the case.
Step 3: Locate the M.2 slot on your motherboard.
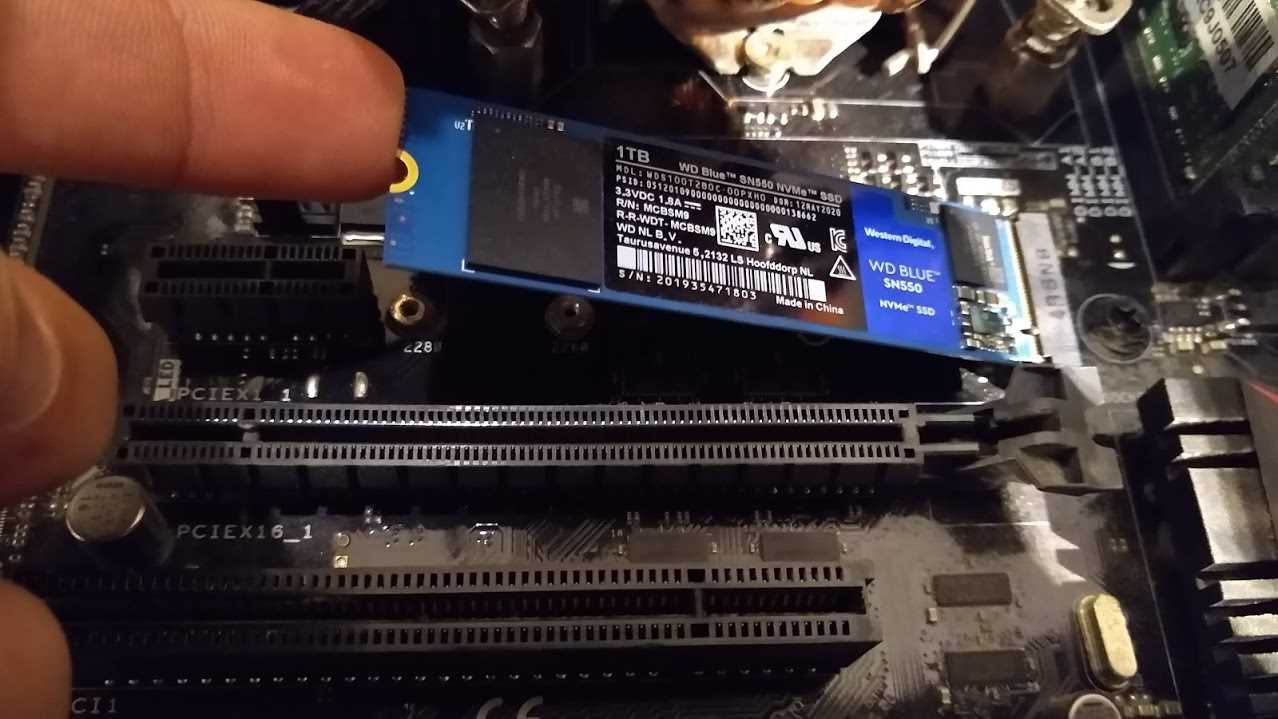
The M.2 slot is a small, rectangular slot on your motherboard where you will insert the NVMe SSD. It is usually located near the CPU socket or near the PCIe slots. Consult your motherboard’s manual if you’re having trouble locating it.
Step 4: Insert the NVMe SSD into the M.2 slot.
Take your NVMe SSD and carefully align it with the M.2 slot on your motherboard. The connector on the SSD should match the slot on the motherboard. Gently insert the SSD into the slot at a 30-degree angle, and then press it down until it is securely in place.
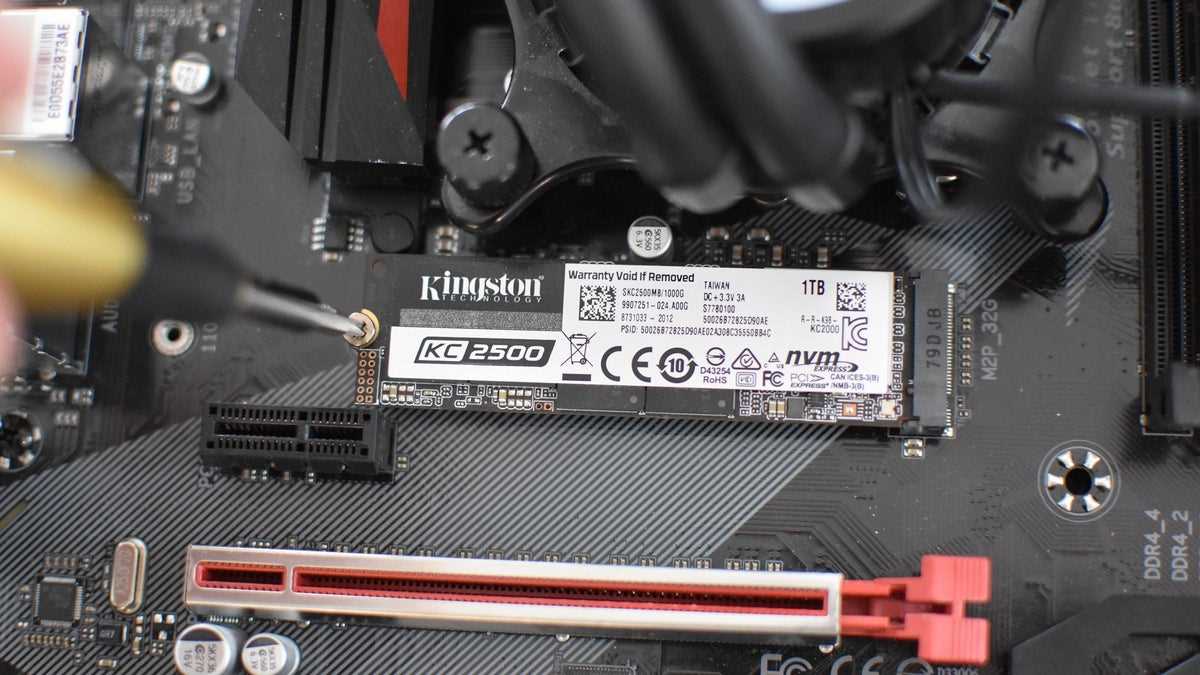
Step 5: Secure the NVMe SSD.
Once the NVMe SSD is inserted into the M.2 slot, you will need to secure it in place. Most motherboards come with a small screw that you can use to secure the SSD. Use your screwdriver to tighten the screw and ensure that the SSD is firmly attached to the motherboard.
Step 6: Close your computer case and power on your computer.
With the NVMe SSD securely installed, you can now close your computer case. Make sure all the cables are properly connected and then plug your computer back into the power source. Power on your computer and check if the NVMe SSD is recognized in the BIOS. If it is, congratulations! You have successfully installed an NVMe SSD.
Installing an NVMe SSD is a relatively simple process that can greatly improve the performance of your computer. By following this step-by-step guide, you can easily install an NVMe SSD and enjoy faster data transfer speeds and improved overall performance.
Preparation
Before you begin the installation process, it is important to gather all the necessary tools and materials. Here is a step-by-step guide on how to prepare for installing an NVMe SSD:
1. Check compatibility: Make sure that your motherboard supports NVMe SSDs. Consult the motherboard’s manual or manufacturer’s website for this information.
2. Purchase the right NVMe SSD: Determine the capacity and form factor that you need for your system. NVMe SSDs come in various sizes, such as M.2 and PCIe, so choose the one that fits your motherboard and meets your storage requirements.
3. Backup your data: Before installing the NVMe SSD, it is recommended to back up your important data to prevent any potential loss during the installation process.
4. Gather the necessary tools: You will need a screwdriver, an antistatic wrist strap (optional but recommended), and any additional cables or adapters required for connecting the NVMe SSD to your motherboard.
5. Read the manufacturer’s instructions: Familiarize yourself with the installation process by reading the user manual or instructions provided by the NVMe SSD manufacturer. This will ensure that you have a clear understanding of the steps involved.
6. Prepare the workspace: Find a clean and well-lit area to work on your computer. Make sure you have enough space to lay out the components and tools needed for the installation.
7. Power off and unplug: Shut down your computer and disconnect it from the power source. This will prevent any electrical accidents and ensure your safety during the installation process.
8. Ground yourself: To avoid static electricity damaging your NVMe SSD or other components, wear an antistatic wrist strap or touch a grounded metal object before handling any sensitive parts.
9. Remove the case: Open your computer case by removing the screws or latches that hold it together. Refer to your computer’s manual for specific instructions on how to access the internal components.
10. Locate the NVMe slot: Identify the NVMe slot on your motherboard where the SSD will be installed. It is usually labeled and located near the CPU or other storage connectors.
11. Remove any existing storage devices: If there are any existing storage devices occupying the NVMe slot, such as a SATA SSD or HDD, disconnect and remove them to make room for the new NVMe SSD.
12. Prepare the NVMe SSD: If necessary, remove the protective cover or heat sink from the NVMe SSD. Be careful not to touch the gold connectors or any sensitive components.
13. Install the NVMe SSD: Gently insert the NVMe SSD into the designated slot on the motherboard. Apply slight pressure until it is securely seated. Make sure it is aligned properly with the slot to avoid any damage.
14. Secure the NVMe SSD: Depending on your motherboard, you may need to use a screw or latch to secure the NVMe SSD in place. Refer to your motherboard’s manual for specific instructions.
15. Close the case: Put the computer case back together by reattaching the screws or latches. Ensure that everything is properly aligned and tightened.
16. Power on and configure: Connect your computer to the power source and turn it on. Enter the BIOS settings to configure the NVMe SSD as the primary boot device, if necessary.
17. Verify installation: Once your computer has booted up, check if the NVMe SSD is recognized by the system. You can do this by checking the BIOS settings or using the operating system’s disk management tool.
By following these preparation steps, you will be ready to install your NVMe SSD with confidence and ensure a smooth installation process.
Gather the necessary tools
Before you begin the installation process, make sure you have all the necessary tools and equipment. Here is a list of items you will need:
| Item | Description |
| SSD | An NVMe SSD that you want to install. |
| Screwdriver | A small screwdriver to remove and install screws. |
| Thermal pad or paste | If your SSD requires thermal management, you will need a thermal pad or paste. |
| Anti-static wrist strap | To prevent static electricity from damaging the SSD, use an anti-static wrist strap. |
| Computer manual | Refer to your computer’s manual for specific instructions on opening the case. |
Make sure you have all these tools ready before you proceed with the installation process. Having everything prepared will ensure a smooth and hassle-free installation of your NVMe SSD.
Back up your data

Before you begin the installation process of your new NVMe SSD, it is crucial to back up your data. Installing a new SSD can sometimes lead to data loss or corruption, so it is always better to be safe than sorry.
To back up your data, you have several options:
| External Hard Drive | You can connect an external hard drive to your computer and copy all your important files and folders onto it. This way, even if something goes wrong during the installation process, you will still have a copy of your data. |
| Cloud Storage | Another option is to use a cloud storage service like Google Drive, Dropbox, or OneDrive. These services allow you to upload your files and access them from any device with an internet connection. Make sure to sync all your important files to the cloud before proceeding with the installation. |
| Network Attached Storage (NAS) | If you have a NAS device, you can transfer your data to it. NAS devices are like personal cloud storage systems that allow you to store and access your files over a network. This option is especially useful if you have a large amount of data that you want to back up. |
Regardless of the method you choose, make sure to double-check that all your important files and folders are backed up before proceeding with the installation. Once you have confirmed that your data is safely backed up, you can proceed with the installation of your new NVMe SSD without worrying about losing any valuable information.
Installation
Installing an NVMe SSD is a straightforward process that can greatly enhance the performance of your computer. Here is a step-by-step guide on how to install an NVMe SSD:
Step 1: Before you begin, make sure your computer is turned off and unplugged from the power source. This will prevent any accidental damage to your hardware.
Step 2: Open your computer case and locate an available M.2 slot. This is where you will install the NVMe SSD. Consult your motherboard manual to find the exact location of the M.2 slot.
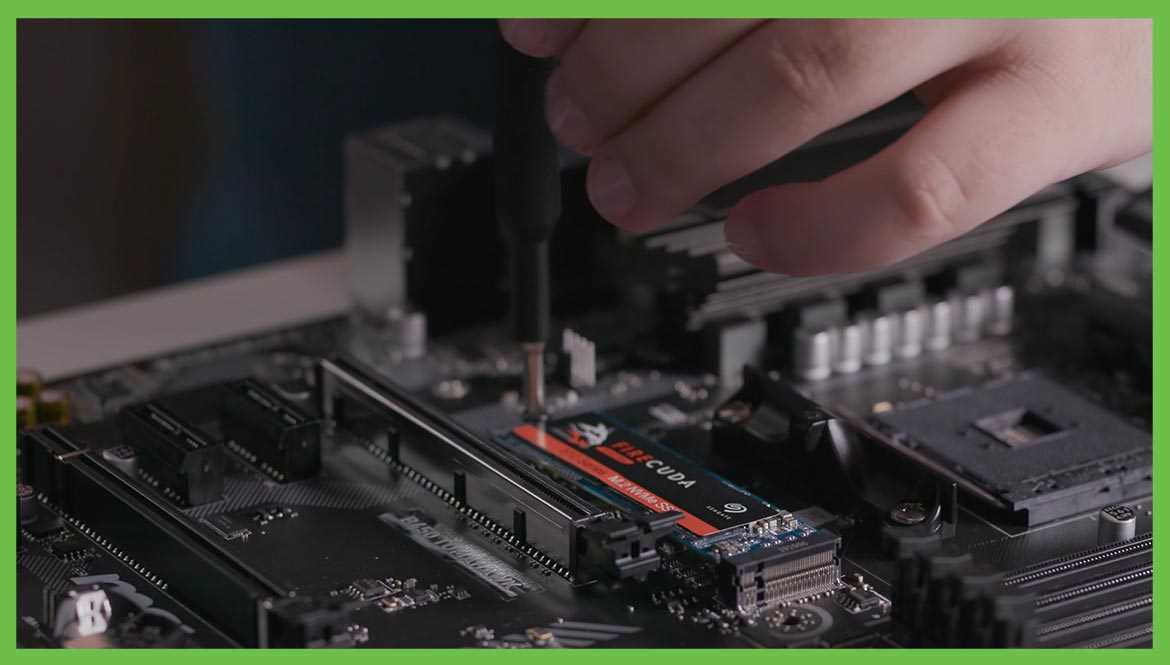
Step 3: Carefully insert the NVMe SSD into the M.2 slot. Make sure the gold connectors on the SSD are properly aligned with the slot. Gently push the SSD into the slot until it is securely in place.
Step 4: Once the NVMe SSD is inserted, use the provided screw to secure it in place. This will prevent any movement or disconnection of the SSD during operation.
Step 5: Close your computer case and reconnect all cables. Make sure everything is properly connected before turning on your computer.
Step 6: Turn on your computer and enter the BIOS settings. Consult your motherboard manual for the specific key or combination of keys to access the BIOS. Once in the BIOS, navigate to the “Boot” or “Storage” section and set the NVMe SSD as the primary boot device.
Step 7: Save your changes and exit the BIOS. Your computer will now boot from the NVMe SSD, providing faster boot times and improved overall performance.
Note: Some older motherboards may require a BIOS update to support NVMe SSDs. Check your motherboard manufacturer’s website for any available updates.
By following these steps, you can easily install an NVMe SSD and enjoy the benefits of faster storage and improved system performance.
Open your computer case
Before you can install your NVMe SSD, you need to open your computer case. Here’s how:
- Make sure your computer is turned off and unplugged from the power source.
- Place your computer on a stable surface with enough space to work.
- Remove any cables or peripherals connected to your computer.
- Locate the screws or latches securing the side panel of your computer case.
- Use a screwdriver or your hands to remove the screws or release the latches.
- Gently slide or lift off the side panel to expose the internal components of your computer.
Now that you have opened your computer case, you can proceed with installing your NVMe SSD. Remember to handle the SSD with care and follow the manufacturer’s instructions for installation.
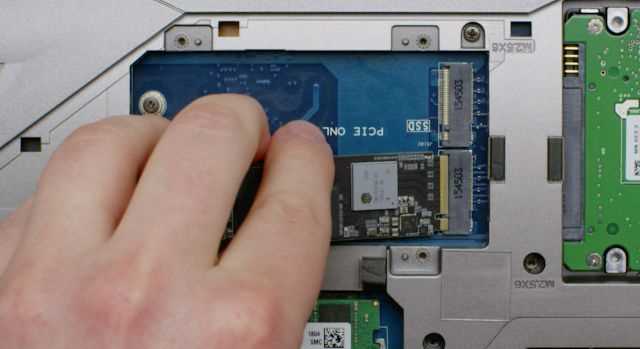
Locate the M.2 slot

Before installing your NVMe SSD, you need to locate the M.2 slot on your motherboard. The M.2 slot is a small, rectangular slot usually located near the CPU socket or the PCIe slots.
To find the M.2 slot, consult your motherboard’s manual or look for a label on the motherboard itself. The manual will provide detailed instructions on where to find the M.2 slot and how to identify it.
Once you have located the M.2 slot, make sure it is compatible with NVMe SSDs. Some motherboards may have multiple M.2 slots, but only one of them supports NVMe. Check the specifications of your motherboard to ensure compatibility.
It is important to note that the M.2 slot may be covered by a heatsink or a protective cover. If this is the case, you will need to remove the cover before installing the NVMe SSD.
Once you have located the M.2 slot and ensured compatibility, you are ready to proceed with the installation of your NVMe SSD.


