
Are you ready to take the plunge into the world of Linux? Installing Linux Mint from a USB drive is a great way to get started. Whether you’re a seasoned Linux user or a complete beginner, this step-by-step guide will walk you through the process of installing Linux Mint from a USB drive.
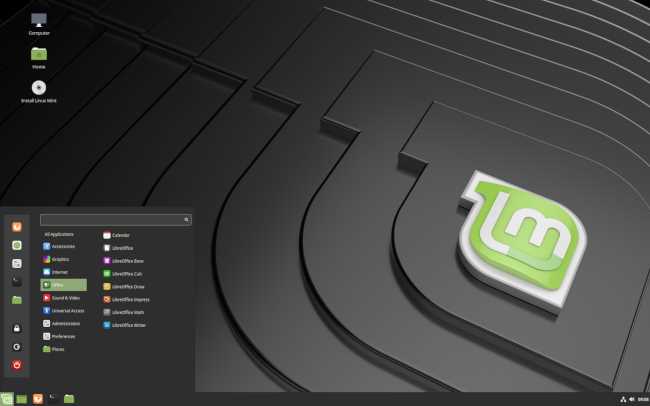
Linux Mint is a popular and user-friendly distribution of the Linux operating system. It offers a sleek and intuitive interface, a wide range of pre-installed software, and a vibrant community of users. By installing Linux Mint from a USB drive, you can try out the operating system without making any changes to your computer’s hard drive.
So, how do you install Linux Mint from a USB drive? It’s easier than you might think. All you need is a USB drive with enough storage space, a computer with a USB port, and a copy of the Linux Mint ISO file. Follow the step-by-step instructions below, and you’ll be up and running with Linux Mint in no time.
Preparing the USB Drive
Before you can install Linux Mint from a USB drive, you need to prepare the drive properly. Follow these steps to ensure a smooth installation process:
- Insert the USB drive into your computer.
- Make sure the USB drive is empty, as all data on it will be erased during the installation process.
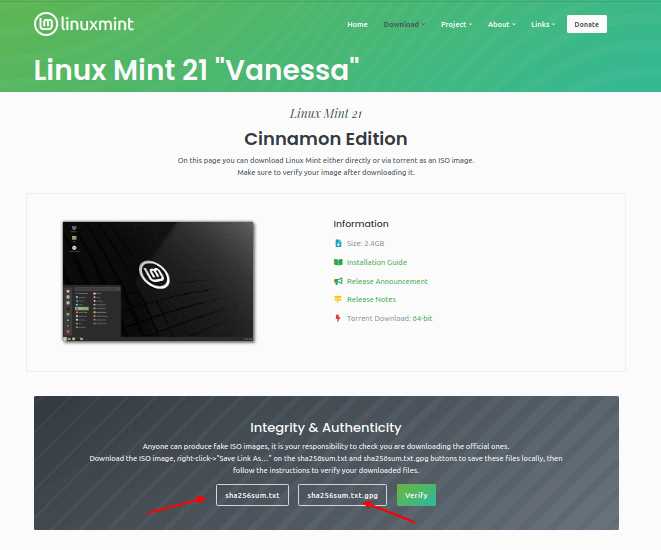
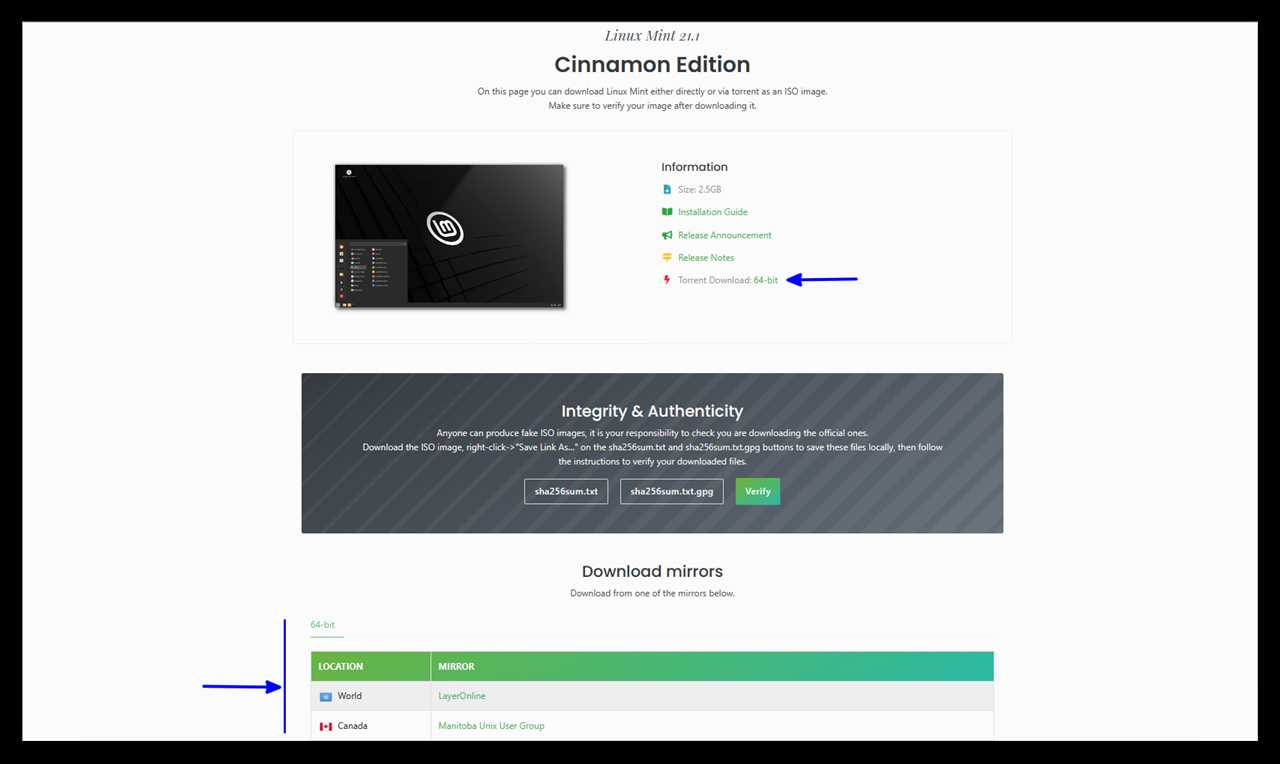
- Download the Linux Mint ISO file from the official website.
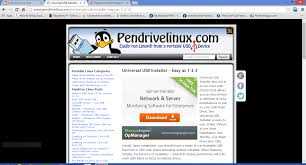
- Once the ISO file is downloaded, you will need to create a bootable USB drive. There are several tools available for this, such as Rufus or Etcher.
- Open the tool of your choice and select the Linux Mint ISO file you downloaded.
- Select the USB drive you inserted into your computer as the destination for the installation.
- Double-check that you have selected the correct USB drive, as selecting the wrong drive can result in data loss.
- Click on the “Start” or “Create” button to begin the process of creating the bootable USB drive.
- Wait for the tool to finish creating the bootable USB drive. This may take a few minutes.
- Once the process is complete, safely eject the USB drive from your computer.
Your USB drive is now ready to be used for installing Linux Mint. You can proceed to the next step of the installation process.
Format the USB Drive
Before you can install Linux Mint from a USB drive, you’ll need to format the drive to ensure it’s compatible with the installation process. Here’s how to do it:
Step 1: Connect the USB drive to your computer.
Step 2: Open the Disk Utility application. You can usually find it in the System Tools or Utilities folder.
Step 3: In the Disk Utility window, select the USB drive from the list of available drives.
Step 4: Click on the “Format” button. A dialog box will appear.
Step 5: In the dialog box, choose a file system format. For Linux Mint, it’s recommended to use the FAT32 format.
Step 6: Enter a name for the USB drive in the “Name” field.
Step 7: Click on the “Format” button to start the formatting process. This will erase all the data on the USB drive, so make sure you have a backup if needed.
Step 8: Once the formatting is complete, you can proceed with installing Linux Mint from the USB drive.
By following these steps, you’ll have a properly formatted USB drive ready for installing Linux Mint. Remember to safely eject the drive before removing it from your computer.
Create a Bootable USB Drive
To install Linux Mint from a USB drive, you will need to create a bootable USB drive. Follow these steps to create one:
- Download the Linux Mint ISO file from the official website.
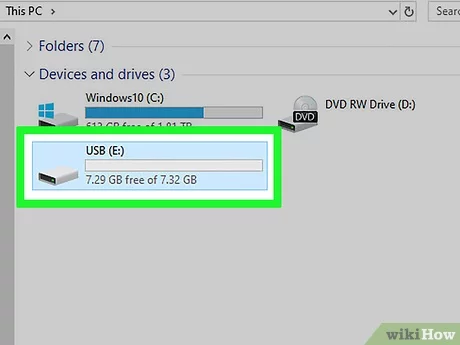
- Insert a USB drive with at least 4GB of storage capacity into your computer.
- Open the “USB Image Writer” application.
- Select the Linux Mint ISO file you downloaded.
- Choose the USB drive you inserted as the target device.
- Click on the “Write” button to start the process.
- Wait for the process to complete.
- Once the process is finished, safely eject the USB drive from your computer.
Your bootable USB drive is now ready to be used for installing Linux Mint. Make sure to set your computer to boot from the USB drive in the BIOS settings before proceeding with the installation.
Verify the Bootable USB Drive
Before proceeding with the installation process, it is important to verify that the USB drive you have created is bootable and ready to install Linux Mint. This step ensures that you won’t encounter any issues during the installation process.
To verify the bootable USB drive, follow these steps:
- Insert the USB drive into the computer where you want to install Linux Mint.
- Restart the computer and access the boot menu. The key to access the boot menu may vary depending on your computer’s manufacturer, but commonly used keys are F12, F10, or Esc.
- Select the USB drive from the boot menu and press Enter.
- If the computer successfully boots from the USB drive, you will see the Linux Mint installation screen. This indicates that the USB drive is bootable and ready for installation.
If the computer does not boot from the USB drive and instead boots into the operating system already installed on the computer, you may need to adjust the boot order in the computer’s BIOS settings. Consult your computer’s manual or manufacturer’s website for instructions on how to change the boot order.
Once you have verified that the USB drive is bootable, you can proceed with the installation process of Linux Mint.
Installing Linux Mint

To install Linux Mint from a USB drive, follow these steps:
- Insert the USB drive into your computer.
- Boot your computer from the USB drive.
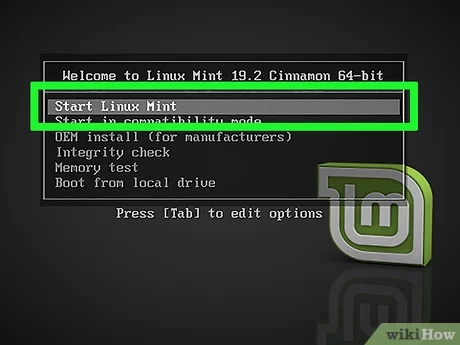
- Select the “Install Linux Mint” option from the boot menu.
- Choose your preferred language and click “Continue”.
- Select your keyboard layout and click “Continue”.
- Choose whether to install third-party software and click “Continue”.
- Select the installation type (e.g., “Erase disk and install Linux Mint”) and click “Install Now”.
- Follow the on-screen instructions to set up your username, password, and other preferences.
- Wait for the installation process to complete.
- Restart your computer and remove the USB drive.
Once the installation is complete, you can start using Linux Mint on your computer.
Boot from the USB Drive
Once you have created a bootable USB drive with Linux Mint, you can now proceed to boot your computer from it. Follow the steps below to boot from the USB drive:
- Insert the USB drive into a USB port on your computer.
- Restart your computer.
- During the boot process, you may need to access the BIOS or UEFI settings. The key to access these settings varies depending on your computer manufacturer, but it is usually one of the function keys (F1, F2, F10, etc.) or the Delete key. Look for a message on the screen during boot that indicates which key to press.
- Once you are in the BIOS or UEFI settings, navigate to the “Boot” or “Boot Order” section.
- Change the boot order so that the USB drive is the first boot option. This will ensure that your computer boots from the USB drive instead of the internal hard drive.
- Save the changes and exit the BIOS or UEFI settings.
- Your computer will now restart and boot from the USB drive.
Once the computer has booted from the USB drive, you will see the Linux Mint installation menu. From here, you can follow the on-screen instructions to install Linux Mint on your computer.
Note: If your computer does not boot from the USB drive, you may need to enable the “USB Boot” or “External Device Boot” option in the BIOS or UEFI settings. Consult your computer’s documentation or manufacturer’s website for more information on how to do this.
Select the Installation Language
When installing Linux Mint from a USB, the first step is to select the installation language. This step is crucial as it determines the language in which the operating system will be installed. To ensure a smooth installation process, it is important to choose a language that you are comfortable with and can easily navigate through.
To select the installation language, follow these steps:
- Boot your computer from the Linux Mint USB.
- Once the Linux Mint boot menu appears, use the arrow keys to navigate to the “Select Language” option.
- Press Enter to confirm your selection.
- A list of available languages will be displayed. Use the arrow keys to highlight your preferred language.
- Press Enter to select the language.
After selecting the installation language, the Linux Mint installation process will continue in the chosen language. It is important to note that changing the language after installation may require additional steps and could potentially affect the system’s functionality.
By carefully selecting the installation language, you can ensure a smooth and hassle-free installation of Linux Mint from a USB.
Choose the Installation Type
Once you have booted your computer from the Linux Mint USB, you will be presented with the installation wizard. The first step is to choose the installation type.
Linux Mint offers two installation options: “Erase disk and install Linux Mint” and “Something else”.
If you want to install Linux Mint as the only operating system on your computer, you can choose the “Erase disk and install Linux Mint” option. This will delete all the data on your hard drive and install Linux Mint as the sole operating system.
If you want to keep your current operating system or have multiple operating systems installed on your computer, you should choose the “Something else” option. This will allow you to manually partition your hard drive and choose where to install Linux Mint.
Regardless of the option you choose, it is recommended to back up your important data before proceeding with the installation process.
Note: Make sure to select the correct installation type that suits your needs, as the installation process will differ depending on your choice.
Once you have made your selection, click “Next” to proceed to the next step of the installation process.
Configuring the Installation
Once you have booted into the Linux Mint USB, you will need to configure the installation settings before proceeding with the installation process. Here is a step-by-step guide on how to configure the installation:
1. Language Selection: Select your preferred language for the installation process. This will determine the language used for the installation wizard and the default language for your Linux Mint system.
2. Keyboard Layout: Choose the keyboard layout that matches your physical keyboard. This is important to ensure that you can type correctly during the installation process and when using Linux Mint.
3. Installation Type: Select the installation type that suits your needs. You can choose to install Linux Mint alongside an existing operating system, replace the existing operating system with Linux Mint, or manually partition the disk for advanced users.
4. Disk Selection: Choose the disk or partition where you want to install Linux Mint. Make sure to select the correct disk or partition, as the installation process will format and erase all data on the selected disk or partition.
5. User Information: Enter your username, password, and computer name. These details will be used to create your user account and set up the system. Make sure to choose a strong password to ensure the security of your Linux Mint system.
6. Installation Progress: Once you have configured all the installation settings, click on the “Install” button to start the installation process. The installer will copy the necessary files and configure the system according to your settings.
7. Installation Complete: After the installation process is complete, you will be prompted to restart your computer. Remove the USB drive and restart your computer to boot into your newly installed Linux Mint system.
By following these steps, you can easily configure the installation of Linux Mint from a USB drive. Enjoy using Linux Mint and exploring its features and functionalities!


