GitHub Copilot is an innovative AI-powered coding assistant developed by GitHub. It uses machine learning algorithms to provide developers with intelligent code suggestions and completions, making coding faster and more efficient. If you’re wondering how to install GitHub Copilot and take advantage of its powerful features, this step-by-step guide will walk you through the process.
Step 1: Sign up for the GitHub Copilot technical preview
To get started with GitHub Copilot, you’ll need to sign up for the technical preview. Visit the GitHub Copilot website and click on the “Sign up for the technical preview” button. Fill in the required information, including your name, email address, and GitHub username. Once you’ve submitted the form, you’ll receive an email with further instructions.
Step 2: Install the GitHub Copilot extension
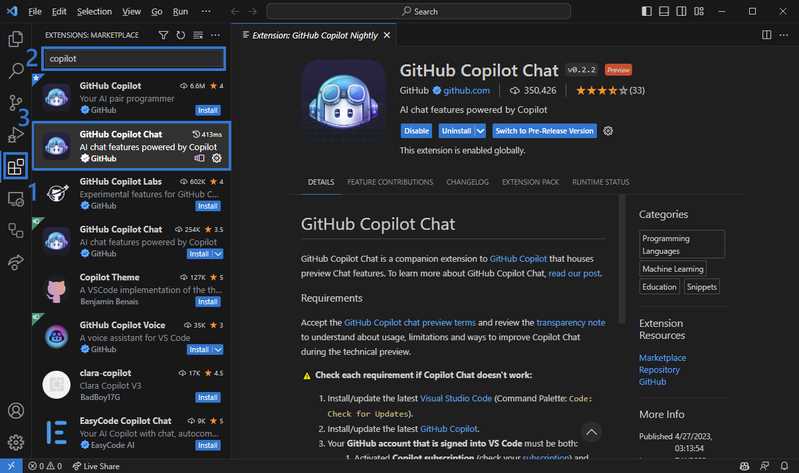
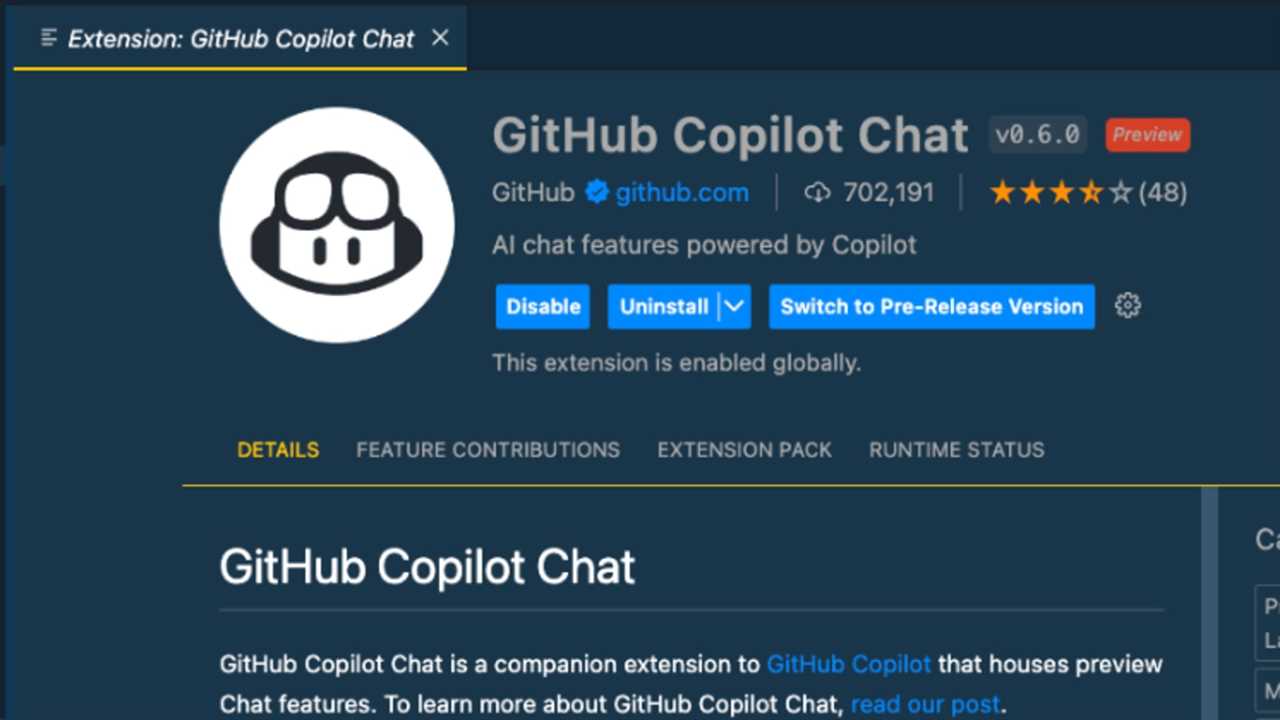
After signing up for the technical preview, you’ll need to install the GitHub Copilot extension in your preferred code editor. GitHub Copilot currently supports Visual Studio Code, so make sure you have it installed on your machine. Open Visual Studio Code and navigate to the Extensions view. Search for “GitHub Copilot” and click on the “Install” button next to the GitHub Copilot extension. Once the installation is complete, you’ll need to restart Visual Studio Code.
Step 3: Set up GitHub Copilot
Once you’ve installed the GitHub Copilot extension, you’ll need to set it up. Open Visual Studio Code and go to the Settings view. Search for “GitHub Copilot” and click on the “Edit in settings.json” link. This will open the settings.json file, where you can configure GitHub Copilot according to your preferences. You can customize various aspects of GitHub Copilot, such as enabling or disabling specific features and setting up keybindings. Save the changes and you’re ready to start using GitHub Copilot!
With GitHub Copilot installed and set up, you’ll be able to experience the power of AI-assisted coding. As you write code, GitHub Copilot will provide intelligent suggestions and completions based on the context, helping you write code faster and with fewer errors. It’s like having a coding expert by your side, guiding you through the development process. So why wait? Install GitHub Copilot today and take your coding productivity to the next level!
Requirements for Installing GitHub Copilot
To install GitHub Copilot, you will need:
– A compatible code editor: GitHub Copilot is currently available as a plugin for Visual Studio Code. Make sure you have Visual Studio Code installed on your computer before proceeding.
– An active GitHub account: GitHub Copilot is developed by GitHub and requires an active GitHub account to use. If you don’t have one, you can sign up for free on the GitHub website.
– Internet connection: GitHub Copilot relies on an internet connection to access its machine learning models and provide code suggestions. Make sure you have a stable internet connection while using GitHub Copilot.
– Sufficient system resources: GitHub Copilot utilizes machine learning models to generate code suggestions, which can be resource-intensive. Ensure that your computer meets the minimum system requirements to run GitHub Copilot smoothly.
– Patience and willingness to learn: GitHub Copilot is an AI-powered tool that learns from your code and provides suggestions. It may not always generate perfect code, so it’s important to have patience and be open to learning from its suggestions.
Operating System Compatibility

GitHub Copilot is compatible with various operating systems, making it accessible to a wide range of developers. Whether you are using Windows, macOS, or Linux, you can easily install and utilize Copilot to enhance your coding experience.
Here is a breakdown of Copilot’s compatibility with different operating systems:
| Operating System | Compatibility |
|---|---|
| Windows | ✔️ |
| macOS | ✔️ |
| Linux | ✔️ |
To install Copilot on your operating system, simply follow the step-by-step guide provided by GitHub. Once installed, you can start taking advantage of Copilot’s powerful code suggestions and auto-completion capabilities to speed up your development process.
Regardless of the operating system you use, GitHub Copilot is designed to seamlessly integrate with your preferred code editor, providing you with intelligent code suggestions and saving you time and effort.
Code Editor Compatibility

GitHub Copilot is compatible with a wide range of code editors, making it accessible to developers using different tools and platforms. Whether you prefer a lightweight editor or a full-featured integrated development environment (IDE), you can easily install and use GitHub Copilot to enhance your coding experience.
Here are some popular code editors that are compatible with GitHub Copilot:
- Visual Studio Code (VS Code): As an official extension developed by GitHub, Copilot seamlessly integrates with VS Code. You can install Copilot directly from the VS Code marketplace and start using it right away.
- Atom: Atom is another popular code editor that supports GitHub Copilot. You can install the Copilot package from the Atom package manager and enable it within your Atom editor.
- Sublime Text: If you’re using Sublime Text, you can also take advantage of GitHub Copilot. Install the Copilot plugin from the Sublime Text package manager and enjoy its code generation capabilities.
- IntelliJ IDEA: IntelliJ IDEA, a powerful Java IDE, can be enhanced with GitHub Copilot. Install the Copilot plugin from the IntelliJ IDEA marketplace and start leveraging its AI-powered code suggestions.
These are just a few examples of code editors that are compatible with GitHub Copilot. However, it’s worth noting that Copilot may work with other editors as well, depending on their compatibility and support for extensions. Make sure to check the official documentation or the respective marketplace of your preferred code editor to see if GitHub Copilot is available.
By installing GitHub Copilot in your preferred code editor, you can benefit from its advanced code generation capabilities and save time while writing code. Whether you’re a beginner or an experienced developer, Copilot can assist you in writing code faster and more efficiently.
Internet Connection
In order to install GitHub Copilot, you will need a stable internet connection. Having a reliable internet connection is essential for downloading and installing the necessary files for GitHub Copilot to function properly.
Make sure that you have a strong and stable internet connection before proceeding with the installation process. If you are using a Wi-Fi connection, ensure that you are connected to a network with a good signal strength. If you are using a wired connection, check that your Ethernet cable is securely plugged in and that your internet service is working correctly.
Having a fast internet connection is also recommended, as it will help speed up the installation process. Slow internet speeds may result in longer download times and potential interruptions during the installation.
Once you have confirmed that you have a stable and fast internet connection, you can proceed with the installation of GitHub Copilot.
Installation Steps for GitHub Copilot

Step 1: Go to the GitHub Copilot website.
Step 2: Click on the “Get started” button.
Step 3: Sign in to your GitHub account or create a new one.
Step 4: Once signed in, click on the “Install Copilot” button.
Step 5: Follow the on-screen instructions to download the Copilot extension for your preferred code editor.
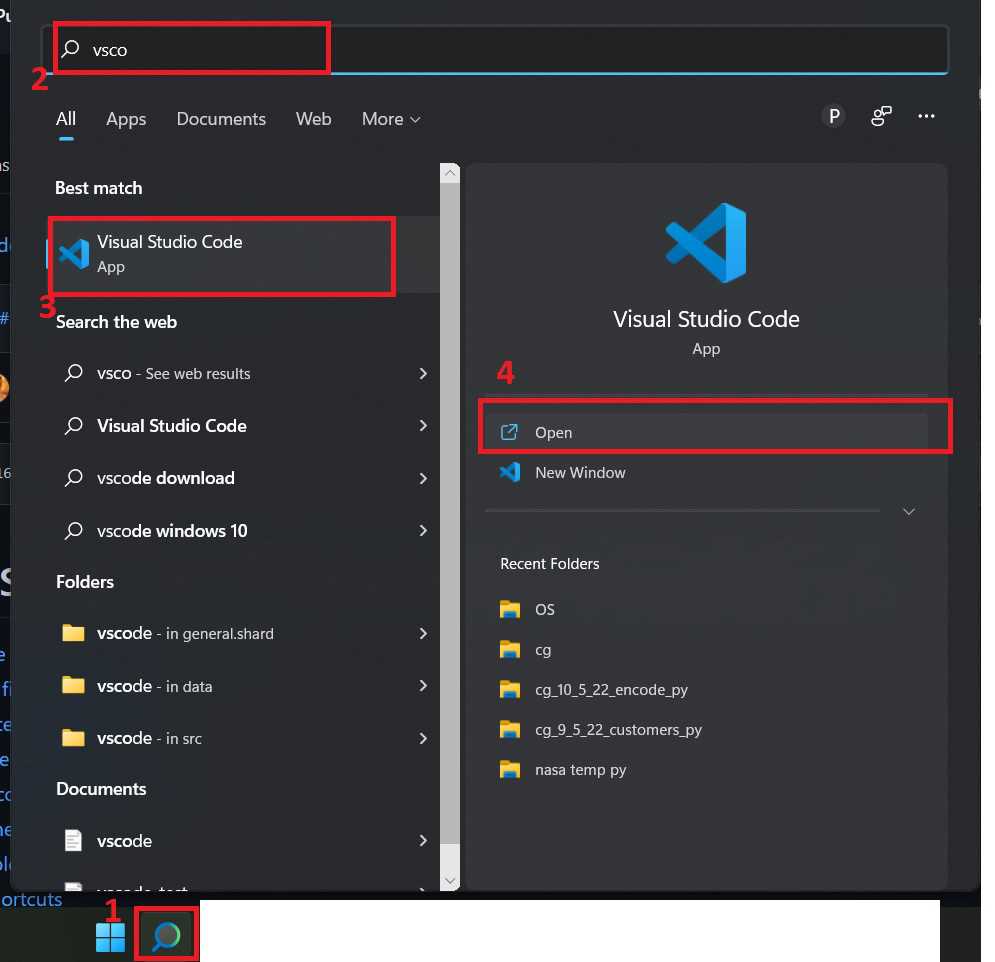
Step 6: After the extension is downloaded, open your code editor.
Step 7: Enable the Copilot extension in your code editor’s settings.
Step 8: Restart your code editor to apply the changes.
Step 9: You’re now ready to use GitHub Copilot to assist you in writing code!
Note: GitHub Copilot is currently in technical preview and may have limitations or bugs.
Downloading the GitHub Copilot Extension
To download and install the GitHub Copilot extension, follow these steps:
- Open your preferred web browser and navigate to the GitHub Copilot extension page.
- Click on the “Download” button to start the download process.
- Once the download is complete, locate the downloaded file on your computer.
- Double-click on the downloaded file to start the installation process.
- Follow the on-screen instructions to complete the installation.
After the installation is finished, the GitHub Copilot extension will be ready to use in your integrated development environment (IDE).
Note: The availability of the GitHub Copilot extension may vary depending on your IDE. Make sure to check the compatibility and requirements before downloading and installing.