If you’re wondering how to install Arch Linux, you’ve come to the right place. Arch Linux is a lightweight and flexible Linux distribution that allows you to customize your system to fit your needs. Whether you’re a beginner or an experienced Linux user, this step-by-step guide will walk you through the installation process.
Step 1: Download the Arch Linux ISO
The first step in installing Arch Linux is to download the Arch Linux ISO. You can find the latest version of the ISO on the official Arch Linux website. Make sure to choose the appropriate version for your system architecture.
Step 2: Create a Bootable USB Drive
Once you have downloaded the Arch Linux ISO, you will need to create a bootable USB drive. You can use a tool like Rufus or Etcher to create the bootable USB drive. Simply select the Arch Linux ISO and the USB drive, and let the tool do its magic.
Step 3: Boot from the USB Drive
After creating the bootable USB drive, you will need to boot your computer from it. Restart your computer and enter the BIOS or UEFI settings. Set the USB drive as the first boot device and save the changes. Your computer will now boot from the USB drive.
Step 4: Install Arch Linux
Once you have booted from the USB drive, you will be presented with the Arch Linux installation environment. Follow the on-screen instructions to partition your hard drive, format the partitions, and install the base system. You will also need to configure the network, set the system clock, and create a user account.
Step 5: Configure the System
After the base system is installed, you will need to configure your system. This includes installing and configuring a bootloader, setting up the network, and installing additional packages. You can also customize your system by installing a desktop environment or window manager, and configuring various system settings.
Step 6: Reboot and Enjoy
Once you have finished configuring your system, you can reboot your computer and start using Arch Linux. Congratulations, you have successfully installed Arch Linux!
Installing Arch Linux may seem daunting at first, but with this step-by-step guide, you’ll be up and running in no time. So go ahead, give it a try, and experience the power and flexibility of Arch Linux.
Preparing for Installation
Before you can install Arch Linux, it is important to make sure you have everything you need. Here are the steps to prepare for the installation:
1. Download the Arch Linux ISO file from the official website.
2. Create a bootable USB drive using the ISO file. You can use tools like Rufus or Etcher to do this.
3. Make sure you have a stable internet connection, as you will need it during the installation process.
4. Back up any important data on your computer, as the installation process may involve formatting your hard drive.
5. Familiarize yourself with the Arch Linux installation guide and make sure you understand the steps involved.
By following these steps, you will be well-prepared to install Arch Linux on your computer.
Gathering the Necessary Materials
Before you can begin the installation process, you will need to gather a few essential materials. Here is a list of what you will need:
- A computer or virtual machine to install Arch Linux on
- An Arch Linux ISO file, which you can download from the official Arch Linux website
- A USB drive or DVD to create a bootable installation media
- A reliable internet connection to download packages and updates during the installation process
- A text editor to modify configuration files
- A basic understanding of the command line interface
Make sure you have all of these materials ready before you proceed with the installation process. Having everything prepared will help ensure a smooth and successful installation of Arch Linux.
Creating a Bootable USB Drive
To install Arch Linux, you will need to create a bootable USB drive. This will allow you to boot into the Arch Linux installation environment and begin the installation process. Here’s how to create a bootable USB drive:
- Download the Arch Linux ISO file from the official website.
- Insert a USB drive into your computer.
- Open a terminal and run the following command to identify the device name of your USB drive:
lsblk- Once you have identified the device name of your USB drive, use the following command to create a bootable USB drive:
sudo dd bs=4M if=/path/to/archlinux.iso of=/dev/sdX status=progress && sync- Replace
/path/to/archlinux.isowith the actual path to the Arch Linux ISO file, and replace/dev/sdXwith the device name of your USB drive. - Wait for the command to complete. This may take some time.
- Once the command has finished, you will have a bootable USB drive with Arch Linux.
Now you can use this bootable USB drive to install Arch Linux on your computer. Simply insert the USB drive into your computer, boot from it, and follow the on-screen instructions to complete the installation process.
Backing Up Important Data
Before proceeding with the installation of Arch Linux, it is crucial to back up any important data that you have on your system. This step is necessary to ensure that you do not lose any valuable information during the installation process.
Here is a step-by-step guide on how to back up your important data:
- Create a backup plan: Determine which files and directories are essential to back up. This may include personal documents, photos, videos, and any other data that you cannot afford to lose.
- Select a backup method: There are several options available for backing up your data, such as using an external hard drive, cloud storage services, or creating disk images. Choose the method that suits your needs and preferences.
- Transfer your data: Once you have decided on a backup method, start transferring your important data to the chosen destination. Make sure to organize your files and directories properly for easy retrieval later.
- Verify the backup: After the data transfer is complete, verify the backup to ensure that all files and directories have been successfully copied. You can do this by comparing the original files with the backup copies.
- Store the backup securely: It is essential to store your backup in a safe and secure location. If you are using an external hard drive, keep it in a cool and dry place. If you are using cloud storage, make sure to choose a reputable and reliable service.
By following these steps, you can ensure that your important data is safely backed up before proceeding with the installation of Arch Linux. This precautionary measure will give you peace of mind and protect your valuable information.
Installing Arch Linux

Arch Linux is a lightweight and flexible Linux distribution that allows users to have complete control over their system. In this step-by-step guide, we will walk you through the process of installing Arch Linux.
- First, you will need to download the Arch Linux ISO from the official website.
- Next, create a bootable USB drive using the ISO file. You can use tools like Rufus or Etcher to do this.
- Insert the bootable USB drive into your computer and restart it.
- During the boot process, you will need to access the BIOS or UEFI settings to change the boot order and prioritize the USB drive.
- Once the computer boots from the USB drive, you will be presented with the Arch Linux installation menu.
- Follow the on-screen instructions to set up the language, keyboard layout, and other basic settings.
- Partition your hard drive according to your needs. You can use tools like fdisk or cfdisk to create and manage partitions.
- Format the partitions with the desired file system, such as ext4.
- Mount the partitions to the appropriate directories, such as / for the root partition.
- Install the base system by running the pacstrap command.
- Configure the system by generating the fstab file and setting up the hostname and network.
- Install and configure a bootloader, such as GRUB, to enable booting into Arch Linux.
- Create a user account and set up a password.
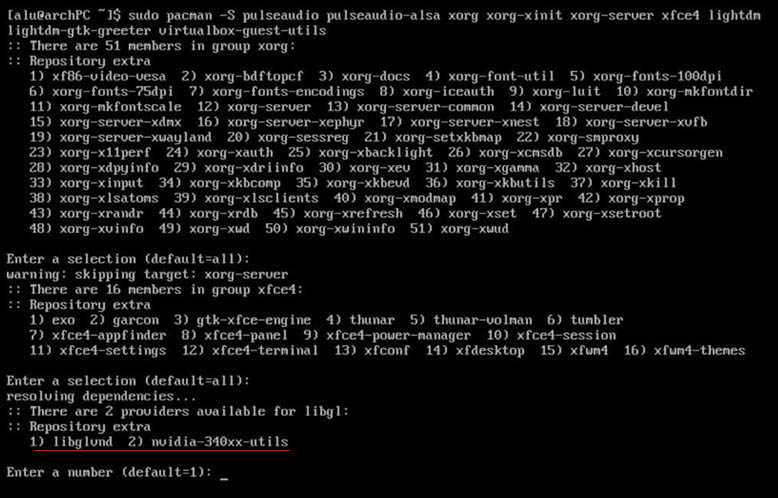
- Install additional packages and software as needed.
- Configure the system further by editing configuration files and installing necessary drivers.
- Finally, reboot the system and log in to your newly installed Arch Linux system.
By following these steps, you will be able to successfully install Arch Linux on your computer and start enjoying the benefits of this powerful and customizable operating system.
Booting from the USB Drive
Once you have successfully created your Arch Linux USB installation media, you are ready to boot from it and begin the installation process. Follow these steps to boot from the USB drive:
- Insert the USB drive into the appropriate port on your computer.
- Restart your computer.
- During the boot process, access the boot menu by pressing the key specified by your computer’s manufacturer. This is typically one of the function keys (e.g., F12, F10) or the Escape key.
- Select the USB drive from the list of boot options.
- Press Enter to boot from the USB drive.
Once you have successfully booted from the USB drive, you will be presented with the Arch Linux installation menu. From here, you can proceed with the installation process as outlined in the rest of this guide.
Partitioning the Hard Drive
Partitioning the hard drive is an essential step in the installation process of Arch Linux. It allows you to divide your hard drive into separate sections, or partitions, which can be used for different purposes.
Here is a step-by-step guide on how to partition your hard drive:
- Boot into the Arch Linux installation media.
- Open a terminal and run the
lsblkcommand to list all available disks and their partitions. - Identify the disk you want to partition. It is usually labeled as
/dev/sda. - Run the
cfdiskcommand followed by the disk label to start the partitioning tool. For example,cfdisk /dev/sda. - Use the arrow keys to navigate and the
Enterkey to select options. - Create a new partition by selecting the
Newoption and specifying the size and type of the partition. - Repeat the previous step to create additional partitions if needed.
- Select the
Writeoption to save the changes to the disk. - Exit the partitioning tool.
Once you have successfully partitioned your hard drive, you can proceed with the installation of Arch Linux. The partitioning step is crucial as it determines how your system will be organized and how the different components of Arch Linux will be installed and accessed.
Remember to double-check your partitioning choices before proceeding, as any mistakes can lead to data loss or system instability. It is recommended to backup your important data before partitioning the hard drive.
Formatting the Partitions
Once you have successfully partitioned your hard drive according to the previous section, it’s time to format the partitions in order to prepare them for the Arch Linux installation. Formatting the partitions involves creating a file system on each partition, which will allow the operating system to read and write data to the disk.
To format a partition in Arch Linux, you can use the mkfs command followed by the desired file system type. For example, to format a partition with the ext4 file system, you would use the following command:
mkfs.ext4 /dev/sdX1Replace /dev/sdX1 with the actual device name and partition number of the partition you want to format.
It’s important to note that formatting a partition will erase all data on that partition, so make sure you have backed up any important files before proceeding.
After formatting all the partitions, you can proceed to the next step of the Arch Linux installation process, which is mounting the partitions.
| Partition | File System |
|---|---|
| /dev/sdX1 | ext4 |
| /dev/sdX2 | swap |
| /dev/sdX3 | ext4 |
Mounting the Partitions
After successfully partitioning your hard drive, the next step in the Arch Linux installation process is to mount the partitions. Mounting is the process of making the partitions accessible to the operating system.
To mount the partitions, follow these steps:
- Open a terminal window.
- Type the command
lsblkto list all the available block devices and their partitions. - Identify the partitions you created for Arch Linux installation.
- Create mount points for each partition using the
mkdircommand. For example, to create a mount point for the root partition, you can use the commandsudo mkdir /mnt/arch. - Mount the partitions using the
mountcommand. For example, to mount the root partition, you can use the commandsudo mount /dev/sda1 /mnt/arch. - If you have created separate partitions for other directories such as
/homeor/boot, repeat steps 4 and 5 for each partition.
Once you have mounted all the partitions, you are ready to proceed with the installation process.