If you’re using Windows 11 and want to remove OneDrive from your system, you’ve come to the right place. OneDrive is a cloud storage service provided by Microsoft, but it may not be necessary for everyone. Whether you’re looking to free up some space on your hard drive or simply don’t use OneDrive, this step-by-step guide will show you how to delete it.
Step 1: Open the Start menu
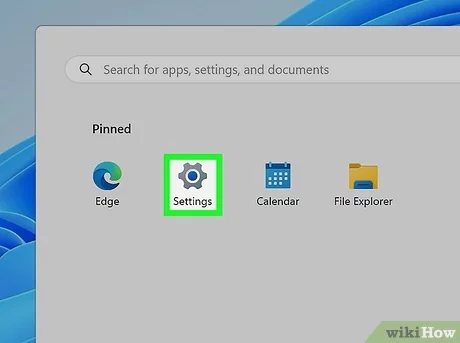
To begin the process of deleting OneDrive, click on the Start menu in the bottom left corner of your screen. This will open up a list of options and applications available on your Windows 11 system.
Step 2: Search for “OneDrive”
In the search bar located at the top of the Start menu, type in “OneDrive” and press Enter. This will bring up the OneDrive application and any related files or folders on your computer.
Step 3: Right-click on OneDrive
Once you’ve located the OneDrive application, right-click on it to open a context menu. From the menu, select “Uninstall” or “Uninstall/Change” to initiate the uninstallation process.
Step 4: Confirm the uninstallation
A confirmation window will appear asking if you’re sure you want to uninstall OneDrive. Click “Yes” to proceed with the uninstallation. Windows 11 will then begin removing the OneDrive application and its associated files from your system.
Note: It’s important to note that uninstalling OneDrive will remove all files and folders stored in your OneDrive account from your computer. Make sure to back up any important data before proceeding with the uninstallation.
By following these simple steps, you can easily delete OneDrive from your Windows 11 system. Whether you’re looking to free up space or simply don’t use the cloud storage service, removing OneDrive can help streamline your computer and improve performance. Remember to back up any important files before uninstalling to avoid losing any data.
Section 1: Disabling OneDrive
If you’re using Windows 11 and want to delete OneDrive from your system, you can follow these steps to disable it:
- Open the OneDrive settings by right-clicking on the OneDrive icon in the taskbar and selecting “Settings”.
- In the Settings tab, click on the “Unlink OneDrive” button.
- A confirmation window will appear asking if you want to unlink your OneDrive account. Click on “Unlink account” to proceed.
- Once you’ve unlinked your account, you can close the OneDrive settings window.
- Next, open the Task Manager by pressing Ctrl + Shift + Esc on your keyboard.
- In the Task Manager, go to the “Startup” tab.
- Look for the “Microsoft OneDrive” entry and select it.
- Click on the “Disable” button at the bottom right corner of the Task Manager window.
- Close the Task Manager.
By following these steps, you have successfully disabled OneDrive on your Windows 11 system. However, keep in mind that this will only disable the OneDrive sync and startup features. If you want to completely delete OneDrive from your system, you will need to follow additional steps.
Accessing OneDrive Settings

To delete OneDrive on Windows 11, you will need to access the OneDrive settings. Here’s how:
1. Click on the OneDrive icon in the taskbar, located in the bottom right corner of the screen. The icon looks like a cloud.
2. A pop-up menu will appear. Click on the three dots (…) to open the OneDrive menu.
3. From the menu, select “Settings”. This will open the OneDrive settings window.
4. In the settings window, navigate to the “Account” tab.
5. Under the “Account” tab, click on the “Unlink this PC” button. This will disconnect your Windows 11 PC from your OneDrive account.
6. A confirmation message will appear. Click on “Unlink account” to confirm the action.
7. Once the account is unlinked, you can close the OneDrive settings window.
By following these steps, you will be able to access the OneDrive settings and unlink your account from your Windows 11 PC, effectively deleting OneDrive.
Turning Off OneDrive Sync
If you no longer want to sync your files with OneDrive on Windows 11, you can easily turn off the sync feature. Here’s how:
Step 1: Open the OneDrive app on your Windows 11 computer.
Step 2: Click on the OneDrive icon in the system tray located at the bottom right corner of your screen.
Step 3: In the OneDrive menu, click on the three-dot icon to open the settings.
Step 4: From the settings menu, select “Settings” option.
Step 5: In the Settings tab, click on the “Account” tab.
Step 6: Under the Account tab, click on the “Unlink this PC” button.
Step 7: A confirmation pop-up will appear, asking if you want to stop syncing your files. Click on the “Unlink account” button to confirm.
Step 8: OneDrive will now stop syncing your files and the OneDrive folder will be removed from your File Explorer.
Note: Turning off OneDrive sync will only stop syncing your files, but it will not delete them from your OneDrive cloud storage. If you want to delete your files from OneDrive as well, you can do so manually.
By following these steps, you can easily turn off OneDrive sync on Windows 11 and stop syncing your files with the cloud storage service.
Disabling OneDrive Startup

If you want to delete OneDrive from your Windows 11 computer, you may also want to disable its startup to prevent it from automatically launching every time you start your computer. Here’s how you can do it:
- Right-click on the taskbar and select “Task Manager” from the context menu.
- In the Task Manager window, click on the “Startup” tab.
- Scroll down the list of startup programs and locate “Microsoft OneDrive”.
- Right-click on “Microsoft OneDrive” and select “Disable” from the menu.
By disabling OneDrive startup, you can ensure that the application doesn’t run in the background and consume system resources unnecessarily. However, please note that this will only prevent OneDrive from launching at startup and won’t delete the application from your computer.
If you ever change your mind and want to enable OneDrive startup again, you can follow the same steps and select “Enable” instead of “Disable” in the Task Manager.
Section 2: Uninstalling OneDrive
If you no longer need OneDrive on your Windows 11 device, you can easily delete it. Here’s how to uninstall OneDrive:
- Open the Start menu by clicking on the Windows icon in the bottom left corner of your screen.
- Type “Control Panel” in the search bar and click on the Control Panel app.
- In the Control Panel window, click on “Uninstall a program” under the “Programs” category.
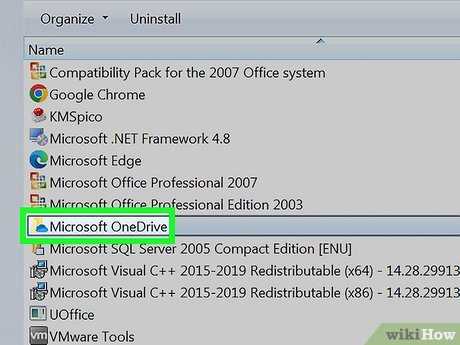
- A list of installed programs will appear. Scroll down and find “Microsoft OneDrive” in the list.
- Right-click on “Microsoft OneDrive” and select “Uninstall”.
- A confirmation window will pop up asking if you want to uninstall OneDrive. Click “Yes” to proceed.
- The uninstallation process will begin. Wait for it to complete.
- Once the uninstallation is finished, you can close the Control Panel window.
After following these steps, OneDrive will be completely removed from your Windows 11 device.
Opening the Control Panel

To delete OneDrive on Windows 11, you will need to access the Control Panel. The Control Panel is a centralized hub where you can manage various settings and features on your computer.
Here’s how you can open the Control Panel:
| 1. | Click on the Start button in the bottom left corner of the screen. |
| 2. | Type “Control Panel” in the search bar. |
| 3. | Click on the Control Panel app that appears in the search results. |
Alternatively, you can also access the Control Panel by right-clicking on the Start button and selecting “Control Panel” from the context menu.
Once you have opened the Control Panel, you will be able to proceed with the steps to delete OneDrive from your Windows 11 computer.
Navigating to Programs and Features
To delete OneDrive on Windows 11, you will need to navigate to the Programs and Features section in the Control Panel. Here are the steps to follow:
| Step 1: | Click on the Start button located at the bottom left corner of the screen. |
| Step 2: | Type “Control Panel” in the search bar and click on the corresponding result. |
| Step 3: | In the Control Panel window, select the “Programs” category. |
| Step 4: | Click on the “Programs and Features” option. |
Once you have reached the Programs and Features section, you will be able to proceed with deleting OneDrive from your Windows 11 system.
Uninstalling OneDrive

If you no longer use OneDrive or want to free up some space on your Windows 11 computer, you can uninstall the OneDrive app. Here’s how to do it:
| Step 1: | Open the Start menu by clicking on the Windows icon in the bottom left corner of the screen. |
| Step 2: | Type “Add or remove programs” in the search bar and click on the corresponding result. |
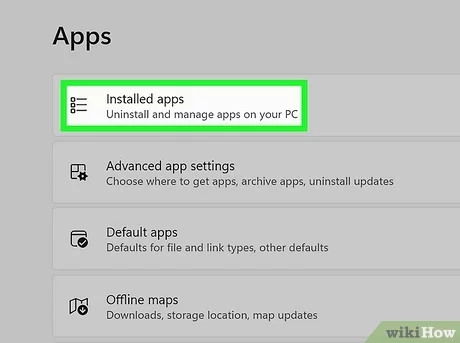
| Step 3: | In the Settings window, scroll down and click on “Apps & features” in the left sidebar. |
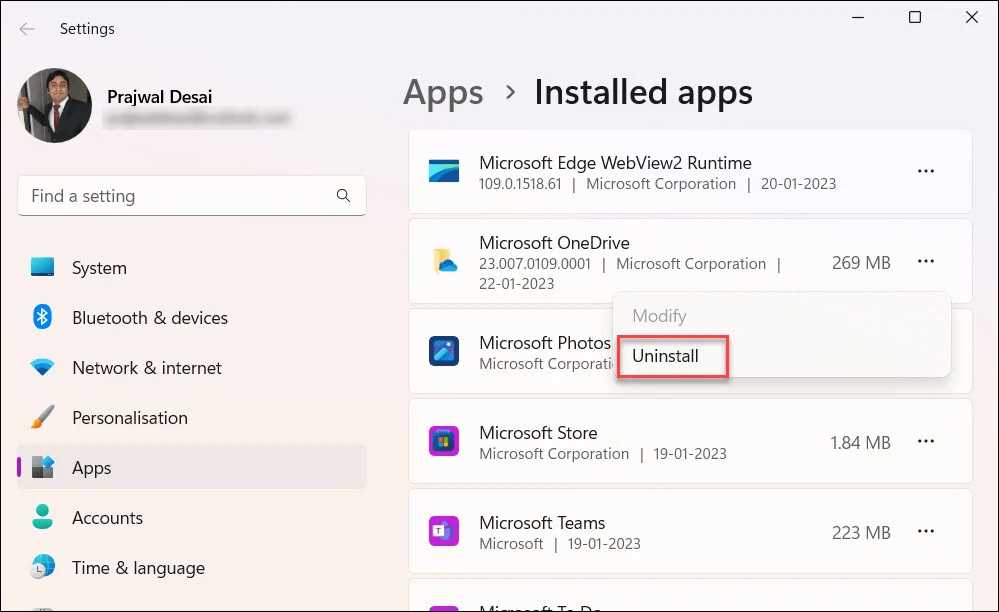
| Step 4: | Scroll through the list of installed apps and locate “Microsoft OneDrive”. |
| Step 5: | Click on “Microsoft OneDrive” and then click on the “Uninstall” button. |
| Step 6: | Follow the on-screen prompts to complete the uninstallation process. |
| Step 7: | Once the uninstallation is finished, OneDrive will be removed from your Windows 11 computer. |
Keep in mind that uninstalling OneDrive will remove the app and its associated files from your computer. If you have any important files stored in your OneDrive account, make sure to back them up before uninstalling.