
When working on a Word document, you may come across a situation where you need to erase or eliminate a page. Whether it’s an extra blank page or a page with unwanted content, deleting it can help you tidy up your document and make it more professional. Fortunately, deleting a page in Word is a simple process that can be done in just a few steps.
To delete a page in Word, you first need to open the document that contains the page you want to discard. Once the document is open, navigate to the page you wish to delete. You can do this by scrolling through the document or using the navigation tools provided by Word.
Once you have located the page you want to delete, place your cursor at the beginning of the page. Press and hold the “Ctrl” key on your keyboard, then press the “Shift” key and the “End” key simultaneously. This will highlight the entire content of the page. Alternatively, you can click and drag your cursor to select the content manually.
With the content of the page selected, press the “Backspace” or “Delete” key on your keyboard. This action will remove the selected content, effectively deleting the page from your Word document. Make sure to save your changes to ensure that the deleted page is permanently removed from the document.
Section 1: Deleting a Page in Word
In Microsoft Word, deleting a page from a document is a simple process that can be done in just a few steps. Whether you want to discard a blank page or remove a specific page with content, Word provides various options to delete, erase, or eliminate unwanted pages.
To delete a page in Word, follow these steps:
- Open the Word document that contains the page you want to delete.
- Select the content on the page you wish to delete by clicking and dragging your cursor over it. If you want to delete the entire page, you can skip this step.
- Once the content is selected, press the “Delete” key on your keyboard. This will remove the selected content from the page.
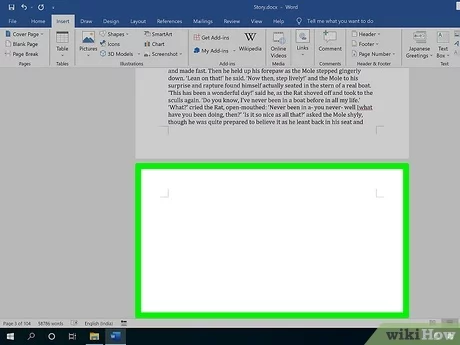
- If you only deleted the content and not the entire page, you may still see an empty page. To remove this blank page, place your cursor at the end of the previous page and press the “Delete” key again. This will eliminate the empty page.
By following these steps, you can easily delete unwanted pages in Microsoft Word and ensure that your document is free from unnecessary content. Remember to save your document after making any changes to ensure that the deleted pages are permanently removed.
Step 1: Open the Word Document

To erase or remove a page from your Word document, you first need to open the document in Microsoft Word. This step is crucial as it allows you to access the page you want to eliminate.
To open the Word document, follow these simple steps:
- Locate the document on your computer or device.
- Double-click on the document to open it in Microsoft Word.
Once the document is open, you can proceed to the next steps to uninstall or discard the specific page you want to delete.
Step 2: Navigate to the Page
Once you have opened your Word document that you want to edit, you need to navigate to the page you want to delete. This step is crucial to ensure that you erase the correct page and don’t accidentally remove any important content.
To navigate to the page, follow these steps:
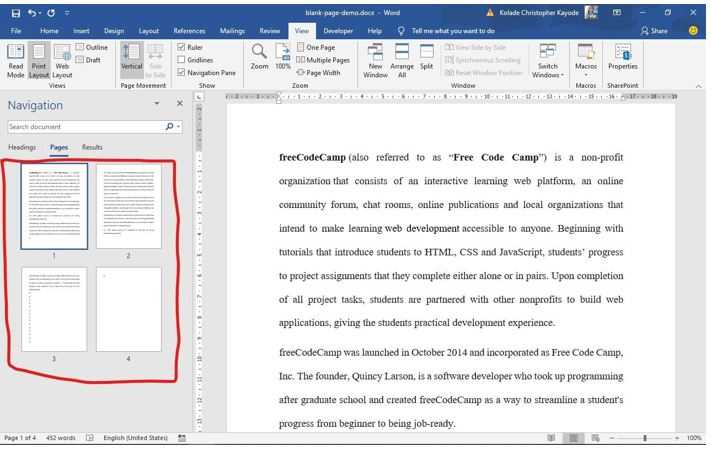
- Scroll through the document until you reach the page you want to delete. You can use the scroll bar on the right side of the screen or the arrow keys on your keyboard to move through the document.
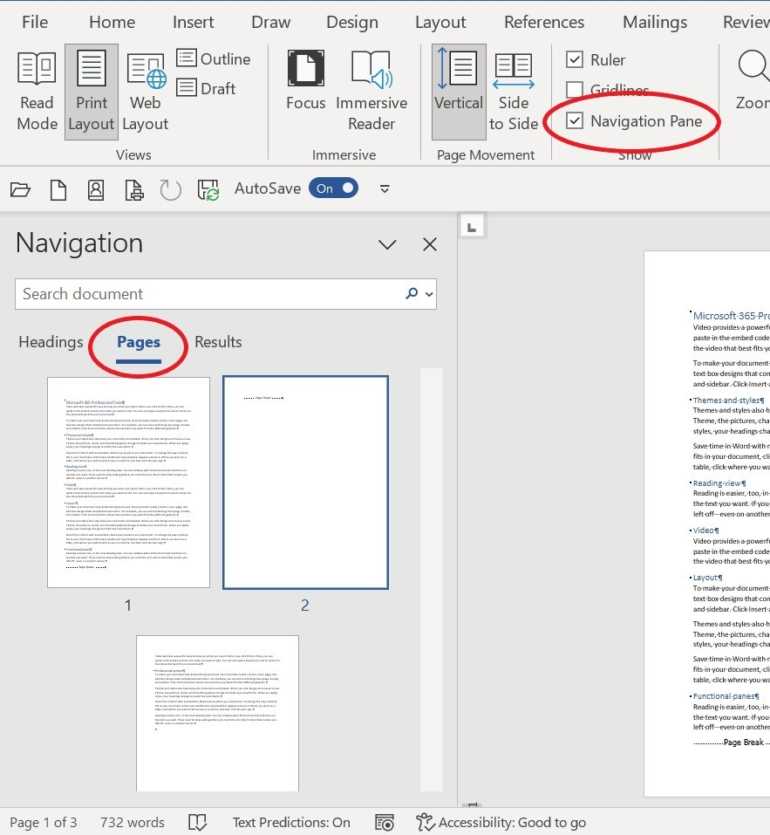
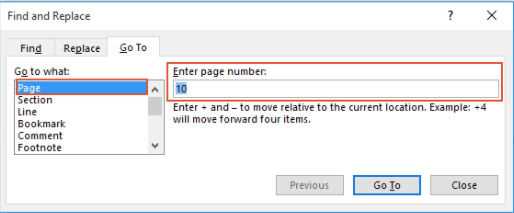
- If you know the page number of the page you want to delete, you can also use the “Go To” feature in Word. Simply click on the “Home” tab in the top menu, then click on the “Find” button in the “Editing” group. In the “Find and Replace” dialog box, enter the page number in the “Enter page number” field and click “Go To”. Word will automatically take you to the specified page.
- Once you have reached the desired page, you are ready to proceed with the deletion process.
By following these steps, you will be able to easily navigate to the page you want to remove from your Word document. This ensures that you don’t accidentally delete any other pages or important content from your document.
Step 3: Select the Content
Once you have identified the page you want to delete, the next step is to select the content on that page. This is important because you don’t want to accidentally discard any important information that may be on the page.
To select the content, simply click and drag your cursor over the text, images, or any other elements that you want to remove. You can also use the “Select All” option by pressing Ctrl + A on your keyboard to select the entire page.
Make sure to double-check your selection before proceeding to the next step. If you accidentally select more than you intended, you can simply deselect the extra content by holding down the Ctrl key and clicking on the unwanted elements.
Remember, the goal is to remove the entire page from your Word document, so be careful not to erase any important content from other pages. Once you are confident with your selection, you can proceed to the next step to permanently delete the page.
Section 2: Removing the Page in Word
To discard or eliminate a page in a Word document, you can follow these steps to erase it completely:
- Open the Word document that contains the page you want to remove.
- Go to the page you wish to uninstall by scrolling through the document.
- Select all the content on the page by clicking and dragging your cursor from the beginning to the end of the page.
- Press the “Delete” key on your keyboard to remove the selected content.
- If the page still exists after deleting the content, place your cursor at the end of the previous page.
- Press the “Backspace” key on your keyboard until the unwanted page is removed.
- Save the document to ensure the changes are applied.
By following these steps, you will be able to successfully remove the unwanted page from your Word document.
Step 1: Access the “Delete” Option

To delete a page in a Word document, you need to access the “Delete” option. This option allows you to uninstall, delete, eliminate, remove, or erase unwanted pages from your document. Here’s how you can access the “Delete” option:
- Open the Word document that contains the page you want to delete.
- Select the page you wish to discard by clicking and dragging your cursor over the content on that page.
- Right-click on the selected content to open the context menu.
- Click on the “Delete” option in the context menu. This will remove the selected page from your Word document.
By following these steps, you can easily delete any unwanted page from your Word document. Make sure to save your document after deleting the page to ensure that the changes are applied.


