
GitLab is a powerful version control system that allows developers to collaborate on projects and manage their code efficiently. One of the key features of GitLab is the ability to create and manage branches, which are separate lines of development that can be worked on independently.
However, as your project progresses, you may find that some branches are no longer needed or have become obsolete. In such cases, it is important to know how to delete a branch in GitLab to keep your repository clean and organized.
To delete a branch in GitLab, follow these simple steps:
- First, navigate to your project’s repository page in GitLab.
- Next, locate the branch you want to delete in the list of branches.
- Click on the branch name to open the branch’s page.
- On the branch’s page, click on the “Delete branch” button.
- A confirmation dialog will appear asking you to confirm the deletion. Click “Delete” to proceed.
Once you have deleted the branch, it will be permanently removed from your GitLab repository. It is important to note that deleting a branch cannot be undone, so make sure you are deleting the correct branch.
Deleting branches that are no longer needed can help keep your repository clean and make it easier to navigate and manage your code. By following these simple steps, you can easily delete branches in GitLab and keep your project organized.
Understanding Git Branches
Git branches are an essential part of version control in GitLab. They allow developers to work on different features or bug fixes simultaneously without interfering with each other’s code. A branch is essentially a separate line of development that diverges from the main codebase.
When you create a branch in GitLab, you are essentially creating a copy of the main codebase. This copy allows you to make changes and experiment without affecting the main codebase. Once you are satisfied with your changes, you can merge the branch back into the main codebase.
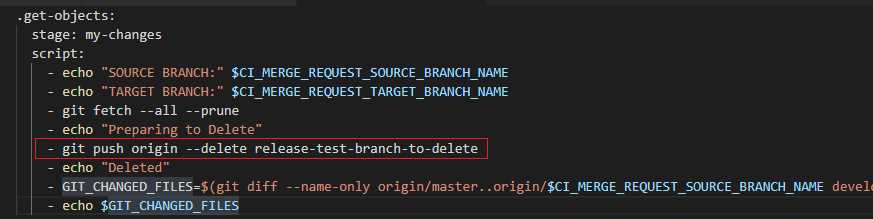
Deleting a branch in GitLab is a straightforward process. Once you have merged the changes from the branch into the main codebase, you can safely delete the branch. This helps keep your repository clean and organized.
To delete a branch in GitLab, follow these steps:
| Step | Action |
| 1 | Go to the repository page in GitLab. |
| 2 | Click on the “Branches” tab. |
| 3 | Find the branch you want to delete in the list. |
| 4 | Click on the trash can icon next to the branch name. |
| 5 | Confirm the deletion when prompted. |
Once you have deleted a branch in GitLab, it cannot be undone. Make sure you have merged any necessary changes before deleting a branch.
Understanding Git branches is crucial for effective collaboration and version control in GitLab. By creating, merging, and deleting branches, developers can work on different features and bug fixes simultaneously, ensuring a smooth and organized development process.
Importance of Deleting Unused Branches
Branches in GitLab are an essential part of the development process. They allow multiple developers to work on different features or bug fixes simultaneously without interfering with each other’s work. However, as the number of branches increases, it becomes crucial to delete unused branches to maintain a clean and organized repository.
Here are a few reasons why deleting unused branches in GitLab is important:
- Reduced clutter: Deleting unused branches helps keep the repository clean and clutter-free. It ensures that only relevant and active branches are present, making it easier for developers to navigate and find the branches they need.
- Improved performance: Having a large number of branches can impact the performance of GitLab. Deleting unused branches helps improve the overall performance of the system by reducing the load on the server.
- Enhanced security: Unused branches can pose a security risk if they contain sensitive or outdated code. By deleting these branches, you can ensure that no unauthorized access or vulnerabilities exist in your repository.
- Effective collaboration: Deleting unused branches encourages effective collaboration among team members. It ensures that everyone is working on the latest and relevant code, avoiding confusion and conflicts.
- Streamlined workflow: Removing unused branches streamlines the development workflow. It allows developers to focus on active branches, prioritize tasks, and deliver projects more efficiently.
In conclusion, deleting unused branches in GitLab is essential for maintaining a clean, organized, and secure repository. It helps reduce clutter, improve performance, enhance security, promote effective collaboration, and streamline the development workflow. By regularly deleting unused branches, you can ensure that your GitLab repository remains efficient and optimized.
Step 1: Accessing the Repository
To delete a branch in GitLab, you first need to access the repository where the branch is located. Here’s how you can do it:
| 1. | Open your web browser and go to the GitLab website. |
| 2. | Log in to your GitLab account using your username and password. |
| 3. | Once logged in, navigate to the project or repository where the branch you want to delete is located. |
| 4. | Click on the repository name to access it. |
Now that you have accessed the repository, you can proceed to the next step to learn how to delete a branch in GitLab.
Logging into GitLab
To delete a branch in GitLab, you first need to log into your GitLab account. Follow the steps below to log in:
- Open your web browser and go to the GitLab website.
- Click on the “Sign In” button located at the top right corner of the page.
- Enter your GitLab username or email address in the provided field.
- Enter your GitLab password in the password field.
- Click on the “Sign In” button to log into your GitLab account.
Once you have successfully logged into GitLab, you can proceed with deleting the branch you no longer need.
Navigating to the Repository

In order to delete a branch in GitLab, you first need to navigate to the repository where the branch is located. This can be done by following these steps:
- Open your web browser and go to the GitLab website.
- Log in to your GitLab account using your username and password.
- Once logged in, you will be taken to your dashboard. From here, you can navigate to the repository where the branch is located.
- Click on the “Projects” tab in the navigation menu at the top of the page.
- In the projects list, locate the project that contains the branch you want to delete and click on it.
- You will now be taken to the project’s main page. Here, you can see an overview of the project and its branches.
- Click on the “Repository” tab in the navigation menu to access the repository.
Once you have successfully navigated to the repository, you can proceed with deleting the branch. The next steps will guide you on how to do this.
Step 2: Selecting the Branch to Delete

Once you are logged into your GitLab account, navigate to the repository where the branch you want to delete is located. On the left-hand side of the repository page, you will see a list of options. Click on the “Repository” tab to access the repository settings.
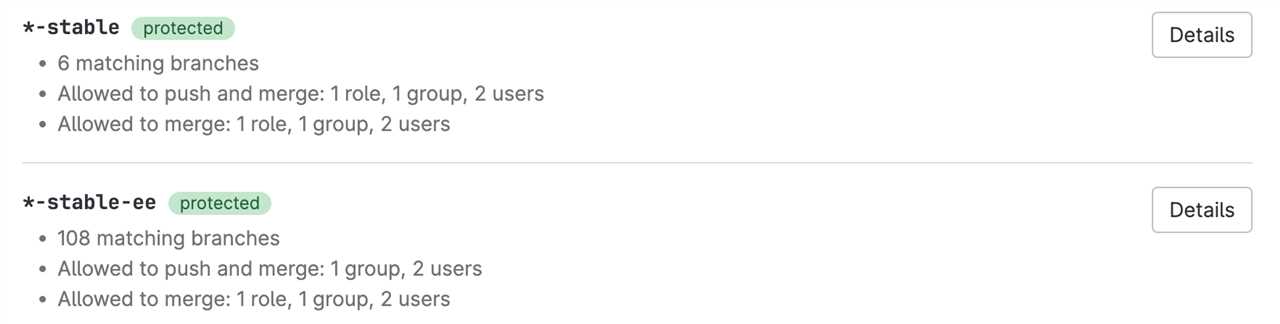
Within the repository settings, scroll down until you find the “Branches” section. This section displays a table with all the branches in the repository. Locate the branch you want to delete in the table.
| Branch Name | Last Commit | Actions |
|---|---|---|
| branch-name | commit-hash | delete |
Identify the branch you want to delete by its name in the “Branch Name” column. The “Last Commit” column displays the hash of the last commit made to that branch. The “Actions” column contains a button labeled “delete” for each branch.
To delete the branch, click on the “delete” button in the “Actions” column for the branch you want to delete. A confirmation dialog will appear asking you to confirm the deletion. Click “Delete” to proceed with the deletion.
Once you confirm the deletion, the branch will be permanently deleted from the repository. It is important to note that this action cannot be undone, so make sure you are deleting the correct branch.
Now that you have selected the branch to delete, you can proceed to the next step to complete the deletion process.
Viewing Available Branches
To view the available branches in GitLab, follow these steps:
- Open the repository in GitLab.
- Click on the “Repository” tab.
- On the left sidebar, click on “Branches”.
- A list of all the branches in the repository will be displayed.
You can now see all the branches that exist in the repository. This list will include both the local branches and the remote branches.
By viewing the available branches, you can easily identify the branch that you want to delete. Once you have identified the branch, you can proceed with the deletion process.


