Upgrading to a new version of Windows can be an exciting experience, but it can also be a daunting task. One of the biggest concerns when installing a new operating system is the fear of losing important data. However, with the release of Windows 11, Microsoft has made it easier than ever to perform a clean install without losing any of your precious files.
Windows 11 offers a streamlined installation process that allows you to keep your personal files, apps, and settings intact. This means that you can enjoy all the new features and improvements of Windows 11 without the hassle of backing up and restoring your data.
To perform a clean install of Windows 11 without losing any data, follow these simple steps:
- Backup your data: Although the clean install process is designed to preserve your files, it’s always a good idea to create a backup before making any major changes to your system. This will give you peace of mind knowing that your data is safe.
- Create a bootable USB drive: To install Windows 11, you’ll need a bootable USB drive. You can easily create one using the Windows 11 Media Creation Tool, which can be downloaded from the Microsoft website.
- Boot from the USB drive: Once you have created the bootable USB drive, restart your computer and enter the BIOS settings. Set the USB drive as the primary boot device and save the changes. Your computer will now boot from the USB drive.
- Install Windows 11: Follow the on-screen instructions to install Windows 11. When prompted, choose the “Custom” installation option and select the partition where you want to install Windows 11. Make sure to select the partition that does not contain your personal files.
- Complete the installation: After the installation process is complete, Windows 11 will automatically configure your system and install any necessary drivers. Once this process is finished, you’ll be greeted with the familiar Windows 11 desktop, but with a fresh installation and all your data intact.
By following these steps, you can easily perform a clean install of Windows 11 without losing any of your important data. This will give you a fresh start with the latest version of Windows, ensuring that your system is running smoothly and efficiently.
Remember to always backup your data before making any changes to your system, and enjoy the new features and improvements that Windows 11 has to offer!
Preparation
Before proceeding with a clean install of Windows 11, it is important to ensure that you have backed up all your important data. This step is crucial to prevent any data loss during the installation process.
Make sure you have a copy of all your important files, documents, photos, and videos stored on an external storage device or cloud storage. This will ensure that you can easily restore your data after the clean installation of Windows 11.
Additionally, it is recommended to create a list of all the applications and programs that you currently have installed on your Windows system. This will help you reinstall them after the clean installation of Windows 11.
Once you have backed up your data and created a list of your installed applications, you can proceed with the clean installation of Windows 11 without worrying about losing any important data.
Backup Your Data

Before proceeding with the clean install of Windows 11, it is crucial to back up your data to prevent any potential loss. This step ensures that you have a copy of all your important files and documents, so you can easily restore them after the installation.
There are several ways to back up your data:
| 1. External Hard Drive | Connect an external hard drive to your computer and copy all the necessary files and folders to it. This method is convenient and allows you to have a physical backup of your data. |
| 2. Cloud Storage | Upload your files to a cloud storage service like Google Drive, Dropbox, or OneDrive. This option provides an additional layer of security as your data will be stored off-site. |
| 3. Network Storage | If you have a network-attached storage (NAS) device, you can back up your data directly to it. This method is useful if you have a large amount of data that cannot fit on an external hard drive. |
Whichever method you choose, make sure to verify that your data has been successfully backed up before proceeding with the clean install of Windows 11. It is always better to be safe than sorry, and having a backup ensures that you can easily restore your files in case anything goes wrong during the installation process.
Create a Bootable USB Drive

To perform a clean install of Windows 11 without losing any data, you will need to create a bootable USB drive. This will allow you to install the new operating system on your computer.
Here are the steps to create a bootable USB drive:
| Step 1: | Insert a USB drive with at least 8GB of storage into your computer. |
| Step 2: | Download the Windows 11 ISO file from the official Microsoft website. |
| Step 3: | Open the Windows USB/DVD Download Tool or any other reliable software for creating bootable USB drives. |
| Step 4: | Select the ISO file you downloaded in Step 2. |
| Step 5: | Choose the USB drive you inserted in Step 1 as the destination for the bootable USB drive. |
| Step 6: | Click on the “Create” or “Start” button to begin the process of creating the bootable USB drive. |
| Step 7: | Wait for the software to finish creating the bootable USB drive. This may take a few minutes. |
| Step 8: | Once the process is complete, safely eject the USB drive from your computer. |
Now you have successfully created a bootable USB drive for installing Windows 11 without losing any data. You can use this USB drive to perform a clean install of the new operating system on your computer.
Check System Requirements
Before proceeding with the clean install of Windows 11 without losing any data, it is essential to ensure that your system meets the minimum requirements for the installation process. This will help to avoid any compatibility issues and ensure a smooth installation.
Here are the system requirements for Windows 11:
| Processor | 1 GHz or faster with 2 or more cores on a compatible 64-bit processor |
|---|---|
| RAM | 4 GB or more |
| Storage | 64 GB or more |
| Graphics Card | DirectX 12 compatible graphics or later with a WDDM 2.0 driver |
| Display | High definition (720p) display, 9″ or greater diagonal, 8 bits per color channel |
| Internet Connection | Internet connectivity is necessary to perform updates and download apps |
| Other Requirements | Microsoft account and internet access for initial setup |
Make sure your system meets these requirements before proceeding with the clean install of Windows 11. If your system does not meet these requirements, you may need to upgrade your hardware or consider an alternative installation method.
Installation
To perform a clean installation of Windows 11 without losing any data, follow the step-by-step guide below:
| Step 1: | Backup your important data |
| Step 2: | Download the Windows 11 installation media |
| Step 3: | Create a bootable USB drive |
| Step 4: | Restart your computer and boot from the USB drive |
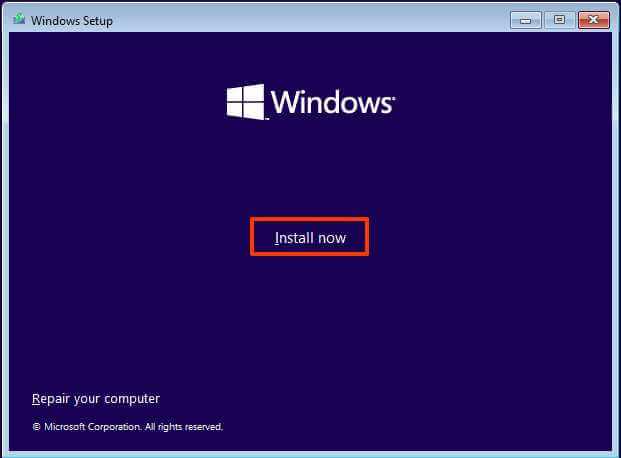
| Step 5: | Follow the on-screen instructions to install Windows 11 |
| Step 6: | Choose the “Custom” installation option |
| Step 7: | Select the partition where you want to install Windows 11 |
| Step 8: | Continue with the installation process |
| Step 9: | Wait for the installation to complete |
| Step 10: | Set up your Windows 11 preferences |
| Step 11: | Restore your backed up data |
By following these steps, you can perform a clean installation of Windows 11 without losing any data. It is important to back up your important files before proceeding with the installation to ensure that you can restore them afterwards.
Boot from USB Drive

To clean install Windows 11 without losing data, you will need to boot your computer from a USB drive. Follow these steps to boot from a USB drive:
- Insert the USB drive containing the Windows 11 installation files into a USB port on your computer.
- Restart your computer.
- During the startup process, press the key (usually F12, F10, or Esc) to access the boot menu.
- In the boot menu, use the arrow keys to select the USB drive as the boot device.
- Press Enter to boot from the USB drive.
Once your computer boots from the USB drive, you can proceed with the clean installation of Windows 11 without losing any data.