
Are you wondering how to remove a virus in Windows 10? Dealing with a virus on your computer can be a frustrating experience, but don’t worry, we’ve got you covered. In this ultimate guide, we will walk you through the easy steps to remove a virus from your Windows 10 system.
Windows 10 is a popular operating system used by millions of people worldwide. Unfortunately, it is not immune to viruses and malware. These malicious programs can slow down your computer, steal your personal information, and even cause system crashes. That’s why it’s important to know how to remove them effectively.
Removing a virus from your Windows 10 system is not as complicated as it may seem. With the right tools and a little bit of know-how, you can get your computer back to its optimal performance. In this guide, we will show you step-by-step instructions on how to remove a virus from your Windows 10 system, so you can get back to using your computer safely and securely.
Step 1: Identifying the Virus
Before you can remove a virus from your Windows 10 computer, you need to first identify the specific virus that has infected your system. This is an important step because different viruses may require different removal methods.
There are several signs that can indicate the presence of a virus on your computer. These include:
- Slow performance: If your computer is suddenly running much slower than usual, it could be a sign of a virus.
- Unexpected pop-ups: If you are seeing an excessive amount of pop-up ads, especially ones that are unrelated to the websites you are visiting, it could be a sign of a virus.
- Unusual error messages: If you are receiving error messages that you have never seen before, it could be a sign of a virus.
- Disabled security software: If your antivirus or firewall software has been disabled without your knowledge, it could be a sign of a virus.
- Unwanted browser toolbars: If you notice new browser toolbars that you did not install, it could be a sign of a virus.
If you are experiencing any of these symptoms, it is important to take action immediately to remove the virus from your computer. In the next step, we will discuss how to remove the virus once it has been identified.
Recognizing the Symptoms
Knowing how to recognize the symptoms of a virus in Windows is crucial in order to remove it effectively. Viruses can cause a variety of issues on your computer, and being able to identify these symptoms can help you take the necessary steps to eliminate the virus.
One common symptom of a virus is a sudden decrease in your computer’s performance. If your Windows system starts running slower than usual, takes longer to start up or shut down, or freezes frequently, it could be a sign of a virus infection.
Another symptom to watch out for is the appearance of pop-up ads or unwanted programs on your computer. If you notice an increase in the number of pop-up ads or if new programs or toolbars suddenly appear on your desktop without your consent, it is likely that your computer has been infected.
Furthermore, if you experience frequent crashes or your computer restarts unexpectedly, it could be a sign of a virus. Viruses can cause instability in your system, leading to crashes or sudden restarts.
Additionally, if you notice that your files or folders have been modified, deleted, or encrypted without your knowledge, it is a strong indication of a virus. Some viruses are designed to manipulate or destroy your files, so it is important to be vigilant and regularly check for any unauthorized changes.
Lastly, if your antivirus software is disabled or if you are unable to access certain system tools, it could be a sign that a virus is present. Viruses often target security software to disable it and prevent detection and removal.
By recognizing these symptoms, you can take the necessary steps to remove the virus from your Windows system and protect your computer from further harm.
Conducting a System Scan

One of the most effective ways to remove a virus in Windows 10 is by conducting a system scan. This process allows you to identify and eliminate any malicious software that may be present on your computer.
To conduct a system scan, follow these steps:
| Step 1 | Open your preferred antivirus software. If you don’t have one installed, you can download and install a reputable antivirus program from the internet. |
| Step 2 | Once the antivirus program is open, navigate to the “Scan” or “Scan Now” option. Click on it to start the scanning process. |
| Step 3 | The antivirus software will now begin scanning your entire system for any viruses or malware. This process may take some time, depending on the size of your hard drive and the number of files stored on it. |
| Step 4 | While the scan is running, avoid using your computer for other tasks as it may slow down the scanning process. |
| Step 5 | Once the scan is complete, the antivirus software will display a report of the detected threats. Review the report and select the option to remove or quarantine the infected files. |
| Step 6 | Follow the prompts provided by the antivirus software to complete the removal process. In some cases, you may need to restart your computer for the changes to take effect. |
By conducting a system scan, you can effectively remove viruses and protect your Windows 10 computer from future infections. Remember to regularly update your antivirus software and perform scans to ensure the ongoing security of your system.
Researching the Virus
When dealing with a virus on your Windows 10 computer, it is important to understand the nature of the threat in order to effectively remove it. Researching the virus can provide valuable information on how it infects your system and what steps you can take to eliminate it.
Here are some steps to research the virus:
| 1. | Identify the virus: Determine the name and type of the virus infecting your Windows 10 system. This information can be obtained through antivirus software or online resources. |
| 2. | Gather information: Once you have identified the virus, gather as much information as possible about its behavior, symptoms, and potential damage it can cause. This will help you understand the severity of the threat and the best course of action to remove it. |
| 3. | Research removal methods: Look for reputable sources that provide step-by-step instructions on how to remove the specific virus from Windows 10. These sources may include antivirus software websites, online forums, or tech support websites. |
| 4. | Consider professional help: If the virus is particularly stubborn or complex, it may be necessary to seek professional assistance. There are specialized companies and technicians who can help you remove the virus safely and efficiently. |
By thoroughly researching the virus infecting your Windows 10 system, you will be better equipped to remove it effectively and prevent future infections. Remember to always keep your antivirus software up to date and practice safe browsing habits to minimize the risk of virus infections.
Step 2: Backing Up Important Data

Before proceeding with the virus removal process in Windows 10, it is crucial to back up your important data. This step ensures that even if something goes wrong during the removal process, you won’t lose any valuable files or documents.
To back up your data, follow these simple steps:
- Identify the important files: Take some time to identify the files and folders that contain important data. This could include documents, photos, videos, or any other files that you cannot afford to lose.
- Choose a backup method: There are several ways to back up your data. You can use an external hard drive, a USB flash drive, or even cloud storage services like Google Drive or Dropbox. Choose the method that suits your needs and preferences.
- Copy the files: Once you have selected the backup method, start copying the important files to the chosen destination. Make sure to create a separate folder or directory to keep all the backed-up files organized.
- Verify the backup: After the copying process is complete, take a moment to verify that all the files have been successfully backed up. Open a few random files to ensure they can be accessed without any issues.
By following these steps, you can ensure that your important data is safely backed up before attempting to remove the virus from your Windows 10 system. This way, even if the virus removal process causes any unexpected data loss, you can easily restore your files from the backup.
Note: It is recommended to regularly back up your important data to prevent any potential loss in the future, not just during virus removal.
Identifying and Prioritizing Important Files

When attempting to remove a virus from your Windows 10 computer, it is important to first identify and prioritize your important files. This will ensure that you can focus on protecting and recovering the most critical data.
To begin, make a list of the files and folders that are essential for your work or personal life. These may include documents, photos, videos, and other important data. Take note of their locations on your computer, such as specific folders or drives.
Next, consider the level of importance for each file or folder. Some may be irreplaceable, while others can be easily recovered or replaced. Prioritize your list based on the criticality of the data.
Once you have identified and prioritized your important files, it is recommended to create backups or copies of them. This can be done by using external storage devices, cloud storage services, or even by emailing the files to yourself. By having multiple copies of your important data, you can ensure that it is protected from potential virus damage.
Additionally, consider implementing a regular backup routine to automatically save your important files. This can be done using built-in Windows features or third-party backup software. Regular backups will help you recover your data quickly and easily in case of a virus attack.
Remember to keep your backups up to date and test their integrity periodically. This will ensure that your important files are protected and can be easily restored if needed.
By identifying and prioritizing your important files, and taking steps to protect and backup them, you can minimize the risk of data loss when removing a virus from your Windows 10 computer.
Creating a Backup
One of the most important steps in removing a virus from your Windows 10 computer is to create a backup of your important files and data. This is crucial because the virus may cause damage to your files or even delete them completely. By creating a backup, you can ensure that your files are safe and can be easily restored if anything goes wrong during the virus removal process.
To create a backup, follow these steps:
| Step 1: | Connect an external storage device, such as a USB flash drive or an external hard drive, to your computer. |
| Step 2: | Open the File Explorer by pressing the Windows key + E on your keyboard. |
| Step 3: | Navigate to the files and folders that you want to backup. |
| Step 4: | Select the files and folders by clicking on them while holding down the Ctrl key on your keyboard. |
| Step 5: | Right-click on the selected files and folders and choose the “Copy” option from the context menu. |
| Step 6: | Open the external storage device in the File Explorer. |
| Step 7: | Right-click inside the external storage device and choose the “Paste” option from the context menu. |
| Step 8: | Wait for the files and folders to be copied to the external storage device. The time it takes will depend on the size of the files and the speed of your computer. |
| Step 9: | Once the backup is complete, safely eject the external storage device from your computer. |
By following these steps, you can create a backup of your important files and data before removing the virus from your Windows 10 computer. This will give you peace of mind knowing that your files are safe and can be easily restored if needed.
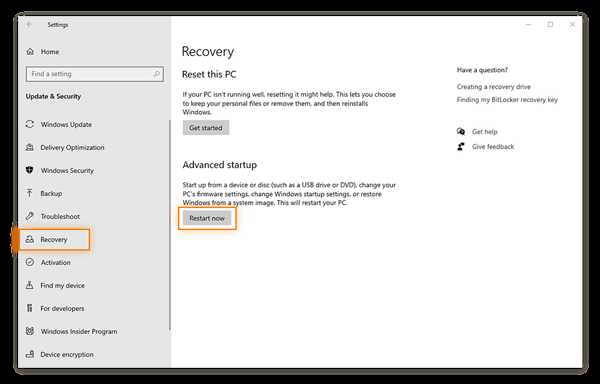
Step 3: Removing the Virus

Now that you have identified the virus in your Windows 10 system, it’s time to take action and remove it. Follow these simple steps to effectively remove the virus:
| Step 1: | Disconnect from the internet to prevent the virus from spreading or downloading additional malware. |
| Step 2: | Open your antivirus software and perform a full system scan. This will help identify and quarantine any infected files. |
| Step 3: | If your antivirus software detects any viruses, follow the prompts to remove or quarantine them. Make sure to delete any suspicious files. |
| Step 4: | Restart your computer to complete the removal process. This will ensure that any active viruses are terminated. |
| Step 5: | After restarting, run another scan to confirm that the virus has been successfully removed. If any infected files are still detected, repeat the removal process. |
| Step 6: | Update your antivirus software and perform regular scans to prevent future infections. Additionally, be cautious when downloading files or visiting suspicious websites. |
By following these steps, you can effectively remove a virus in Windows 10 and protect your system from further harm.
Using Antivirus Software
In order to remove a virus in Windows, it is crucial to have reliable antivirus software installed on your computer. Antivirus software is designed to detect and eliminate malicious programs that can harm your system.
Here is how you can use antivirus software to remove a virus from your Windows computer:
| Step 1 | Launch your antivirus software by double-clicking on its icon in the system tray or by searching for it in the Start menu. |
| Step 2 | Once the antivirus software is open, navigate to the “Scan” or “Scan Now” option. This will initiate a scan of your entire system for any viruses or malware. |
| Step 3 | Wait for the scan to complete. The duration of the scan will depend on the size of your hard drive and the number of files on your computer. |
| Step 4 | After the scan is finished, the antivirus software will display a list of detected threats. Review the list and select the option to remove or quarantine the viruses. |
| Step 5 | Follow any additional prompts or instructions provided by the antivirus software to complete the virus removal process. |
| Step 6 | Once the virus removal process is complete, restart your computer to ensure that all traces of the virus have been eliminated. |
Remember to keep your antivirus software up to date to ensure that it can effectively detect and remove the latest threats. Regularly scanning your computer for viruses is an essential part of maintaining a secure and healthy system.


