If you’re looking to install Windows 11 on your computer, you’ve come to the right place. In this step-by-step guide, we’ll show you how to install Windows 11 from a USB drive in BIOS mode. This method is useful if you want to perform a clean installation or if you’re having trouble installing Windows 11 using other methods.
Step 1: Prepare the USB drive
First, you’ll need to prepare a USB drive with at least 8GB of storage. Make sure to back up any important data on the USB drive, as the installation process will erase all existing data. Format the USB drive to FAT32 file system and give it a recognizable name.
Step 2: Download the Windows 11 ISO
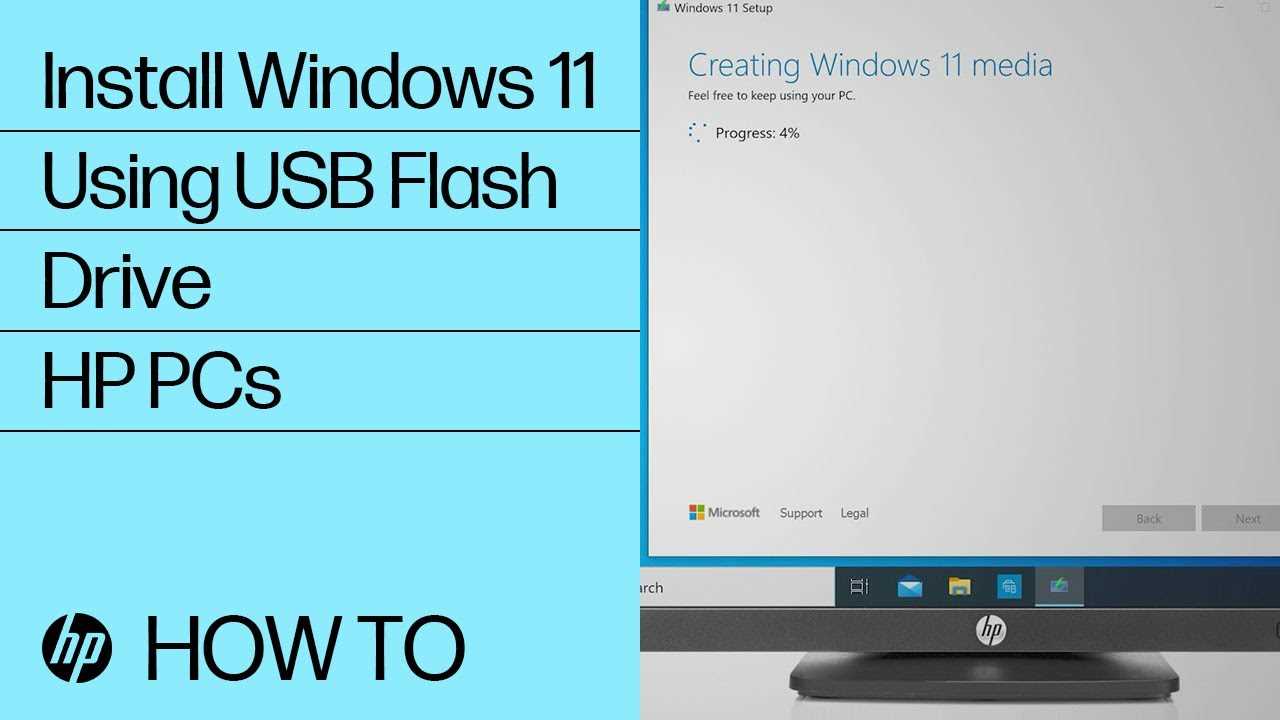
Next, you’ll need to download the Windows 11 ISO file from the official Microsoft website. Make sure to download the correct version for your computer, whether it’s 32-bit or 64-bit. Once the download is complete, save the ISO file to your computer.
Step 3: Create a bootable USB drive
Now it’s time to create a bootable USB drive using the Windows 11 ISO file. There are several tools available that can help you create a bootable USB drive, such as Rufus or the Windows USB/DVD Download Tool. Follow the instructions provided by the tool of your choice to create the bootable USB drive.
Step 4: Boot from the USB drive
Once you have the bootable USB drive ready, restart your computer and enter the BIOS mode. The key to enter BIOS mode may vary depending on your computer manufacturer, but it’s usually one of the function keys (F1, F2, F10, etc.) or the Delete key. Look for a message on the screen during startup that indicates which key to press.
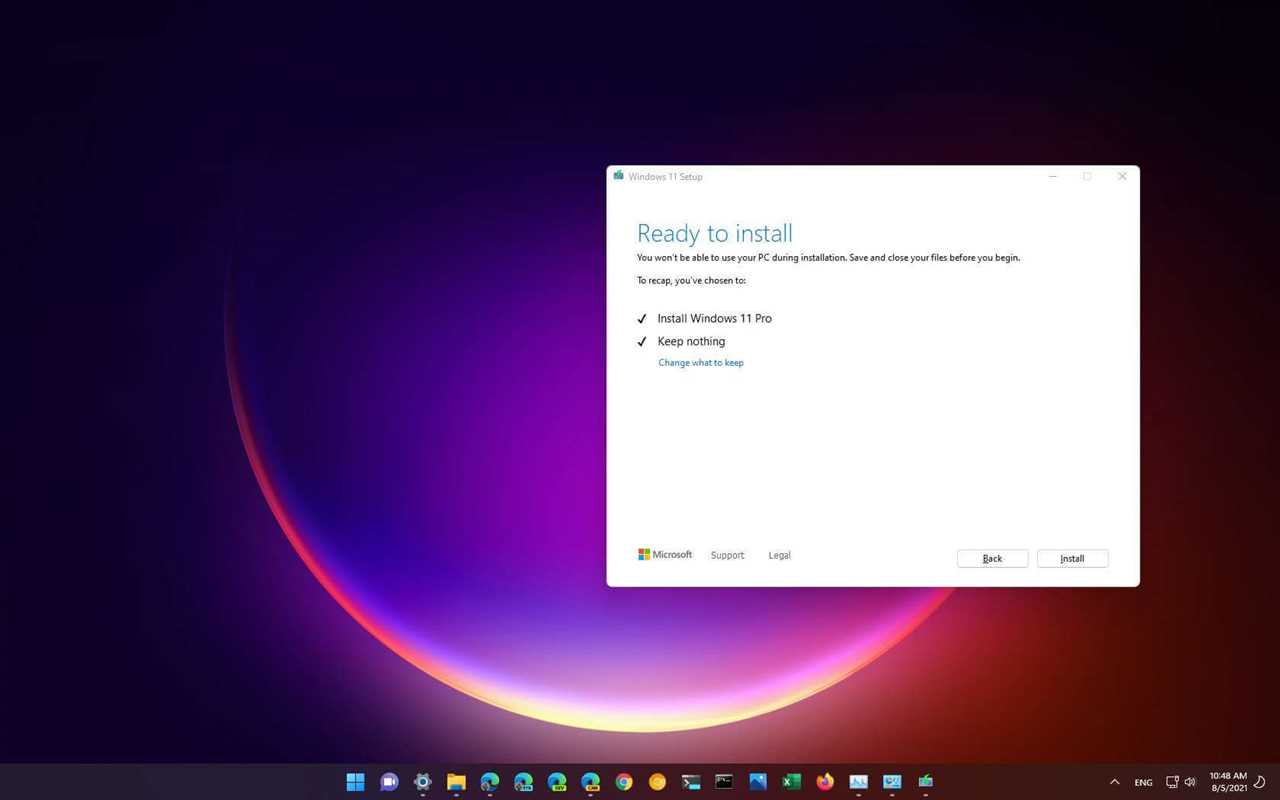
Step 5: Install Windows 11
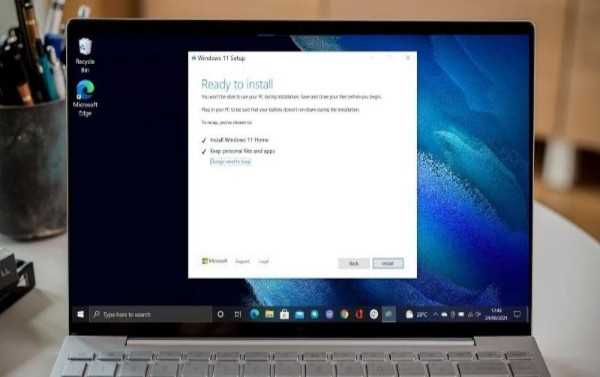
Once you’re in the BIOS mode, navigate to the “Boot” or “Boot Order” section and set the USB drive as the first boot device. Save the changes and exit the BIOS. Your computer will now boot from the USB drive and the Windows 11 installation process will begin. Follow the on-screen instructions to complete the installation.
That’s it! You’ve successfully installed Windows 11 from a USB drive in BIOS mode. Enjoy the new features and improvements that Windows 11 has to offer!
Preparing for Installation
Before you can install Windows 11 from a USB in BIOS mode, you need to make sure you have the necessary tools and information. Here’s how to prepare:
- Download the Windows 11 ISO file from the official Microsoft website.
- Create a bootable USB drive using a tool like Rufus or the Windows USB/DVD Download Tool.
- Make sure your computer is set to boot from USB in the BIOS settings. You may need to consult your computer’s manual or do a quick internet search to find out how to access the BIOS settings on your specific device.
- Back up any important files or data on your computer, as the installation process may involve formatting your hard drive.
- Ensure that your computer meets the minimum system requirements for Windows 11. This includes having a compatible processor, sufficient RAM, and enough storage space.
By following these steps, you’ll be well-prepared to install Windows 11 from a USB in BIOS mode.
Check System Requirements
Before you begin the installation process, it is important to check if your system meets the necessary requirements. Here’s how:
- Make sure your computer is compatible with Windows 11. Check the official Microsoft website for the minimum system requirements.
- Ensure that your BIOS is up to date. You can usually update your BIOS by visiting the manufacturer’s website and downloading the latest version.
- Prepare a USB drive with at least 8GB of storage capacity. This will be used to create a bootable USB for installing Windows 11.
By following these steps, you can ensure that your system is ready for the installation process in BIOS mode using a USB drive.
Download Windows 11 ISO
If you want to install Windows 11 from a USB, the first step is to download the Windows 11 ISO file. The ISO file contains all the necessary files to install the operating system on your computer.
To download the Windows 11 ISO file, you can follow these steps:
- Go to the official Microsoft website.
- Navigate to the Windows 11 download page.
- Click on the “Download now” button.
- Select the edition of Windows 11 you want to download (e.g., Home, Pro).
- Choose the language and architecture (32-bit or 64-bit) that matches your computer.
- Click on the “Download” button to start the download.
Once the download is complete, you will have the Windows 11 ISO file on your computer. You can then proceed to create a bootable USB drive using this ISO file to install Windows 11 on your computer.
Note: Make sure to download the Windows 11 ISO file from a trusted source to avoid any potential security risks.
Create Bootable USB Drive
To install Windows 11 from a USB drive in BIOS mode, you will need to create a bootable USB drive. Here’s how to do it:
- First, make sure you have a USB drive with at least 8GB of storage capacity.
- Download the Windows 11 ISO file from the official Microsoft website.
- Insert the USB drive into your computer.
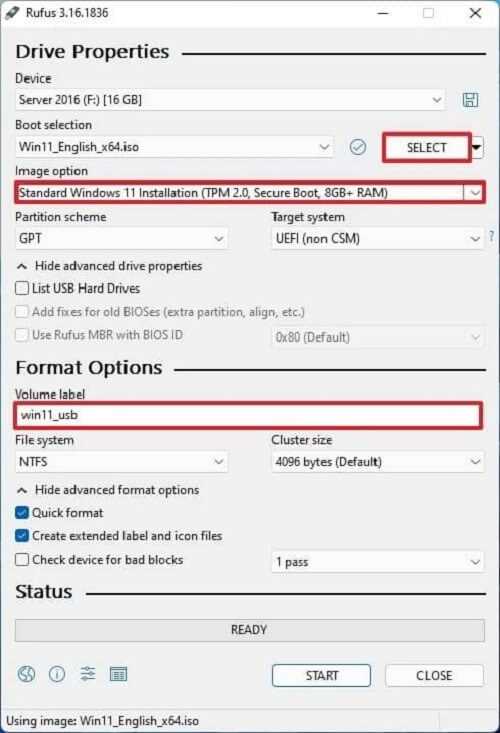
- Open the Rufus software, which is a popular tool for creating bootable USB drives.
- In Rufus, select the USB drive you inserted from the “Device” dropdown menu.
- Under the “Boot selection” section, click on the “Select” button and navigate to the location where you saved the Windows 11 ISO file.
- Click on the “Start” button to begin the process of creating the bootable USB drive.
- Wait for Rufus to finish creating the bootable USB drive. This may take a few minutes.
- Once the process is complete, you can safely remove the USB drive from your computer.
Now you have successfully created a bootable USB drive for installing Windows 11 in BIOS mode. You can use this USB drive to install Windows 11 on any compatible computer.
Configuring BIOS Settings
Before you can install Windows 11 from a USB, you need to configure your BIOS settings to boot from the USB drive. Here’s how:
- Start by restarting your computer and entering the BIOS menu. The key to access the BIOS may vary depending on your computer manufacturer, but it is usually displayed on the startup screen. Common keys include F2, F10, or Del.
- Once you are in the BIOS menu, navigate to the “Boot” tab using the arrow keys on your keyboard.
- Look for the “Boot Order” or “Boot Priority” option and select it.
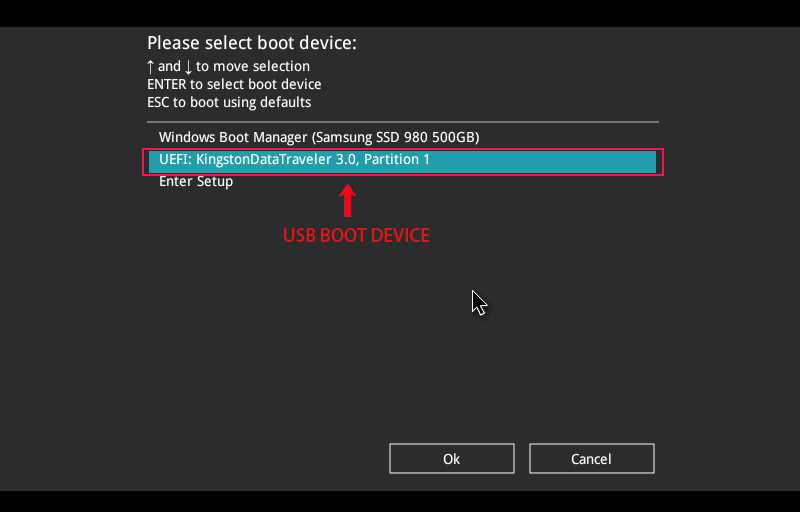
- Move the USB drive to the top of the boot order list. This will ensure that your computer boots from the USB drive first.
- Save the changes and exit the BIOS menu. This is usually done by pressing the F10 key.
By configuring your BIOS settings to boot from the USB drive, you are now ready to install Windows 11. Follow the next steps in the guide to complete the installation process.
Access BIOS Menu

To install Windows 11 from a USB in BIOS mode, you need to access the BIOS menu on your computer. The BIOS (Basic Input/Output System) is a firmware that is responsible for initializing hardware during the boot process.
Here are the steps to access the BIOS menu:
- Start or restart your computer.
- During the boot process, look for a message that indicates which key to press to enter the BIOS setup. This key is usually displayed on the screen for a brief moment, such as “Press F2 to enter BIOS” or “Press Del to enter setup”.
- Press the designated key before the operating system starts loading. If you miss the opportunity, you may need to restart your computer and try again.
- Once you press the correct key, the BIOS menu should appear. It may vary depending on the manufacturer and model of your computer.
- Use the arrow keys on your keyboard to navigate through the BIOS menu. Look for an option related to boot settings or boot priority.
- Set the USB drive as the first boot device in the boot priority list. This ensures that your computer will boot from the USB drive when you restart it.
- Save the changes and exit the BIOS menu. The specific key to save and exit may be displayed on the screen, such as “Press F10 to save and exit”.
By accessing the BIOS menu and setting the USB drive as the first boot device, you can proceed with the installation of Windows 11 from the USB in BIOS mode.
Change Boot Order
To install Windows 11 from a USB in BIOS mode, you need to change the boot order in your computer’s BIOS settings. The boot order determines the sequence in which your computer looks for an operating system to load. By changing the boot order, you can prioritize the USB drive as the first boot device, allowing you to install Windows 11.
Here’s how you can change the boot order:
- Restart your computer and enter the BIOS settings by pressing the appropriate key (usually F2, F10, or Del) during the boot process.
- Navigate to the “Boot” or “Boot Order” section in the BIOS menu.
- Locate the option that allows you to change the boot order or boot sequence.
- Using the arrow keys, move the USB drive to the top of the boot order list.
- Save the changes and exit the BIOS settings.
Once you have changed the boot order, your computer will prioritize booting from the USB drive. This will allow you to install Windows 11 from the USB drive in BIOS mode.
Disable Secure Boot
To install Windows 11 from a USB in BIOS mode, you may need to disable Secure Boot. Secure Boot is a security feature that ensures only trusted software can run on your computer. However, it can prevent you from installing an operating system that is not digitally signed by a trusted authority.
Here’s how to disable Secure Boot:
- Restart your computer and enter the BIOS settings. The key to access the BIOS settings may vary depending on your computer manufacturer, but it is usually one of the function keys (F1, F2, F10, etc.) or the Delete key.
- Navigate to the “Security” or “Boot” section in the BIOS settings.
- Find the option for Secure Boot and set it to “Disabled”.
- Save the changes and exit the BIOS settings.
Once Secure Boot is disabled, you should be able to install Windows 11 from a USB in BIOS mode without any issues. Remember to re-enable Secure Boot after the installation is complete to ensure the security of your system.