Are you a gaming enthusiast who wants to take your Xbox experience to the next level? Look no further! In this step-by-step guide, we will walk you through the process of installing Windows on your Xbox, opening up a whole new world of possibilities for gaming and entertainment.
Installing Windows on your Xbox allows you to access a wide range of applications and features that are not available on the standard Xbox operating system. With Windows, you can enjoy a seamless integration of your favorite games, apps, and media, making your gaming experience even more immersive and enjoyable.
One of the key benefits of installing Windows on your Xbox is the ability to play PC games directly on your console. With Windows, you can access a vast library of games that were previously only available on PC, opening up a whole new world of gaming possibilities. Whether you’re a fan of first-person shooters, strategy games, or role-playing adventures, the Windows operating system on your Xbox will allow you to enjoy all your favorite games in one place.
So, how do you go about installing Windows on your Xbox? Don’t worry, we’ve got you covered. In this tutorial, we will provide you with a detailed step-by-step guide that will walk you through the entire installation process. From preparing your Xbox for installation to configuring the Windows operating system, we will cover everything you need to know to successfully install Windows on your Xbox and start enjoying all the benefits it has to offer.
Step-by-Step Guide to Installing Windows on Xbox
If you’re a gaming enthusiast and own an Xbox console, you may be interested in expanding its capabilities by installing the Windows operating system. By doing so, you can access a wide range of applications and games that are compatible with Windows.
Here is a step-by-step guide to help you with the installation process:
1. Make sure your Xbox console is connected to the internet. This is necessary to download the Windows installation files.
2. Go to the Xbox Store and search for the Windows app. Download and install it on your console.
3. Once the Windows app is installed, launch it from your Xbox dashboard.
4. Follow the on-screen instructions to set up Windows on your Xbox. This may include signing in with your Microsoft account and accepting the terms and conditions.
5. After the initial setup, you will be prompted to download and install the necessary updates for Windows.
6. Once the updates are installed, you can start exploring the Windows interface on your Xbox. You will have access to the Windows Store, where you can download and install various applications and games.
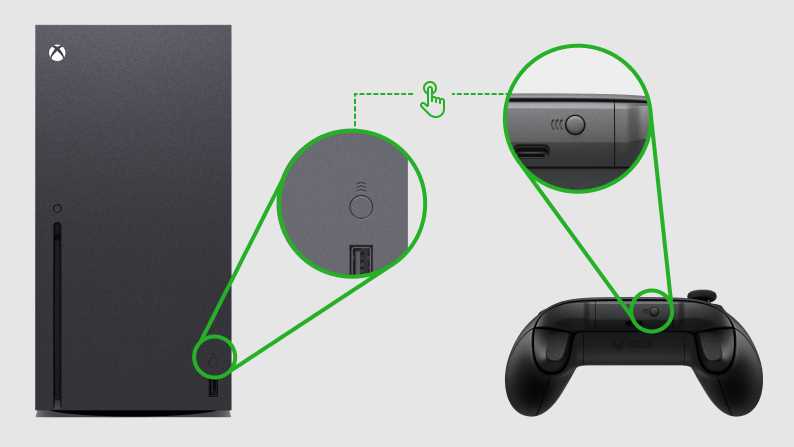
7. To switch between the Xbox interface and the Windows interface, simply press the Xbox button on your controller and select the desired option.
8. Enjoy the benefits of having Windows on your Xbox console! You can now play a wide range of games and use various applications that were previously unavailable on the Xbox platform.
Remember, installing Windows on your Xbox may void your warranty and can have potential risks. Make sure to follow the instructions carefully and proceed at your own risk.
With Windows installed on your Xbox, you can take your gaming experience to the next level and unlock a whole new world of possibilities!
Why Install Windows on Xbox?
Installing Windows on your Xbox console can provide you with a range of benefits and opportunities. By having the Windows operating system on your Xbox, you can unlock a whole new level of functionality and customization.
One of the main advantages of installing Windows on your Xbox is the ability to access a wider range of games. While Xbox consoles already offer a vast library of games, having Windows installed opens up the possibility of playing PC games on your console. This means you can enjoy a larger selection of games and have access to exclusive titles that are only available on the PC platform.
Additionally, having Windows on your Xbox allows you to take advantage of the full capabilities of the operating system. You can use your console for more than just gaming – you can browse the internet, stream media, and even use productivity tools. This versatility makes your Xbox a multi-functional device that can serve as both a gaming console and a computer.
Furthermore, installing Windows on your Xbox gives you the ability to customize your gaming experience to suit your preferences. You can install and use various software and applications that are compatible with Windows, allowing you to personalize your console and enhance your gaming experience. Whether it’s customizing your gaming interface or using third-party software to optimize performance, having Windows on your Xbox gives you the freedom to tailor your gaming setup to your liking.
In conclusion, installing Windows on your Xbox opens up a world of possibilities. From accessing a wider range of games to enjoying the full functionality of the Windows operating system, having Windows on your console enhances your gaming experience and allows for greater customization. So, if you’re looking to take your gaming to the next level, consider installing Windows on your Xbox.
Benefits of Installing Windows on Xbox

Installing Windows on your Xbox console can bring a range of benefits that enhance your gaming experience. Here are some of the advantages:
- Access to a vast library of games: By installing Windows on your Xbox, you can gain access to a wide range of games that are compatible with the Windows operating system. This opens up a whole new world of gaming possibilities.
- Improved system functionality: Windows is a powerful operating system that offers a range of features and functionalities. By installing it on your Xbox, you can take advantage of these features and enhance the overall functionality of your gaming console.
- Compatibility with PC games: Many PC games are not compatible with Xbox consoles. However, by installing Windows on your Xbox, you can bridge this gap and enjoy playing your favorite PC games on your console.
- Access to Windows-exclusive gaming features: Windows offers a range of gaming features that are not available on Xbox consoles. By installing Windows on your Xbox, you can access these exclusive features and take your gaming experience to the next level.
- Customization options: Windows provides a high level of customization options, allowing you to personalize your gaming experience. By installing Windows on your Xbox, you can customize various aspects of your console, such as the user interface, themes, and settings.
Overall, installing Windows on your Xbox can unlock a whole new world of gaming possibilities and enhance the functionality of your console. It allows you to access a vast library of games, enjoy PC games on your console, and take advantage of Windows-exclusive gaming features. Additionally, it provides customization options that allow you to personalize your gaming experience to suit your preferences.
Preparation
Before you can begin the installation process, there are a few things you need to do to prepare your Xbox console.
- Make sure your Xbox is connected to the internet. This is necessary to download the Windows installation files.
- Ensure that your Xbox has enough storage space to accommodate the Windows operating system. You may need to delete some games or other files to free up space.
- Back up any important data or game saves on your Xbox. Installing Windows will erase all existing data on the console.
- Ensure that your Xbox is fully charged or connected to a power source. The installation process can take some time, and you don’t want your console to run out of power in the middle of the installation.
Once you have completed these preparations, you are ready to move on to the next step of the installation process.
Check System Requirements

Before installing Windows on your Xbox console, it is important to check if your system meets the minimum requirements. This will ensure a smooth installation process and optimal performance for your gaming experience.
Here are the system requirements for installing Windows on Xbox:
| Operating System | Windows 10 |
|---|---|
| Processor | 1.6 GHz or faster |
| RAM | 4 GB or more |
| Storage | 64 GB or more |
| Graphics | DirectX 9 or later with WDDM 1.0 driver |
| Internet Connection | High-speed internet for updates and online gaming |
Make sure your Xbox console meets these requirements before proceeding with the installation. If your system falls short of any of these requirements, it may not be able to run Windows properly or handle certain games and applications.
Once you have confirmed that your Xbox meets the system requirements, you can proceed with the installation process. Follow the step-by-step guide to install Windows on your Xbox and enjoy a whole new level of gaming experience.
Backup Your Data
Before proceeding with the installation of Windows on your Xbox console, it is crucial to backup all your data. This step is necessary to prevent any potential loss of important files, game saves, or settings.
To backup your data, you can use an external storage device such as a USB flash drive or an external hard drive. Connect the storage device to your Xbox console and navigate to the settings menu. From there, select the “System” tab and choose the “Storage” option.
In the storage menu, you will see a list of all the storage devices connected to your Xbox console. Select the device you want to use for backup and choose the “Transfer” option. This will allow you to transfer your games, apps, and other data to the external storage device.
Once the transfer is complete, safely disconnect the storage device from your Xbox console. This backup will ensure that your important data is safe and can be easily restored after the installation of Windows.
Remember to keep your backup storage device in a secure place to avoid any damage or loss. It is also recommended to create multiple backups to ensure the safety of your data.
By following these steps to backup your data, you can proceed with confidence to the next step of installing Windows on your Xbox console and enjoy a new gaming experience with the operating system.
Download Windows Installation Files

Before you can start installing Windows on your Xbox console, you will need to download the necessary installation files. These files contain the operating system that will allow you to run Windows on your Xbox and enjoy a whole new level of gaming.
To download the Windows installation files, follow these steps:
- Make sure your Xbox console is connected to the internet.
- Go to the Xbox Store on your console.
- Search for “Windows Installation Files” in the search bar.
- Select the appropriate installation files for your Xbox model.
- Click on the “Download” button to start the download.
Once the download is complete, you will have the necessary files to proceed with the installation process. These files are essential for installing Windows on your Xbox and will ensure that your gaming experience is optimized for the new operating system.
It is important to note that downloading and installing Windows on your Xbox may void your warranty and could potentially cause issues with your console. Make sure to follow the installation instructions carefully and proceed at your own risk.
Now that you have downloaded the Windows installation files, you are ready to move on to the next step in the installation process.
Installation Process
The installation process for Windows on Xbox is a straightforward and simple procedure. Follow the step-by-step guide below to successfully install Windows on your Xbox console:
| Step 1: | Ensure that your Xbox console is connected to the internet and powered on. |
| Step 2: | Go to the Xbox Store and search for the Windows operating system. |
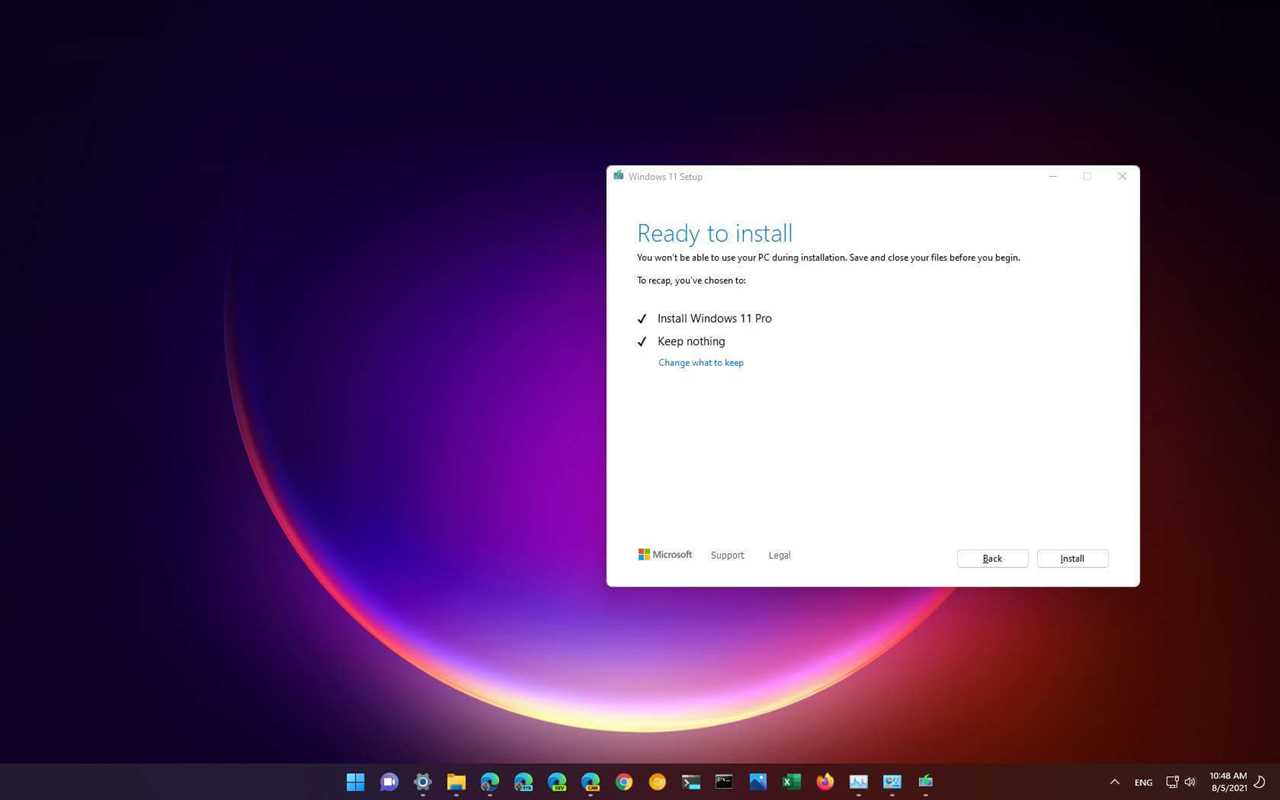
| Step 3: | Select the Windows version you want to install and click on the “Install” button. |
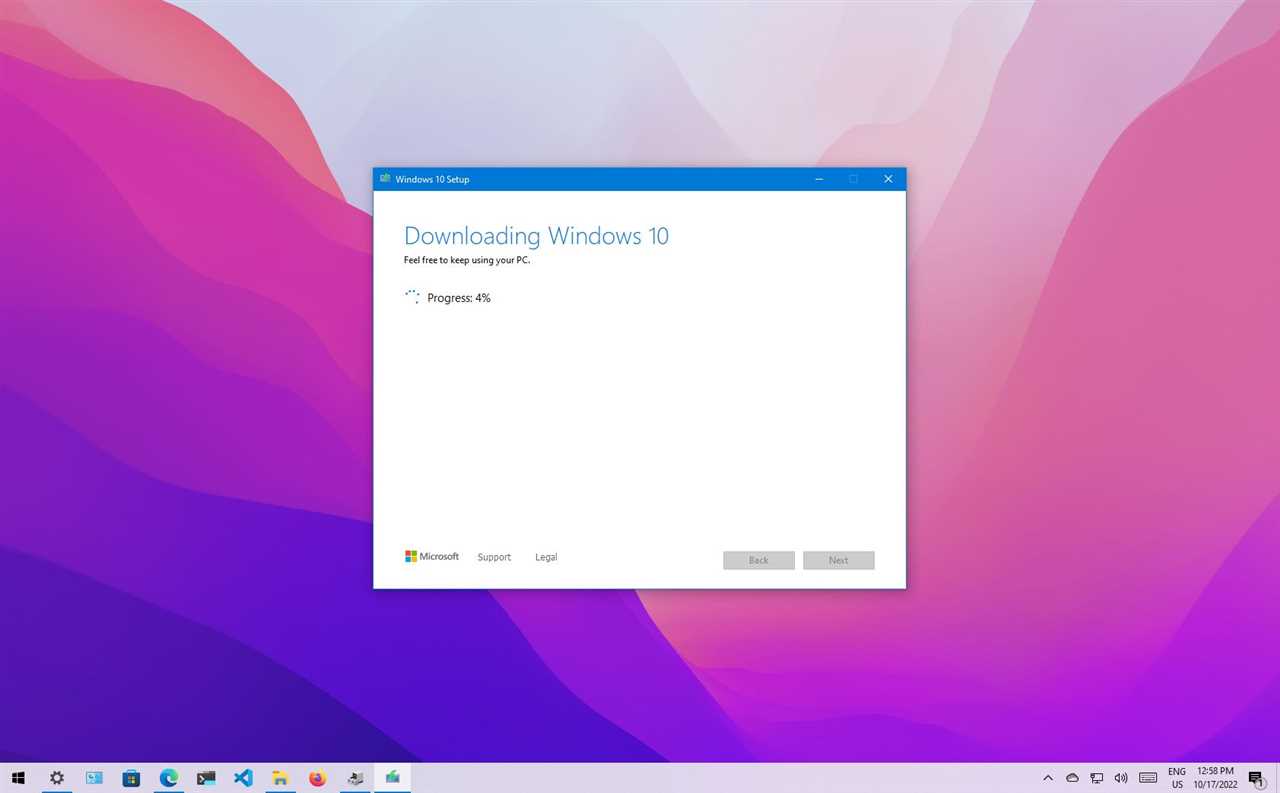
| Step 4: | Wait for the installation process to complete. This may take some time depending on your internet connection speed. |
| Step 5: | Once the installation is finished, restart your Xbox console. |
| Step 6: | After the restart, you will be prompted to set up Windows on your Xbox. Follow the on-screen instructions to complete the setup process. |
| Step 7: | Once the setup is complete, you can start enjoying a wide range of gaming experiences with Windows on your Xbox console. |
By following these simple steps, you can easily install Windows on your Xbox and unlock a whole new world of gaming possibilities. Whether you want to play Xbox games or explore the vast library of Windows games, installing Windows on your Xbox console is a great way to enhance your gaming experience.
Step 1: Prepare a Bootable USB Drive

To begin the installation process of Windows on your Xbox console, you will need to prepare a bootable USB drive. This USB drive will serve as the medium through which you will install the operating system and games onto your gaming console.
Here are the steps to prepare a bootable USB drive:
- First, ensure that you have a USB drive with sufficient storage capacity. It is recommended to use a USB drive with at least 16GB of storage.
- Format the USB drive to ensure it is compatible with the Xbox console. To do this, connect the USB drive to your computer and open the Disk Management tool. Right-click on the USB drive and select the “Format” option. Choose the FAT32 file system and click “Format” to begin the formatting process.
- Once the USB drive is formatted, you will need to create a bootable Windows installation media. Download the Windows Installation Media Creation Tool from the official Microsoft website and run the tool on your computer.
- Follow the on-screen instructions provided by the Windows Installation Media Creation Tool to create a bootable USB drive. Make sure to select the USB drive you formatted in the previous step as the destination for the installation media.
- Once the bootable USB drive is created, safely eject it from your computer and connect it to your Xbox console.
With the bootable USB drive prepared, you are now ready to proceed with the installation of Windows on your Xbox console. Move on to Step 2 to continue the installation process.