
If you’re looking to install Linux on your Chromebook, Linux Mint is a great choice. Linux Mint is a user-friendly operating system that is based on the popular Ubuntu distribution. It offers a familiar desktop environment and a wide range of software applications, making it a perfect choice for Chromebook users who want to expand their device’s capabilities.
Installing Linux Mint on your Chromebook is a straightforward process that can be done in just a few steps. In this step-by-step guide, we’ll walk you through the process of installing Linux Mint on your Chromebook, from preparing your device to booting into the new operating system.
Before we begin, it’s important to note that installing Linux Mint on your Chromebook will require you to enable developer mode, which may void your warranty. Additionally, the process may vary slightly depending on your specific Chromebook model. With that said, let’s get started!
Preparing Your Chromebook
Before you can install Linux Mint on your Chromebook, you need to make sure your device is ready for the installation process. Here’s how to prepare your Chromebook:
1. Enable Developer Mode: To install Linux on your Chromebook, you’ll need to enable Developer Mode. This process will wipe all data on your device, so make sure to back up any important files before proceeding.
2. Enable Legacy Boot Mode: By default, Chromebooks use a feature called “Verified Boot” to ensure the operating system is secure. However, this feature can prevent you from installing Linux. To disable it, you’ll need to enable Legacy Boot Mode in your Chromebook’s BIOS settings.
3. Create a Recovery Drive: It’s always a good idea to create a recovery drive before making any changes to your Chromebook. This will allow you to restore your device to its original state if anything goes wrong during the installation process.
4. Check Hardware Compatibility: Not all Chromebook models are compatible with Linux Mint. Before proceeding, check the official Linux Mint website or community forums to ensure that your specific Chromebook model is supported.
5. Backup Your Data: As mentioned earlier, the installation process will wipe all data on your Chromebook. Make sure to back up any important files to an external storage device or cloud storage service.
Once you’ve completed these steps, you’re ready to proceed with the installation of Linux Mint on your Chromebook. Follow the step-by-step guide to learn how to install Linux Mint on your Chromebook.
Enabling Developer Mode

To install Linux on your Chromebook, you need to enable Developer Mode. This mode allows you to make changes to your Chromebook’s operating system and install third-party software, such as Linux.
Before proceeding, keep in mind that enabling Developer Mode will wipe all the data on your Chromebook. Make sure to back up any important files before starting the process.
- Turn off your Chromebook.
- Press and hold the Esc key and the Refresh key (which is usually the fourth key from the left on the top row) simultaneously.
- While holding these keys, press the Power button to turn on your Chromebook.
- When the “Chrome OS is missing or damaged” screen appears, release all the keys.
- Press Ctrl + D to enable Developer Mode.
- On the next screen, press Enter to confirm and enable Developer Mode.
- Your Chromebook will now reboot and display a warning screen. Press Ctrl + D again to bypass this screen.
- Wait for your Chromebook to reboot again. This process may take a few minutes.
- After the reboot, you will see a screen with a red exclamation mark. Press Ctrl + D one more time to proceed.
- Your Chromebook will now transition to Developer Mode. This process may take several minutes.
- Once the transition is complete, your Chromebook will reboot again and display a screen that says “OS verification is off.” This indicates that Developer Mode is enabled.
Now that you have enabled Developer Mode on your Chromebook, you can proceed with the installation of Linux. Follow the next steps in this guide to learn how to install Linux on your Chromebook.
Backing Up Your Data
Before you proceed with the installation of Linux Mint on your Chromebook, it is important to back up your data to ensure that you don’t lose any important files or documents. Here are the steps to back up your data:
- Connect an external storage device, such as a USB drive or an external hard drive, to your Chromebook.
- Open the file manager on your Chromebook and navigate to the files and folders that you want to back up.
- Select the files and folders that you want to back up by clicking on them while holding down the Ctrl key.
- Right-click on the selected files and folders and choose the “Copy” option from the context menu.
- Navigate to the external storage device in the file manager and right-click on an empty space.
- Choose the “Paste” option from the context menu to copy the selected files and folders to the external storage device.
- Wait for the copying process to complete. The time it takes will depend on the size of the files and folders you are backing up.
- Once the copying process is finished, safely eject the external storage device from your Chromebook.
By following these steps, you can ensure that your important data is safely backed up before proceeding with the installation of Linux Mint on your Chromebook. This way, even if something goes wrong during the installation process, you will still have a copy of your data.
Disabling Secure Boot
Before installing Linux Mint on your Chromebook, you need to disable Secure Boot. Secure Boot is a security feature that prevents unauthorized operating systems from running on your device. Here’s how to disable Secure Boot on your Chromebook:
| Step 1: | Turn on your Chromebook and press the power button to boot into Chrome OS. |
| Step 2: | Click on the status area in the bottom-right corner of the screen and select the gear icon to open the Settings menu. |
| Step 3: | In the Settings menu, scroll down and click on “Advanced” to expand the advanced settings. |
| Step 4: | Under the “Advanced” section, click on “Developers” to open the developer options. |
| Step 5: | Toggle the “Developer mode” switch to enable developer mode. You will see a warning message informing you that enabling developer mode will erase all local data on your Chromebook. |
| Step 6: | Click on “Enable” to confirm and proceed with enabling developer mode. |
| Step 7: | Your Chromebook will reboot and enter developer mode. During the reboot process, you will see a screen with a warning message. Press Ctrl+D to bypass the warning and continue booting into developer mode. |
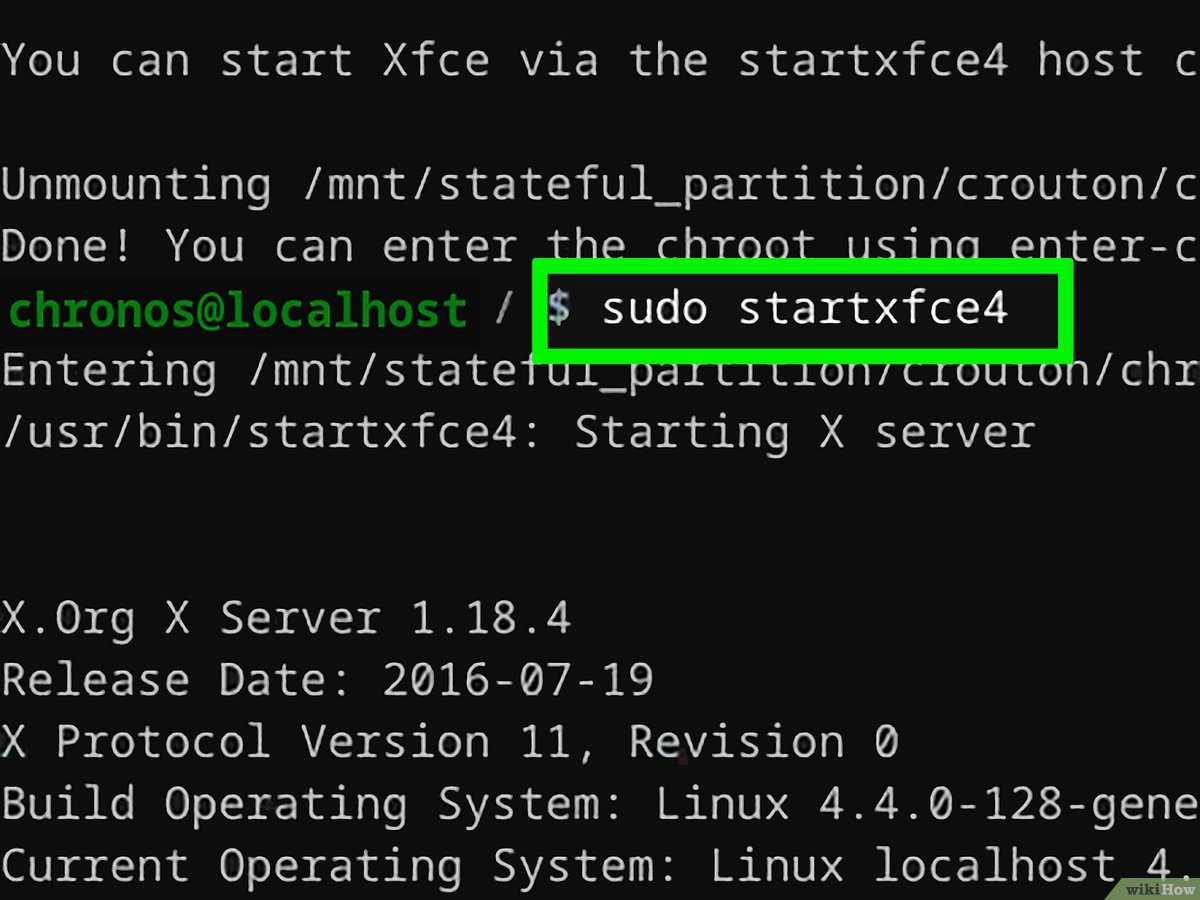
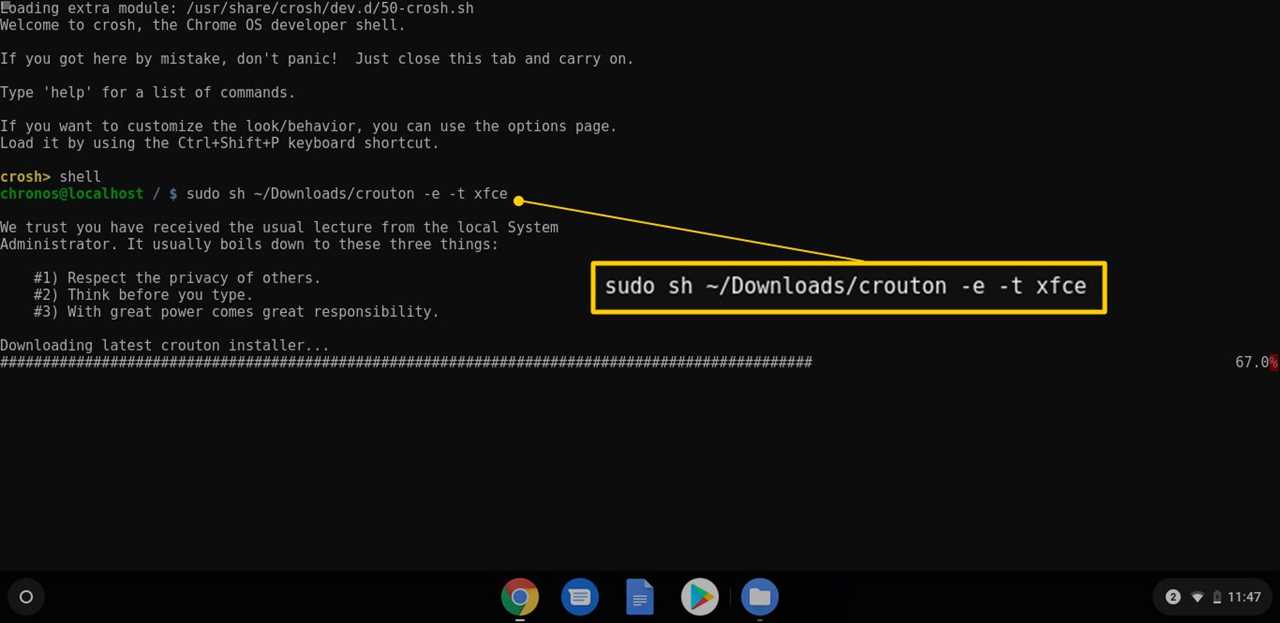
| Step 8: | Once your Chromebook has booted into developer mode, press Ctrl+Alt+T to open the crosh shell. |
| Step 9: | Type “shell” in the crosh shell and press Enter to enter the Linux shell. |
| Step 10: | Type the following command in the Linux shell to disable Secure Boot: |
sudo crossystem dev_boot_signed_only=0 |
|
| Step 11: | Press Enter and enter your Chromebook’s password when prompted. |
| Step 12: | Restart your Chromebook to apply the changes. |
Once you have disabled Secure Boot, you can proceed with installing Linux Mint on your Chromebook.
Installing Linux Mint
If you’re looking to install Linux Mint on your Chromebook, you’re in luck! Here’s a step-by-step guide on how to do it:
1. First, you’ll need to enable Developer Mode on your Chromebook. This will allow you to access the Linux installation options.
2. Once you’re in Developer Mode, you can install Linux Mint by following these steps:
– Download the Linux Mint ISO file from the official website.
– Create a bootable USB drive with the ISO file using a tool like Etcher.
– Insert the USB drive into your Chromebook.
– Restart your Chromebook and press the appropriate key to access the boot menu.
– Select the USB drive as the boot device.
– Follow the on-screen instructions to install Linux Mint.
3. After the installation is complete, you can choose to dual-boot Linux Mint with Chrome OS or replace Chrome OS entirely.
That’s it! You’ve successfully installed Linux Mint on your Chromebook. Enjoy exploring the world of Linux!


