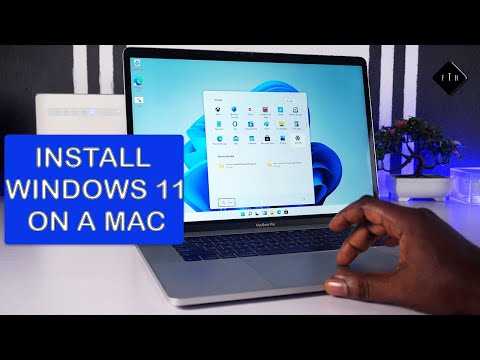
If you’re a Mac user who wants to experience the latest version of Windows, you’re in luck! With the release of Windows 11, you can now install it on your Mac and enjoy the best of both worlds. In this step-by-step guide, we will walk you through the process of installing Windows 11 on your Mac, so you can take advantage of all the new features and improvements.
Before we begin, it’s important to note that installing Windows 11 on a Mac requires a few prerequisites. First, you will need a compatible Mac model that meets the minimum system requirements for Windows 11. Second, you will need a valid copy of Windows 11, either in the form of an ISO file or a bootable USB drive. Once you have these requirements in place, you’re ready to get started.
The first step in installing Windows 11 on your Mac is to create a bootable USB drive. This will allow you to install Windows 11 on your Mac without the need for a DVD drive. To create a bootable USB drive, you will need a USB flash drive with at least 8GB of storage capacity. Insert the USB drive into your Mac, then open the Disk Utility application. Select the USB drive from the list of available drives, then click on the “Erase” tab. Choose a name for your USB drive, select the “MS-DOS (FAT)” format, and click on the “Erase” button. Once the formatting is complete, close the Disk Utility application.
Now that you have a bootable USB drive, it’s time to install Windows 11 on your Mac. Restart your Mac, then hold down the Option key while it boots up. This will bring up the boot menu, where you can select the USB drive as the startup disk. Once you’ve selected the USB drive, your Mac will boot into the Windows 11 installer. Follow the on-screen instructions to install Windows 11 on your Mac. You may need to partition your Mac’s hard drive to make room for Windows 11, so be sure to back up any important data before proceeding.
After the installation is complete, your Mac will restart and boot into Windows 11. You can now set up Windows 11 according to your preferences, just like you would on a regular Windows PC. You can install your favorite apps, customize the desktop, and enjoy all the new features that Windows 11 has to offer. And don’t worry, you can still switch back to macOS whenever you want by restarting your Mac and holding down the Option key to bring up the boot menu.
That’s it! You’ve successfully installed Windows 11 on your Mac. Now you can enjoy the best of both worlds and take advantage of all the features and improvements that Windows 11 has to offer. Whether you need Windows for work or just want to try something new, this step-by-step guide has you covered. Happy computing!
Section 1: Preparing Your Mac for Windows 11 Installation
Windows 11 is the latest version of the popular operating system developed by Microsoft. If you’re a Mac user and want to experience the new features and improvements of Windows 11, you can install it on your Mac. In this section, we will guide you on how to prepare your Mac for the Windows 11 installation.
Step 1: Check the system requirements
Before installing Windows 11 on your Mac, it’s important to ensure that your Mac meets the minimum system requirements. Windows 11 requires a compatible Mac model with a supported processor, sufficient RAM, and available storage space. You can find the detailed system requirements on the official Microsoft website.
Step 2: Backup your data
Installing a new operating system can sometimes lead to data loss or unexpected issues. It’s always a good practice to create a backup of your important files and documents before proceeding with the installation. You can use Time Machine or any other backup software to create a complete backup of your Mac.
Step 3: Create a bootable Windows 11 USB drive
In order to install Windows 11 on your Mac, you will need a bootable USB drive containing the Windows 11 installation files. You can create a bootable USB drive using the official Windows 11 Media Creation Tool or third-party software like Rufus. Make sure to follow the instructions provided by the tool or software to create the bootable USB drive successfully.
Step 4: Disable Secure Boot and enable Boot Camp Assistant
Before installing Windows 11, you need to disable the Secure Boot feature on your Mac. Secure Boot is a security feature that prevents unauthorized operating systems from loading during the startup process. You can disable Secure Boot by accessing the Startup Security Utility in the macOS Recovery mode.
Additionally, you need to enable Boot Camp Assistant, which is a built-in utility in macOS that allows you to install Windows on your Mac. You can find Boot Camp Assistant in the Utilities folder within the Applications folder.
Step 5: Allocate disk space for Windows 11
During the Windows 11 installation process, you will be prompted to allocate disk space for the new operating system. Make sure to allocate enough space to accommodate the Windows 11 installation files and future updates. You can use the Boot Camp Assistant to create a new partition for Windows 11 or resize an existing partition.
By following these steps, you will be able to prepare your Mac for the installation of Windows 11. In the next section, we will guide you on how to install Windows 11 on your Mac using the bootable USB drive.
Checking System Requirements
Before you begin the installation process, it is important to check if your Mac meets the system requirements for installing Windows 11. Here are the steps to check the system requirements:
- Make sure your Mac is running on the latest version of macOS.
- Check the processor compatibility. Windows 11 requires a compatible 64-bit processor with at least 1 GHz clock speed and 2 or more cores.
- Verify the RAM requirements. Windows 11 requires a minimum of 4 GB of RAM.
- Ensure that your Mac has enough storage space. Windows 11 requires at least 64 GB of storage.
- Check the graphics card compatibility. Windows 11 requires a DirectX 12 compatible graphics card or integrated GPU.
- Verify the display requirements. Windows 11 requires a display with a minimum resolution of 720p.
- Check the internet connectivity. Make sure your Mac is connected to the internet for the installation process.
If your Mac meets all the system requirements, you are ready to proceed with the installation of Windows 11 on your Mac.
Creating a Backup of Your Mac
Before you proceed to install Windows 11 on your Mac, it is essential to create a backup of your existing data. This step is crucial to ensure that you don’t lose any important files or information during the installation process.
There are several methods you can use to create a backup of your Mac:
| Method | Description |
|---|---|
| Time Machine | Time Machine is a built-in backup feature in macOS that allows you to create automatic backups of your entire system. You can use an external hard drive or a network storage device to store your backups. To create a Time Machine backup, connect your backup device, go to System Preferences, select Time Machine, and follow the on-screen instructions. |
| Third-Party Backup Software | There are many third-party backup software options available for Mac that offer additional features and flexibility compared to Time Machine. Some popular options include Carbon Copy Cloner, SuperDuper!, and Acronis True Image. These software solutions allow you to create bootable backups, schedule backups, and customize your backup settings according to your needs. |
| Cloud Storage | If you have limited storage space on your Mac or prefer an off-site backup solution, you can use cloud storage services like iCloud, Google Drive, or Dropbox to store your important files. These services offer automatic syncing and versioning, ensuring that your files are always up to date and accessible from any device with an internet connection. |
Regardless of the method you choose, make sure to verify that your backup is complete and accessible before proceeding with the Windows 11 installation. This will give you peace of mind knowing that your data is safe and can be restored if anything goes wrong during the installation process.
Partitioning Your Mac’s Hard Drive
Before you can install Windows on your Mac, you need to partition your Mac’s hard drive. Partitioning allows you to create a separate section of your hard drive where you can install Windows.
To partition your Mac’s hard drive, follow these steps:
- Back up your data: Before making any changes to your hard drive, it’s important to back up all your important files and data. This will ensure that you don’t lose any important information during the partitioning process.
- Open Disk Utility: Go to the Applications folder, then open the Utilities folder, and finally, open Disk Utility.
- Select your hard drive: In Disk Utility, select your Mac’s hard drive from the list of available drives.
- Click on the Partition tab: Once you’ve selected your hard drive, click on the Partition tab at the top of the Disk Utility window.
- Add a new partition: Click on the “+” button to add a new partition to your hard drive.
- Adjust the partition size: In the Size field, enter the desired size for your Windows partition. Keep in mind that you’ll need enough space to install Windows and any additional software or files you plan to use.
- Choose a name and format: Give your new partition a name and choose the format as “MS-DOS (FAT)” or “ExFAT”. These formats are compatible with Windows.
- Apply the changes: Once you’ve adjusted the partition size and chosen the format, click on the Apply button to apply the changes and create the new partition.
After partitioning your Mac’s hard drive, you’ll have a separate section where you can install Windows. This will allow you to dual-boot your Mac and have both macOS and Windows operating systems on your machine.
Note: Partitioning your hard drive will erase all data on the newly created partition. Make sure you have a backup of any important files before proceeding.
Section 2: Downloading and Preparing Windows 11 Installation Media
Once you have decided to install Windows 11 on your Mac, you will need to download and prepare the necessary installation media. Follow the steps below to get started:
| Step 1: | Go to the official Microsoft website and navigate to the Windows 11 download page. |
| Step 2: | Click on the “Download now” button to start downloading the Windows 11 installation file. |
| Step 3: | Once the download is complete, locate the installation file on your Mac. |
| Step 4: | Double-click on the installation file to begin the Windows 11 installation process. |
| Step 5: | Follow the on-screen instructions to create a bootable USB drive or DVD with the Windows 11 installation files. |
| Step 6: | Once the bootable media is created, restart your Mac and hold down the Option key to access the boot menu. |
| Step 7: | Select the bootable USB drive or DVD from the boot menu and press Enter to start the Windows 11 installation. |
By following these steps, you will be able to download and prepare the necessary installation media for installing Windows 11 on your Mac. Make sure to back up any important data before proceeding with the installation process.
Downloading the Windows 11 ISO File
To install Windows 11 on your Mac, you will need to download the Windows 11 ISO file. The ISO file contains all the necessary installation files for Windows 11. Here’s how you can download it:
Step 1: Go to the official Microsoft website.
Step 2: Navigate to the Windows 11 download page.
Step 3: Click on the “Download” button to start the download.
Step 4: Choose the edition of Windows 11 you want to download (Home, Pro, etc.).
Step 5: Select the language and architecture (32-bit or 64-bit) that matches your Mac.
Step 6: Click on the “Download” button to begin the download process.
Step 7: Wait for the download to complete. This may take some time depending on your internet connection speed.
Step 8: Once the download is finished, you will have the Windows 11 ISO file ready to be used for installation.
Note: Make sure you have a stable internet connection and enough disk space to download the Windows 11 ISO file.
Now that you have downloaded the Windows 11 ISO file, you can proceed to the next step of the installation process.
Creating a Bootable USB Drive

To install Windows 11 on your Mac, you will need to create a bootable USB drive. This will allow you to boot into the Windows 11 installation process and install the operating system on your Mac.
Here is a step-by-step guide on how to create a bootable USB drive:
- First, you will need to download the Windows 11 ISO file from the official Microsoft website.
- Once you have downloaded the ISO file, insert a USB drive with at least 8GB of storage into your Mac.
- Open the Disk Utility application on your Mac.
- Select the USB drive from the list of available drives on the left-hand side of the Disk Utility window.
- Click on the “Erase” tab at the top of the Disk Utility window.
- Choose a name for your USB drive and select the “MS-DOS (FAT)” format.
- Click on the “Erase” button to format the USB drive.
- Once the formatting process is complete, open the Terminal application on your Mac.
- Type the following command into the Terminal window:
sudo /Applications/Install\ macOS\ Big\ Sur.app/Contents/Resources/createinstallmedia --volume /Volumes/Untitled --nointeraction - Press Enter to execute the command. You will be prompted to enter your Mac password.
- The Terminal will begin creating the bootable USB drive. This process may take some time.
- Once the process is complete, you will have a bootable USB drive with the Windows 11 installation files.
Now you are ready to install Windows 11 on your Mac using the bootable USB drive. Simply restart your Mac and hold down the Option key while it is booting up. Select the USB drive from the list of available boot options, and follow the on-screen instructions to install Windows 11.
Preparing the Boot Camp Assistant
Before you can install Windows 11 on your Mac, you need to prepare the Boot Camp Assistant. Boot Camp Assistant is a built-in utility on Mac computers that allows you to install Windows on a separate partition.
To start, make sure your Mac meets the system requirements for Windows 11. Check the Apple website or consult your Mac’s documentation for the specific requirements.
Next, ensure that you have a valid copy of the Windows 11 installation media. This can be a USB drive or an ISO file. If you don’t have one, you can purchase a copy from the Microsoft website or use a third-party tool to create a bootable USB drive.
Once you have the installation media, open Boot Camp Assistant. You can find it in the Utilities folder, which is located in the Applications folder. Alternatively, you can use Spotlight to search for Boot Camp Assistant.
When Boot Camp Assistant opens, it will guide you through the process of installing Windows 11 on your Mac. Follow the on-screen instructions and select the options that best suit your needs.
During the installation process, Boot Camp Assistant will create a separate partition on your Mac’s hard drive for Windows 11. This partition will be used to store the Windows operating system and any files or applications you install on Windows.
It’s important to note that installing Windows 11 on your Mac will require a significant amount of disk space. Make sure you have enough free space on your Mac’s hard drive before proceeding.
Once you have prepared the Boot Camp Assistant, you are ready to install Windows 11 on your Mac. The next step is to partition your Mac’s hard drive and begin the installation process.
Section 3: Installing Windows 11 on Your Mac
Now that you have prepared your Mac for the installation, it’s time to proceed with installing Windows 11. Follow these steps to successfully install Windows 11 on your Mac:
1. Make sure you have a valid copy of the Windows 11 installation media. This can be a USB drive or an ISO file.
2. Connect the installation media to your Mac.
3. Restart your Mac and hold down the Option key while it’s booting up. This will bring up the Startup Manager.
4. Use the arrow keys to select the installation media and press Enter.
5. The Windows 11 installer will now load. Follow the on-screen instructions to proceed with the installation.
6. When prompted, select the desired language, time and currency format, and keyboard layout.
7. Click “Install now” to begin the installation process.
8. Read and accept the license terms, then click “Next”.
9. Choose the type of installation you want. If you want to replace macOS with Windows 11, select “Custom: Install Windows only (advanced)”. If you want to dual boot macOS and Windows 11, select “Upgrade: Install Windows and keep files, settings, and applications”.
10. Select the drive where you want to install Windows 11 and click “Next”.
11. The installation process will now begin. Your Mac will restart multiple times during the installation.
12. Once the installation is complete, you will be prompted to set up Windows 11. Follow the on-screen instructions to complete the setup process.
13. After the setup is complete, you can start using Windows 11 on your Mac.
Congratulations! You have successfully installed Windows 11 on your Mac. Enjoy the new features and functionalities of the latest Windows operating system.