
Are you looking to install the latest version of Windows, Windows 10, on your Dell laptop? Look no further! In this step-by-step guide, we will walk you through the process of installing Windows 10 on your Dell laptop. Whether you are upgrading from a previous version of Windows or performing a clean installation, we’ve got you covered.
Step 1: Prepare Your Dell Laptop
Before you begin the installation process, it is important to ensure that your Dell laptop meets the system requirements for Windows 10. Check the Dell website or your laptop’s documentation for the specific requirements. Additionally, make sure to back up any important files or data on your laptop to avoid losing them during the installation process.
Step 2: Obtain a Copy of Windows 10
Next, you will need to obtain a copy of Windows 10. You can either purchase a physical copy from a retailer or download a digital copy from the official Microsoft website. Make sure to choose the correct version of Windows 10 that matches your laptop’s architecture (32-bit or 64-bit).
Step 3: Create a Bootable USB Drive
Once you have obtained a copy of Windows 10, you will need to create a bootable USB drive. This will allow you to install Windows 10 on your Dell laptop. You can use tools like Rufus or the Windows USB/DVD Download Tool to create the bootable USB drive. Follow the instructions provided by the tool to create the bootable USB drive successfully.
Step 4: Install Windows 10
Now that you have a bootable USB drive, you are ready to install Windows 10 on your Dell laptop. Insert the bootable USB drive into your laptop and restart it. During the startup process, you may need to press a key (such as F12 or F2) to access the boot menu. Select the USB drive as the boot device and follow the on-screen instructions to begin the installation process.
Step 5: Complete the Installation
Once the installation process begins, you will be guided through a series of steps to set up Windows 10 on your Dell laptop. Follow the prompts to select your language, region, and keyboard layout. You may also be prompted to enter your product key, so make sure to have it handy. Finally, choose your desired settings and wait for the installation to complete.
Congratulations! You have successfully installed Windows 10 on your Dell laptop. Enjoy the new features and improved performance that Windows 10 has to offer!
Preparing for Installation

Before you can install Windows 10 on your Dell laptop, it’s important to make sure you have everything you need and that your laptop is ready for the installation process. Follow these steps to prepare:
- Make sure you have a valid copy of Windows 10. You can purchase a copy from the Microsoft Store or download an ISO file from the official Windows website.
- Back up your important files and data. Installing Windows 10 will erase all the data on your laptop, so it’s crucial to create a backup to prevent any data loss.
- Ensure your Dell laptop meets the minimum system requirements for Windows 10. Check the specifications of your laptop to confirm that it has enough processing power, memory, and storage space to run Windows 10 smoothly.
- Connect your laptop to a power source. Installing Windows 10 can take a while, so it’s best to have your laptop plugged in to avoid any interruptions due to low battery.
- Disconnect any external devices or peripherals from your laptop. This includes USB drives, printers, scanners, and any other devices that are not necessary for the installation process.
- Make a note of your Dell laptop’s product key, if applicable. Some Dell laptops come with a pre-installed copy of Windows, and you may need the product key during the installation process.
By following these steps, you’ll be well-prepared to install Windows 10 on your Dell laptop. Once you’ve completed these preparations, you can proceed with the installation process.
Check System Requirements
Before you begin the installation process, it is important to ensure that your Dell laptop meets the necessary system requirements to install Windows 10. This will help ensure a smooth and successful installation.
Firstly, make sure that your laptop is compatible with Windows 10. Check the Dell website or the documentation that came with your laptop to confirm compatibility.
Next, ensure that your laptop meets the minimum hardware requirements for Windows 10. These include a 1 GHz or faster processor, 1 GB of RAM for 32-bit systems or 2 GB of RAM for 64-bit systems, and at least 16 GB of free disk space.
Additionally, check that your laptop has a stable internet connection, as you will need to download updates and drivers during the installation process.
Finally, it is recommended to back up any important files or data on your laptop before proceeding with the installation. This will help prevent any potential data loss during the installation process.
By ensuring that your Dell laptop meets these system requirements, you can proceed with confidence knowing that your laptop is ready for the installation of Windows 10.
Backup Your Data

Before you begin the installation process, it is crucial to back up all your important data on your Dell laptop. This step ensures that you do not lose any valuable files or documents during the Windows 10 installation.
To back up your data, you can use various methods. One option is to transfer your files to an external hard drive or a USB flash drive. Simply connect the storage device to your laptop and copy all the necessary files to the device.
Another option is to use cloud storage services such as Dropbox, Google Drive, or OneDrive. These services allow you to upload your files to the cloud, ensuring that they are safely stored and accessible from any device with an internet connection.
Additionally, you can create a system image of your Dell laptop using built-in Windows tools. This creates a complete backup of your entire system, including the operating system, applications, and files. In case anything goes wrong during the installation process, you can restore your laptop to its previous state using the system image.
Regardless of the method you choose, make sure to double-check that all your important files are backed up properly before proceeding with the Windows 10 installation on your Dell laptop. This precautionary step will give you peace of mind and ensure that you can easily restore your data if needed.
Create a Windows 10 Installation Media

To install Windows 10 on your Dell laptop, you will need to create a Windows 10 installation media. This media will be used to boot your laptop and install the operating system.
Here is a step-by-step guide on how to create a Windows 10 installation media:
Step 1: Insert a USB flash drive with at least 8GB of storage into your laptop.
Step 2: Open the Windows 10 Media Creation Tool, which can be downloaded from the official Microsoft website.
Step 3: Follow the on-screen instructions to download and install the Media Creation Tool.
Step 4: Once the tool is installed, launch it and select “Create installation media for another PC” option.
Step 5: Choose the language, edition, and architecture (32-bit or 64-bit) of Windows 10 that you want to install.
Step 6: Select the USB flash drive that you inserted in Step 1 as the destination for the installation media.
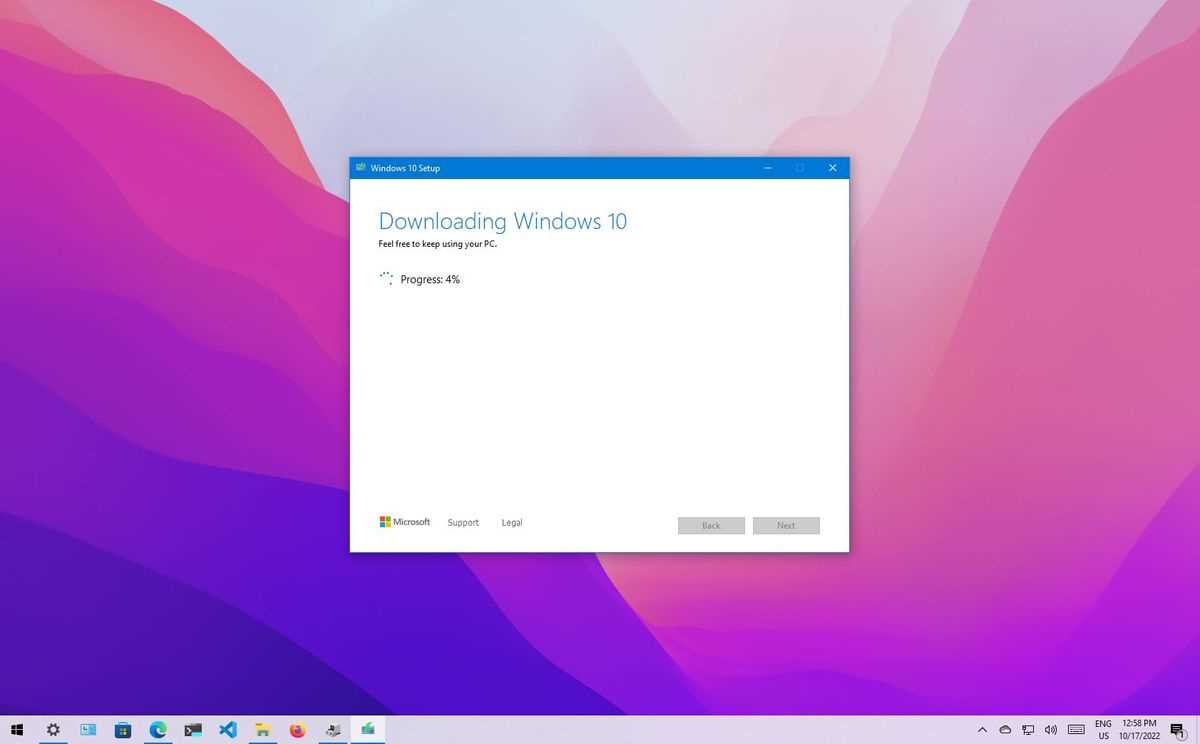
Step 7: Click on the “Next” button and wait for the Media Creation Tool to download and create the Windows 10 installation media on your USB flash drive.
Step 8: Once the process is complete, safely remove the USB flash drive from your laptop.
Now you have successfully created a Windows 10 installation media. You can use this media to install Windows 10 on your Dell laptop by booting from the USB flash drive.
Installing Windows 10
If you have a Dell laptop and want to install Windows 10, follow these step-by-step instructions:
- Make sure your Dell laptop meets the minimum system requirements for Windows 10.
- Back up all your important files and data to an external storage device.
- Obtain a copy of the Windows 10 installation media. You can either download it from the official Microsoft website or purchase a physical copy.
- Insert the Windows 10 installation media into your Dell laptop.
- Restart your laptop and press the appropriate key (usually F12 or F2) to access the boot menu.
- Select the option to boot from the Windows 10 installation media.
- Follow the on-screen instructions to begin the Windows 10 installation process.
- Choose your language, time zone, and keyboard layout preferences.
- Click “Install Now” and accept the license terms.
- Choose the type of installation you want (upgrade or custom).
- Select the partition where you want to install Windows 10.
- Wait for the installation process to complete. Your Dell laptop will restart multiple times during this process.
- Set up your Windows 10 user account and personalize your settings.
- Install any necessary drivers and software for your Dell laptop.
- Restore your backed-up files and data to your Dell laptop.
- Restart your laptop one final time to complete the installation.
Once the installation is complete, you will have a fresh copy of Windows 10 on your Dell laptop, ready to use.
Insert the Installation Media

To install Windows 10 on your Dell laptop, you will need to insert the installation media into your computer. The installation media can be a USB drive or a DVD that contains the Windows 10 operating system.
Here’s how to insert the installation media:
| 1. | Turn on your Dell laptop and make sure it is connected to a power source. |
| 2. | Locate the USB port or DVD drive on your laptop. |
| 3. | If you are using a USB drive, insert it into the USB port. If you are using a DVD, insert it into the DVD drive. |
| 4. | Wait for your laptop to recognize the installation media. It may take a few moments for the computer to detect the USB drive or DVD. |
Once the installation media is inserted, you are ready to proceed with the installation process. Follow the on-screen instructions to install Windows 10 on your Dell laptop.
Boot from the Installation Media

To install Windows 10 on your Dell laptop, you will need to boot from the installation media. The installation media can be a USB drive or a DVD that contains the Windows 10 installation files.
Here’s how to boot from the installation media:
- Insert the USB drive or DVD into your laptop.
- Restart your laptop.
- While your laptop is starting up, press the appropriate key to access the boot menu. The key may vary depending on your laptop model, but it is usually one of the function keys (F1, F2, F12) or the ESC key.
- In the boot menu, use the arrow keys to navigate to the option that corresponds to the installation media (USB drive or DVD).
- Press Enter to select the installation media.
- Follow the on-screen instructions to begin the Windows 10 installation process.
It is important to note that changing the boot order in the BIOS settings may be required if your laptop does not automatically boot from the installation media. Consult your laptop’s user manual or the manufacturer’s website for specific instructions on how to change the boot order.
By booting from the installation media, you will be able to start the Windows 10 installation process and proceed with installing the operating system on your Dell laptop.
Select Language and Keyboard Layout

During the installation process of Windows 10 on your Dell laptop, you will be prompted to select your preferred language and keyboard layout. This step is crucial as it determines the language in which your operating system will be displayed and the keyboard layout you will use.
To begin, click on the “Install” button to proceed with the installation process. Next, you will be presented with a screen that allows you to choose your language. Select your desired language from the list provided. Windows 10 supports a wide range of languages, so you can choose the one that suits you best.
After selecting your language, you will need to choose your keyboard layout. This step is important as it ensures that the keys on your keyboard are mapped correctly to the characters on the screen. Click on the “Keyboard layout” drop-down menu and choose the layout that matches your keyboard. If you are unsure, you can click on the “See more keyboard layouts” link to view additional options.
Once you have selected your language and keyboard layout, click on the “Next” button to proceed. Windows 10 will then continue with the installation process, using your chosen language and keyboard layout settings.
Install Windows 10

If you have a Dell laptop and want to install Windows 10, follow these step-by-step instructions to ensure a successful installation.
Step 1: Prepare your laptop
Before you begin, make sure your laptop meets the system requirements for Windows 10. Check the Dell website for any specific requirements for your model. Back up any important files or data to an external storage device.
Step 2: Obtain a Windows 10 installation media
You will need a Windows 10 installation media to proceed. You can either download the ISO file from the official Microsoft website or purchase a Windows 10 installation USB from a retailer.
Step 3: Boot from the installation media
Insert the Windows 10 installation media into your laptop and restart it. Press the appropriate key (usually F12 or F2) to access the boot menu. Select the installation media as the boot device and press Enter.
Step 4: Install Windows 10
Follow the on-screen instructions to install Windows 10. Choose your language, time zone, and keyboard layout preferences. Select “Custom installation” and choose the partition where you want to install Windows 10. Click “Next” to begin the installation process.
Step 5: Complete the installation
Once the installation is complete, your laptop will restart. Follow the prompts to set up Windows 10, including signing in with a Microsoft account and customizing your settings. Install any necessary drivers and software for your Dell laptop.
Step 6: Update Windows 10
After the installation, it is important to update Windows 10 to ensure you have the latest security patches and features. Go to the Start menu, click on “Settings,” then “Update & Security,” and finally “Windows Update.” Click on “Check for updates” and install any available updates.
That’s it! You have successfully installed Windows 10 on your Dell laptop. Enjoy the new features and improved performance of the latest operating system from Microsoft.

