
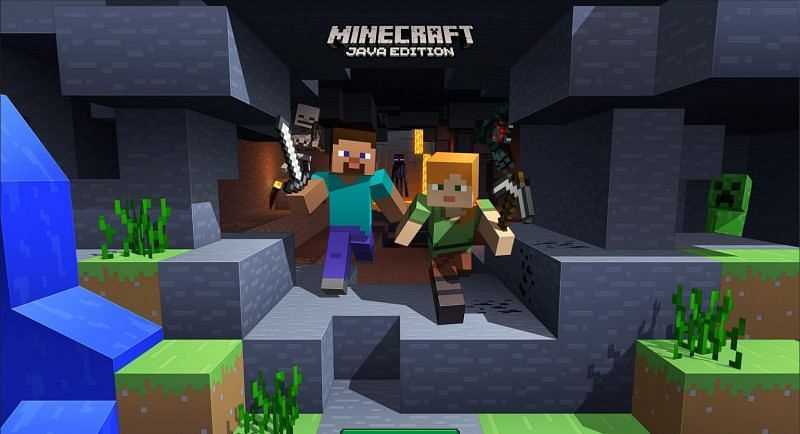
If you’re a fan of computer games, chances are you’ve heard of Minecraft. This popular sandbox game allows players to build and explore virtual worlds made up of blocks. Whether you’re a seasoned player or new to the game, this tutorial will guide you through the process of downloading and installing Minecraft on your computer.
Before you can play Minecraft, you’ll need to download and install the game on your device. The first step is to visit the official Minecraft website and navigate to the “Download” section. Here, you’ll find the option to download Minecraft for your specific operating system, whether it’s Windows, macOS, or Linux.
Once you’ve downloaded the Minecraft installer, double-click on the file to begin the installation process. Follow the on-screen instructions to complete the installation. During the installation, you may be prompted to create a Minecraft account or log in with an existing one. This account will allow you to access the full version of the game and play online with other players.
After the installation is complete, you can launch Minecraft and start playing. The game offers various modes, including survival mode, creative mode, and adventure mode, each offering a unique gameplay experience. Whether you want to build your own virtual world or embark on exciting quests, Minecraft offers endless possibilities for exploration and creativity.
Section 1: Preparing for Installation
Before you can play the game, you will need to download and install Minecraft on your computer. Here is a step-by-step guide on how to do it:
- Make sure your computer meets the minimum system requirements for Minecraft.
- Visit the official Minecraft website to download the game.
- Click on the “Download” button to start the download process.
- Choose the version of Minecraft you want to install (Java Edition or Bedrock Edition).
- Once the download is complete, locate the downloaded file on your computer.
- Double-click on the file to start the installation process.
- Follow the on-screen instructions to complete the installation.
- After the installation is finished, launch Minecraft and create a new account if you don’t have one already.
- Log in to your Minecraft account and start playing the game!
By following these steps, you will be able to install Minecraft on your computer and start enjoying the game in no time!
Check System Requirements
Before you can install and play Minecraft on your computer, it’s important to check if your system meets the minimum requirements. This step is crucial to ensure a smooth and enjoyable gaming experience.
To play Minecraft, your computer needs to meet the following system requirements:
Operating System: Minecraft is compatible with Windows, macOS, and Linux. Make sure your computer is running one of these operating systems.
Processor: Minecraft requires at least a 1.8 GHz processor or equivalent. A faster processor will provide better performance.
Memory (RAM): The minimum requirement for Minecraft is 2 GB of RAM. However, it’s recommended to have at least 4 GB for optimal performance.
Graphics Card: Minecraft is not a demanding game in terms of graphics. Any modern graphics card should be able to handle it without any issues.
Storage: Minecraft requires around 4 GB of free storage space. Make sure you have enough space available on your computer before installing the game.
Internet Connection: While an internet connection is not required to play Minecraft in single-player mode, it is necessary for multiplayer and to download updates.
By checking your system against these requirements, you can ensure that your computer is capable of running Minecraft smoothly. If your system meets or exceeds these requirements, you’re ready to proceed with the installation process.
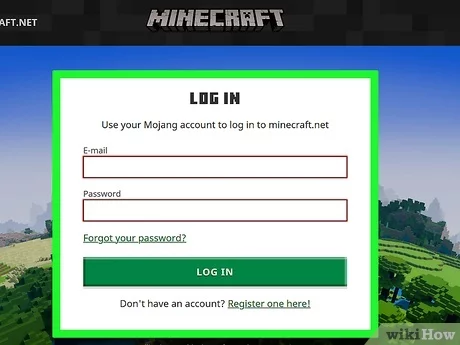
Create a Mojang Account

In order to play Minecraft on your computer, you will need to create a Mojang account. This tutorial will guide you through the process of setting up your account so that you can install and play the game.
- Go to the Mojang website at www.mojang.com.
- Click on the “Get Minecraft” button located at the top of the page.
- On the next page, click on the “Register” button.
- Fill out the required information, including your email address and a password for your account.
- Read and accept the Terms of Service and Privacy Policy.
- Click on the “Register” button to create your account.
- Check your email for a verification message from Mojang.
- Open the email and click on the verification link to activate your account.
- Once your account is activated, you can proceed to install Minecraft on your computer.
By creating a Mojang account, you will have access to all the features and benefits of the Minecraft game. Enjoy!
Purchase Minecraft

If you want to play the game Minecraft on your computer, you will first need to purchase it. Here is a step-by-step tutorial on how to purchase and download Minecraft:
- Go to the official Minecraft website.
- Click on the “Get Minecraft” button.
- You will be redirected to the purchase page.
- Choose the edition of Minecraft you want to buy (Java Edition or Bedrock Edition).
- Click on the “Buy” button next to the edition you have chosen.
- You will be prompted to create a Mojang account if you don’t have one already.
- Fill in the required information and click on the “Create Account” button.
- Choose your preferred payment method and complete the purchase.
- Once the purchase is complete, you will receive a confirmation email with your Minecraft account details.
- Go back to the Minecraft website and log in with your Mojang account.
- Click on the “Download” button to download the Minecraft installer.
- Run the installer and follow the on-screen instructions to install Minecraft on your computer.
Now that you have purchased and installed Minecraft, you are ready to start playing the game and exploring its endless possibilities!
Section 2: Installing Minecraft
Now that you know how to download Minecraft, it’s time to install the game on your computer. Follow this step-by-step tutorial to get started:
| Step 1: | Open the Minecraft installer file that you downloaded. |
| Step 2: | Click on the “Install” button to begin the installation process. |
| Step 3: | Follow the on-screen instructions to complete the installation. |
| Step 4: | Once the installation is complete, launch the game by clicking on the Minecraft icon on your desktop or in your applications folder. |
| Step 5: | Log in to your Minecraft account or create a new one if you don’t have an account yet. |
| Step 6: | After logging in, you can start playing Minecraft on your computer! |
Congratulations! You have successfully installed Minecraft on your computer. Now you can enjoy the game and explore its endless possibilities.
Download the Minecraft Installer
To install Minecraft on your computer, you will need to download the Minecraft installer. The installer is a file that will guide you through the installation process step by step. Follow the tutorial below to learn how to download the Minecraft installer and start playing.
Step 1: Open your preferred web browser and go to the official Minecraft website.
Step 2: Once you are on the Minecraft website, navigate to the “Download” section.
Step 3: Look for the download button that says “Download Minecraft” or something similar. Click on it to start the download.
Step 4: Depending on your browser settings, you may be prompted to choose a location to save the installer file. Select a location on your computer where you want to save the file and click “Save”.
Step 5: Wait for the download to complete. The download time will vary depending on your internet connection speed.
Step 6: Once the download is finished, navigate to the location where you saved the installer file. It is usually in the “Downloads” folder.
Step 7: Double-click on the installer file to start the installation process. Follow the on-screen instructions to complete the installation.
Step 8: After the installation is complete, you can launch Minecraft and start playing. Enjoy the game!
By following this tutorial, you should now have successfully downloaded the Minecraft installer and installed the game on your computer. Have fun exploring the blocky world of Minecraft!
Run the Installer
Once you have completed the download process, it’s time to run the Minecraft installer on your computer. This step is crucial to install the game and start playing.
Locate the downloaded Minecraft file on your device. It is usually saved in the “Downloads” folder, but you may have chosen a different location during the download process.
Double-click on the Minecraft installer file to launch the installation wizard. Follow the on-screen instructions to proceed with the installation.
During the installation process, you may be prompted to choose the installation location and create shortcuts. Make sure to select the desired options according to your preferences.
Once you have completed the installation, the Minecraft game will be ready to play on your computer. You can find the game icon on your desktop or in the start menu.
Now that you have successfully installed Minecraft, you can start exploring the endless possibilities of this popular game. Enjoy building, crafting, and surviving in the blocky world of Minecraft!
Choose Installation Options
Once you have decided to install Minecraft on your device, you will need to choose the installation option that suits you best. There are several ways to install the game, depending on the device you are using and your preferences.
If you want to install Minecraft on your computer, you can choose to download the game directly from the official Minecraft website. This option is recommended for those who are familiar with the installation process and want to have the game installed on their computer.
Another option is to install Minecraft through a game launcher. Game launchers are software programs that allow you to download and install games easily. They often come with additional features such as automatic updates and mod support. Some popular game launchers that support Minecraft include the Minecraft Launcher and the Technic Launcher.
If you prefer to play Minecraft on your mobile device, you can install the game through an app store. Both the Apple App Store and the Google Play Store offer Minecraft for download. Simply search for “Minecraft” in the app store, select the game, and click the install button.
Regardless of the installation option you choose, make sure to follow the step-by-step tutorial provided by the official Minecraft website or the game launcher. This will ensure that the installation process goes smoothly and you can start playing Minecraft as soon as possible.
Section 3: Setting Up Minecraft
Now that you have downloaded Minecraft onto your computer, it’s time to install and play the game. Follow this step-by-step tutorial to learn how to set up Minecraft on your device.
| Step 1: | Locate the Minecraft installation file that you downloaded earlier. |
| Step 2: | Double-click on the installation file to start the installation process. |
| Step 3: | Follow the on-screen instructions to complete the installation. Make sure to select the appropriate options for your preferences. |
| Step 4: | Once the installation is complete, launch Minecraft by double-clicking on the game icon. |
| Step 5: | On the Minecraft launcher, click on the “Play” button to start the game. |
| Step 6: | Wait for the game to load. This may take a few moments depending on your computer’s performance. |
| Step 7: | Congratulations! You have successfully installed Minecraft on your computer and are ready to start playing. |
Now that you know how to install Minecraft, you can explore the vast world of blocks and adventures that the game has to offer. Enjoy your gaming experience!


