Git is a powerful version control system that allows developers to track changes in their code and collaborate with others. If you’re a Mac user and want to start using Git, this step-by-step guide will show you how to install it on your Mac.
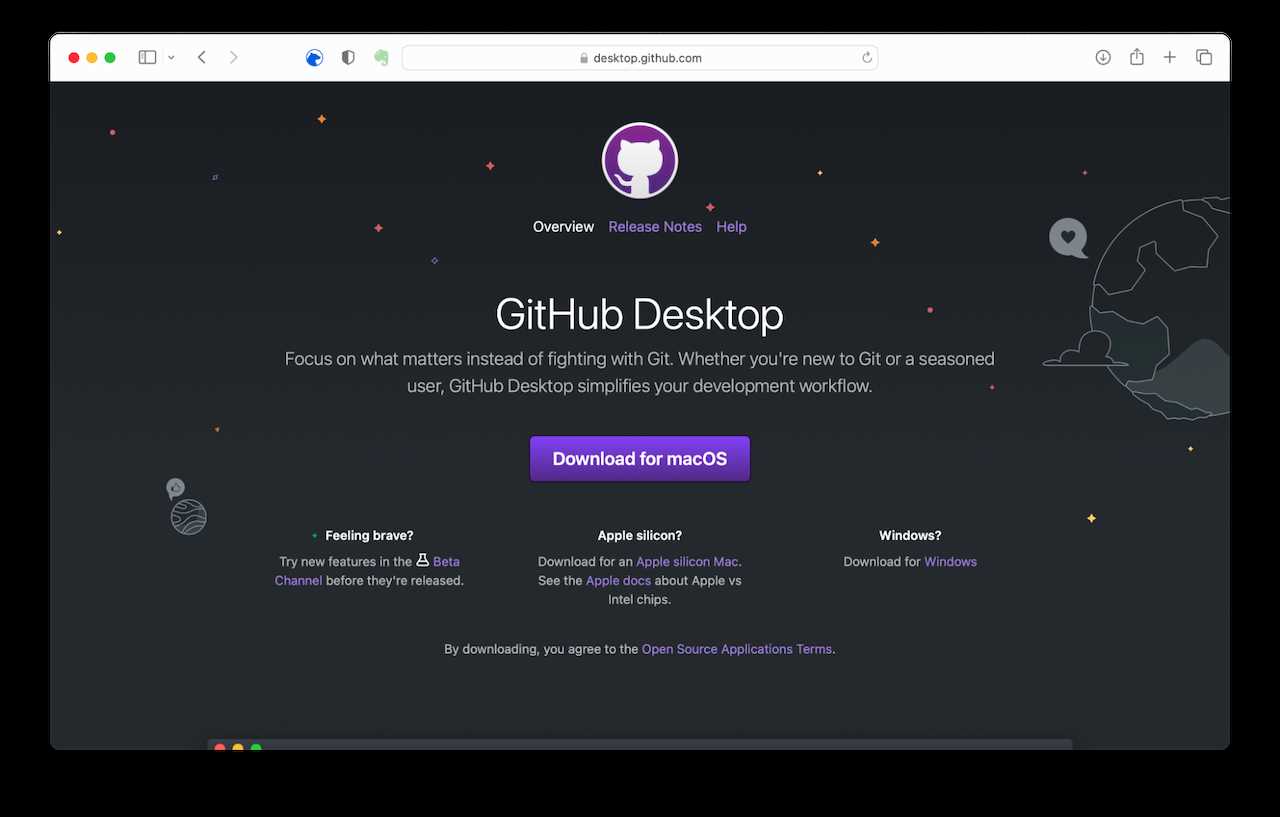
Step 1: Open your web browser and go to the official Git website.
Step 2: Download the latest version of Git for Mac by clicking on the download link.
Step 3: Once the download is complete, locate the downloaded file and double-click on it to start the installation process.
Step 4: Follow the on-screen instructions to install Git on your Mac. You may be asked to enter your administrator password.
Step 5: After the installation is complete, open the Terminal application on your Mac.
Step 6: Type git –version in the Terminal and press Enter. If Git is installed correctly, you should see the version number displayed.
That’s it! You have successfully installed Git on your Mac. Now you can start using Git to track changes in your code and collaborate with other developers.
Prerequisites
Before you can install Git on your Mac, there are a few prerequisites you need to have in place.
1. Mac Operating System: Make sure you have a Mac computer running macOS or OS X. Git is compatible with these operating systems.
2. Terminal: Git is primarily a command-line tool, so you will need to have a terminal application installed on your Mac. The default terminal application on macOS is called Terminal, and it can be found in the Utilities folder within the Applications folder.
3. Xcode Command Line Tools: Git relies on some tools provided by Xcode, Apple’s development environment. To install these tools, open Terminal and run the following command:
xcode-select –install
This will prompt you to install the necessary tools. Follow the on-screen instructions to complete the installation.
Once you have these prerequisites in place, you are ready to proceed with the installation of Git on your Mac.
Mac Operating System
The Mac operating system, also known as macOS, is the operating system used on Apple’s Macintosh computers. It is designed to be user-friendly and intuitive, making it easy for users to navigate and perform tasks on their Macs.
One of the key features of the Mac operating system is its compatibility with various software and applications, including Git. Git is a version control system that allows developers to track changes to their code and collaborate with others. In this step-by-step guide, we will show you how to install Git on your Mac.
| Step | Description |
|---|---|
| Step 1 | Open the Terminal application on your Mac. You can find it by searching for “Terminal” in Spotlight or by navigating to Applications > Utilities > Terminal. |
| Step 2 | Once the Terminal is open, type the following command to install Homebrew, a package manager for macOS: |
| Step 3 | After Homebrew is installed, you can use it to install Git. Type the following command in the Terminal: |
| Step 4 | Wait for the installation process to complete. Homebrew will download and install Git on your Mac. |
| Step 5 | Once the installation is finished, you can verify that Git is installed by typing the following command in the Terminal: |
By following these steps, you can easily install Git on your Mac and start using it for version control and collaboration on your projects.
Internet Connection
Before you can install Git on your Mac, you will need a stable internet connection. This is necessary because the installation process requires downloading files from the internet. Make sure that you have a reliable internet connection to ensure a smooth installation process.
If you are unsure about the stability of your internet connection, you can perform a quick test by visiting a website or streaming a video. If the website loads quickly or the video plays without buffering, then your internet connection should be sufficient for the installation process.
It is also recommended to connect your Mac to a Wi-Fi network rather than using a cellular data connection. This is because the installation files for Git can be quite large, and using a Wi-Fi network will ensure faster download speeds and a more stable connection.
Once you have confirmed that you have a stable internet connection, you can proceed with the installation process. Follow the step-by-step guide below to learn how to install Git on your Mac.
Installation Steps
Installing Git on a Mac is a straightforward process. Follow these steps to get started:
- Open a web browser on your Mac.
- Go to the official Git website.
- Click on the “Downloads” link in the navigation menu.
- Scroll down to find the Mac OS X section.
- Click on the download link for the latest stable version of Git for Mac.
- Wait for the download to complete.
- Locate the downloaded file in your Downloads folder.
- Double-click on the file to start the installation process.
- Follow the on-screen instructions to complete the installation.
- Once the installation is finished, open the Terminal application.
- Type “git –version” in the Terminal and press Enter to verify that Git has been successfully installed.
That’s it! You have successfully installed Git on your Mac. Now you can start using Git for version control and collaboration on your projects.