Welcome to the step-by-step guide on how to install Arch Linux in VirtualBox. Arch Linux is a lightweight and flexible Linux distribution that allows you to customize your system to fit your needs. Installing Arch Linux in VirtualBox is a great way to test out the distribution and get familiar with its installation process.
In this guide, we will walk you through the process of installing Arch Linux in VirtualBox. We will cover everything from downloading the ISO image to configuring the virtual machine. By following this guide, you will learn how to install Arch Linux in VirtualBox and have a fully functional system up and running in no time.
Before we begin, it is important to note that installing Arch Linux requires some technical knowledge and familiarity with the command line. If you are new to Linux or prefer a more user-friendly distribution, you may want to consider trying out a different distribution first. However, if you are up for the challenge and want to learn how to install Arch Linux, let’s get started!
Preparation
Before you can install Arch Linux in VirtualBox, you need to make sure you have the necessary tools and resources. Here’s what you’ll need:
- An Arch Linux ISO file: You can download the latest version from the official Arch Linux website.
- VirtualBox: This is the virtualization software that will allow you to create a virtual machine to install Arch Linux.
- A computer with enough resources: Make sure your computer has enough RAM, CPU power, and disk space to run a virtual machine.
- A stable internet connection: You’ll need an internet connection to download the necessary packages during the installation process.
Once you have all the necessary tools and resources, you’re ready to proceed with the installation process. In the next section, we’ll guide you step-by-step on how to install Arch Linux in VirtualBox.
Download Arch Linux ISO
To install Arch Linux in VirtualBox, you will first need to download the Arch Linux ISO file. The ISO file contains the installation image of Arch Linux, which you will use to create a virtual machine in VirtualBox.
To download the Arch Linux ISO, follow these steps:
- Open a web browser and go to the Arch Linux website.
- Navigate to the download page.
- Scroll down to the “Arch Linux Downloads” section.
- Click on the link for the latest version of Arch Linux.
- Choose a mirror from the list of available mirrors.
- Click on the link to download the ISO file.
Once the download is complete, you will have the Arch Linux ISO file ready to use for the installation process.
Create a New Virtual Machine in VirtualBox
To install Arch Linux in VirtualBox, you first need to create a new virtual machine. Follow the steps below to set up a new virtual machine:
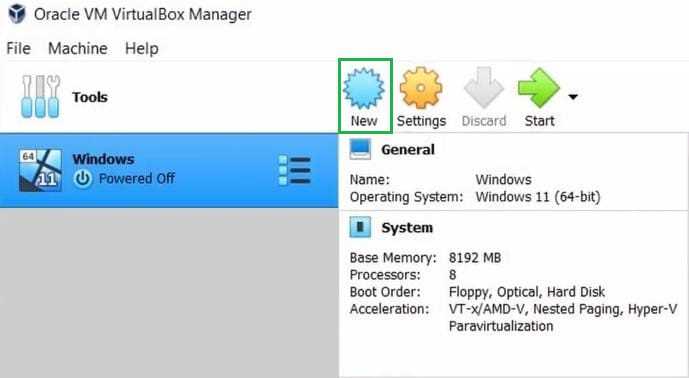
1. Open VirtualBox and click on the “New” button to start the new virtual machine creation wizard.
2. In the “Name and operating system” section, enter a name for your virtual machine, such as “Arch Linux”. Choose “Linux” as the type and “Linux 2.6 / 3.x / 4.x (64-bit)” as the version.
3. In the “Memory size” section, allocate the desired amount of RAM for your virtual machine. It is recommended to allocate at least 1 GB of RAM for Arch Linux.
4. In the “Hard disk” section, select “Create a virtual hard disk now” and click on the “Create” button.
5. Choose the hard disk file type. Select “VDI (VirtualBox Disk Image)” and click “Next”.
6. Select “Dynamically allocated” for the storage on physical hard disk and click “Next”.
7. Specify the size of the virtual hard disk. It is recommended to allocate at least 20 GB of disk space for Arch Linux.
8. Click “Create” to finish creating the new virtual machine.
Now you have successfully created a new virtual machine in VirtualBox. In the next steps, we will guide you on how to install Arch Linux on this virtual machine.
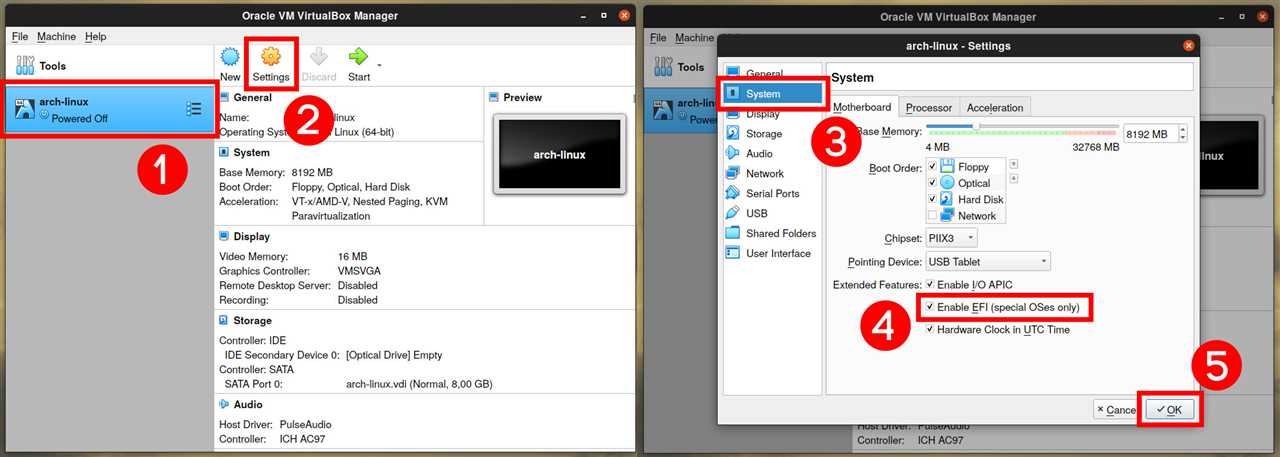
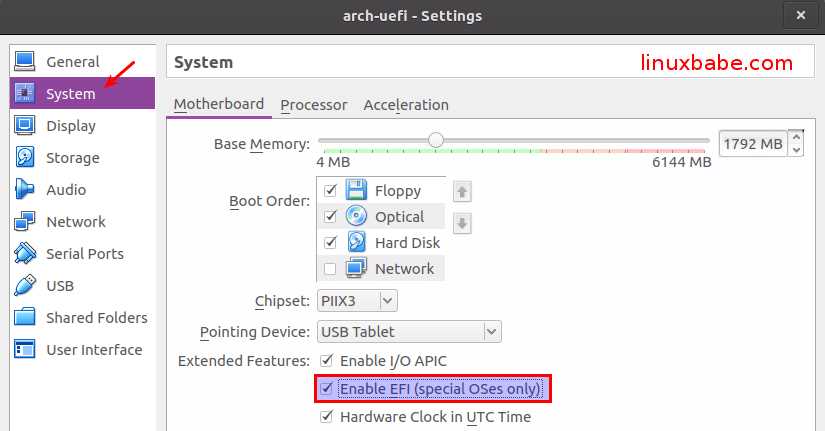
Configure Virtual Machine Settings
Before you can install Arch Linux in VirtualBox, you need to configure the virtual machine settings. Here’s how:
Step 1: Open VirtualBox and click on “New” to create a new virtual machine.
Step 2: Enter a name for your virtual machine, such as “Arch Linux”, and select “Linux” as the type and “Arch Linux (64-bit)” as the version.
Step 3: Allocate the desired amount of memory to the virtual machine. It is recommended to allocate at least 1 GB of RAM for smooth performance.
Step 4: Choose “Create a virtual hard disk now” and click “Create”.
Step 5: Select “VDI (VirtualBox Disk Image)” as the hard disk file type and click “Next”.
Step 6: Choose “Dynamically allocated” for the storage on physical hard disk and click “Next”.
Step 7: Specify the desired size for the virtual hard disk. It is recommended to allocate at least 20 GB of disk space.
Step 8: Click “Create” to create the virtual hard disk.
Once you have configured the virtual machine settings, you are ready to proceed with the installation of Arch Linux in VirtualBox.
Installation
To install Arch Linux in VirtualBox, follow these steps:
Step 1: Download the Arch Linux ISO file from the official website.
Step 2: Create a new virtual machine in VirtualBox and configure the settings according to your preferences.
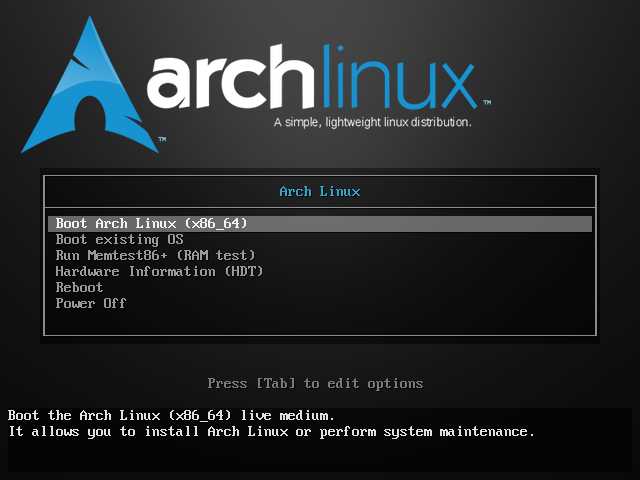
Step 3: Start the virtual machine and select the Arch Linux ISO file as the bootable media.
Step 4: Follow the on-screen instructions to begin the installation process.
Step 5: Partition the virtual hard drive and format the partitions.
Step 6: Install the base system and essential packages.
Step 7: Configure the system settings, such as the hostname and network.
Step 8: Install a bootloader, such as GRUB, to enable the system to boot.
Step 9: Create a user account and set a password.
Step 10: Install additional packages and customize the system to your liking.
Step 11: Reboot the virtual machine to complete the installation process.
Once the installation is complete, you can start using Arch Linux in VirtualBox.
Boot from the Arch Linux ISO
To install Arch Linux in VirtualBox, you need to boot from the Arch Linux ISO file. Here’s how:
Step 1: Open VirtualBox and select the virtual machine you want to install Arch Linux on.
Step 2: Click on the “Settings” button and go to the “Storage” tab.
Step 3: Under the “Controller: IDE” section, click on the “Empty” CD icon.
Step 4: On the right side of the window, click on the CD icon and select “Choose a disk file”.
Step 5: Navigate to the location where you have downloaded the Arch Linux ISO file and select it.
Step 6: Click on the “OK” button to save the changes.
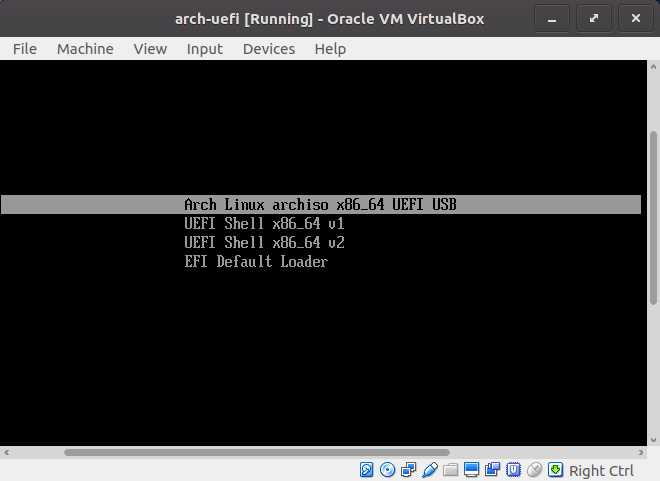
Step 7: Start the virtual machine by clicking on the “Start” button.
Step 8: The virtual machine will now boot from the Arch Linux ISO file.
Note: If the virtual machine doesn’t boot from the ISO file, you may need to change the boot order in the virtual machine’s BIOS settings.
Once the virtual machine has booted from the Arch Linux ISO, you can proceed with the installation process.
Set Up the Network Connection
To install Arch Linux in VirtualBox, you need to set up the network connection properly. This will ensure that you have internet access during the installation process.
Here’s how to do it:
- Open the VirtualBox application and select the virtual machine you want to install Arch Linux on.
- Click on “Settings” and navigate to the “Network” tab.
- Under “Adapter 1”, select “Bridged Adapter” from the dropdown menu.
- Click on the “Advanced” button and make sure that the “Cable connected” option is checked.
- Click “OK” to save the changes.
By setting up the network connection in this way, your Arch Linux virtual machine will be able to connect to the internet and download the necessary packages during the installation process.
Note: If you are using a wireless connection, you may need to select your wireless adapter from the “Name” dropdown menu in the “Adapter 1” section. Make sure that your host machine is connected to the internet before proceeding with the installation.
Now that you have set up the network connection, you are ready to proceed with the installation of Arch Linux in VirtualBox.