
Are you looking to erase unnecessary files and documents from your Microsoft 365 account? Uninstalling or removing unwanted documents is a simple process that can help you declutter your digital workspace and free up storage space. In this step-by-step guide, we will show you how to delete documents in Microsoft 365.
Step 1: Open your Microsoft 365 account and navigate to the documents or files you want to delete. This can be done by accessing the “Documents” or “Files” tab in your account.
Step 2: Once you have located the documents you wish to remove, select them by clicking on the checkbox next to each file. You can also select multiple files by holding down the “Ctrl” key (or “Command” key on a Mac) while clicking on the files.
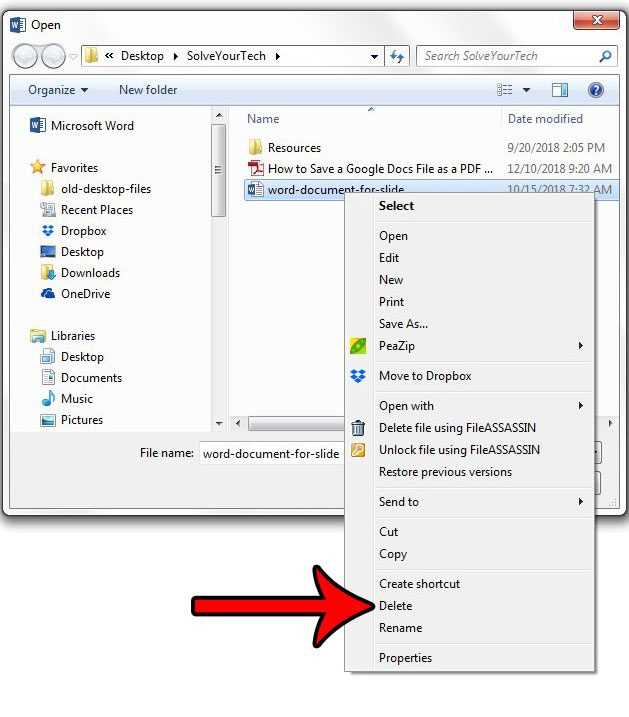
Step 3: After selecting the documents, right-click on one of the files and a drop-down menu will appear. From the menu, choose the “Delete” or “Remove” option to initiate the deletion process.
Step 4: A confirmation prompt will appear asking if you are sure you want to delete the selected documents. Read the prompt carefully and click “Yes” or “OK” to confirm the deletion.
Step 5: Once you have confirmed the deletion, the selected documents will be permanently deleted from your Microsoft 365 account. It is important to note that deleted documents cannot be recovered, so make sure you have backed up any important files before proceeding with the deletion.
By following these simple steps, you can easily delete unwanted documents and files from your Microsoft 365 account. This will help you keep your digital workspace organized and ensure that you have enough storage space for your important files. Remember to regularly review and delete unnecessary documents to maintain an efficient and clutter-free Microsoft 365 experience.
Overview of Microsoft 365
Microsoft 365 is a comprehensive suite of productivity tools that allows users to create, edit, and collaborate on files and documents. With Microsoft 365, you can easily manage your files and documents, whether they are stored locally on your device or in the cloud.
One of the key features of Microsoft 365 is the ability to delete and remove documents. Deleting a document in Microsoft 365 allows you to erase it from your device or cloud storage, ensuring that it is no longer accessible. This can be useful when you want to discard old or unnecessary files, or when you need to free up storage space.
When you delete a document in Microsoft 365, it is moved to the Recycle Bin or Trash, depending on your operating system. From there, you have the option to permanently delete the document or restore it if needed. Permanently deleting a document removes it from your device or cloud storage, while restoring a document allows you to retrieve it and continue working on it.
Microsoft 365 also provides the option to uninstall the entire suite if you no longer need it. Uninstalling Microsoft 365 removes all the installed applications and associated files from your device, freeing up storage space and ensuring that no traces of the suite remain.
In summary, Microsoft 365 offers a range of features for managing and organizing your files and documents. Whether you need to delete, remove, or uninstall documents, Microsoft 365 provides the tools and functionality to help you effectively manage your digital workspace.
Importance of Document Management
Effective document management is crucial for any organization, especially when it comes to digital files in Microsoft 365. It is important to have a systematic approach to discard, delete, and remove unnecessary documents to ensure a clutter-free and organized workspace.
Here are a few reasons why document management is important:
- Efficiency: Proper document management allows for quick and easy access to important files. By organizing documents in a logical and structured manner, employees can find the information they need without wasting time searching through countless files.
- Security: Document management ensures that sensitive information is protected. By regularly reviewing and uninstalling unnecessary files, organizations can minimize the risk of data breaches and unauthorized access to confidential documents.
- Compliance: Many industries have specific regulations and compliance requirements when it comes to document retention and disposal. By implementing a document management system, organizations can ensure they are meeting these requirements and avoid potential legal issues.
- Collaboration: Document management systems in Microsoft 365 enable seamless collaboration among team members. By keeping files organized and up-to-date, employees can easily share and work on documents together, improving productivity and teamwork.
- Storage Optimization: By regularly deleting unnecessary documents, organizations can optimize their storage space. This not only helps to reduce costs associated with storage but also ensures that the most relevant and important files are easily accessible.
In conclusion, effective document management is essential for organizations using Microsoft 365. By regularly reviewing and deleting unnecessary files, organizations can improve efficiency, enhance security, ensure compliance, foster collaboration, and optimize storage space.
Step 1: Accessing Microsoft 365

To delete or remove documents from Microsoft 365, you will need to access the Microsoft 365 platform. Follow the steps below to access Microsoft 365:
- Open your preferred web browser.
- Go to the Microsoft website.
- Click on the “Sign In” button located at the top right corner of the page.
- Enter your Microsoft account credentials and click “Sign In”.
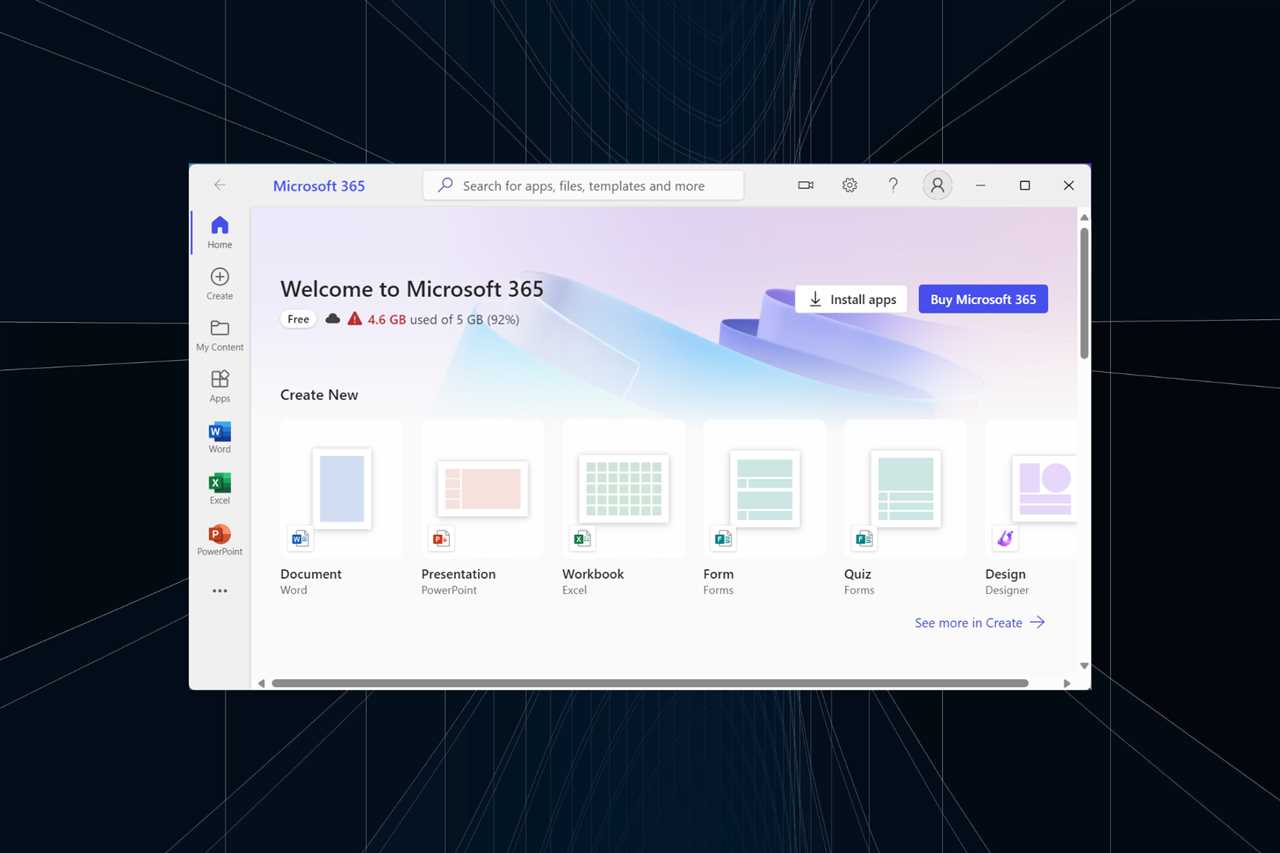
- Once signed in, you will be redirected to the Microsoft 365 homepage.
- From the homepage, navigate to the “Files” section.
- Click on the “Files” tab to access your documents.
By following these steps, you will be able to access your Microsoft 365 account and proceed with deleting or discarding unwanted documents.
Logging into Microsoft 365

In order to delete, remove, discard, or erase documents in Microsoft 365, you will need to log into your Microsoft 365 account. Here are the steps to log in:
- Open a web browser and go to the Microsoft 365 login page.
- Enter your Microsoft 365 username and password.
- Click on the “Sign In” button to access your Microsoft 365 account.
Once you are logged in, you will be able to navigate to the documents section of Microsoft 365 and proceed with deleting, removing, or uninstalling unwanted documents.
Navigating to the Documents Section
To delete files in Microsoft 365, you need to navigate to the documents section. Here’s how you can do it:
- Open your web browser and go to the Microsoft 365 website.
- Sign in to your Microsoft account using your credentials.
- Once you are logged in, locate and click on the “Documents” tab or section.
- This will take you to the documents section where all your files are stored.
Now that you have successfully navigated to the documents section, you can proceed to erase or remove any unwanted documents from your Microsoft 365 account.
Step 2: Selecting Documents to Delete

Once you have accessed your Microsoft 365 account, it’s time to remove any unnecessary files or documents. Deleting these files will help free up storage space and declutter your workspace.
To begin, navigate to the folder or location where the files or documents you wish to delete are stored. You can do this by using the file explorer or by accessing the specific application where the files are saved.
Next, select the files or documents you want to delete. You can do this by clicking on each individual file while holding down the Ctrl key, or you can click and drag your mouse to select multiple files at once.
Once you have selected the files or documents you want to delete, right-click on one of the selected items. A drop-down menu will appear with various options. From this menu, select the “Delete” or “Uninstall” option to permanently remove the files from your Microsoft 365 account.
After selecting the delete option, a confirmation prompt may appear asking if you are sure you want to delete the selected files. Review the prompt and click “Yes” or “OK” to proceed with the deletion process.
Once the deletion process is complete, the selected files or documents will be removed from your Microsoft 365 account. It is important to note that deleted files cannot be recovered, so make sure to double-check your selection before confirming the deletion.
By following these steps, you can easily delete unnecessary files or documents from your Microsoft 365 account, helping to keep your workspace organized and efficient.
Browsing through Document Folders
When managing your documents in Microsoft 365, it’s important to know how to browse through your document folders. This will allow you to easily locate and remove any unwanted files or documents.
To browse through your document folders in Microsoft 365, follow these steps:
- Open Microsoft 365 and sign in to your account.
- Navigate to the “Documents” section.
- Click on the folder that contains the documents you want to delete.
- Once inside the folder, you can browse through the documents by scrolling through the list or using the search bar to find specific files.
- To remove a document, simply click on it to select it.
- Once the document is selected, you can choose to delete it by clicking on the “Delete” button.
- A confirmation prompt will appear asking if you want to permanently erase the document. Click “Yes” to proceed with the deletion.
By following these steps, you can easily browse through your document folders in Microsoft 365 and delete any unwanted files or documents. It’s important to regularly discard unnecessary documents to keep your storage space organized and efficient.
Using Search Filters to Locate Documents

When it comes to managing your documents in Microsoft 365, it’s important to know how to efficiently locate and delete files that are no longer needed. One way to streamline this process is by using search filters to quickly find the documents you want to remove.
Here are some steps to help you use search filters effectively:
- Open the Microsoft 365 application on your device.
- Navigate to the document library or folder where the files you want to delete are located.
- Look for the search bar at the top of the screen and click on it.
- Type in keywords or specific criteria related to the documents you want to delete. For example, you can search by file name, file type, author, or date modified.
- As you type, Microsoft 365 will automatically start displaying search suggestions based on your input. You can click on these suggestions to refine your search.
- Once you have entered your search criteria, press Enter or click on the search icon to initiate the search.
- Microsoft 365 will display a list of documents that match your search filters. Take a moment to review the results and make sure they are the files you want to delete.
- Select the files you want to delete by clicking on the checkboxes next to their names.
- After selecting the files, look for the delete or remove option in the toolbar or right-click menu. Click on it to initiate the deletion process.
- Confirm the deletion when prompted. Depending on the Microsoft 365 application you are using, the prompt may ask you to confirm whether you want to move the files to the recycle bin or permanently delete them.
By using search filters, you can quickly locate and delete unwanted documents in Microsoft 365, saving you time and helping you keep your files organized. Remember to double-check your search criteria and review the search results before deleting any files to avoid accidentally discarding important documents.


